
Google Cloud 内で Play Games サービス プロジェクトを直接表示、編集することが必要な場合があります。
一般に、次のようなシナリオがあります:
- プロジェクトにおいて追加の API(Google ドライブなど)を有効にする
- ゲームの OAuth 2.0 ダイアログで使用されるブランド情報を編集する
- API の割り当てを確認し、追加をリクエストする(必要な場合)
- 以前に作成したクライアント ID に含まれる承認済み URI または JavaScript 生成元を編集する
プロジェクトを見る
Google Cloud でプロジェクトを表示するには:
- ゲーム用の認証情報を [構成] ページ([ユーザーを増やす] > [Play ゲームサービス] > [設定と管理] > [構成])で選択します。
- [認証] セクションに移動し、[Google Cloud で表示] をクリックします。
API 使用量の割り当てを調整する
Google Cloud では、ゲームに設定されている API の使用量上限と使用されている割り当て数を確認できます。また、嫌がらせ行為者(またはバグのあるゲーム クライアント)が割り当ての全量を消費しないように、ユーザーごとに上限を設定することもできます。
プロジェクトの使用量上限を確認して変更する手順、または割り当ての増加をリクエストする手順は次のとおりです。
- プロジェクトの請求先アカウントをまだ持っていない場合は、1 つ作成します。
- API Console で API ライブラリの [有効な API] ページに移動し、リストから API を選択します。
- 割り当て関連の設定を表示および変更するには、[割り当て] を選択します。使用統計情報を表示するには、[使用量] を選択します。
「ユーザー」は、割り当てリクエストを行うクライアントの IP アドレスに基づいて決定されます。たとえば、すべてのリクエストが 1 つのサーバーから送信された場合は、サーバーが誤ってスパム行為のあるユーザーとしてタグ付けされる可能性があります。これを防ぐには、API エンドポイント リクエストに userIp=x.x.x.x 引数を追加します。
ユーザーごとの割り当ての設定について詳しくは、API 使用量の上限設定をご覧ください。
Google Play Games サービス API には、ユーザーごとの上限に加えて、アプリ全体の 1 日あたりの上限が存在します。通常、事前に割り当てられた上限を変更する必要はありません。ただし、ボリュームの急増が見込まれる場合(予定されているリリース イベントなど)は、[Request more] リンクをクリックして追加の割り当てをリクエストできます。
他の API を有効にする
Google Play Console でクライアント ID を作成すると、プロジェクトに対して Google Play Games サービス API が自動的に有効になります。他の Google API は Google Cloud から有効にできます。
プロジェクトで API を有効にする手順は、次のとおりです。
Google API Console で API ライブラリを開きます。プロンプトが表示されたら、既存のプロジェクトのいずれかを選択するか、新しいプロジェクトを作成します。API ライブラリには、利用可能なすべての API がプロダクト ファミリーと人気度に応じて分類されて表示されます。
有効にする API がリストで見当たらない場合は、検索して見つけます。
有効にする API を選択し、[有効にする] ボタンをクリックします。
プロンプトが表示されたら、請求機能を有効にします。
プロンプトが表示されたら、API の利用規約に同意します。
ブランディング情報を変更する
OAuth 2.0 ダイアログに表示されるゲームのブランド情報(タイトル、ロゴなど)を変更するには、Google Cloud の同意画面で属性を設定します。
次の手順で、プロジェクトの同意画面を設定します。
- Google Play Console で同意画面のページを開きます。プロンプトが表示されたら、既存のプロジェクトのいずれかを選択するか、新しいプロジェクトを作成します。
- フォームに記入して [保存] をクリックします。
OAuth ユーザータイプを変更する
個人用テスト アカウントを使用して製品版([テストとリリース] > [製品版])テストトラックでテストする場合は、Google Cloud で OAuth オーディエンス設定を [外部] にも設定する必要があります。詳しくは、アプリ ユーザーを管理するをご覧ください。
クライアント ID 関連の属性を変更する
OAuth 2.0 クライアント ID に関連する属性(ウェブアプリのウェブ生成元やリダイレクト URL など)を変更するには:
- Google Play Console を開き、ゲームに移動します。
- ゲーム用の認証情報を [構成] ページ([ユーザーを増やす] > [Play ゲームサービス] > [設定と管理] > [構成])で選択します。
- [認証] セクションの一番下までスクロールし、[Google Cloud で表示] をクリックします。
- Google Cloud で、プロジェクトを選択します。
- 左側にあるサイドバーで、[API と認証] を選択します。表示された API のリストで Google Play Games サービス API のステータスが [オン] になっていることを確認します。
- 左側にあるスライドバーで [登録済みアプリケーション] を選択します。
- [OAuth 2.0 クライアント ID] セクションを展開し、編集する属性を探します。
既存のクラウド プロジェクトから OAuth クライアントを移行する
Google Cloud でプロジェクトを表示するには、プロジェクトを表示するの手順に沿って操作します。
Play Games サービス(PGS)を設定するには、一意の Google Cloud プロジェクトが必要です。複数のゲームで 1 つのクラウド プロジェクトを共有している場合は、適切な構成を確保するために、Android OAuth クライアントを独立したプロジェクトに移行する必要があります。
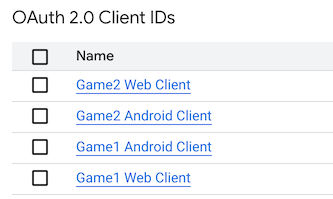
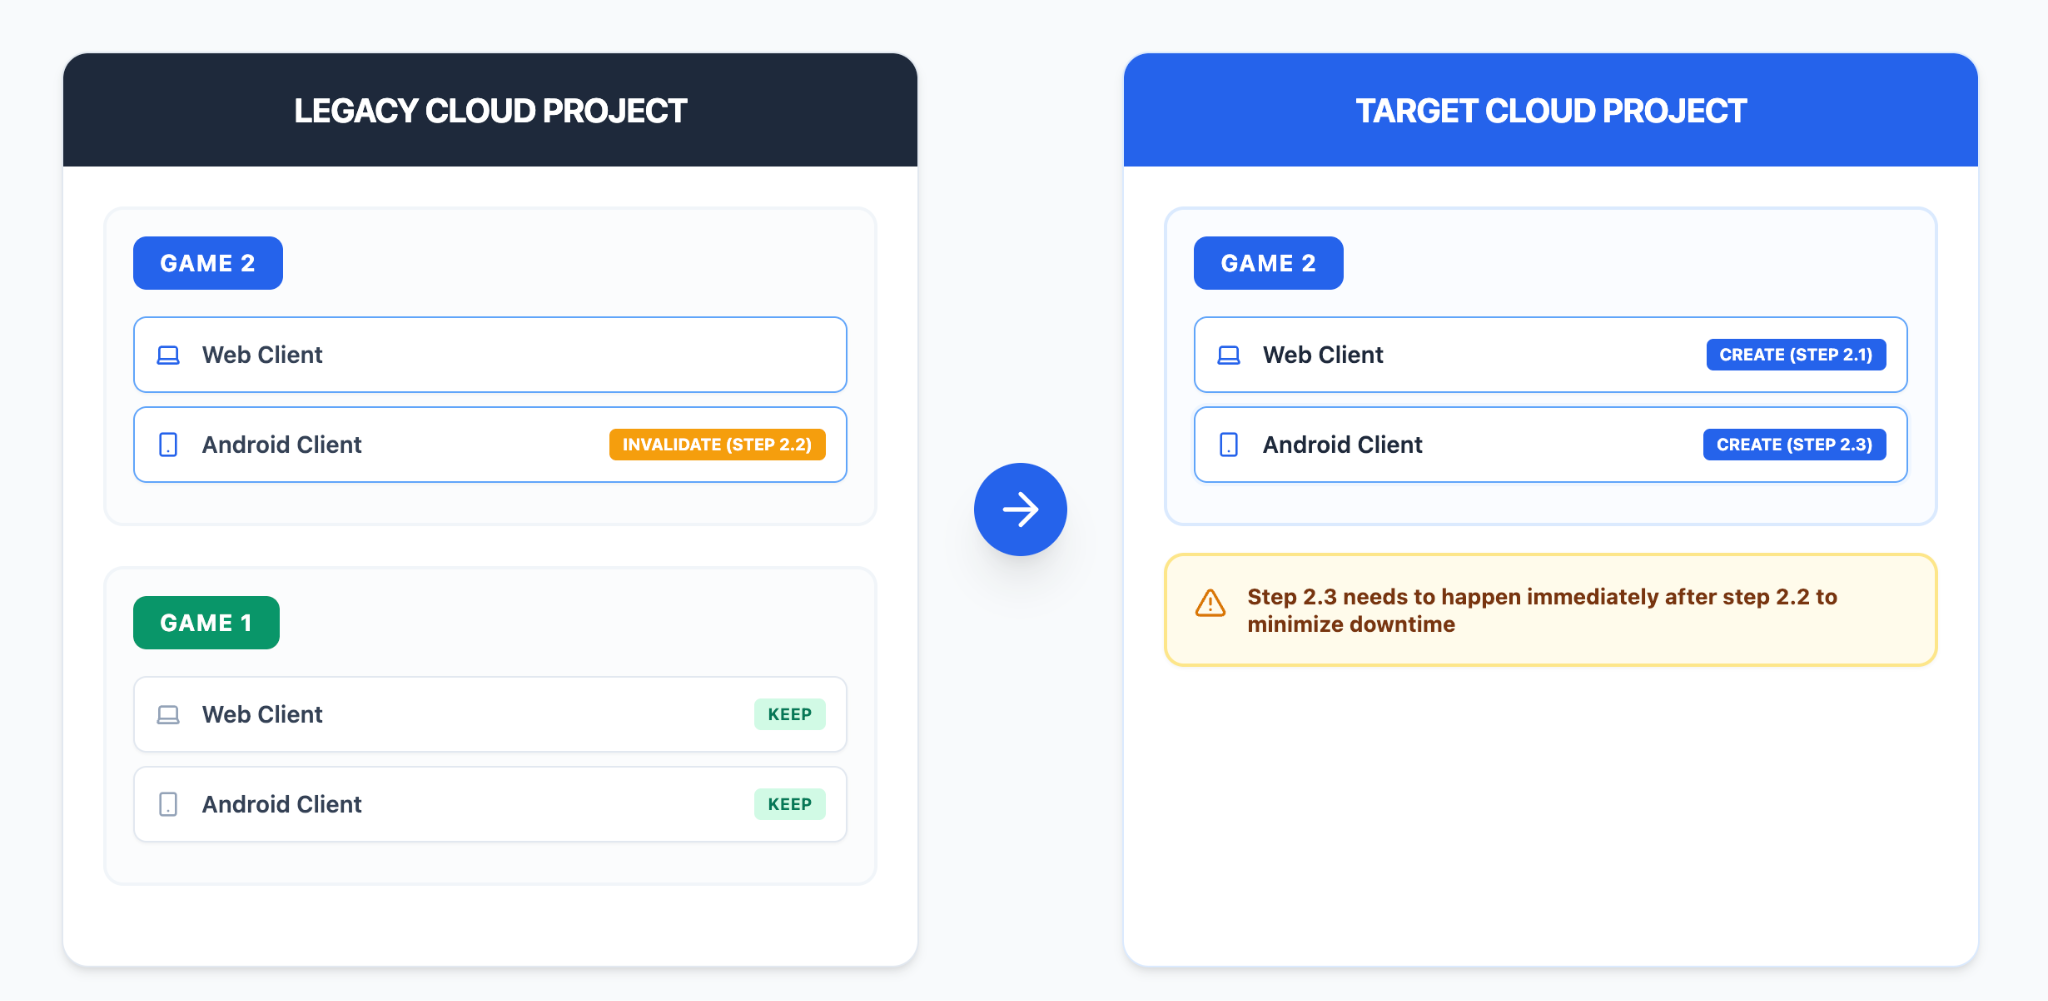
上記の例では、ゲーム 1 とゲーム 2 は、Google でログイン用の単一の Google Cloud プロジェクト内にウェブ クライアントと Android クライアントを作成しています。ゲーム 2 のウェブ クライアントと Android クライアントを、現在のレガシー Google Cloud プロジェクトから新しいターゲット Google Cloud プロジェクトに移動する必要があります。
ステップ 1: バックエンドの準備
切り替えを行う前に、古いウェブ クライアント ID と新しいウェブ クライアント ID の両方が同時に存在する場合に対応できるように、バックエンドとクライアントを調整する必要があります。
- サーバーサイドの構成: サーバーが ID トークン内のウェブ クライアント ID を検証する場合は、サーバーサイドのロジックを更新して、以前の Cloud プロジェクトの古いクライアントと、ターゲット Cloud プロジェクトで生成する必要がある新しいクライアントの両方で発行された ID トークンを同時にサポートする必要があります。
- クライアントサイドの構成: 切り替え時に新しいウェブ クライアント ID を使用してログインするには、クライアント アプリケーションで複数のウェブ クライアント ID をサポートする必要があります。次のいずれかの方法を使用できます。
- クライアント アプリに 2 つのウェブ クライアント ID が組み込まれており、古いクライアント ID の有効期限が切れると新しいウェブ クライアント ID に切り替わる
- サーバーから最新のウェブ クライアント ID を動的に取得して切り替えを完了する
- ウェブ クライアントを事前に作成する: アトミック切り替え中に遅延が発生する可能性を回避するため、ターゲット プロジェクトで新しいウェブ クライアントを事前に作成する必要があります。
ステップ 2: 正しい Google Cloud で新しいウェブと Android の OAuth クライアントを構成する
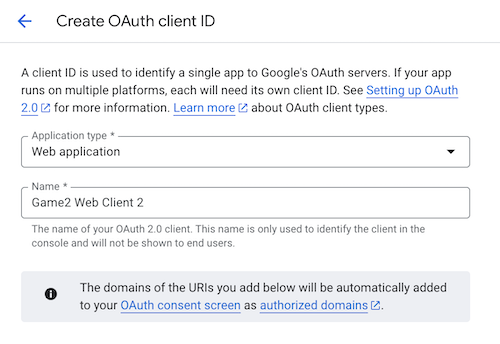
ステップ 2.1: ターゲットの Google Cloud プロジェクトでゲーム 2 の新しいウェブ OAuth クライアントを作成します。
ステップ 2.2: 警告: Android クライアントを変更すると、ゲームのユーザーが Google でログインを使用してゲームにログインできなくなるため、ステップ 2.2 の直後にステップ 2.3 を実行する必要があります。変更と再作成の間隔を最小限に抑えるため、オペレーションでは 2 つのウェブページを同時に開くことをおすすめします。
以前の Google Cloud プロジェクトで、ゲーム 2 の Android クライアントのパッケージ名を com.noexist.none などの無効な値に変更します。

ステップ 2.3: ターゲットの Google Cloud プロジェクトで、Game 2 の SHA-1 フィンガープリントとパッケージ名を使用して、Game 2 の新しい Android クライアントをすぐに作成します。

ステップ 3: リアルタイム構成のデプロイ
ターゲット プロジェクトで新しい Android クライアントを正常に作成したら、すぐに次の操作を行います。
- クライアントをリダイレクトする: 動的構成メカニズム(Remote Config など)を使用して、新しいウェブ クライアント ID を使用するようにクライアント アプリケーションを直ちに切り替えます。
- 古いクライアントを保持する: 問題が発生した場合に以前の OAuth クライアント ログインにロールバックするためのフォールバック オプションとして、古い OAuth クライアントを保持します。