
Follow these best practices to optimize the use of materials and shaders in your Android game.
Materials and shaders are core building blocks of modern 3D art. 3D games that run well on the largest number of devices begin with 3D art that has been designed to best take advantage of graphics processors. This guide highlights optimizations and best practices for materials and shaders on mobile to make your game perform better and minimize power consumption.
Portions of this article are based on work contributed and copyrighted by Arm Limited.
Game engine mobile friendly shaders
Game engines differ in how they associate materials and shaders. The Unity engine can create multiple shaders, but each material can only have a single shader assigned to it. Unreal Engine 4 can apply different shaders to a material based on the target platform.
For a definition of shaders and materials, see Material and shader best practices for artists.
If you are using a game engine such as Unity or Unreal Engine 4, use built-in shaders designed for mobile hardware. These shaders contain simplified feature implementations for greater performance on mobile devices. If possible, turn off features you aren’t using when you configure your materials. These features might be things like color tinting or detail maps. Disabling unused features allows the engine to omit them from the final shader program resulting in better performance.
Unity
Unity includes multiple rendering engines. For modern mobile games, the best option is the Universal Render Pipeline (URP). The URP includes a standard set of shaders that automatically scale in complexity depending on the target platform. The legacy Unity renderer includes a collection of shaders designed for mobile platforms. These shaders are grouped in the Mobile category.
Unreal Engine 4
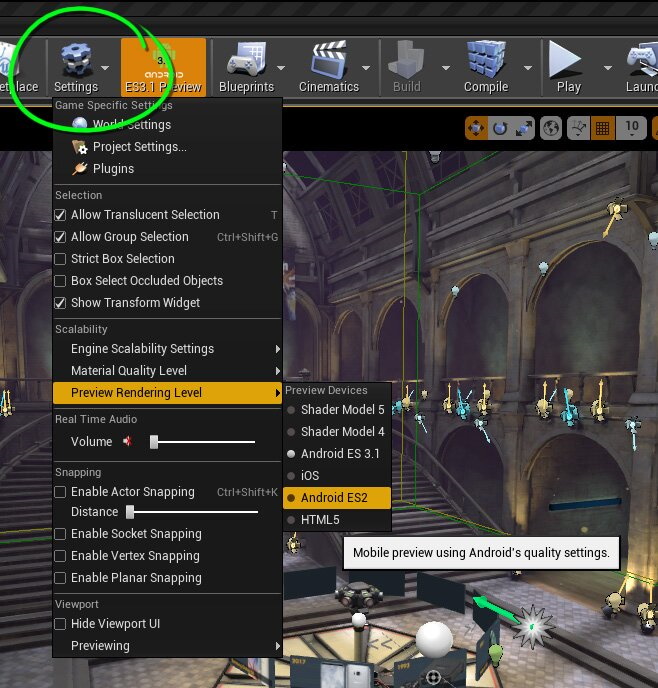
The Unreal engine will choose a mobile shader based on the selected target platform. Visual output from mobile shaders can differ from the default Shader Model 5 shaders. You can change the Preview Rendering Level in the Unreal editor to simulate the rendering output of the mobile shaders. Despite some differences, Unreal uses the same process for materials on all platforms, so mobile shaders will generally have similar visuals and behaviors as the default shaders.
Minimize texture samplers
Games targeting mobile devices should use the fewest textures possible in their materials. Each added texture requires additional texture sampling, which consumes memory bandwidth and increases power consumption. Unreal Engine 4 recommends a maximum of five material textures when running on mobile devices. Even five texture samplers may be prohibitively expensive for widespread use on many devices. Strategies to minimize texture sampler count include:
- Use texture packing to combine single-channel textures. For more information on this technique, see the Textures guide.
- Replace data for parameters such as roughness or metallic with a numeric constant instead of being read from a texture.
- Use unlit shaders or a simple lighting model, to be able to omit textures needed to support lighting calculations in more complicated lighting models.
Disable lighting when possible
Lit versus unlit is a common divide for shaders and materials. Real time lighting involves additional calculation in the shader. Depending on the type of lighting system being implemented, material textures might be needed, which use more memory space and bandwidth. For mobile games, particularly those targeting less powerful hardware, minimizing use of real time lighting is important to achieving optimal performance. You should consider designing your art direction around designs that work well without real time lighting, such as stylized or cartoony art.
Minimize use of transparency
Use opaque materials wherever possible. Rendering an object with transparency is always more expensive than an equivalent opaque object. The design of mobile graphics hardware makes transparency comparatively more expensive to render than on computer or gaming console graphics hardware. Drawing many transparent objects in your game, especially when rendered on top of each other, will negatively impact performance.
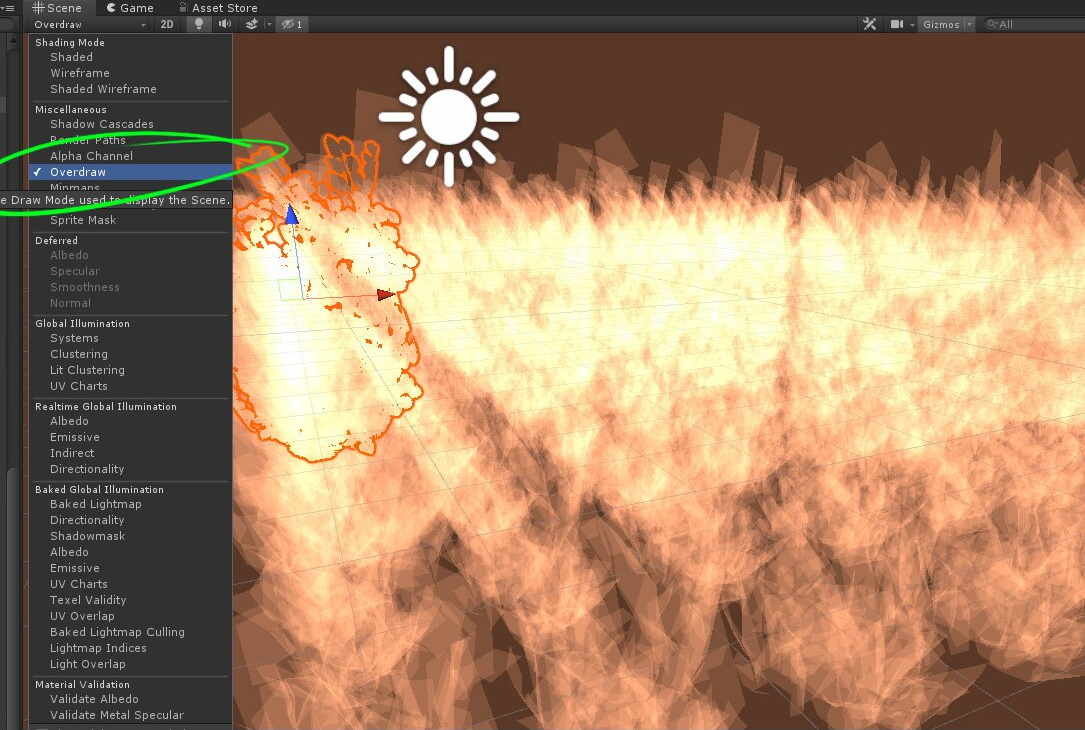
Drawing over the same pixel multiple times is a problem known as overdraw. Multiple layers of transparency overdraw should be avoided. Many games have diagnostic tools to visualize overdraw to help detect and eliminate it. Use these tools to improve the performance of your game and identify problem areas that bring down your frame rate.
Use the appropriate alpha method
The most common methods of implementing transparency are alpha blending and alpha testing.
Alpha testing will make the object material look either 100% opaque or 100% transparent. You can configure the alpha value threshold for this cutoff. In Unity this type of transparency is called Cutout. In Unreal Engine 4 it is called the Masked blend mode.
Alpha blending allows the object material to have a range of transparency, and can make an object look partially transparent. Unity calls this type of transparency Transparent. In Unreal Engine 4 it is called the Translucent blend mode.

Alpha blending generally results in a superior visual appearance than alpha testing. However, for certain types of meshes, such as foliage, alpha blending can look odd when the mesh is viewed in motion. This is caused by perception of the leaves and branches being rendered in the wrong order. Alpha testing minimizes this effect, at the cost of increased aliasing and sharp edges on the leaves and branches.
Alpha blending and alpha testing may take a different amount of time to render the same mesh. For meshes where either mode results in acceptable visual output, you should benchmark to see if one method performs better than the other.
Profile shader complexity
Rendering features such as texture samplers, lighting, and transparency all add to shader complexity and decrease rendering performance. You can use tools built into game engines as well as external graphics tools to evaluate your shader complexity.
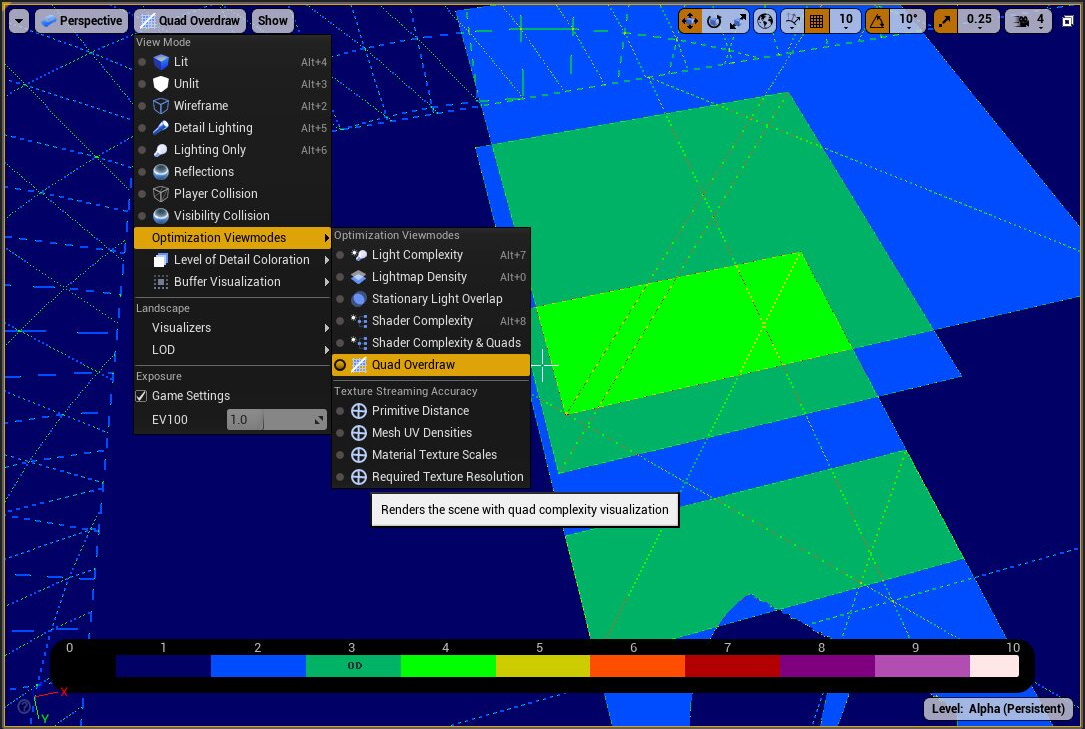
Unreal Engine 4 includes a Shader Complexity viewmode that provides cost estimates for the objects in your scene.

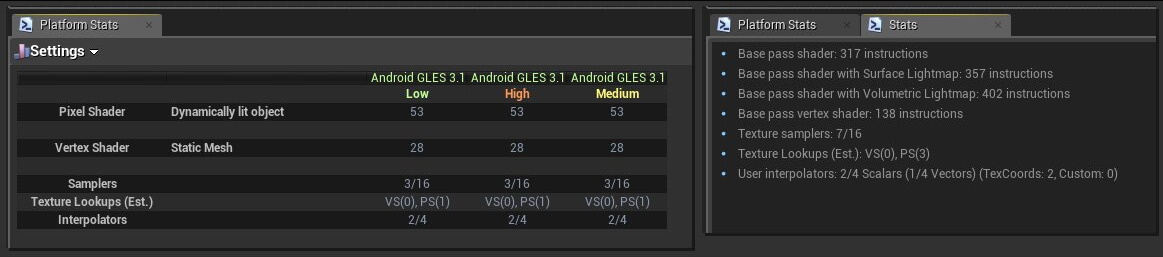
You can also use Unreal’s Material Stats feature to profile the cost of materials as you author them.
Calculate in the vertex shader
Rendering shader calculations are usually split between a vertex shader and a fragment (also known as pixel) shader. The number of fragments being rendered will usually be greater than the number of vertices. If an expensive computation can be performed in the vertex shader, it will be run less frequently than if it happens in the fragment shader.
However, if this data is consumed by the fragment shader, it must be passed from the vertex shader. If the quantity of data being transferred is too large, performing the calculations in the fragment shader may have higher performance. You can use profiling tools to evaluate tiler utilization to determine the optimal shader location for a set of calculations. Unreal Engine 4 has a Customized UVs feature that can assist with this profiling.
Avoid expensive math operations
Mathematical operations are used in shader programs to control the behavior and look of the shader output. Common operations include basic arithmetic, power, floor, logarithm, etc. Math operations are not equal in their computational cost. A shader filled with expensive operations will perform more slowly, especially on older devices. Examples of relatively inexpensive operations include:
- Addition
- Subtraction
- Multiplication
More expensive operations include:
- Division
- Transcendentals (sin, cos, power, log, tan)
Profile performance often
Your performance bottlenecks may not always be obvious. Avoid assuming where your problem areas are and use profiling tools to evaluate your rendering performance. Make sure you do before and after tests with any optimization to accurately gauge its impact.