
Czasami możesz chcieć wyświetlić i edytować projekt usług gier Play bezpośrednio w Google Cloud.
Typowe scenariusze:
- włączanie dodatkowych interfejsów API w projekcie (np. Google Drive);
- Edytowanie informacji o marce gry w oknie OAuth 2.0.
- wyświetlanie limitu interfejsu API i w razie potrzeby przesyłanie prośby o dodatkowy limit;
- Edytowanie autoryzowanych identyfikatorów URI lub źródeł JavaScript w identyfikatorach klientów utworzonych w przeszłości.
Zobacz swój projekt
Aby wyświetlić projekt w Google Cloud:
- Na stronie Konfiguracja (Zwiększanie liczby użytkowników > Usługi gier Play > Konfiguracja i zarządzanie > Konfiguracja) wybierz dane logowania do gry.
- Przejdź do sekcji Uwierzytelnianie i kliknij Wyświetl w Google Cloud.
Dostosowywanie limitów wykorzystania interfejsu API
W Google Cloud możesz wyświetlić limity wykorzystania interfejsu API skonfigurowane dla Twojej gry oraz ilość wykorzystanego limitu. Możesz też ustawić limity dla poszczególnych użytkowników, aby zapobiec wyczerpaniu limitu przez użytkownika, który dopuszcza się nadużyć (lub przez klienta gry z błędami).
Aby wyświetlić lub zmienić limity wykorzystania w projekcie albo poprosić o zwiększenie limitu:
- Jeśli nie masz jeszcze konta rozliczeniowego dla projektu, utwórz je.
- Otwórz stronę Włączone interfejsy API w bibliotece interfejsów API w Konsoli interfejsów API i wybierz interfejs API z listy.
- Aby wyświetlić i zmienić ustawienia związane z limitami, kliknij Limity. Aby wyświetlić statystyki użytkowania, kliknij Użycie.
Pamiętaj, że „użytkownicy” są określani na podstawie adresu IP klienta wysyłającego żądanie limitu. Jeśli na przykład wszystkie żądania pochodzą z jednego serwera, może on zostać błędnie oznaczony jako jeden użytkownik wysyłający spam. Aby temu zapobiec, możesz dołączyć argument userIp=x.x.x.x do żądań punktów końcowych interfejsu API.
Więcej informacji o ustawianiu limitów dla poszczególnych użytkowników znajdziesz w artykule Ograniczanie wykorzystania interfejsu API.
Oprócz limitu na użytkownika istnieje limit dzienny dla całego interfejsu API usług Gier Google Play. Zwykle nie musisz zmieniać wstępnie przydzielonego limitu. Jeśli jednak przewidujesz duży wzrost liczby zapytań (np. w przypadku zbliżającego się wydarzenia), możesz poprosić o zwiększenie limitu, klikając link Poproś o więcej.
Wyświetlanie ograniczeń liczby żądań OAuth i limitów nowych użytkowników
Aby wyświetlić limity związane z szybkością przyznawania autoryzacji użytkownikom OAuth i limity nowych użytkowników:
- Otwórz konsolę Google Cloud.
- Sprawdź, czy masz wybrany odpowiedni projekt.
- Otwórz Interfejsy API i usługi > Ekran zgody OAuth.
- Na tej stronie możesz wyświetlić bieżący odsetek przyznawania autoryzacji użytkownikom (lub odsetek przyznawania tokenów) oraz łączny limit nowych użytkowników.
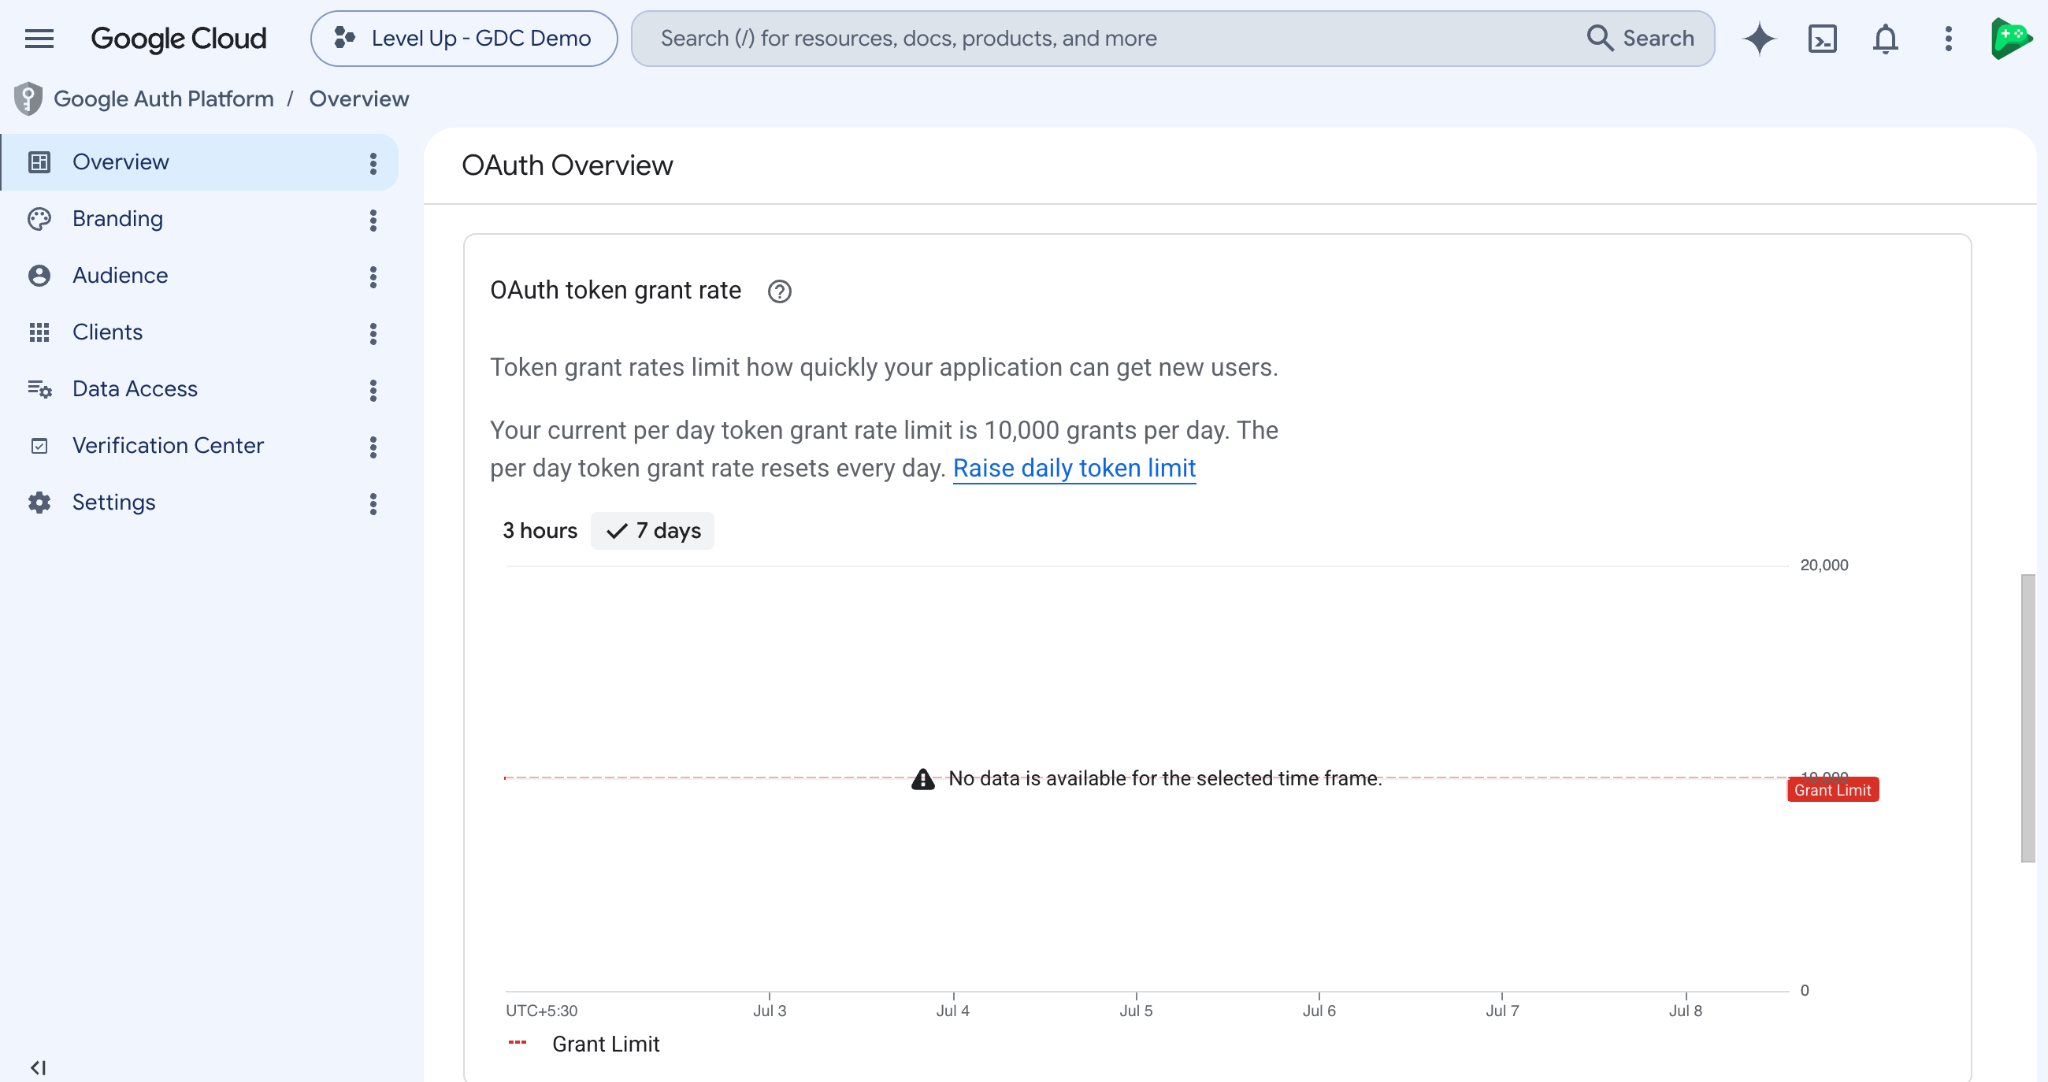
Jeśli widzisz, że Twoja gra wkrótce osiągnie limit szybkości, podejmij działania, aby zapobiec przerwom w działaniu gry dla graczy, i poproś o zwiększenie limitu szybkości.
Więcej informacji znajdziesz w artykule Limity żądań aplikacji OAuth.
Aktywowanie innych interfejsów API
Gdy utworzysz identyfikator klienta w Konsoli Play, interfejs Google Play Games Services API zostanie automatycznie włączony w Twoim projekcie. Inne interfejsy API Google możesz aktywować w Google Cloud.
Aby włączyć interfejs API w projekcie, wykonaj te czynności:
Otwórz Bibliotekę interfejsów API w Konsoli interfejsów API Google. Jeśli pojawi się monit, wybierz projekt lub utwórz nowy. W Bibliotece interfejsów API znajdziesz wszystkie dostępne interfejsy API pogrupowane według rodziny produktów i popularności.
Jeśli interfejsu API, który chcesz włączyć, nie ma na liście, wyszukaj go.
Wybierz interfejs API, który chcesz włączyć, a następnie kliknij przycisk Włącz.
Jeśli pojawi się taka prośba, włącz płatności.
Jeśli pojawi się taka prośba, zaakceptuj warunki korzystania z interfejsu API.
Zmiana informacji o marce
Aby zmodyfikować informacje o marce (tytuł, logo itp.) gry, które pojawiają się w oknie OAuth 2.0, ustaw atrybuty na ekranie zgody w Google Cloud.
Aby skonfigurować ekran zgody w projekcie:
- Otwórz stronę ekranu zgody w Konsoli Play. Jeśli pojawi się monit, wybierz projekt lub utwórz nowy.
- Wypełnij formularz i kliknij Zapisz.
Modyfikowanie typu użytkownika OAuth
Jeśli testujesz w ramach ścieżki testowej Wersja produkcyjna (Testowanie i wdrażanie > Wersja produkcyjna) przy użyciu konta testowego osobistego, musisz też skonfigurować w Google Cloud ustawienie odbiorców OAuth jako Zewnętrzne. Więcej informacji znajdziesz w artykule Zarządzanie odbiorcami aplikacji.
Modyfikowanie atrybutów związanych z identyfikatorem klienta
Aby zmodyfikować atrybuty związane z identyfikatorem klienta OAuth 2.0 (pochodzenie internetowe i adresy URL przekierowania w przypadku aplikacji internetowej itp.):
- Otwórz Konsolę Play i przejdź do swojej gry.
- Na stronie Konfiguracja (Zwiększanie liczby użytkowników > Usługi gier Play > Konfiguracja i zarządzanie > Konfiguracja) wybierz dane logowania do gry.
- Przewiń w dół sekcji Uwierzytelnianie i kliknij Wyświetl w Google Cloud.
- W Google Cloud wybierz swój projekt.
- Na pasku bocznym po lewej stronie wybierz Interfejsy API i uwierzytelnianie. Sprawdź, czy na wyświetlonej liście interfejsów API stan interfejsu Google Play Game Services API to WŁĄCZONY.
- Na pasku bocznym po lewej stronie wybierz Zarejestrowane aplikacje.
- Rozwiń sekcję Identyfikator klienta OAuth 2.0 i znajdź atrybut, który chcesz edytować.
Migracja klientów OAuth z istniejącego projektu w chmurze
Aby wyświetlić projekt w Google Cloud, wykonaj czynności opisane w sekcji Wyświetlanie projektu.
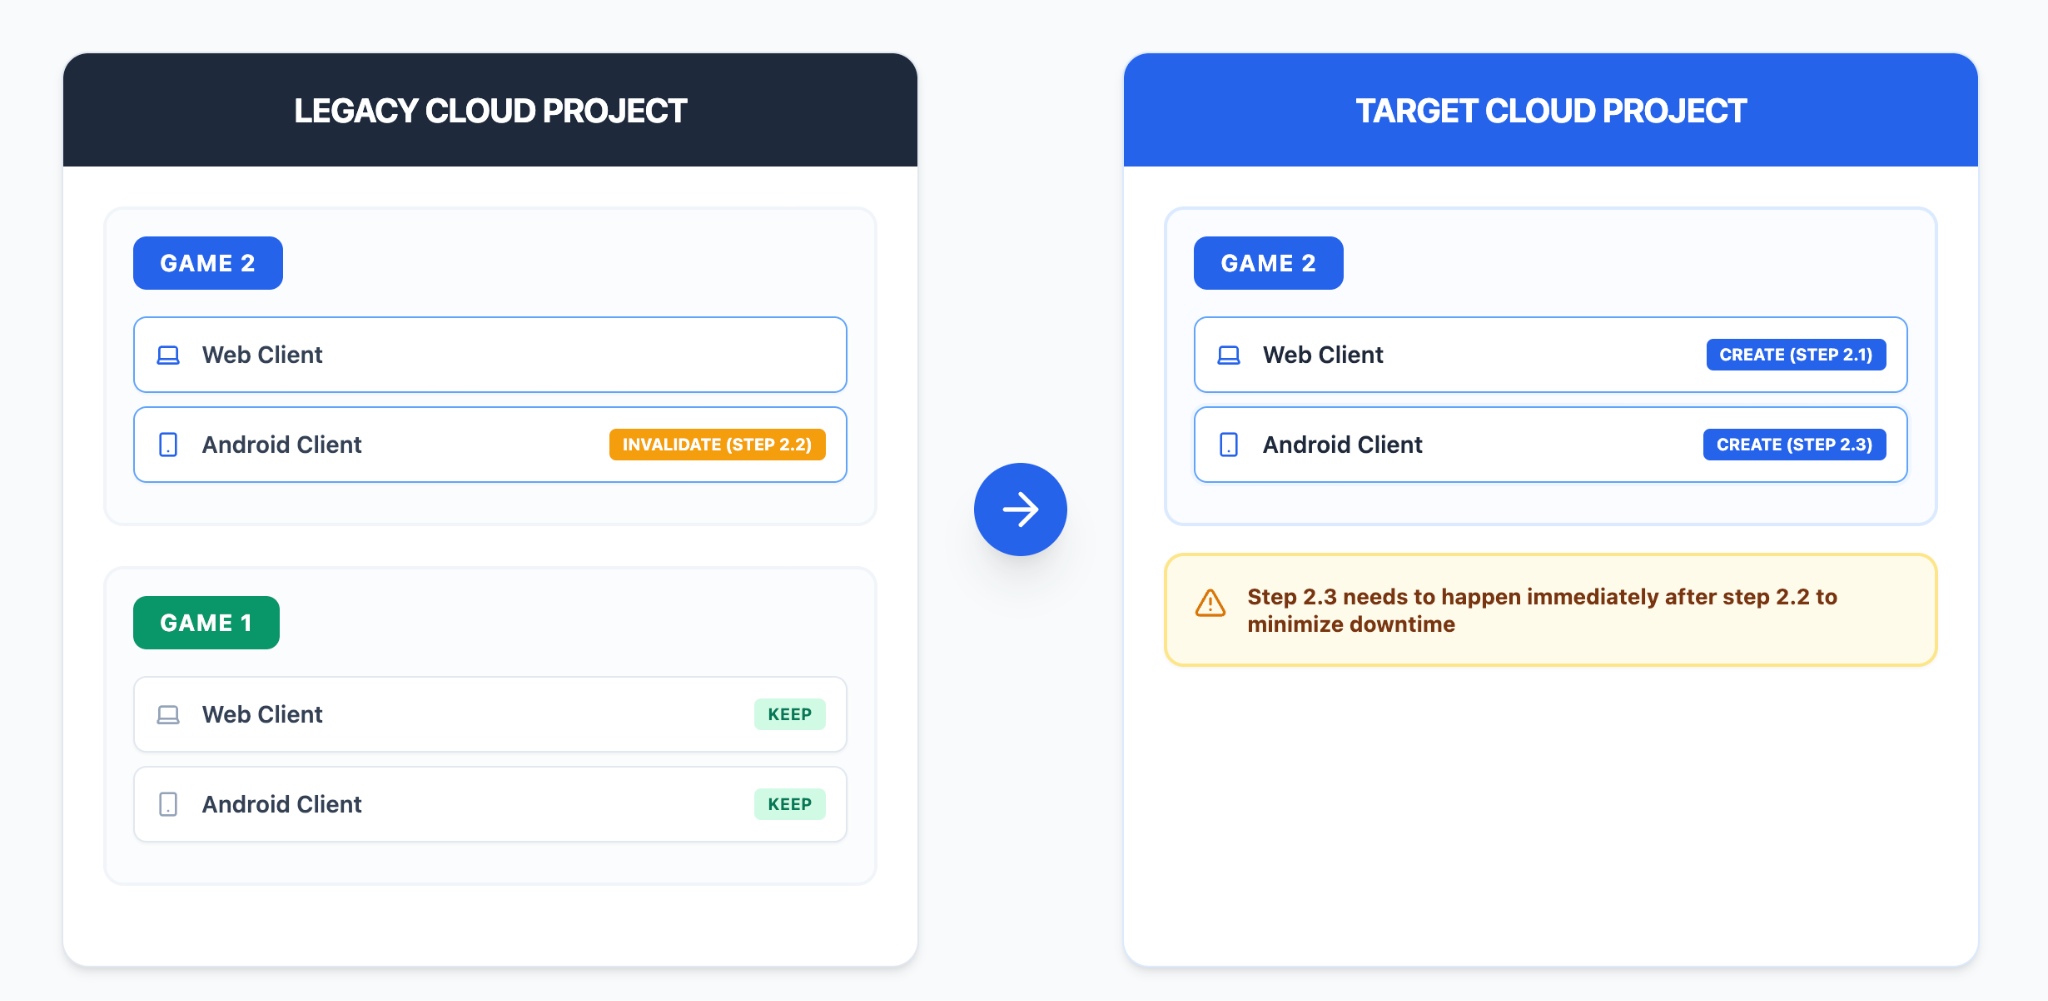
Do skonfigurowania usług gier Play wymagany jest unikalny projekt Google Cloud. Jeśli kilka gier korzysta z jednego projektu w chmurze, musisz przenieść ich klienty OAuth na Androida do niezależnych projektów, aby zapewnić prawidłową konfigurację.
W powyższym przykładzie gry 1 i 2 utworzyły klienty internetowe i na Androida w ramach jednego projektu Google Cloud na potrzeby logowania przez Google. Musimy przenieść klientów internetowych i Androida z gry 2 z obecnego starszego projektu Google Cloud do nowego docelowego projektu Google Cloud.
Krok 1. Przygotowanie backendu
Zanim to zrobisz, musisz dostosować backend i klientów do obsługi jednoczesnego istnienia starych i nowych identyfikatorów klienta internetowego.
- Konfiguracja po stronie serwera: jeśli serwer weryfikuje identyfikator klienta internetowego w tokenie identyfikatora, musisz zaktualizować logikę po stronie serwera, aby jednocześnie obsługiwała tokeny identyfikatora wydawane zarówno przez starych klientów w starszym projekcie w Google Cloud, jak i przez nowych klientów, których musisz wygenerować w docelowym projekcie w Google Cloud.
- Konfiguracja po stronie klienta: aplikacja kliencka musi obsługiwać wiele identyfikatorów klienta internetowego, aby można było zalogować się przy użyciu nowego identyfikatora klienta internetowego podczas przełączania. Możesz użyć dowolnej z tych metod:
- Wbudowane 2 identyfikatory klienta internetowego w aplikacji klienckiej, przełączanie na nowy identyfikator klienta internetowego po wygaśnięciu starego identyfikatora klienta
- Dynamiczne pobieranie najnowszego identyfikatora klienta internetowego z serwera w celu ukończenia przełączania
- Wcześniejsze utworzenie klientów internetowych: w projekcie docelowym musisz wcześniej utworzyć nowego klienta internetowego, aby uniknąć potencjalnych opóźnień podczas przełączania atomowego.
Krok 2. Skonfiguruj nowych klientów OAuth w internecie i na Androidzie w odpowiedniej usłudze Google Cloud
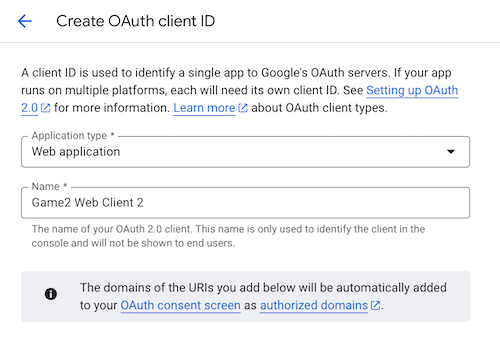
Krok 2.1. Utwórz nowego klienta OAuth w usłudze internetowej dla Gry 2 w docelowym projekcie Google Cloud:

Krok 2.2: Ostrzeżenie: zmodyfikowanie klienta Androida uniemożliwi użytkownikom gry logowanie się w niej za pomocą funkcji Zaloguj się przez Google, dlatego musisz wykonać krok 2.3 natychmiast po kroku 2.2. Aby zminimalizować odstęp czasu między modyfikacją a ponownym utworzeniem, zalecamy otwieranie 2 stron internetowych jednocześnie.
Zmień nazwę pakietu klienta Androida w projekcie Google Cloud starszego typu na nieprawidłową wartość, np. com.noexist.none.
Krok 2.3. Natychmiast utwórz nowego klienta Androida dla Gry 2 z tym samym odciskiem cyfrowym SHA-1 i nazwą pakietu Gry 2 w docelowym projekcie Google Cloud:

Krok 3. Wdrażanie konfiguracji w czasie rzeczywistym
Po utworzeniu nowego klienta Androida w projekcie docelowym wykonaj od razu te czynności:
- Przekieruj klientów: użyj mechanizmu konfiguracji dynamicznej (np. Zdalnej konfiguracji), aby natychmiast przełączyć aplikację klienta na nowy identyfikator klienta internetowego.
- Zachowaj starych klientów: zachowaj starych klientów OAuth jako opcję rezerwową, aby w razie problemów móc przywrócić poprzednie logowanie klienta OAuth.