
Android Game Development Extension を使用するようにプロジェクトを構成します。
Android Game Development Extension は、MSBuild を呼び出して C / C++ ソースコードを共有ライブラリ(.so)と静的ライブラリ(.a)にビルドします。ビルドプロセスの一環として、カスタム MSBuild タスクは Gradle を呼び出して Java および Kotlin のソースコードをコンパイルし、アセットをパッケージ化して、デプロイ用の APK ファイルを生成します。プロジェクトを構成する際は、Android プラットフォーム用にビルドするために必要な情報が MSBuild に含まれていることを確認する必要があります。
MSBuild で C / C++ をビルドする
通常、Android プロジェクトは Gradle でビルドされます。CMake または ndk-build を実行する Gradle パスによって、プロジェクト内のネイティブ コードがビルドされます。Android Game Development Extension for Visual Studio では、ビルドプロセスが逆になります。MSBuild がビルドプロセスの開始点です。C/C++ ソースコードはすべて、拡張機能の一部としてシステムにインストールされた新しい Android プラットフォーム(「Android-x86_64」など)用に MSBuild で最初にビルドされます。その後、MSBuild は Gradle を呼び出し、C / C++ ロジックを含む共有ライブラリ ファイルを APK にパッケージ化します。
まず、CMake でプロジェクトの既存のビルドロジックを複製するか、MSBuild で ndk-build を複製します。ターゲット プラットフォームを次のように設定します。
- Android-x86
- Android-x86_64
- Android-armeabi-v7a
- Android-arm64-v8a
これらのプラットフォームはすべて、Android Game Development Extension によって提供されます。
コンパイル オプションとリンク オプションを設定する
AGDE は、選択した NDK を使用して、アプリの C/C++ 部分をビルドする際のデフォルトのコンパイル オプションとリンク オプションを決定します。
これらのコンパイル オプションまたはリンク オプションをカスタマイズする必要がある場合は、[プロジェクトのプロパティ] を使用して設定できます。最も一般的なオプションは、[C/C++](コンパイル用)、[Librarian](静的ライブラリのアーカイブ用)、[Linker](動的ライブラリのリンク用)の各グループにあります。他のカスタム オプションを渡す必要がある場合は、[コマンドライン] セクションに追加します。たとえば、r28 より前の NDK を使用している場合は、アプリが16 KB のページサイズをサポートするようにリンカー フラグを設定できます。
Android プラットフォームを追加する
teapot サンプル プロジェクトには Android プラットフォームが含まれていますが、既存のプロジェクトには Android プラットフォームを手動で追加する必要があります。新しいプラットフォームを追加するには、Visual Studio で次の手順を実施します。
- [Build] > [Configuration Manager] を選択します。
- [Active solution platform] で [<New>] を選択します。
新しいプラットフォームについて、次のいずれかを入力します。
- Android-armeabi-v7a
- Android-arm64-v8a
- Android-x86
- Android-x86_64
[Copy settings from] ボックスで、別の既存の Android プラットフォームを選択します。Android プラットフォームがまだない場合は、[<Empty>] を選択します。[Create new project platforms] を有効にします。
Android APK アイテムを追加する
[Add] > [New Item] > [Visual C++] > [Android] > [Android APK] を選択し、[Add] をクリックします。次のダイアログで Android アプリを構成します。
- Application Name: 人間が読める形式の Android アプリ名。
- Application ID: Android アプリの一意の識別子。
- Solution Explorer Location: 追加した Android パッケージ化サポート ファイルが配置される仮想フォルダの場所。デフォルトでは、これらのファイルはプロジェクト内の同名のフォルダにも配置されます。場所をカスタマイズするには、[Put support files in a custom location] チェックボックスをオンにしてカスタムの場所を指定します。仮想フォルダは、Solution Explorer の現在のプロジェクトの下に残ります。
MSBuild で Gradle を呼び出して APK をビルドする
MSBuild は、Gradle プロジェクトの場所を把握している場合を除き、Gradle を呼び出せません。図 1 に示すように、Gradle Build Directory プロパティを使用してこの場所を設定します。
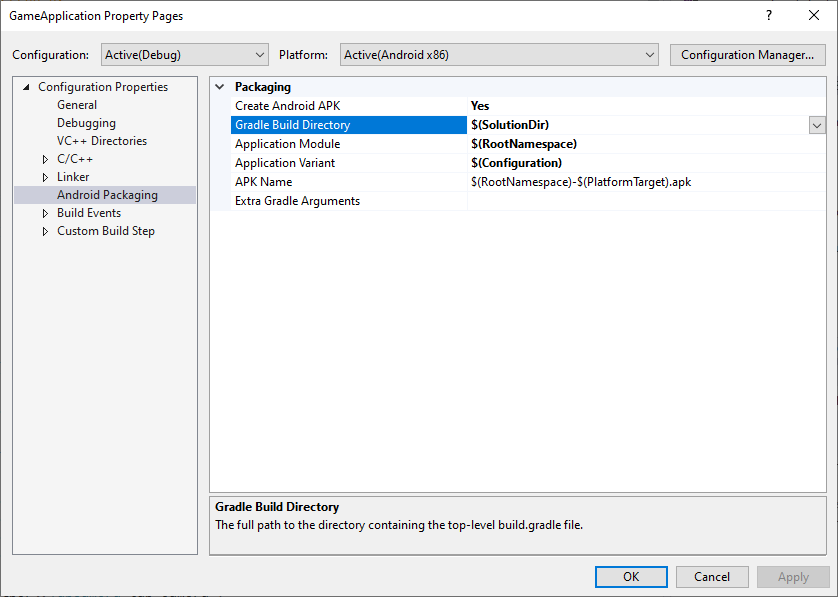
図 1. Gradle Build Directory プロパティ
さらに、前の図に示すように、Application Module プロパティ、Application Variant プロパティ、APK Name プロパティを設定して、MSBuild がビルド対象を認識できるようにします。
- Application Module: Gradle サブプロジェクトの名前。これは
settings.gradleファイルで設定するメイン プロジェクトです。通常は、Android Studio を使用して直接作成されたプロジェクトのappといいます。 - Application Variant: ビルドする Android バリアント。この値は、MSBuild 構成に沿って設定する必要があります。たとえば、デバッグビルドでは値をデバッグ バリアントに設定する必要があります。プロジェクトの MSBuild 構成名が Gradle バリアント名と一致する場合は、デフォルト値の
$(Configuration)を使用します。 - APK Name: 開発用パソコンでのデバッグとプロファイリングに使用される生成 APK ファイルの名前。この名前は Gradle に渡されます。Gradle ビルド スクリプトは、この名前を尊重する必要があります(次のセクションの
MSBUILD_ANDROID_OUTPUT_APK_NAMEプロパティをご覧ください)。
Gradle ビルド スクリプトを変更する
ビルド時に、MSBuild は次の情報をプロジェクト プロパティとして Gradle スクリプトに渡します。これらのプロパティを読み取るように、プロジェクトの既存のビルド スクリプト(通常は build.gradle という名前)を変更します。
MSBUILD_MIN_SDK_VERSION: APK をビルドするために必要な最小 SDK バージョン(文字列)。この値は、図 2 に示すプロジェクト プロパティ ページの [Minimum Android SDK Version] ボックスで設定します。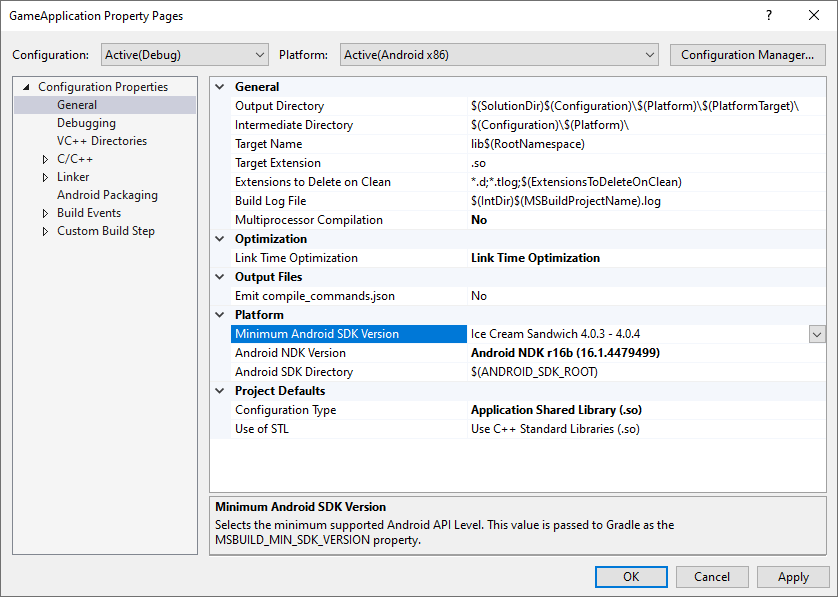
図 2. Minimum Android SDK Version プロパティGradle ビルド スクリプトは、
minSdkVersionまたはminSdkをこの文字列値に設定し、必要に応じてtoInteger()型変換を行う必要があります。Groovy
android {
  // ...

  defaultConfig {
      applicationId "com.yourcompany.yourapp"
      minSdkVersion MSBUILD_MIN_SDK_VERSION
      // Or: minSdk MSBUILD_MIN_SDK_VERSION.toInteger()
      // ...
  }

  // ...
}
Kotlin
android {
  // ...

  defaultConfig {
      applicationId = "com.yourcompany.yourapp"
      minSdkVersion(MSBUILD_MIN_SDK_VERSION)
      // Or: minSdk = MSBUILD_MIN_SDK_VERSION.toInteger()
      // ...
  }

  // ...
}
MSBUILD_ANDROID_OUTPUT_APK_NAME: Gradle がビルドする APK の予想される名前。Android Game Development Extension は、この名前と一致する APK を探し、接続済みのデバイスにデプロイします(デバッグとプロファイリングのため)。この値は、図 3 に示すプロジェクト プロパティ ページの [APK Name] ボックスで設定します。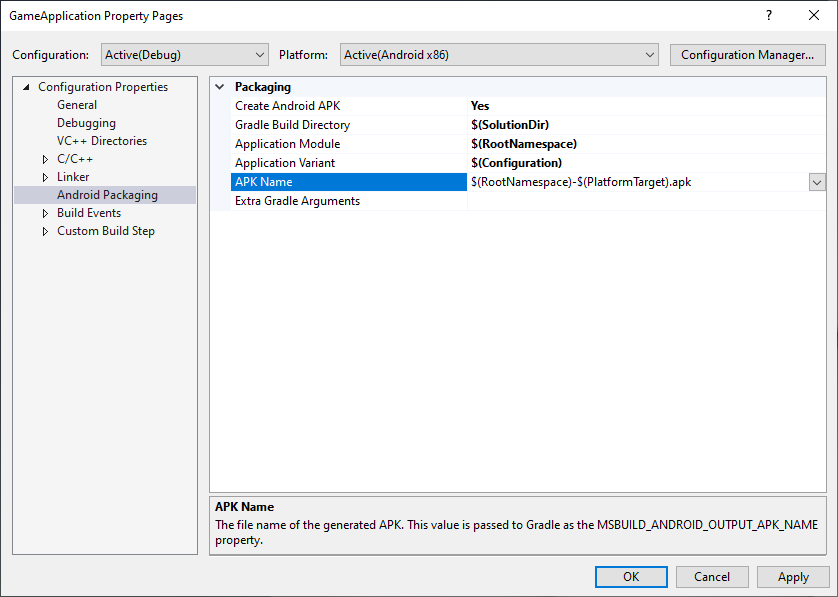
図 3. APK Name プロパティGradle ビルド スクリプトはこのプロパティを尊重する必要があります。たとえば、次の例では、すべてのバリアントの出力 APK 名を、MSBuild によって選択された名前に設定しています。
Groovy
android {
  // ...

  applicationVariants.all { variant ->
      variant.outputs.all {
          outputFileName = MSBUILD_ANDROID_OUTPUT_APK_NAME
      }
  }

  // ...
}
Kotlin
android {
  // ...

  applicationVariants.all { variant ->
      variant.outputs.all {
          outputFileName = MSBUILD_ANDROID_OUTPUT_APK_NAME
      }
  }

  // ...
}
MSBUILD_JNI_LIBS_SRC_DIR: MSBuild でビルドされた共有ライブラリ(.soファイル)を含むディレクトリ。この値は、次に示すプロジェクト プロパティ ページの [Output Directory] ボックスで設定します。図 4 に示すように、デフォルトでは、この値は Visual Studio プロジェクトの出力ディレクトリ プロパティです。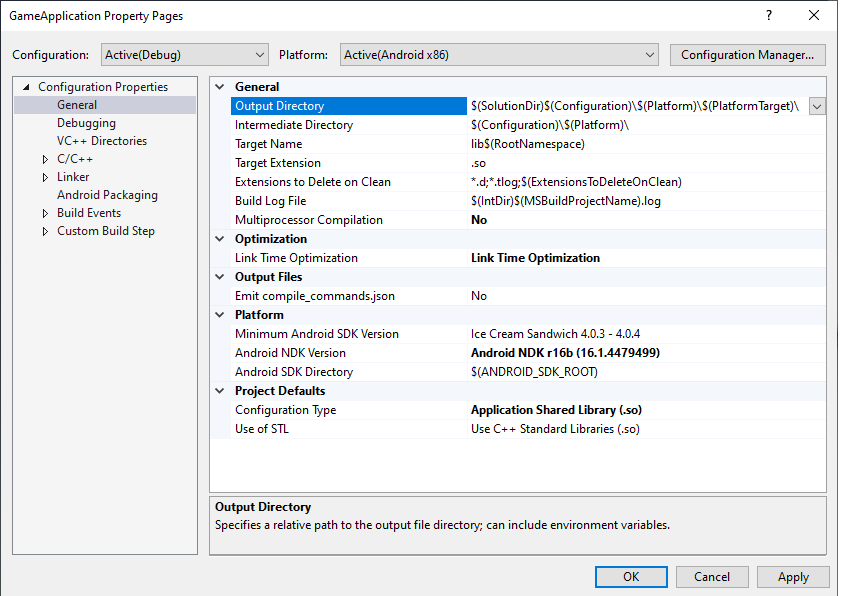
図 4. Output Directory プロパティGradle は、Android アプリが実行時に読み込めるように、APK 内のこのフォルダで共有ライブラリ ファイルをパッケージ化する必要があります。
Groovy
android {
  // ...

  sourceSets {
      main {
          jniLibs.srcDirs += [MSBUILD_JNI_LIBS_SRC_DIR]
      }
  }

  // ...
}
Kotlin
android {
  // ...

  sourceSets.getByName("main") {
      jniLibs.srcDir(MSBUILD_JNI_LIBS_SRC_DIR)
  }

  // ...
}
また、C / C++ コードが MSBuild でビルドされたため、Gradle ビルド スクリプトの
externalNativeBuildセクションを削除します。これらのセクションは、CMake または ndk-build を呼び出して C / C++ コードをコンパイルするために使用されていましたが、不要になりました。MSBUILD_NDK_VERSION: プロジェクトのビルドに使用する NDK のバージョン。この値は、図 5 に示すプロジェクト プロパティ ページの [Android NDK Version] ボックスで設定します。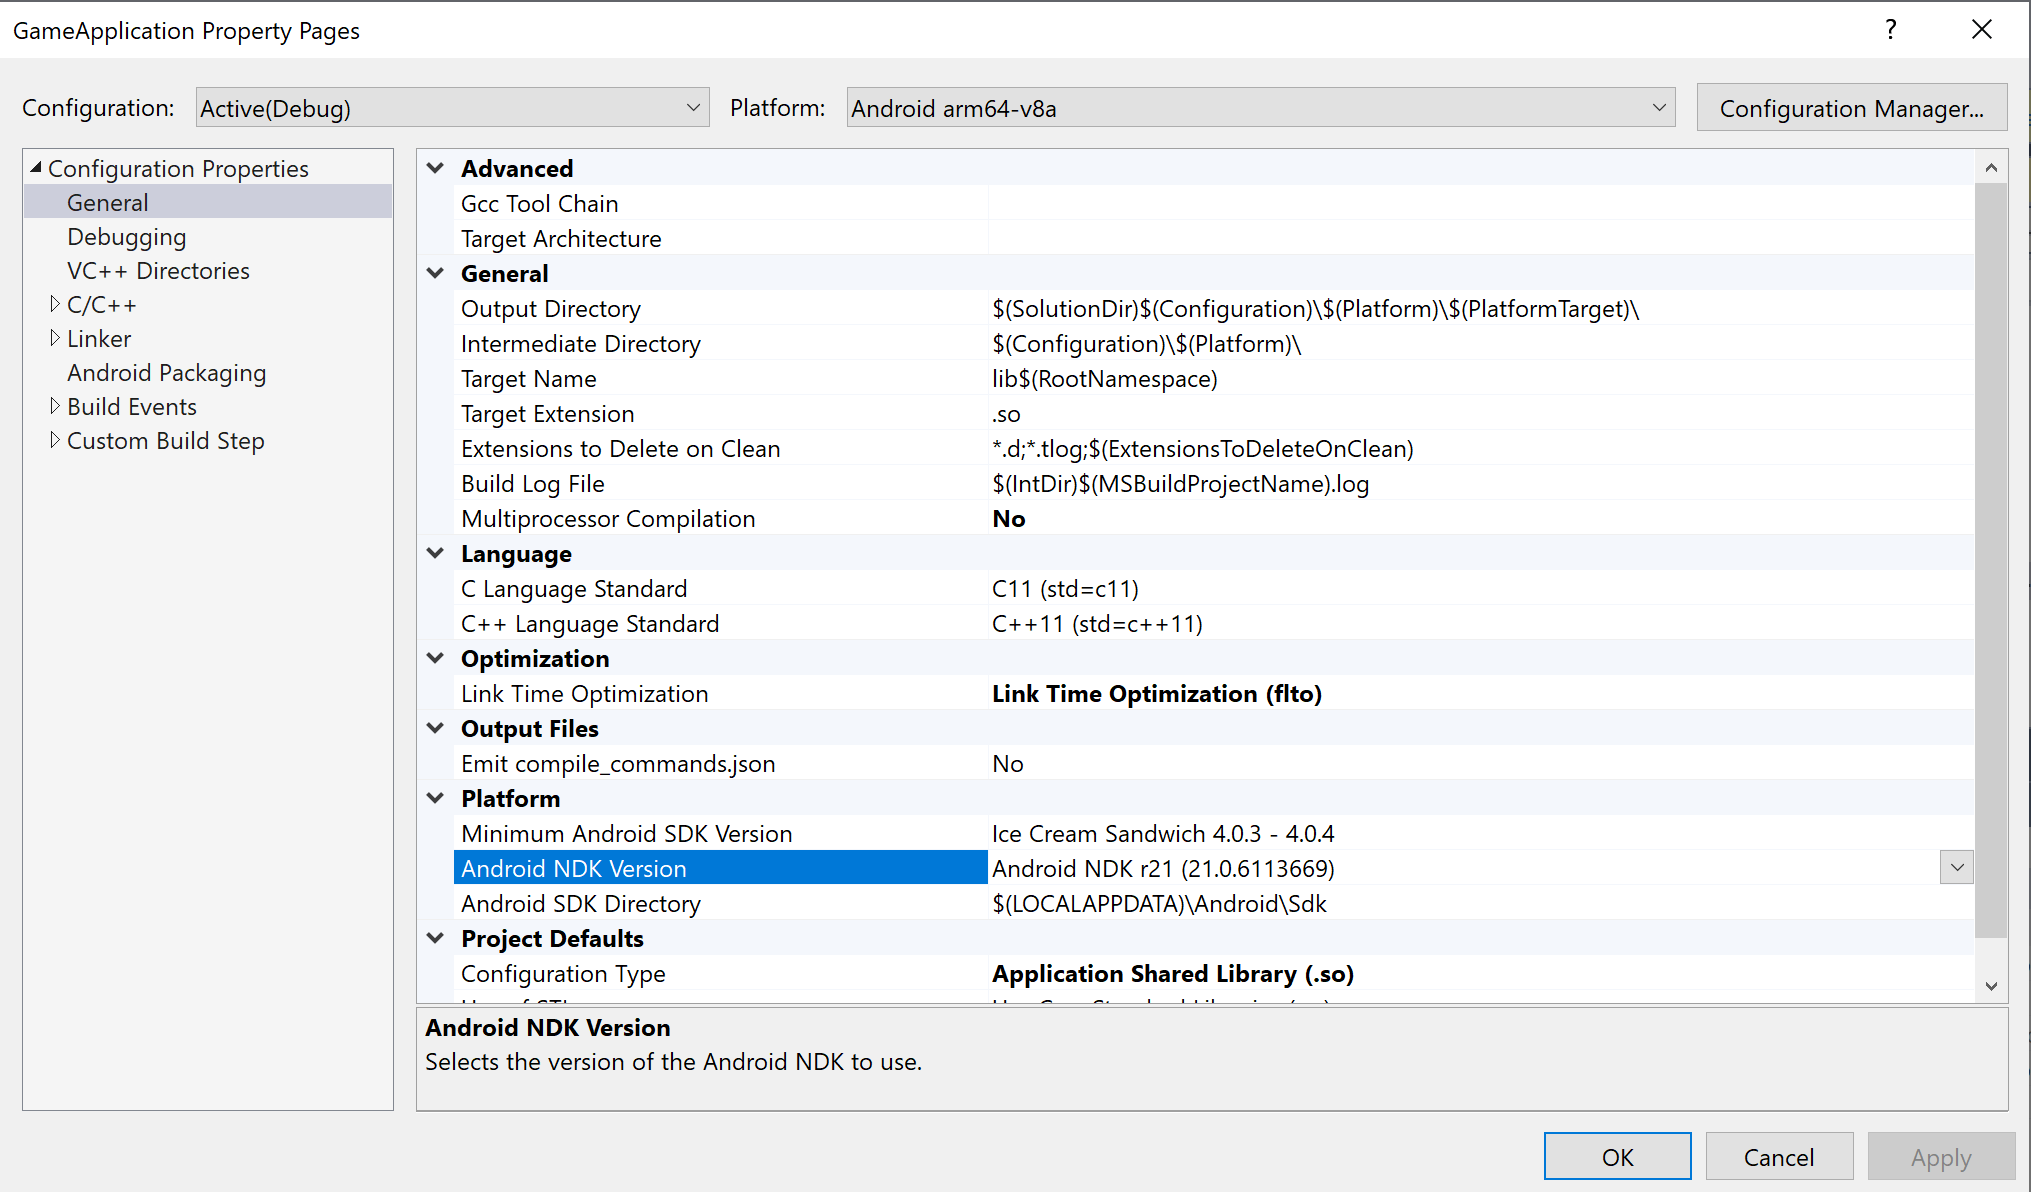
図 5. Android NDK Version プロパティ次に示すように、Gradle ビルド スクリプトは
ndkVersionをこの値に設定する必要があります。Groovy
android {
  // ...

  ndkVersion MSBUILD_NDK_VERSION

  // ...
}
Kotlin
android {
  // ...

  ndkVersion = MSBUILD_NDK_VERSION

  // ...
}
詳細については、Android Studio の NDK と CMake のインストールと設定に関するトピックをご覧ください。