建立可調整大小的點陣圖 (9-patch 檔案)
透過集合功能整理內容
你可以依據偏好儲存及分類內容。
9-patch 繪製工具是 Android Studio 內附的所見即所得編輯工具。您可以使用這項工具建立點陣圖圖像,並且可自動依照檢視畫面內容及螢幕尺寸調整大小。您可以根據在圖片中繪製的指標,水平或垂直縮放圖片中選取的部分。
NinePatch 圖像介紹及運作方式請參閱 NinePatch 可繪項目。
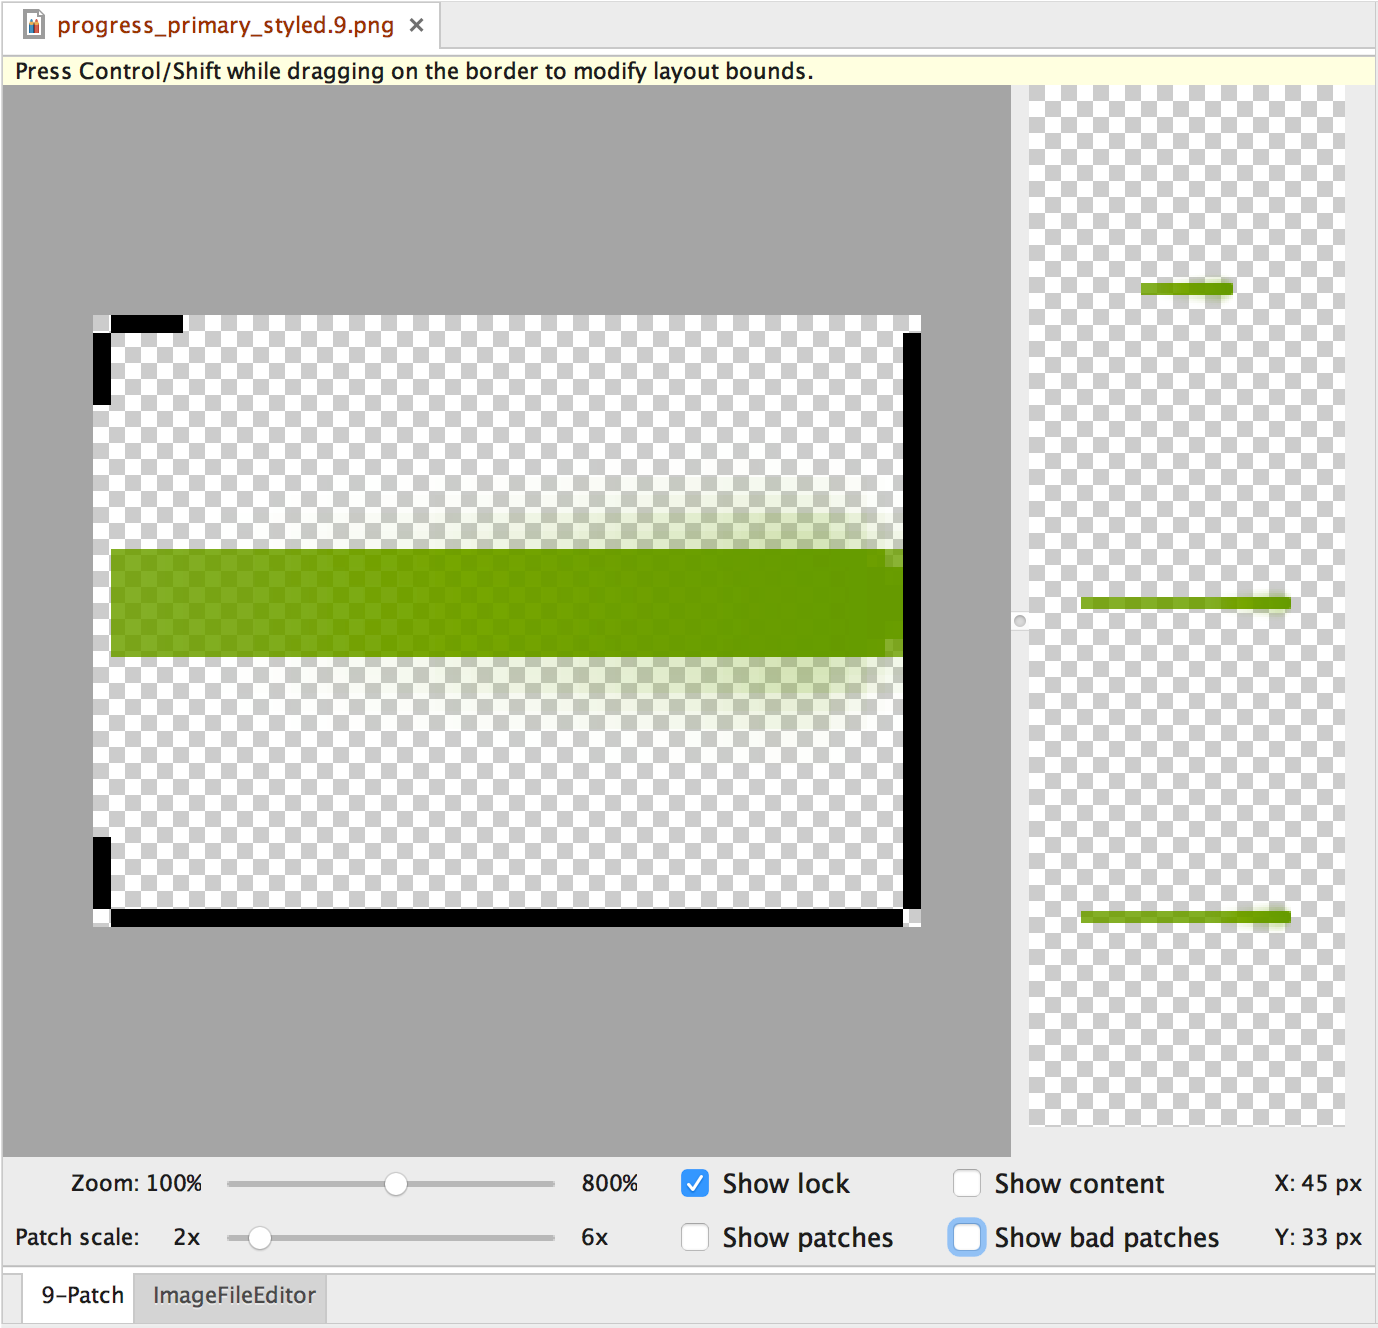
圖 1。Android Studio 的 9-patch 繪製工具,顯示 NinePatch 圖像。
請按照下列步驟使用 Android Studio 中的繪製 9-patch 工具來建立 NinePatch 圖像。您需要準備欲用來建立 NinePatch 圖像的 PNG 圖像。
- 在 Android Studio 中,於要建立 NinePatch 圖像的 PNG 圖像上按一下滑鼠右鍵,然後按一下「Create 9-patch File」(建立 9-patch 檔案)。
- 輸入 NinePatch 圖像的檔案名稱,然後按一下「確定」。圖像即會產生,其副檔名為
.9.png
。
- 按兩下新的 NinePatch 檔案,在 Android Studio 中將其開啟。
在隨即開啟的工作區中,左側窗格為繪圖區,您可以在此編輯可延展小塊和內容區域的線條。右側窗格為預覽區,您可以在此預覽圖像延展的結果。
- 在 1 像素的周長內部按一下,以便繪製可延展小塊及 (選擇性的) 內容區域的定義線。
按一下滑鼠右鍵即可清除之前繪製的線條 (Mac 使用者請按住 Shift 後按一下)。
- 完成後,按一下「File」>「Save」,即可儲存變更內容。
如要在 Android Studio 中開啟現有的 NinePatch 檔案,請在檔案上按兩下。
如果想確認 NinePatch 圖像縮小時正確成像,請確定所有可延展區域的大小至少有 2x2 像素。否則這些區域在縮小後可能就會消失。為避免在縮放時進行插補可能導致邊界的顏色改變,請在圖像的延展區域前後提供 1 個像素的額外安全空間。
注意:系統在載入時,會在一般的 PNG 檔案 (*.png
),圖像四周加入空白的 1 像素邊界。您可以在邊框內繪製可延展小塊和內容區域。系統會將之前儲存的 NinePatch 檔案 (*.9.png
) 原封不動載入而不會加入繪製區域,因為已經存在。
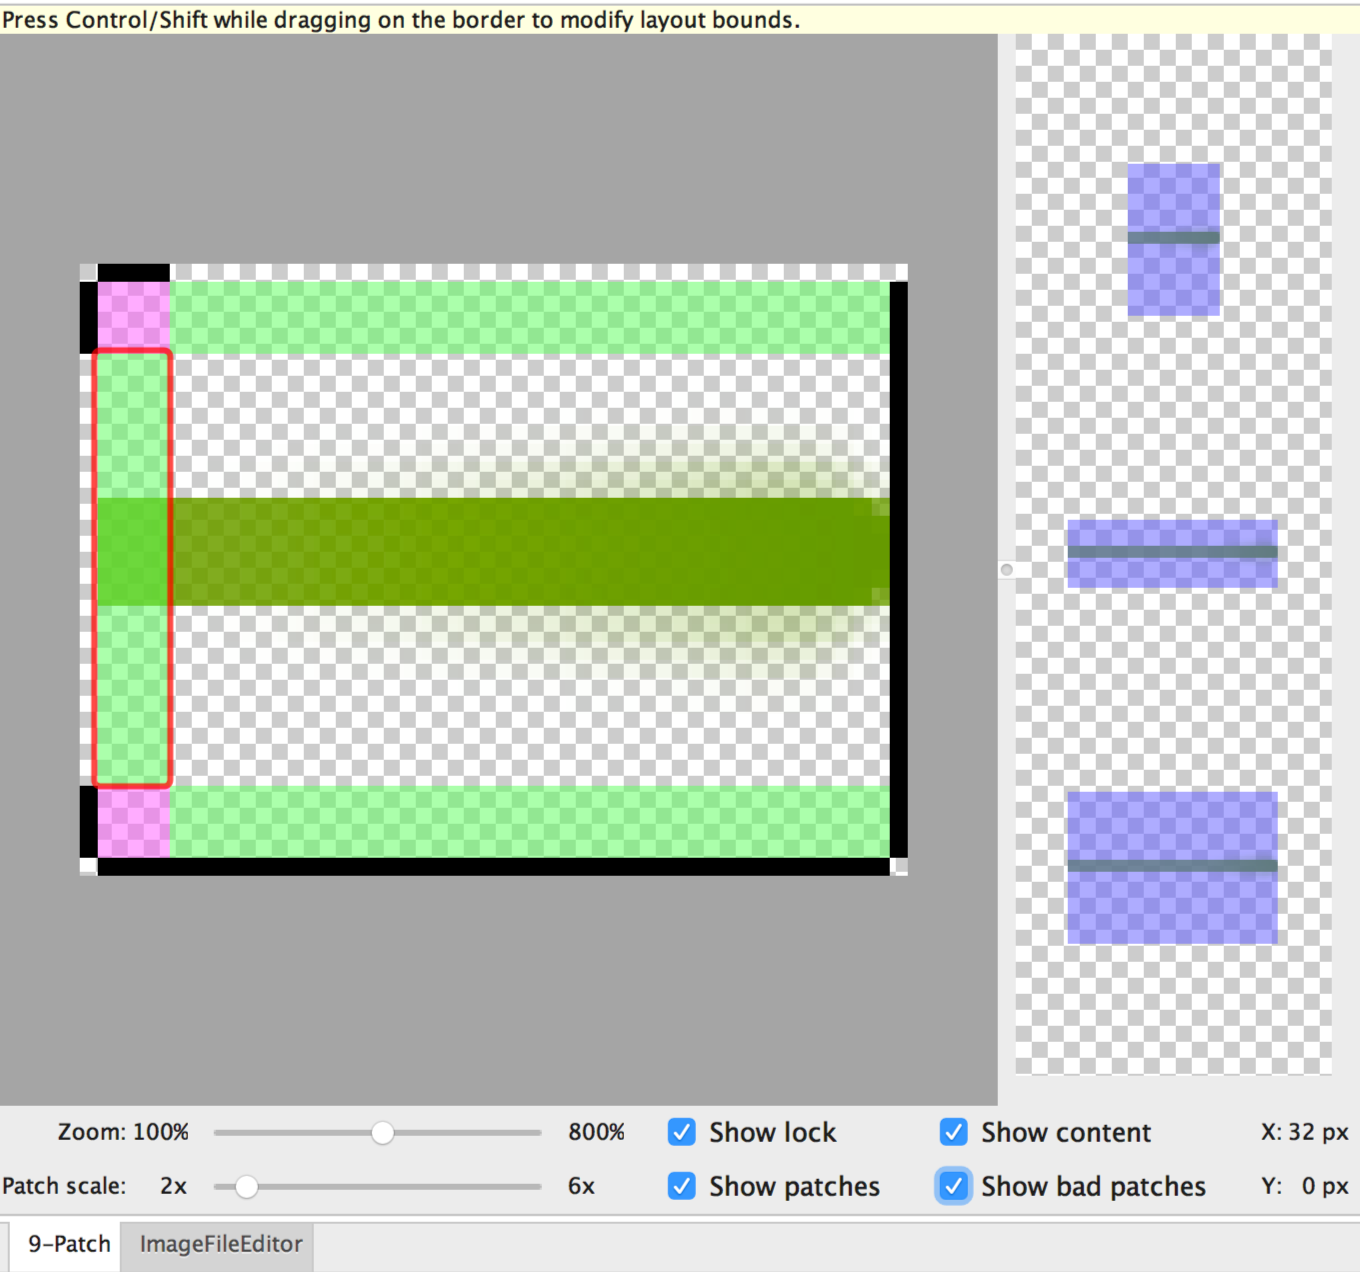
圖 2。Android Studio 中的 NinePatch 圖像,顯示內容、小塊和不佳的小塊。
可選用的控制項包括:
- 縮放:調整繪圖區的圖像縮放等級。
- 小塊縮放:調整預覽區內的圖像縮放比例。
- 顯示鎖定:顯示滑鼠懸停圖像中不可繪圖的區域。
- 顯示小塊:在繪圖區預覽粉紅色可延展小塊。粉紅色代表可延展小塊,如圖 2 所示。
- 顯示內容:在預覽圖片中醒目顯示內容區域。紫色代表可呈現內容的區域,如圖 2 所示。
- 顯示不佳小塊:在延展時可能產生不自然痕跡的小塊區域周遭加入紅色邊框,如圖 2. 所示。清除所有不佳小塊,即可保持延展圖片的視覺一致性。
這個頁面中的內容和程式碼範例均受《內容授權》中的授權所規範。Java 與 OpenJDK 是 Oracle 和/或其關係企業的商標或註冊商標。
上次更新時間:2025-07-27 (世界標準時間)。
[[["容易理解","easyToUnderstand","thumb-up"],["確實解決了我的問題","solvedMyProblem","thumb-up"],["其他","otherUp","thumb-up"]],[["缺少我需要的資訊","missingTheInformationINeed","thumb-down"],["過於複雜/步驟過多","tooComplicatedTooManySteps","thumb-down"],["過時","outOfDate","thumb-down"],["翻譯問題","translationIssue","thumb-down"],["示例/程式碼問題","samplesCodeIssue","thumb-down"],["其他","otherDown","thumb-down"]],["上次更新時間:2025-07-27 (世界標準時間)。"],[],[],null,["# Create resizable bitmaps (9-patch files)\n\nThe Draw 9-patch tool is a WYSIWYG editor included in Android Studio. The tool lets you create\nbitmap images that automatically resize to accommodate the contents of the view and the size of\nthe screen. You can scale selected parts of the image horizontally or vertically based on indicators\ndrawn within the image.\n\nFor an introduction to NinePatch graphics and how they work, read\n[NinePatch drawables](/guide/topics/graphics/2d-graphics#nine-patch).\n\n**Figure 1.** Android Studio's\nDraw 9-patch tool displaying a NinePatch image.\n\nFollow these steps to create a NinePatch graphic using the Draw 9-patch tool in Android\nStudio. You'll need the PNG image that you'd like to create a NinePatch image from.\n\n1. In Android Studio, right-click the PNG image you'd like to create a NinePatch image from, then click **Create 9-patch file**.\n2. Enter a filename for your NinePatch image and click **OK** . Your image will be created with the `.9.png` file extension.\n3. Double-click your new NinePatch file to open it in Android Studio. \n\n In the workspace that opens, the left pane is your drawing area, where you can edit\n the lines for the stretchable patches and content area. The right\n pane is the preview area, where you can preview your graphic when stretched.\n4. Click within the 1-pixel perimeter to draw the lines that define the stretchable patches and (optional) the content area. \n\n Right-click to erase\n previously drawn lines (on Mac, hold Shift and click).\n5. When done, click **File** \\\u003e **Save** to save your changes.\n\nTo open an existing NinePatch file in Android\nStudio, double-click the file.\n\nTo make sure that your NinePatch graphics scale down properly, verify that any\nstretchable regions are at least 2x2 pixels in size.\nOtherwise, those regions may disappear when scaled down. To avoid interpolation during scaling\nthat may cause the color at the boundaries to change, provide 1 pixel of extra safe\nspace in the graphics before and after stretchable regions.\n\n**Note:** A normal PNG file (`*.png`) is\nloaded with an empty 1-pixel border added around the image. You can draw\nthe stretchable patches and content area within the border.\nA previously saved NinePatch file (`*.9.png`) is loaded as-is,\nwith no drawing area added because it already exists.\n\n**Figure 2.** A NinePatch image in Android Studio\nshowing content, patches, and bad patches.\n\nOptional controls include:\n\n- **Zoom**: Adjust the zoom level of the graphic in the drawing area.\n- **Patch scale**: Adjust the scale of the images in the preview area.\n- **Show lock**: Visualize the non-drawable area of the graphic on mouse-over.\n- **Show patches**: Preview the pink stretchable patches in the drawing area. Pink indicates a stretchable patch, as shown in figure 2.\n- **Show content**: Highlight the content area in the preview images. Purple indicates the area where content is allowed, as shown in figure 2.\n- **Show bad patches**: Adds a red border around patch areas that may produce artifacts in the graphic when stretched, as shown in figure 2. If you eliminate all bad patches, you will maintain the visual coherence of your stretched image."]]