
The Android Studio main window consists of several logical areas, shown in Figure 1.
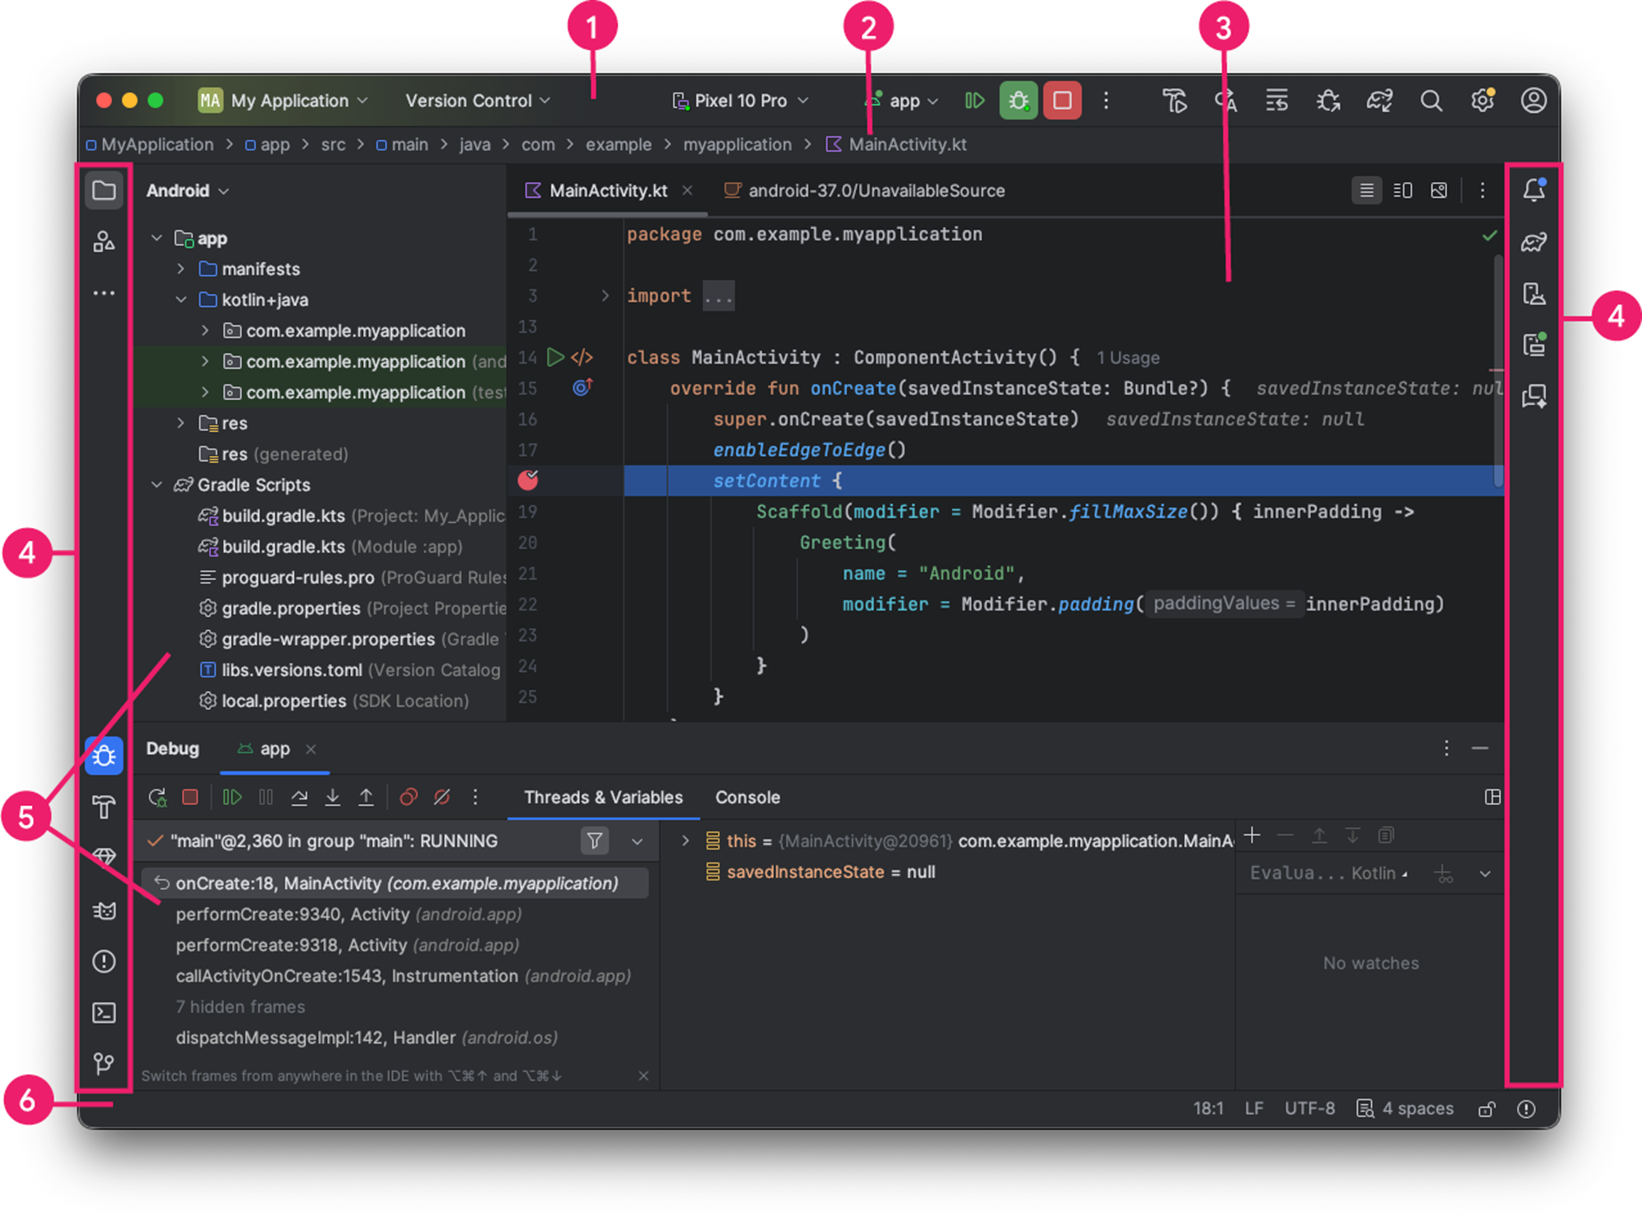
Figure 1. The Android Studio main window.
- Toolbar: Carry out a wide range of actions, including running your app and launching Android tools.
- Navigation bar: Navigate through your project and open files for editing. It provides a more compact view of the structure visible in the Project window.
- Editor window: Create and modify code. Depending on the current file type, the editor can change. For example, when editing Kotlin files with composable functions, the editor displays the Layout Editor.
- Tool window bar: Use the buttons on the outside of the IDE window to expand or collapse individual tool windows.
- Tool windows: Access specific tasks like project management, search, version control, and more. You can expand them and collapse them.
- Status bar: Display the status of your project and the IDE itself, as well as any warnings or messages.
To organize the main window for more screen space, hide or move the toolbars and tool windows. You can also use keyboard shortcuts to access most IDE features.
To search across your source code, databases, actions, elements of the user interface, and more, do one of the following:
- Double-press the Shift key.
- Click the magnifying glass in the upper right-hand corner of the Android Studio window.
This can be very useful if, for example, you are trying to locate a particular IDE action that you have forgotten how to trigger.
Tool windows
Instead of using preset perspectives, Android Studio follows your context and automatically brings up relevant tool windows as you work. By default, the most commonly used tool windows are pinned to the tool window bar at the edges of the application window.
Navigate the tool window using the following:
- To expand or collapse a tool window, click the tool's icon in the tool window bar. You can also drag, pin, unpin, attach, and detach tool windows.
- To return to the default layout of the current tool window, click Window > Layouts > Default. To customize your default layout, click Window > Layouts > Save Current Layout as New.
- To show or hide all available tool windows, click the overflow icon
 on the left side of the Android Studio window.
 - To locate a specific tool window, select the overflow icon and select the tool window from the menu.
You can also use keyboard shortcuts to open tool windows. Table 1 lists the shortcuts for the most common tool windows.
Table 1. Keyboard shortcuts for tool windows
| Tool window | Windows and Linux | macOS |
|---|---|---|
| Project | Alt+1 | Command+1 |
| Version Control | Alt+9 | Command+9 |
| Run | Shift+F10 | Control+R |
| Debug | Shift+F9 | Control+D |
| Problems | Alt+6 | Command+6 |
| Return to Editor | Esc | Esc |
| Hide All Tool Windows | Control+Shift+F12 | Command+Shift+F12 |
To hide all toolbars, tool windows, and editor tabs, click View > Appearance > Enter Distraction Free Mode. To exit Distraction Free Mode, click View > Exit Distraction Free Mode.
Use Speed Search to search and filter within most tool windows in Android Studio. To use Speed Search, select the tool window and then type your search query.
Code completion
Android Studio has three types of code completion, which you can access using keyboard shortcuts.
Table 2. Keyboard shortcuts for code completion
| Type | Description | Windows and Linux | macOS |
|---|---|---|---|
| Basic Completion | Displays basic suggestions for variables, types, methods, expressions, and so on. If you call basic completion twice in a row, you see more results, including private members and non-imported static members. | Control+Space | Control+Space |
| Smart Completion | Displays relevant options based on the context. Smart completion is aware of the expected type and data flows. If you call Smart Completion twice in a row, you see more results, including chains. | Control+Shift+Space | Control+Shift+Space |
| Statement Completion | Completes the current statement for you, adding missing parentheses, brackets, braces, formatting, and so on. | Control+Shift+Enter | Command+Shift+Enter |
To perform quickfixes and show intention actions, press Alt+Enter (Option+Enter on macOS).
Android Studio also offers AI-enabled autocompletion when you enable Gemini features.
Find sample code
The Code Sample Browser in Android Studio helps you find high-quality, Google-provided Android code samples based on the currently highlighted symbol in your project. For more information, see Find sample code.
Navigation
Here are some tips to help you navigate Android Studio.
Use the Recent Files action to switch between your recently accessed files:
To bring up the Recent Files action, press Control+E (Command+E on macOS). By default, the last accessed file is selected. With this action, you can also access any tool window through the left column.
Use the File Structure action to view the structure of the current file and quickly navigate to any part of your current file:
To bring up the File Structure action, press Control+F12 (Command+F12 on macOS).
Use the Navigate to Class action to search for and navigate to a specific class in your project. Navigate to Class supports sophisticated expressions, including camel humps (which lets you search by the capitalized letters in an element's camel-cased name), paths, line navigate to (which lets you navigate to a specific line within the file), middle name matching (which lets you search for a part of the class name), and many more. If you call it twice in a row, it shows you the results out of the project classes.
To bring up the Navigate to Class action, press Control+N (Command+O on macOS).
Use the Navigate to File action to navigate to a file or folder:
To bring up Navigate to File action, press Control+Shift+N (Command+Shift+O on macOS). To search for folders rather than files, add a "/" at the end of your expression.
Use the Navigate to Symbol action to navigate to a method or field by name:
To bring up the Navigate to Symbol action, press Control+Shift+Alt+N (Command+Option+O on macOS).
To find all the pieces of code referencing the class, method, field, parameter, or statement at the current cursor position, press Alt+F7 (Option+F7 on macOS).
Style and formatting
As you edit, Android Studio automatically applies formatting and styles as specified in your code style settings. You can customize the code style settings by programming language, including specifying conventions for tabs and indents, spaces, wrapping and braces, and blank lines.
To customize your code style settings, click File > Settings > Editor > Code Style (Android Studio > Settings > Editor > Code Style on macOS).
Although the IDE automatically applies formatting as you work, you can also explicitly call the Reformat Code action. To call the action, press Control+Alt+L (Opt+Command+L on macOS). To auto-indent all lines, press Control+Alt+I (Control+Option+I on macOS).
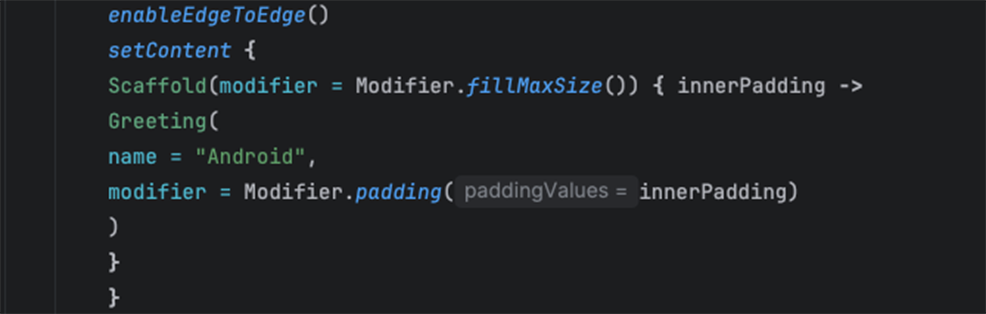
Figure 2. Code before formatting.
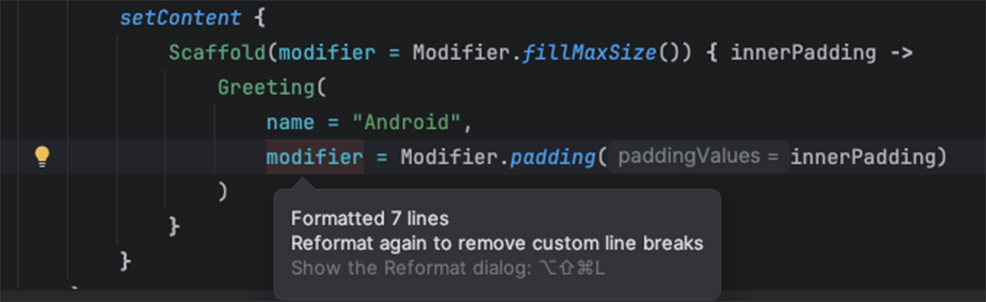
Figure 3. Code after formatting.