
Compose には、Canvas コンポーザブルの他にも、カスタム コンテンツの描画に役立つ便利なグラフィック Modifiers があります。これらの修飾子はどのコンポーザブルにも適用できます。
描画修飾子
Compose では、描画コマンドはすべて描画修飾子によって実行されます。Compose には、主要な描画修飾子が 3 つあります。
描画の基本修飾子は drawWithContent です。この場合、コンポーザブルの描画順序と、修飾子内で実行される描画コマンドを決定できます。drawBehind は、drawWithContent の便利なラッパーで、描画順序はコンポーザブルのコンテンツより後になります。drawWithCache は内部で onDrawBehind または onDrawWithContent を呼び出し、その中で作成されたオブジェクトをキャッシュするメカニズムを提供します。
Modifier.drawWithContent: 描画順序を選択
Modifier.drawWithContent を使用すると、コンポーザブルのコンテンツの前または後に DrawScope オペレーションを実行できます。drawContent を呼び出してから、コンポーザブルの実際のコンテンツをレンダリングしてください。この修飾子を使用すると、オペレーションの順序、つまりカスタム描画オペレーションの前と後のどちらでコンテンツを描画するか決めることができます。
たとえば、コンテンツの上に円形グラデーションをレンダリングして UI にライト キーホール効果を作成する場合は、次のようにします。
var pointerOffset by remember { mutableStateOf(Offset(0f, 0f)) } Column( modifier = Modifier .fillMaxSize() .pointerInput("dragging") { detectDragGestures { change, dragAmount -> pointerOffset += dragAmount } } .onSizeChanged { pointerOffset = Offset(it.width / 2f, it.height / 2f) } .drawWithContent { drawContent() // draws a fully black area with a small keyhole at pointerOffset that’ll show part of the UI. drawRect( Brush.radialGradient( listOf(Color.Transparent, Color.Black), center = pointerOffset, radius = 100.dp.toPx(), ) ) } ) { // Your composables here }
Modifier.drawBehind: コンポーザブルの背後の描画
Modifier.drawBehind を使用すると、画面に描画されるコンポーザブル コンテンツの背後で DrawScope オペレーションを実行できます。Canvas の実装を見てみると、単に Modifier.drawBehind のラッパーであることがわかります。
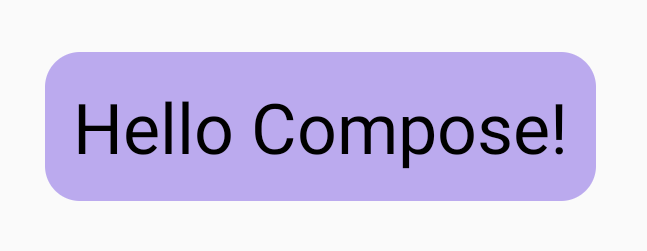
Text の後ろに角丸四角形を描画するには、次のようにします。
Text( "Hello Compose!", modifier = Modifier .drawBehind { drawRoundRect( Color(0xFFBBAAEE), cornerRadius = CornerRadius(10.dp.toPx()) ) } .padding(4.dp) )
結果は次のようになります。
Modifier.drawWithCache: 描画オブジェクトの描画とキャッシュ
Modifier.drawWithCache は、オブジェクト内で作成されたオブジェクトをキャッシュに保存します。描画領域のサイズが同じであるか、読み取られる状態オブジェクトが変更されていない場合に限り、オブジェクトはキャッシュに保存されます。この修飾子は、描画時に作成されるオブジェクト(Brush, Shader, Path など)を再割り当てする必要がないため、描画呼び出しのパフォーマンスの改善に役立ちます。
あるいは、修飾子の外部にある remember を使用してオブジェクトをキャッシュに保存することもできます。ただし、コンポジションに常にアクセスできるわけではないため、この処理ができない場合もあります。オブジェクトを描画にのみ使用する場合、drawWithCache を使用するとパフォーマンスが向上します。
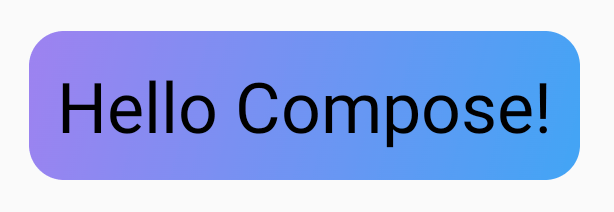
たとえば、Text の背後にグラデーションを描画する Brush を作成する場合、drawWithCache を使用すると、描画領域のサイズが変更されるまで Brush オブジェクトがキャッシュに保存されます。
Text( "Hello Compose!", modifier = Modifier .drawWithCache { val brush = Brush.linearGradient( listOf( Color(0xFF9E82F0), Color(0xFF42A5F5) ) ) onDrawBehind { drawRoundRect( brush, cornerRadius = CornerRadius(10.dp.toPx()) ) } } )
グラフィック修飾子
Modifier.graphicsLayer: コンポーザブルに変換を適用
Modifier.graphicsLayer は、コンポーザブルのコンテンツを描画レイヤに描画する修飾子です。レイヤには、次のようないくつかの機能があります。
- 描画命令の分離(
RenderNodeと同様)。レイヤの一部としてキャプチャされた描画命令は、アプリケーション コードを再実行しなくても、レンダリング パイプラインによって効率的に再実行できます。 - レイヤに含まれるすべての描画命令に適用される変換。
- 合成機能のラスタライズ。レイヤがラスタライズされると、描画命令が実行され、出力が画面外バッファにキャプチャされます。後続のフレーム用にこのようなバッファを合成すると、個々の命令を実行するより短時間で済みますが、スケーリングや回転などの変換が適用されるとビットマップとして動作します。
変換
Modifier.graphicsLayer では、描画の手順が分離されます。たとえば、Modifier.graphicsLayer を使用してさまざまな変換を適用できます。これらは、描画ラムダを再実行することなく、アニメーション化または変更できます。
Modifier.graphicsLayer は描画フェーズにのみ影響するため、コンポーザブルの測定サイズや配置は変更されません。そのため、コンポーザブルがレイアウト境界の外側に描画されると、他のコンポーザブルと重なることがあります。
この修飾子を使用すると、次の変換を適用できます。
スケール - サイズを拡大
scaleX と scaleY を使用すると、コンテンツはそれぞれ水平方向または垂直方向に拡大または縮小されます。値が 1.0f の場合、スケーリングの変化はありません。また、値が 0.5f の場合、サイズは半分になります。
Image( painter = painterResource(id = R.drawable.sunset), contentDescription = "Sunset", modifier = Modifier .graphicsLayer { this.scaleX = 1.2f this.scaleY = 0.8f } )
平行移動
translationX と translationY は graphicsLayer で変更できます。translationX はコンポーザブルを左右に移動します。translationY はコンポーザブルを上下に移動します。
Image( painter = painterResource(id = R.drawable.sunset), contentDescription = "Sunset", modifier = Modifier .graphicsLayer { this.translationX = 100.dp.toPx() this.translationY = 10.dp.toPx() } )
回転
rotationX で水平方向の回転、rotationY で垂直方向の回転、rotationZ で Z 軸上での回転(標準の回転)を設定します。この値は度単位(0~360)で指定します。
Image( painter = painterResource(id = R.drawable.sunset), contentDescription = "Sunset", modifier = Modifier .graphicsLayer { this.rotationX = 90f this.rotationY = 275f this.rotationZ = 180f } )
原点
transformOrigin を指定できます。その後、この点を原点として変換を実行できます。これまでの例ではすべて TransformOrigin.Center を使用していました。これは (0.5f, 0.5f) に位置します。原点を (0f, 0f) に指定すると、変換はコンポーザブルの左上の隅から開始されます。
rotationZ 変換で原点を変更すると、コンポーザブルの左上でアイテムが回転します。
Image( painter = painterResource(id = R.drawable.sunset), contentDescription = "Sunset", modifier = Modifier .graphicsLayer { this.transformOrigin = TransformOrigin(0f, 0f) this.rotationX = 90f this.rotationY = 275f this.rotationZ = 180f } )
クリップと図形
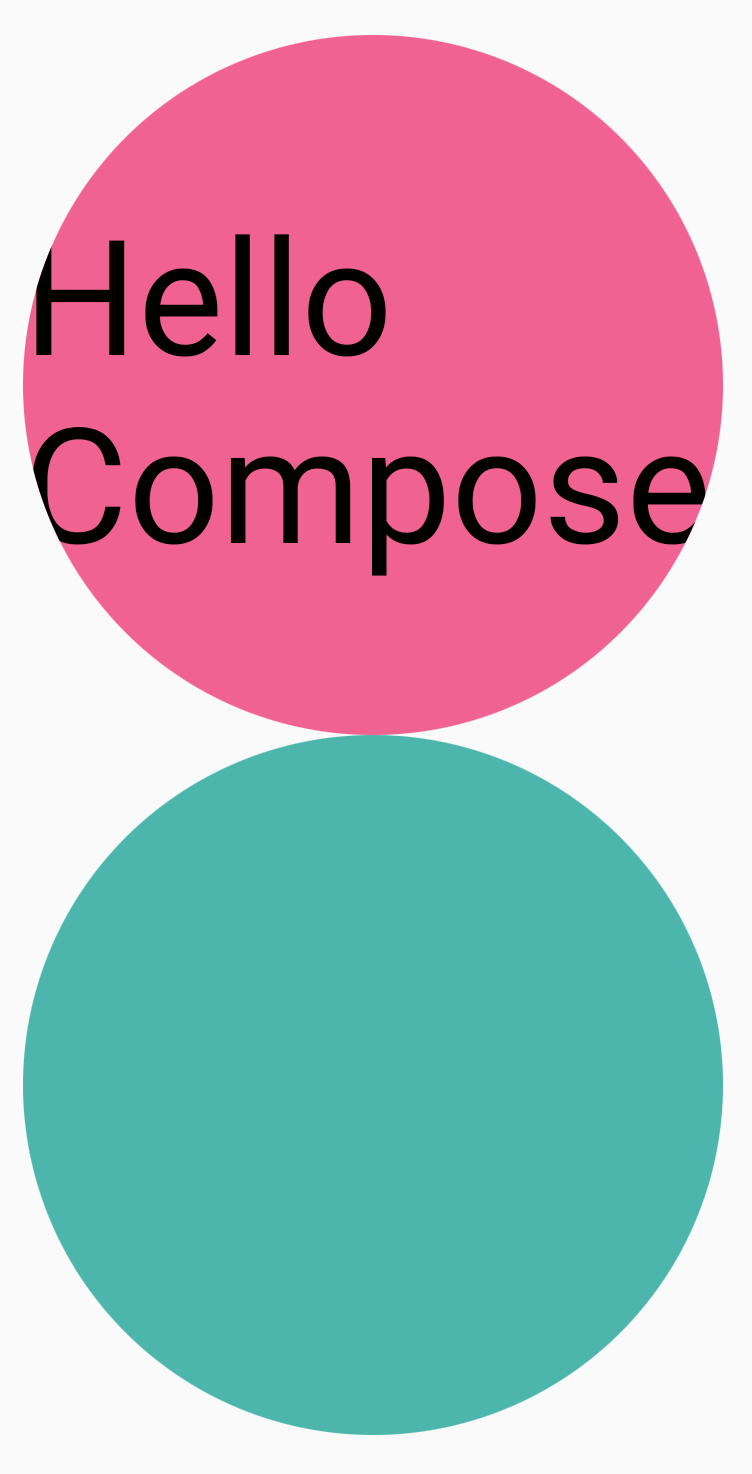
形状とは、clip = true の場合にコンテンツがクリップされる輪郭を指します。この例では、2 つのボックスを設定して、2 つの異なるクリップを作成します。1 つは graphicsLayer クリップ変数を使用し、もう 1 つは便利なラッパー Modifier.clip を使用します。
Column(modifier = Modifier.padding(16.dp)) { Box( modifier = Modifier .size(200.dp) .graphicsLayer { clip = true shape = CircleShape } .background(Color(0xFFF06292)) ) { Text( "Hello Compose", style = TextStyle(color = Color.Black, fontSize = 46.sp), modifier = Modifier.align(Alignment.Center) ) } Box( modifier = Modifier .size(200.dp) .clip(CircleShape) .background(Color(0xFF4DB6AC)) ) }
最初のボックス(テキスト「Hello Compose」)が円形に切り取られます。
上のピンク色の円に translationY を適用すると、コンポーザブルの境界は同じままですが、この円は下の円より下(とその境界の外側)に描画されます。
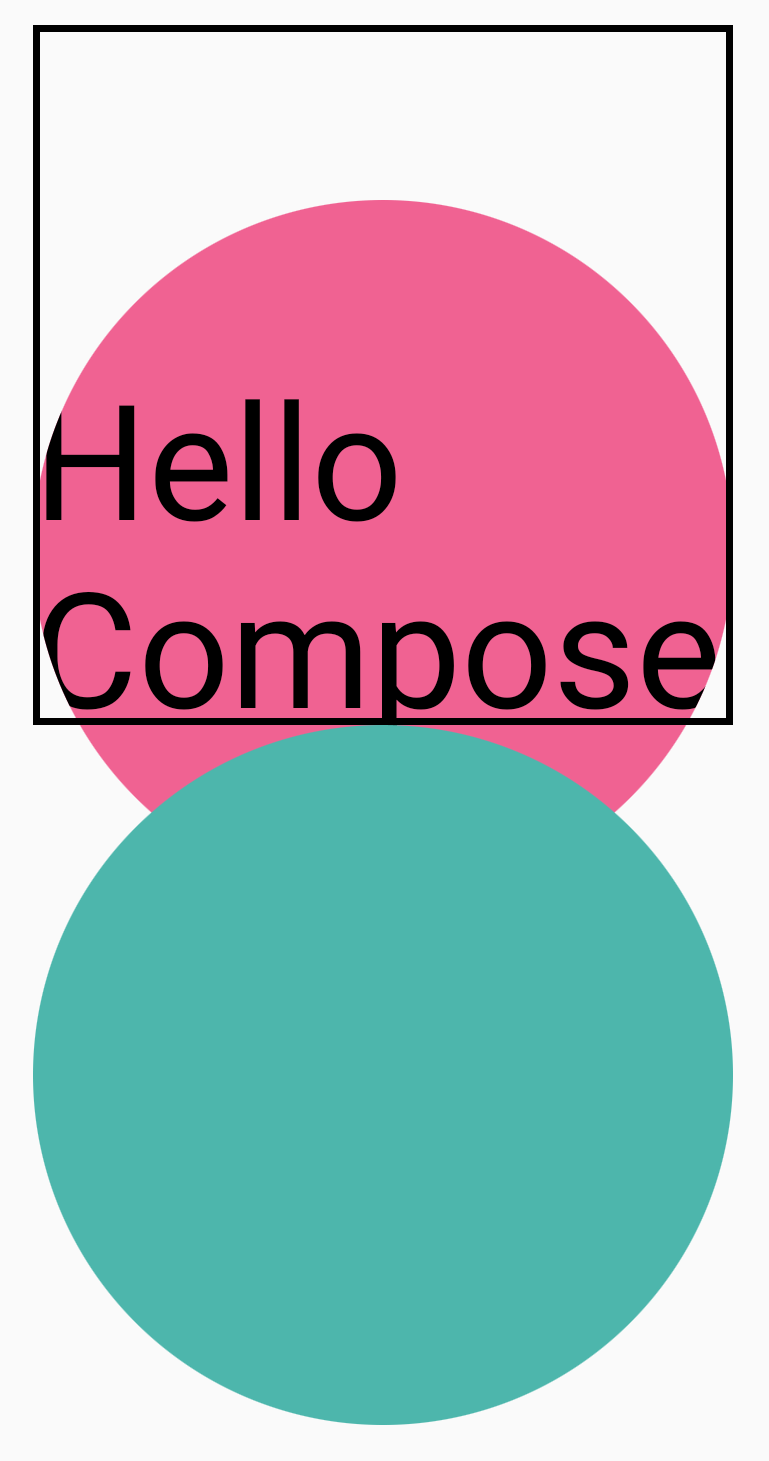
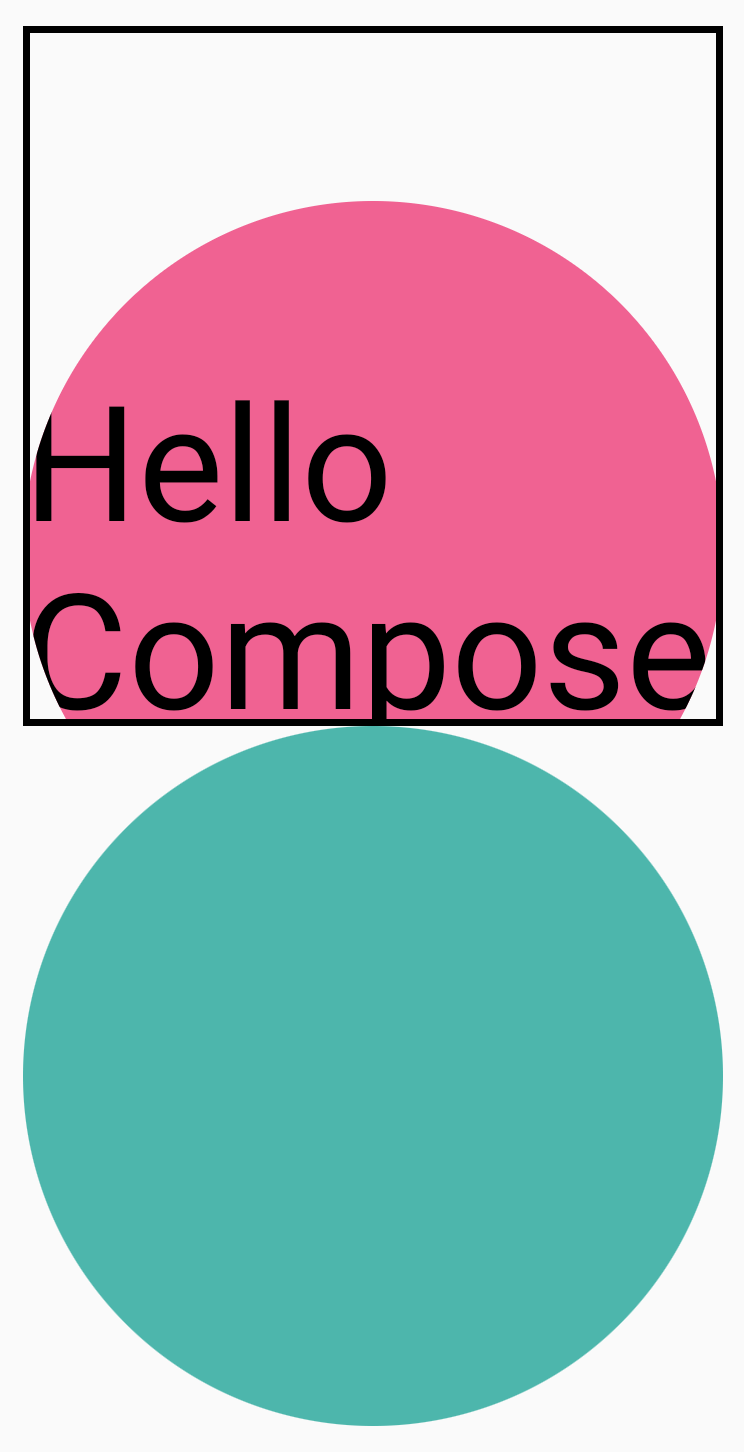
コンポーザブルを描画領域にクリップするには、修飾子チェーンの先頭に別の Modifier.clip(RectangleShape) を追加します。コンテンツは元の境界内に残ります。
Column(modifier = Modifier.padding(16.dp)) { Box( modifier = Modifier .clip(RectangleShape) .size(200.dp) .border(2.dp, Color.Black) .graphicsLayer { clip = true shape = CircleShape translationY = 50.dp.toPx() } .background(Color(0xFFF06292)) ) { Text( "Hello Compose", style = TextStyle(color = Color.Black, fontSize = 46.sp), modifier = Modifier.align(Alignment.Center) ) } Box( modifier = Modifier .size(200.dp) .clip(RoundedCornerShape(500.dp)) .background(Color(0xFF4DB6AC)) ) }
アルファ
Modifier.graphicsLayer を使用すると、レイヤ全体の alpha(不透明度)を設定できます。1.0f は完全に不透明で、0.0f は完全に透明になります。
Image( painter = painterResource(id = R.drawable.sunset), contentDescription = "clock", modifier = Modifier .graphicsLayer { this.alpha = 0.5f } )
合成戦略
アルファと透明度の取り扱いは、単一のアルファ値を変更する場合ほど単純ではないことがあります。アルファを変更するだけでなく、graphicsLayer に CompositingStrategy を設定することもできます。CompositingStrategy は、コンポーザブルのコンテンツを、すでに画面に描画されている他のコンテンツとどのように合成する(まとめる)かを決定します。
戦略には次のようなものがあります。
自動(デフォルト)
合成戦略は、graphicsLayer の残りのパラメータによって決まります。アルファが 1.0f 未満であるか、RenderEffect が設定されている場合、レイヤが画面外バッファにレンダリングされます。アルファが 1f 未満の場合は、コンテンツのレンダリングのために合成レイヤが自動的に作成され、対応するアルファを使用して目的の場所にこの画面外バッファが描画されます。RenderEffect またはオーバースクロールを設定すると、CompositingStrategy の設定にかかわらず、コンテンツが常に画面外バッファにレンダリングされます。
画面外
コンポーザブルのコンテンツは、目的の場所にレンダリングする前に常に画面外のテクスチャまたはビットマップにラスタライズされます。これは、BlendMode オペレーションを適用してコンテンツをマスクし、複雑な描画手順のセットをレンダリングする場合に便利です。
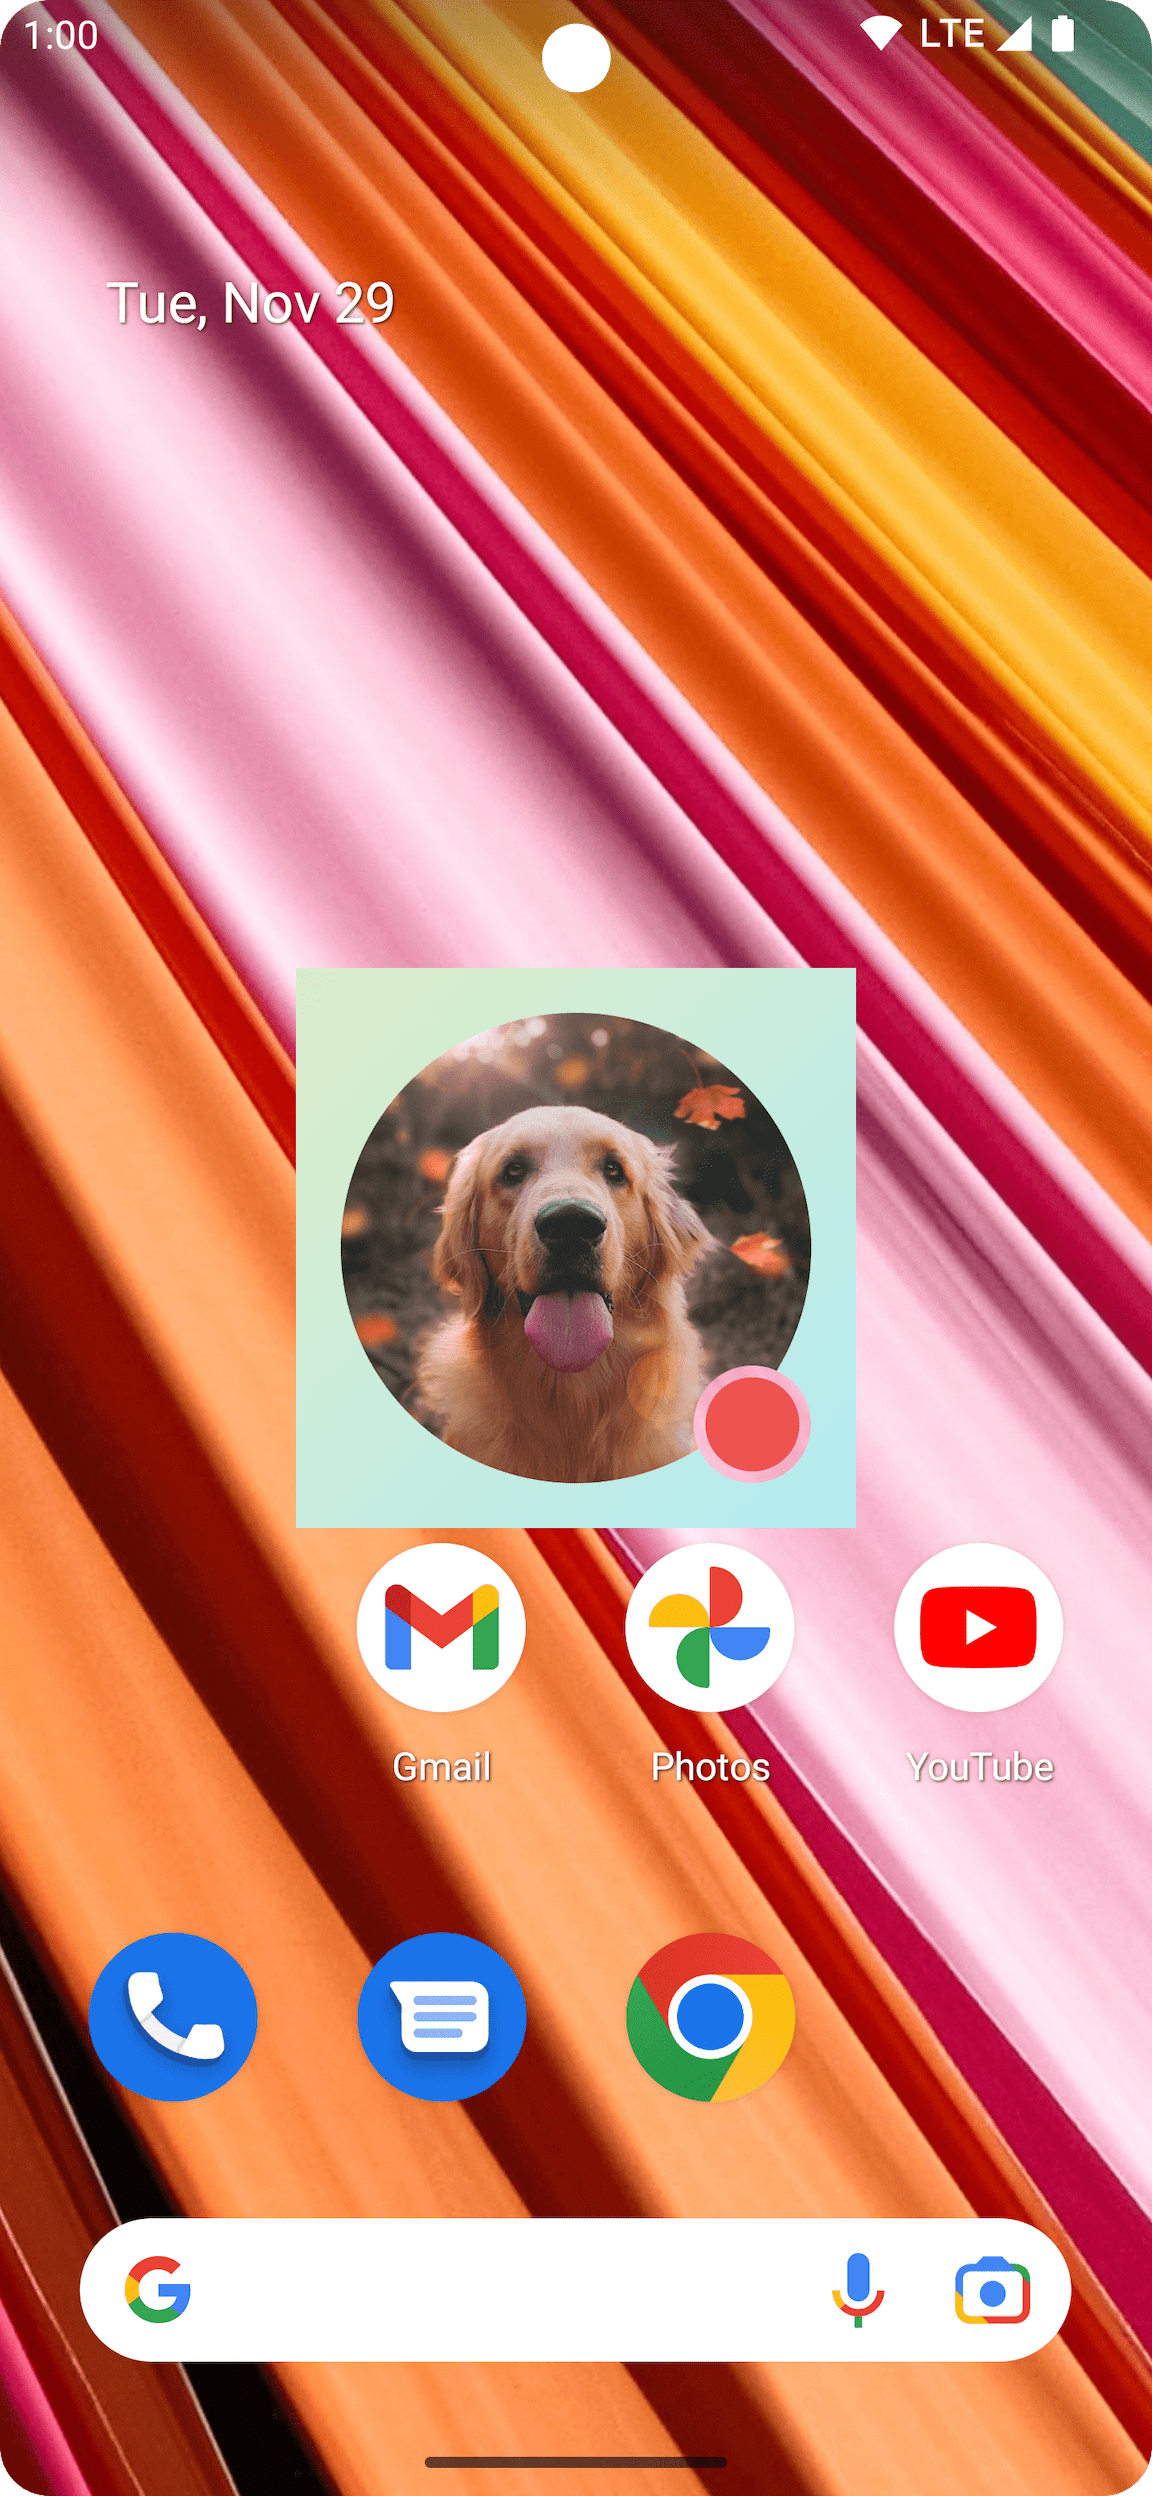
CompositingStrategy.Offscreen は、たとえば、BlendModes とあわせて使用できます。次の例では、BlendMode.Clear を使用する描画コマンドを実行して Image コンポーザブルを部分的に削除できます。compositingStrategy を CompositingStrategy.Offscreen に設定しない場合、BlendMode はすべてのバックグラウンド コンテンツを操作します。
Image( painter = painterResource(id = R.drawable.dog), contentDescription = "Dog", contentScale = ContentScale.Crop, modifier = Modifier .size(120.dp) .aspectRatio(1f) .background( Brush.linearGradient( listOf( Color(0xFFC5E1A5), Color(0xFF80DEEA) ) ) ) .padding(8.dp) .graphicsLayer { compositingStrategy = CompositingStrategy.Offscreen } .drawWithCache { val path = Path() path.addOval( Rect( topLeft = Offset.Zero, bottomRight = Offset(size.width, size.height) ) ) onDrawWithContent { clipPath(path) { // this draws the actual image - if you don't call drawContent, it wont // render anything this@onDrawWithContent.drawContent() } val dotSize = size.width / 8f // Clip a white border for the content drawCircle( Color.Black, radius = dotSize, center = Offset( x = size.width - dotSize, y = size.height - dotSize ), blendMode = BlendMode.Clear ) // draw the red circle indication drawCircle( Color(0xFFEF5350), radius = dotSize * 0.8f, center = Offset( x = size.width - dotSize, y = size.height - dotSize ) ) } } )
CompositingStrategy を Offscreen に設定すると、コマンドを実行する画面外テクスチャが作成されます(BlendMode はこのコンポーザブルのコンテンツにのみ適用されます)。その後、すでに画面にレンダリングされているコンテンツの上にレンダリングします。描画済みのコンテンツには影響しません。
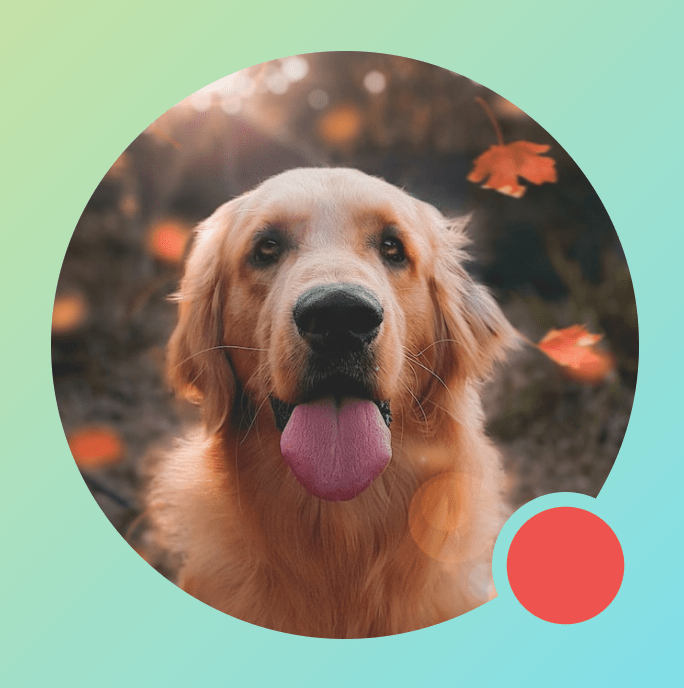
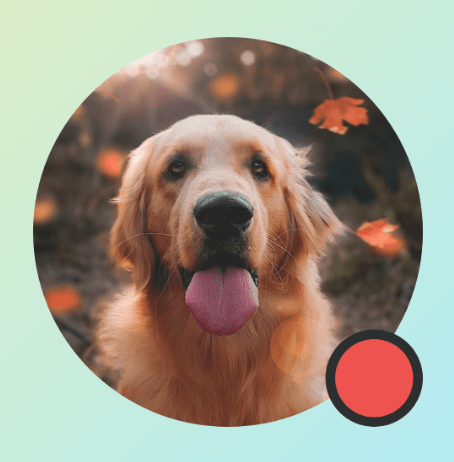
CompositingStrategy.Offscreen を使用しなかった場合は、BlendMode.Clear を適用した結果、すでに設定されている内容に関係なく、目的の場所すべてのピクセルがクリアされます。このため、ウィンドウのレンダリング バッファ(黒)は残ります。アルファを使用する BlendModes の多くは、画面外バッファがないと想定どおりに機能しません。赤い円形インジケーターの周りにある黒いリングに注目してください。
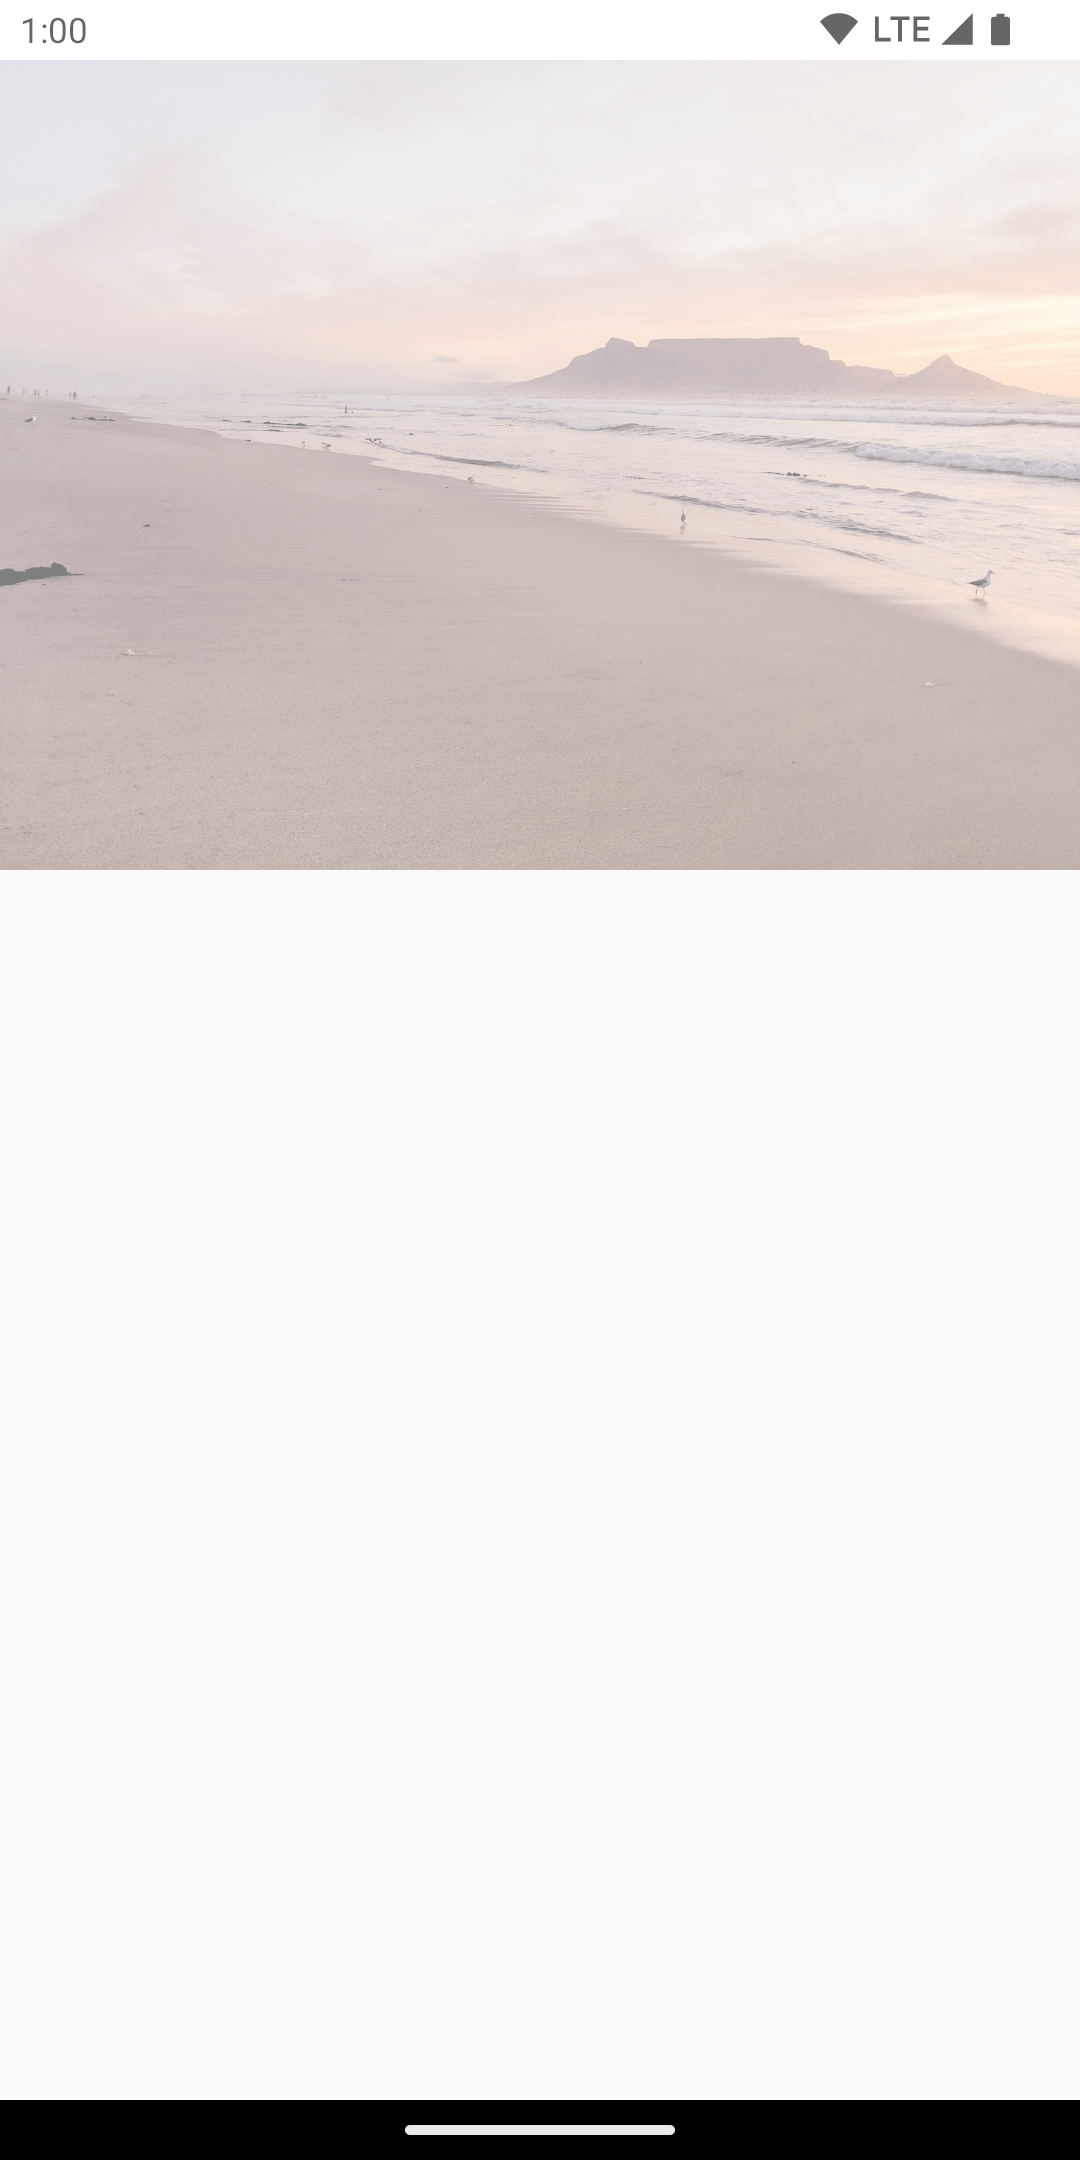
もう少し詳しく見てみましょう。アプリに半透明のウィンドウ背景があり、CompositingStrategy.Offscreen を使用しなかった場合は、BlendMode がアプリ全体を操作します。以下の例に示すように、すべてのピクセルがクリアされ、その下のアプリまたは壁紙が表示されます。
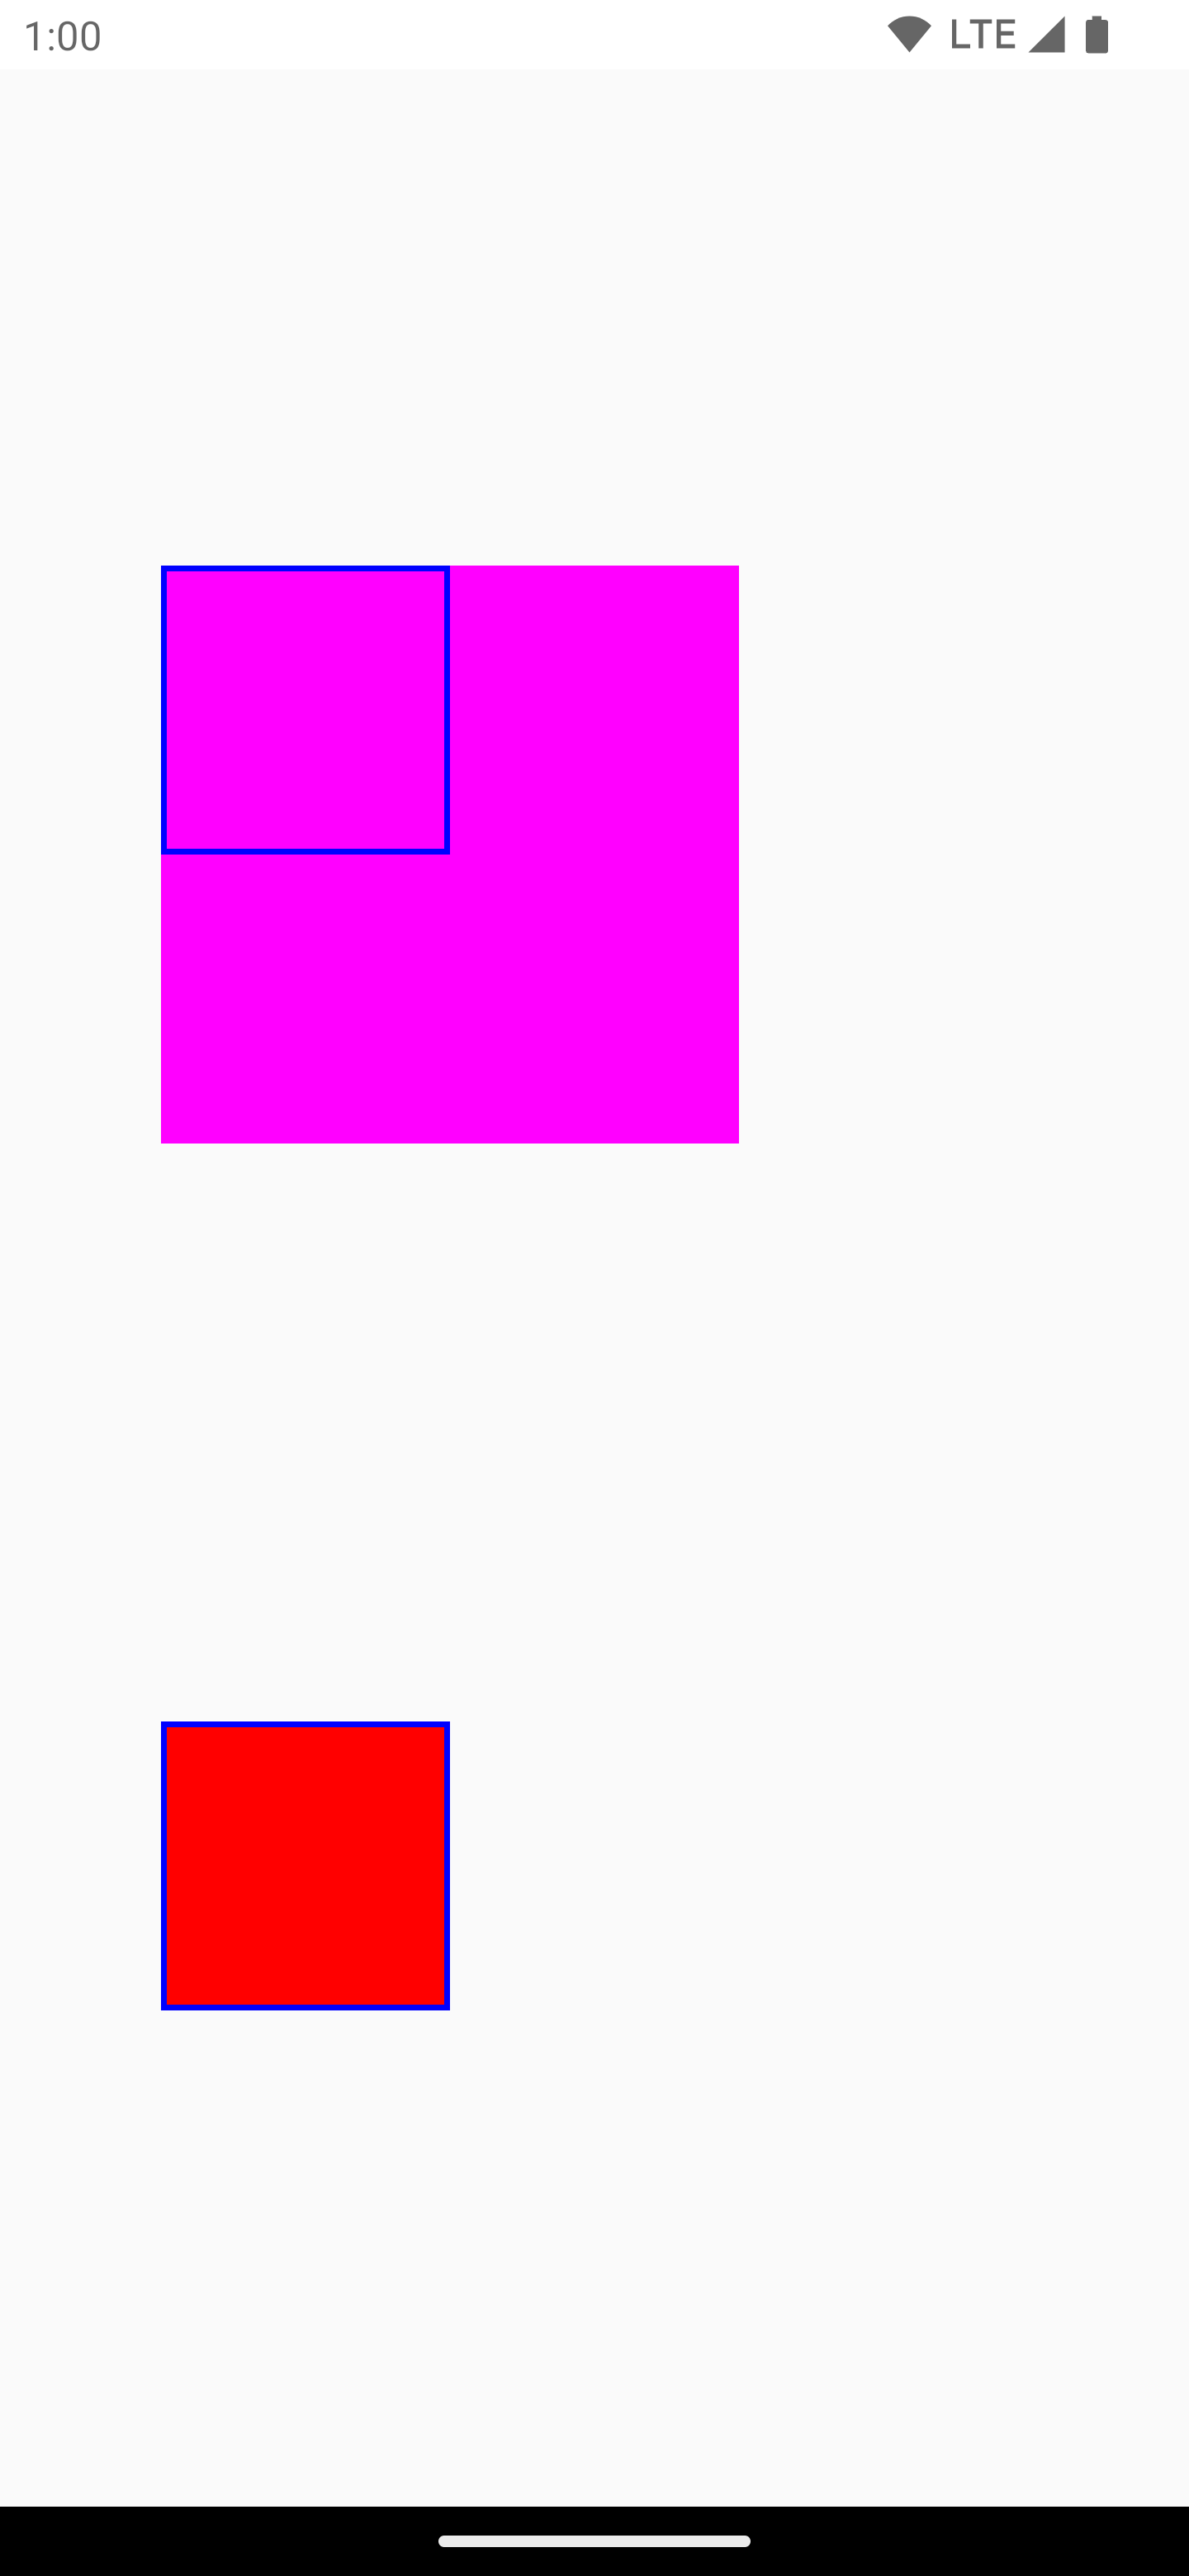
CompositingStrategy.Offscreen を使用すると、描画領域のサイズと一致する画面外テクスチャが作成され、画面上にレンダリングされます。デフォルトでは、この戦略により実行された描画コマンドはすべてこの領域にクリップされます。次のコード スニペットは、画面外テクスチャに切り替えた場合の違いを示しています。
@Composable fun CompositingStrategyExamples() { Column( modifier = Modifier .fillMaxSize() .wrapContentSize(Alignment.Center) ) { // Does not clip content even with a graphics layer usage here. By default, graphicsLayer // does not allocate + rasterize content into a separate layer but instead is used // for isolation. That is draw invalidations made outside of this graphicsLayer will not // re-record the drawing instructions in this composable as they have not changed Canvas( modifier = Modifier .graphicsLayer() .size(100.dp) // Note size of 100 dp here .border(2.dp, color = Color.Blue) ) { // ... and drawing a size of 200 dp here outside the bounds drawRect(color = Color.Magenta, size = Size(200.dp.toPx(), 200.dp.toPx())) } Spacer(modifier = Modifier.size(300.dp)) /* Clips content as alpha usage here creates an offscreen buffer to rasterize content into first then draws to the original destination */ Canvas( modifier = Modifier // force to an offscreen buffer .graphicsLayer(compositingStrategy = CompositingStrategy.Offscreen) .size(100.dp) // Note size of 100 dp here .border(2.dp, color = Color.Blue) ) { /* ... and drawing a size of 200 dp. However, because of the CompositingStrategy.Offscreen usage above, the content gets clipped */ drawRect(color = Color.Red, size = Size(200.dp.toPx(), 200.dp.toPx())) } } }
ModulateAlpha
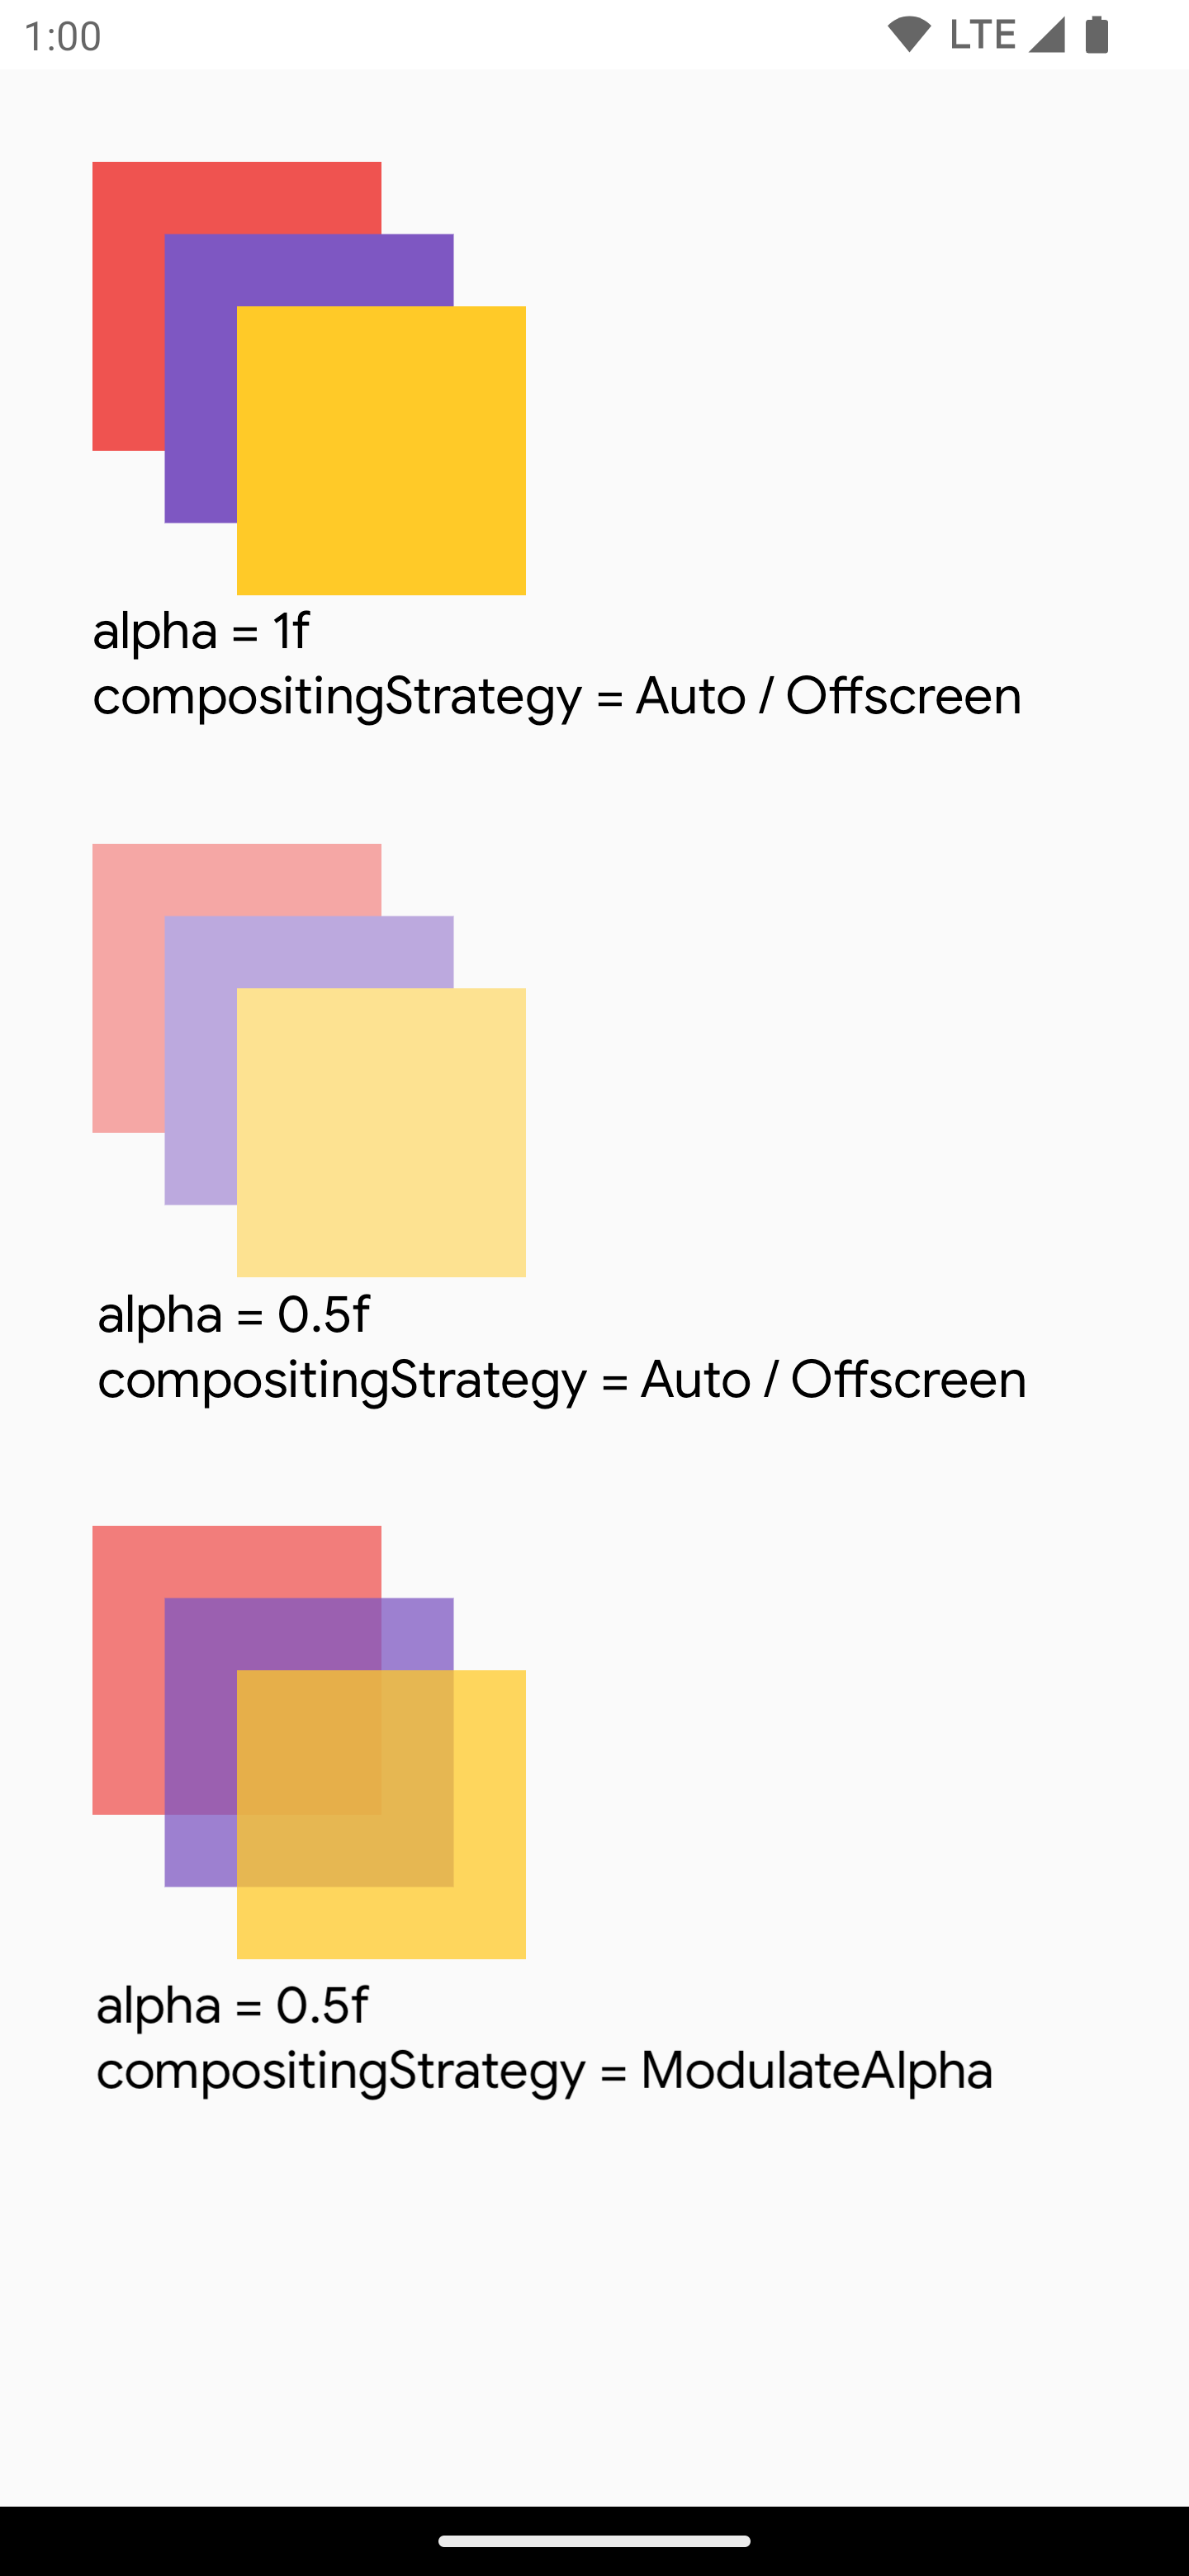
この合成戦略は、graphicsLayer 内で記録された各描画命令のアルファを調節します。RenderEffect が設定されていない場合、1.0f 未満のアルファに対して画面外バッファは作成されないため、アルファ レンダリングを効率的に行うことができます。ただし、コンテンツが重なる場合は、結果が異なる可能性があります。コンテンツが重なっていないことが事前にわかっている場合は、アルファ値が 1 未満の CompositingStrategy.Auto よりもパフォーマンスが高くなることがあります。
次の例は、さまざまな合成戦略を示しています。コンポーザブルの各部分に異なるアルファを適用し、Modulate 戦略を適用しています。
@Preview @Composable fun CompositingStrategy_ModulateAlpha() { Column( modifier = Modifier .fillMaxSize() .padding(32.dp) ) { // Base drawing, no alpha applied Canvas( modifier = Modifier.size(200.dp) ) { drawSquares() } Spacer(modifier = Modifier.size(36.dp)) // Alpha 0.5f applied to whole composable Canvas( modifier = Modifier .size(200.dp) .graphicsLayer { alpha = 0.5f } ) { drawSquares() } Spacer(modifier = Modifier.size(36.dp)) // 0.75f alpha applied to each draw call when using ModulateAlpha Canvas( modifier = Modifier .size(200.dp) .graphicsLayer { compositingStrategy = CompositingStrategy.ModulateAlpha alpha = 0.75f } ) { drawSquares() } } } private fun DrawScope.drawSquares() { val size = Size(100.dp.toPx(), 100.dp.toPx()) drawRect(color = Red, size = size) drawRect( color = Purple, size = size, topLeft = Offset(size.width / 4f, size.height / 4f) ) drawRect( color = Yellow, size = size, topLeft = Offset(size.width / 4f * 2f, size.height / 4f * 2f) ) } val Purple = Color(0xFF7E57C2) val Yellow = Color(0xFFFFCA28) val Red = Color(0xFFEF5350)
コンポーザブルの内容をビットマップに書き込む
一般的なユースケースは、コンポーザブルから Bitmap を作成することです。コンポーザブルの内容を Bitmap にコピーするには、rememberGraphicsLayer() を使用して GraphicsLayer を作成します。
drawWithContent() と graphicsLayer.record{} を使用して、描画コマンドを新しいレイヤにリダイレクトします。次に、drawLayer を使用して、表示可能なキャンバスにレイヤを描画します。
val coroutineScope = rememberCoroutineScope() val graphicsLayer = rememberGraphicsLayer() Box( modifier = Modifier .drawWithContent { // call record to capture the content in the graphics layer graphicsLayer.record { // draw the contents of the composable into the graphics layer this@drawWithContent.drawContent() } // draw the graphics layer on the visible canvas drawLayer(graphicsLayer) } .clickable { coroutineScope.launch { val bitmap = graphicsLayer.toImageBitmap() // do something with the newly acquired bitmap } } .background(Color.White) ) { Text("Hello Android", fontSize = 26.sp) }
ビットマップをディスクに保存して共有できます。詳しくは、完全なサンプル スニペットをご覧ください。ディスクに保存する前に、デバイスの権限を確認してください。
カスタム描画修飾子
独自のカスタム修飾子を作成するには、DrawModifier インターフェースを実装します。これにより ContentDrawScope にアクセスできるようになりますが、これは Modifier.drawWithContent() の使用時に公開されるものと同じです。次に、一般的な描画オペレーションをカスタム描画修飾子に抽出して、コードをクリーンアップし、使いやすいラッパーを提供します。たとえば、Modifier.background() は使いやすい DrawModifier です。
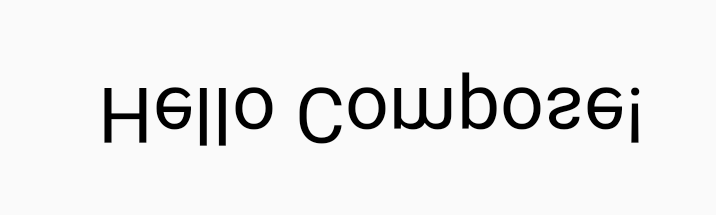
コンテンツを垂直方向に反転する Modifier を実装する場合は、次のように作成します。
class FlippedModifier : DrawModifier { override fun ContentDrawScope.draw() { scale(1f, -1f) { this@draw.drawContent() } } } fun Modifier.flipped() = this.then(FlippedModifier())
次に、この反転修飾子を Text で適用します。
Text( "Hello Compose!", modifier = Modifier .flipped() )
参考情報
graphicsLayer とカスタム描画を使用するその他の例については、次のリソースをご覧ください。
あなたへのおすすめ
- 注: JavaScript がオフになっている場合はリンクテキストが表示されます
- Compose のグラフィック
- 画像をカスタマイズする {:#customize-image}
- Jetpack Compose で Kotlin を使用する