
Notifications provide short, timely information about events in your app while it isn't in use. This document shows you how to create a notification with various features. For an introduction to how notifications appear on Android, see the Notifications overview. For sample code that uses notifications, see the SociaLite sample on GitHub.
The code in this page uses the NotificationCompat APIs from the AndroidX
Library. These APIs let you add features available only on newer versions of
Android while still providing compatibility back to Android 9 (API level 28).
However, some features, such as the inline reply action, result in a no-op on
earlier versions.
Create a basic notification
A notification in its most basic and compact form—also known as collapsed form—displays an icon, a title, and a small amount of text content. This section shows how to create a notification that the user can tap to launch an activity in your app.
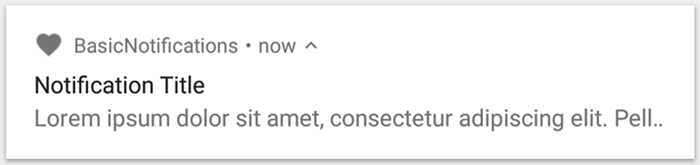
Figure 1. A notification with an icon, a title, and some text.
For more details about each part of a notification, read about notification anatomy.
Declare the runtime permission
Android 13 (API level 33) and higher supports a runtime permission for posting non-exempt (including Foreground Services (FGS)) notifications from an app.
The permission that you need to declare in your app's manifest file appears in the following code snippet:
<manifest ...>
    <uses-permission android:name="android.permission.POST_NOTIFICATIONS"/>
    <application ...>
        ...
    </application>
</manifest>
For more details about runtime permissions, see Notification runtime permission.
Set the notification content
To get started, set the notification's content and channel using a
NotificationCompat.Builder object. The following example shows how to
create a notification with the following:
A small icon, set by
setSmallIcon(). This is the only user-visible content that's required.A title, set by
setContentTitle().The body text, set by
setContentText().The notification priority, set by
setPriority(). The priority determines how intrusive the notification is on Android 7.1 and earlier. For Android 8.0 and later, instead set the channel importance as shown in the next section.
val textTitle = "Title" val textContent = "Content" val builder = NotificationCompat.Builder(context, CHANNEL_ID) .setSmallIcon(R.drawable.ic_logo) .setContentTitle(textTitle) .setContentText(textContent) .setPriority(NotificationCompat.PRIORITY_DEFAULT)
The NotificationCompat.Builder constructor requires you to provide a channel
ID. This is required for compatibility with Android 8.0 (API level 26) and
later, but is ignored by earlier versions.
By default, the notification's text content is truncated to fit one line. You can show additional information by creating an expandable notification.
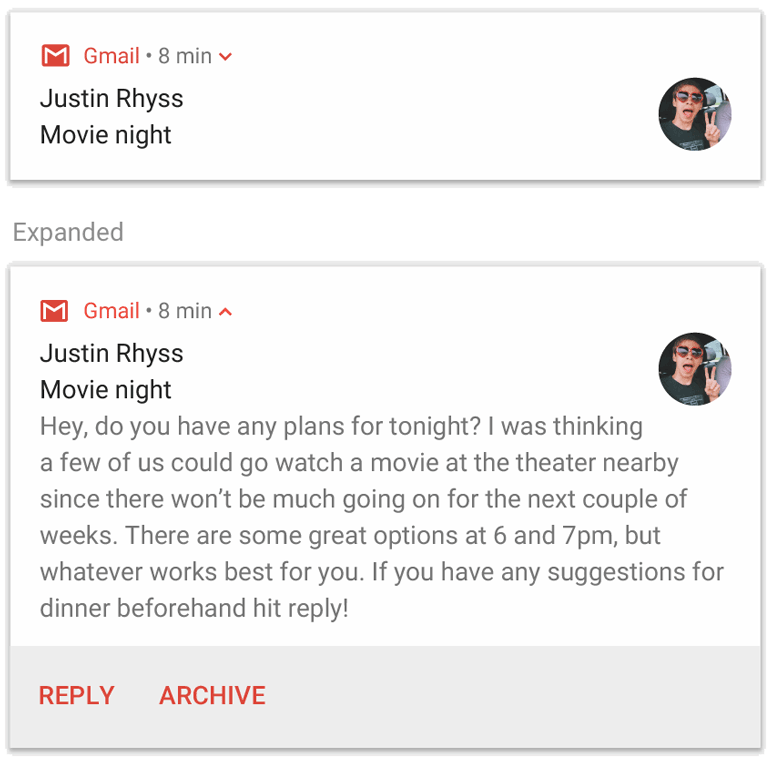
Figure 2. An expandable notification in its collapsed and expanded forms.
If you want your notification to be longer, you can enable an expandable
notification by adding a style template with setStyle(). For example,
the following code creates a larger text area:
val builder = NotificationCompat.Builder(context, CHANNEL_ID) .setSmallIcon(R.drawable.ic_logo) .setContentTitle("My notification") .setContentText("Much longer text that cannot fit one line...") .setStyle(NotificationCompat.BigTextStyle() .bigText("Much longer text that cannot fit one line...")) .setPriority(NotificationCompat.PRIORITY_DEFAULT)
For more information about other large notification styles, including how to add an image and media playback controls, see Create an expandable notification.
Create a channel and set the importance
Before you can deliver the notification on Android 8.0 and later, register your
app's notification channel with the system by passing an instance of
NotificationChannel to createNotificationChannel(). The
following code is blocked by a condition on the SDK_INT version:
fun createNotificationChannel(context: Context) { // Create the NotificationChannel, but only on API 26+ because // the NotificationChannel class is not in the Support Library. if (Build.VERSION.SDK_INT >= Build.VERSION_CODES.O) { val name = context.getString(R.string.channel_name) val descriptionText = context.getString(R.string.channel_description) val importance = NotificationManager.IMPORTANCE_DEFAULT val channel = NotificationChannel(CHANNEL_ID, name, importance).apply { description = descriptionText } // Register the channel with the system. val notificationManager: NotificationManager = context.getSystemService(NotificationManager::class.java) as NotificationManager notificationManager.createNotificationChannel(channel) } }
Because you must create the notification channel before posting any notifications on Android 8.0 and later, execute this code as soon as your app starts. It's safe to call this repeatedly, because creating an existing notification channel performs no operation.
The NotificationChannel constructor requires an importance, using one of the
constants from the NotificationManager class. This parameter determines
how to interrupt the user for any notification that belongs to this channel. Set
the priority with setPriority() to support Android 7.1 and earlier, as shown
in the preceding example.
Although you must set the notification importance or priority as shown in the following example, the system doesn't guarantee the alert behavior you get. In some cases, the system might change the importance level based on other factors, and the user can always redefine what the importance level is for a given channel.
For more information about what the different levels mean, read about notification importance levels.
Set the notification's tap action
Every notification must respond to a tap, usually to open an activity in your
app that corresponds to the notification. To do so, specify a content intent
defined with a PendingIntent object and pass it to
setContentIntent().
The following snippet shows how to create a basic intent to open an activity when the user taps the notification:
// Create an explicit intent for an Activity in your app. val intent = Intent(context, AlertDetails::class.java).apply { flags = Intent.FLAG_ACTIVITY_NEW_TASK or Intent.FLAG_ACTIVITY_CLEAR_TASK } val pendingIntent: PendingIntent = PendingIntent.getActivity(context, 0, intent, PendingIntent.FLAG_IMMUTABLE) val builder = NotificationCompat.Builder(context, CHANNEL_ID) .setSmallIcon(R.drawable.ic_logo) .setContentTitle("My notification") .setContentText("Hello World!") .setPriority(NotificationCompat.PRIORITY_DEFAULT) // Set the intent that fires when the user taps the notification. .setContentIntent(pendingIntent) .setAutoCancel(true)
This code calls setAutoCancel(), which automatically removes the
notification when the user taps it.
The intent flags in the preceding example preserve the user's expected navigation experience after the user opens your app using the notification. You might want to use it depending on the type of activity you're starting, which can be one of the following:
An activity that exists exclusively for responses to the notification. There's no reason the user navigates to this activity during normal app use, so the activity starts a new task instead of being added to your app's existing task and back stack. This is the type of intent created in the preceding sample.
An activity that exists in your app's regular app flow. In this case, starting the activity creates a back stack so that the user's expectations for the Back and Up buttons are preserved.
Show the notification
To make the notification appear, call
NotificationManagerCompat.notify(), passing it a unique ID for the
notification and the result of NotificationCompat.Builder.build(). This
is shown in the following example:
with(NotificationManagerCompat.from(context)) { if (ActivityCompat.checkSelfPermission( context, Manifest.permission.POST_NOTIFICATIONS ) != PackageManager.PERMISSION_GRANTED ) { // TODO: Consider calling ActivityCompat#requestPermissions here // to request the missing permissions, and then overriding // public fun onRequestPermissionsResult(requestCode: Int, permissions: Array<out String>, // grantResults: IntArray) // to handle the case where the user grants the permission. See the documentation // for ActivityCompat#requestPermissions for more details. return@with } // notificationId is a unique int for each notification that you must define. notify(notificationId, builder.build())
Save the notification ID that you pass to NotificationManagerCompat.notify(),
because you need it when you want to update or
remove the notification.
Additionally, in order to test basic notifications on devices running on Android 13 and higher, turn on notifications manually or create a dialog to request notifications.
Add action buttons
A notification can offer up to three action buttons that let the user respond quickly, such as to snooze a reminder or to reply to a text message. But these action buttons must not duplicate the action performed when the user taps the notification.
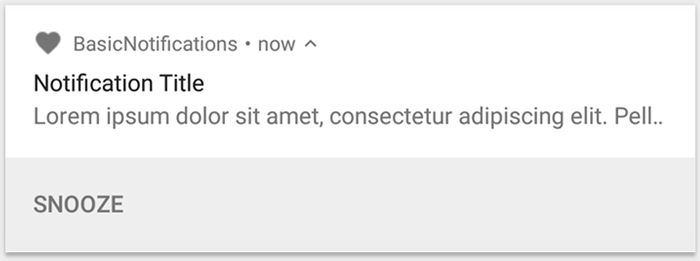
Figure 3. A notification with one action button.
To add an action button, pass a PendingIntent to the addAction()
method. This is like setting up the notification's default tap action, except
instead of launching an activity, you can do other things such as start a
BroadcastReceiver that performs a job in the background so that the
action doesn't interrupt the app that's already open.
For example, the following code shows how to send a broadcast to a specific receiver:
val ACTION_SNOOZE = "snooze" val snoozeIntent = Intent(context, MyBroadcastReceiver::class.java).apply { action = ACTION_SNOOZE putExtra(EXTRA_NOTIFICATION_ID, 0) } val snoozePendingIntent: PendingIntent = PendingIntent.getBroadcast(context, 0, snoozeIntent, PendingIntent.FLAG_IMMUTABLE) val builder = NotificationCompat.Builder(context, CHANNEL_ID) .setSmallIcon(R.drawable.ic_logo) .setContentTitle("My notification") .setContentText("Hello World!") .setPriority(NotificationCompat.PRIORITY_DEFAULT) .setContentIntent(pendingIntent) .addAction(R.drawable.snooze, context.getString(R.string.snooze), snoozePendingIntent)
For more information about building a BroadcastReceiver to run background
work, see the Broadcasts overview.
If you're instead trying to build a notification with media playback buttons, such as to pause and skip tracks, see how to create a notification with media controls.
Add a direct reply action
The direct reply action, introduced in Android 7.0 (API level 24), lets users enter text directly into the notification. The text is then delivered to your app without opening an activity. For example, you can use a direct reply action to let users reply to text messages or update task lists from within the notification.

Figure 4. Tapping the "Reply" button opens the text input.
The direct reply action appears as an additional button in the notification that opens a text input. When the user finishes typing, the system attaches the text response to the intent you specify for the notification action and sends the intent to your app.
Add the reply button
To create a notification action that supports direct reply, follow these steps:
Create an instance of RemoteInput.Builder that you can add to your notification action. This class's constructor accepts a string that the system uses as the key for the text input. Your app later uses that key to retrieve the text of the input.
// Key for the string that's delivered in the action's intent. val replyLabel: String = context.resources.getString(R.string.reply_label) val remoteInput: RemoteInput = RemoteInput.Builder(KEY_TEXT_REPLY).run { setLabel(replyLabel) build() }
Create a PendingIntent for the reply action.
// Build a PendingIntent for the reply action to trigger. val replyPendingIntent: PendingIntent = PendingIntent.getBroadcast(context, conversationId, getMessageReplyIntent(conversationId), PendingIntent.FLAG_MUTABLE)
Attach the RemoteInput object to an action using
addRemoteInput().
// Create the reply action and add the remote input. val action: NotificationCompat.Action = NotificationCompat.Action.Builder(R.drawable.reply, context.getString(R.string.reply_label), replyPendingIntent) .addRemoteInput(remoteInput) .build()
Apply the action to a notification and issue the notification.
// Build the notification and add the action.
val newMessageNotification = NotificationCompat.Builder(context, CHANNEL_ID)
    .setSmallIcon(R.drawable.ic_message)
    .setContentTitle(context.getString(R.string.title))
    .setContentText(context.getString(R.string.content))
    .addAction(action)
    .build()

// Issue the notification.
NotificationManagerCompat.from(context).notify(notificationId, newMessageNotification)
The system prompts the user to input a response when they trigger the notification action, as shown in figure 4.
Retrieve user input from the reply
To receive user input from the notification's reply UI, call
RemoteInput.getResultsFromIntent(), passing it the Intent received by
your BroadcastReceiver:
private fun getMessageText(intent: Intent): CharSequence? { return RemoteInput.getResultsFromIntent(intent)?.getCharSequence(KEY_TEXT_REPLY) }
After you process the text, update the notification by calling
NotificationManagerCompat.notify() with the same ID and tag, if used. This is
necessary to hide the direct reply UI and confirm to the user that their reply
is received and processed correctly.
// Build a new notification, which informs the user that the system // handled their interaction with the previous notification. val repliedNotification = NotificationCompat.Builder(context, CHANNEL_ID) .setSmallIcon(R.drawable.message) .setContentText(context.getString(R.string.replied)) .build() // Issue the new notification. NotificationManagerCompat.from(context).notify(notificationId, repliedNotification)
Retrieve other data
Handling other data types works similarly with RemoteInput. The following
example uses image as input.
val replyLabel: String = context.resources.getString(R.string.reply_label) val remoteInput: RemoteInput = RemoteInput.Builder(KEY_REPLY).run { setLabel(replyLabel) // Allow for image data types in the input. // This method can be used again to allow for other data types. setAllowDataType("image/*", true) build() }
Call RemoteInput#getDataResultsFromIntent and extract the corresponding data.
class ReplyReceiver : BroadcastReceiver() { override fun onReceive(context: Context, intent: Intent) { val dataResults = RemoteInput.getDataResultsFromIntent(intent, KEY_REPLY) val imageUri: Uri? = dataResults?.get("image/*") as? Uri if (imageUri != null) { // Extract the image context.contentResolver.openInputStream(imageUri)?.use { inputStream -> val bitmap = BitmapFactory.decodeStream(inputStream) // Display the image // ... } } } companion object { const val KEY_REPLY = "key_reply" const val KEY_TEXT_REPLY = "key_text_reply" } }
When working with this new notification, use the context that's passed to the
receiver's onReceive() method.
Append the reply to the bottom of the notification by calling
setRemoteInputHistory(). However, if you're building a messaging app,
create a messaging-style notification and append the new message to the
conversation.
For more advice for notifications from a messaging apps, see the section about best practices for messaging apps.
Show an urgent message
Your app might need to display an urgent, time-sensitive message, such as an incoming phone call or a ringing alarm. In these situations, you can associate a full-screen intent with your notification.
When the notification is invoked, users see one of the following, depending on the device's lock status:
- If the user's device is locked, a full-screen activity appears, covering the lockscreen.
- If the user's device is unlocked, the notification appears in an expanded form that includes options for handling or dismissing the notification.
The following code snippet demonstrates how to associate your notification with a full-screen intent:
val fullScreenIntent = Intent(context, ImportantActivity::class.java) val fullScreenPendingIntent = PendingIntent.getActivity(context, 0, fullScreenIntent, PendingIntent.FLAG_IMMUTABLE) val builder = NotificationCompat.Builder(context, CHANNEL_ID) .setSmallIcon(R.drawable.ic_logo) .setContentTitle("My notification") .setContentText("Hello World!") .setPriority(NotificationCompat.PRIORITY_DEFAULT) .setFullScreenIntent(fullScreenPendingIntent, true)
Set lock screen visibility
To control the level of detail visible in the notification from the lock screen,
call setVisibility() and specify one of the following values:
VISIBILITY_PUBLIC: the notification's full content shows on the lock screen.VISIBILITY_SECRET: no part of the notification shows on the lock screen.VISIBILITY_PRIVATE: only basic information, such as the notification's icon and the content title, shows on the lock screen. The notification's full content doesn't show.
When you set VISIBILITY_PRIVATE, you can also provide an alternate version of
the notification content that hides certain details. For example, an SMS app
might display a notification that shows "You have 3 new text messages," but
hides the message contents and senders. To provide this alternative
notification, first create the alternative notification with
NotificationCompat.Builder as usual. Then, attach the alternative notification
to the normal notification with setPublicVersion().
Bear in mind that the user always has ultimate control over whether their notifications are visible on the lock screen and can control them based on your app's notification channels.
Update a notification
To update a notification after you issue it, call
NotificationManagerCompat.notify() again, passing it the same ID you used
before. If the previous notification is dismissed, a new notification is created
instead.
You can optionally call setOnlyAlertOnce() so your notification
interrupts the user—with sound, vibration, or visual clues—only the
first time the notification appears and not for later updates.
Remove a notification
Notifications remain visible until one of the following happens:
- The user dismisses the notification.
- The user taps the notification, if you call
setAutoCancel()when you create the notification. - You call
cancel()for a specific notification ID. This method also deletes ongoing notifications. - You call
cancelAll(), which removes all notifications you previously issued. - The specified duration elapses, if you set a timeout when creating the
notification, using
setTimeoutAfter(). If required, you can cancel a notification before the specified timeout duration elapses.
Best practices for messaging apps
Consider the best practices listed here when creating notifications for your messaging and chat apps.
Use MessagingStyle
Starting in Android 7.0 (API level 24), Android provides a notification style
template specifically for messaging content. Using the
NotificationCompat.MessagingStyle class, you can change several of the
labels displayed on the notification, including the conversation title,
additional messages, and the content view for the notification.
The following code snippet demonstrates how to customize a notification's style
using the MessagingStyle class.
val message1 = NotificationCompat.MessagingStyle.Message( messages[0].text, messages[0].time, messages[0].sender ) val message2 = NotificationCompat.MessagingStyle.Message( messages[1].text, messages[1].time, messages[1].sender ) notification = NotificationCompat.Builder(context, CHANNEL_ID) .setSmallIcon(R.drawable.ic_logo) .setStyle( NotificationCompat.MessagingStyle(Person.Builder().setName("Me").build()) .addMessage(message1) .addMessage(message2) ) .build()
Starting in Android 9.0 (API level 28), It is also required to use the
Person class in order to get an optimal rendering of the notification
and its avatars.
When using NotificationCompat.MessagingStyle, do the following:
- Call
MessagingStyle.setConversationTitle()to set a title for group chats with more than two people. A good conversation title might be the name of the group chat or, if it doesn't have a name, a list of the participants in the conversation. Without this, the message might be mistaken as belonging to a one-to-one conversation with the sender of the most recent message in the conversation. - Use the
MessagingStyle.setData()method to include media messages such as images. MIME types of the pattern image/* are supported.
Use Direct Reply
Direct Reply lets a user reply inline to a message.
- After a user replies with the inline reply action, use
MessagingStyle.addMessage()to update theMessagingStylenotification, and don't retract or cancel the notification. Not cancelling the notification lets the user send multiple replies from the notification. - To make the inline reply action compatible with Wear OS, call
Action.WearableExtender.setHintDisplayInlineAction(true). - Use the
addHistoricMessage()method to provide context to a direct reply conversation by adding historic messages to the notification.
Enable Smart Reply
- To enable Smart Reply, call
setAllowGeneratedResponses(true)on the reply action. This causes Smart Reply responses to be available to users when the notification is bridged to a Wear OS device. Smart Reply responses are generated by an entirely on-watch machine learning model using the context provided by theNotificationCompat.MessagingStylenotification, and no data is uploaded to the internet to generate the responses.
Add notification metadata
- Assign notification metadata to tell the system how to handle your app
notifications when the device is in Do Not Disturb mode. For
example, use the
addPerson()orsetCategory(Notification.CATEGORY_MESSAGE)method to override the Do Not Disturb.