Good visual design is essential for a successful app, and color schemes are a primary component of design. The Palette library is a Jetpack library that extracts prominent colors from images to create visually engaging apps.
You can use the Palette library to design layout
themes and apply custom colors to
visual elements in your app. For example, you can use a palette to create a
color-coordinated title card for a song based on its album cover or to adjust an
app's toolbar color when its background image changes. The
Palette
object gives you access to the colors in a
Bitmap image
while also providing six main color profiles from the bitmap to inform your
design choices.
Set up the library
To use the Palette library, add the following to your
build.gradle:
Kotlin
android {
    compileSdkVersion(36)
    ...
}

dependencies {
    ...
    implementation("androidx.palette:palette:1.0.0")
}
Groovy
android {
    compileSdkVersion 36
    ...
}

dependencies {
    ...
    implementation 'androidx.palette:palette:1.0.0'
}
Create a palette
A Palette object gives you access to the primary colors in an
image as well as the corresponding colors for overlaid text. Use palettes to
design your app's style and to dynamically change your app's color scheme based
on a given source image.
To create a palette, first instantiate a
Palette.Builder
from a Bitmap. You can then use the Palette.Builder to
customize the palette before generating it. This section describes palette
generation and customization from a bitmap image.
Generate a Palette instance
Generate a Palette instance using its
from(Bitmap bitmap)
method to first create a Palette.Builder from a
Bitmap.
The builder can generate the palette synchronously or asynchronously. Use
synchronous palette generation if you want to create the palette on the same
thread as the method being called. If you generate the palette asynchronously,
on a different thread, use the
onGenerated()
method to access the palette immediately after it is created.
The following code snippet provides example methods for both types of palette generation:
Kotlin
// Generate palette synchronously and return it.
fun createPaletteSync(bitmap: Bitmap): Palette = Palette.from(bitmap).generate()

// Generate palette asynchronously and use it on a different thread using onGenerated().
fun createPaletteAsync(bitmap: Bitmap) {
    Palette.from(bitmap).generate { palette ->
        // Use generated instance.
    }
}
Java
// Generate palette synchronously and return it.
public Palette createPaletteSync(Bitmap bitmap) {
  Palette p = Palette.from(bitmap).generate();
  return p;
}

// Generate palette asynchronously and use it on a different thread using onGenerated().
public void createPaletteAsync(Bitmap bitmap) {
  Palette.from(bitmap).generate(new PaletteAsyncListener() {
    public void onGenerated(Palette p) {
      // Use generated instance.
    }
  });
}
If you need to continuously generate palettes for a sorted list of images or
objects, consider
caching the
Palette instances to prevent slow UI performance. Don't create the
palettes on your
main thread.
Customize your palette
The Palette.Builder lets you customize your palette by choosing
how many colors are in the resulting palette, what area of your image the
builder uses to generate the palette, and what colors are included in the
palette. For example, you can filter out the color black or ensure the builder
only uses the top half of an image to generate your palette.
Fine-tune your palette's size and colors with the following methods from the
Palette.Builder class:
addFilter()- This method adds a filter that indicates what colors are allowed in the
resulting palette. Pass in your own
Palette.Filterand modify itsisAllowed()method to determine which colors are filtered from the palette. maximumColorCount()- This method sets the maximum number of colors in your palette. The default
value is 16, and the optimal value depends on the source image. For
landscapes, optimal values range from 8-16, while pictures with faces usually
have values from 24-32. The
Palette.Buildertakes longer to generate palettes with more colors. setRegion()- This method indicates what area of the bitmap the builder uses when creating the palette. You can only use this method when generating the palette from a bitmap, and it doesn't affect the original image.
addTarget()- This method lets you perform your own color matching by adding a
Targetcolor profile to the builder. If the defaultTargetis insufficient, advanced developers can create their ownTargetusing aTarget.Builder.
Extract color profiles
Based on the
standards of Material
Design, the Palette library extracts commonly used color profiles from an
image. Each profile is defined by a Target, and colors extracted
from the bitmap image are scored against each profile based on saturation,
luminance, and population (number of pixels in the bitmap represented by the
color). For each profile, the color with the best score defines that color
profile for the given image.
By default, a Palette object contains 16 primary colors from a
given image. When generating your palette, you can
customize its number of colors using the
Palette.Builder. Extracting more colors provides more potential
matches for each color profile, but it also causes Palette.Builder
to take longer when generating the palette.
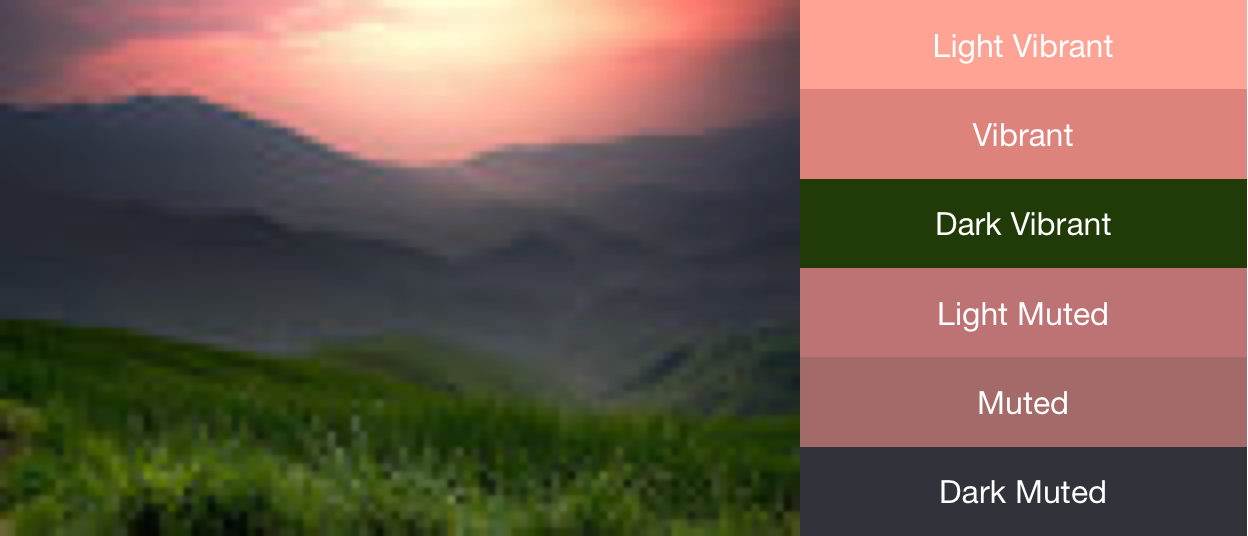
The Palette library attempts to extract the following six color profiles:
- Light Vibrant
- Vibrant
- Dark Vibrant
- Light Muted
- Muted
- Dark Muted
Each of the get<Profile>Color() methods in
Palette returns the color in the palette associated with that
particular profile, where <Profile> is replaced by
the name of one of the six color profiles. For example, the method to get the
Dark Vibrant color profile is
getDarkVibrantColor().
Since not all images contain all color profiles, provide a default color to
return.
Figure 1 displays a photo and its corresponding color profiles from the
get<Profile>Color() methods.
Use swatches to create color schemes
The Palette class also generates
Palette.Swatch
objects for each color profile. Palette.Swatch objects contain the
associated color for that profile as well as the color's population in
pixels.
Swatches have additional methods for accessing more information about the
color profile, such as HSL values and pixel population. You can use swatches to
help create more comprehensive color schemes and app themes using the
getBodyTextColor()
and
getTitleTextColor()
methods. These methods return colors appropriate for use over the swatch's
color.
Each get<Profile>Swatch() methods from
Palette returns the swatch associated with that particular profile,
where <Profile> is replaced by the name of one of
the six color profiles. Although the palette's
get<Profile>Swatch() methods don't require default
value parameters, they return null if that particular profile
doesn't exist in the image. Therefore, check that a swatch isn't null before
using it. For example, the following code gets the title text color from a
palette if the Vibrant swatch isn't null:
Kotlin
val vibrant = myPalette.vibrantSwatch
// In Kotlin, check for null before accessing properties on the vibrant swatch.
val titleColor = vibrant?.titleTextColor
Java
Palette.Swatch vibrant = myPalette.getVibrantSwatch();
if(vibrant != null){
    int titleColor = vibrant.getTitleTextColor();
    // ...
}
To access all colors in a palette, the
getSwatches()
method returns a list of all swatches generated from an image, including the
standard six color profiles.
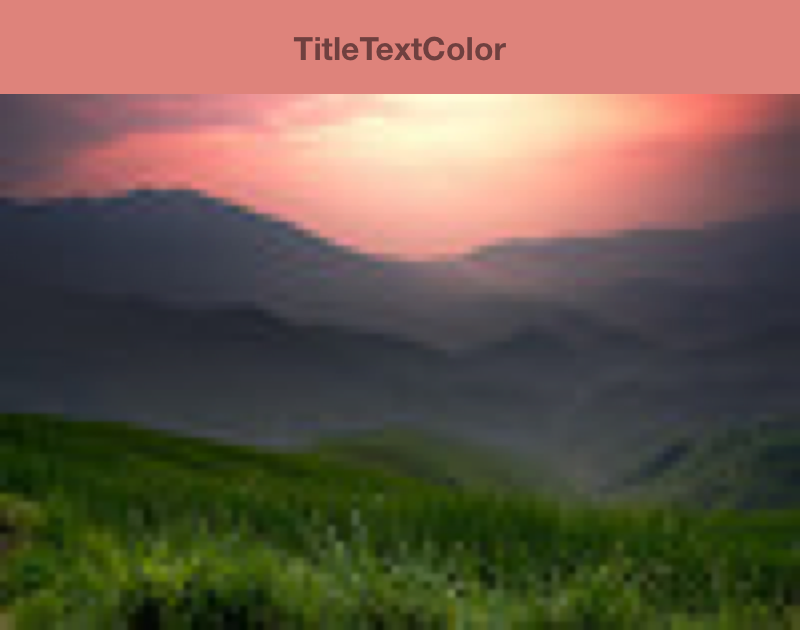
The following snippet of code uses the methods from the preceding code snippets to synchronously generate a palette, get its vibrant swatch, and change the colors of a toolbar to match the bitmap image. Figure 2 displays the resulting image and toolbar.
Kotlin
// Set the background and text colors of a toolbar given a bitmap image to
// match.
fun setToolbarColor(bitmap: Bitmap) {
    // Generate the palette and get the vibrant swatch.
    val vibrantSwatch = createPaletteSync(bitmap).vibrantSwatch

    // Set the toolbar background and text colors.
    // Fall back to default colors if the vibrant swatch isn't available.
    with(findViewById<Toolbar>(R.id.toolbar)) {
        setBackgroundColor(vibrantSwatch?.rgb ?:
                ContextCompat.getColor(context, R.color.default_title_background))
        setTitleTextColor(vibrantSwatch?.titleTextColor ?:
                ContextCompat.getColor(context, R.color.default_title_color))
    }
}
Java
// Set the background and text colors of a toolbar given a bitmap image to
// match.
public void setToolbarColor(Bitmap bitmap) {
    // Generate the palette and get the vibrant swatch.
    // See the createPaletteSync() method from the preceding code snippet.
    Palette p = createPaletteSync(bitmap);
    Palette.Swatch vibrantSwatch = p.getVibrantSwatch();

    Toolbar toolbar = (Toolbar) findViewById(R.id.toolbar);

    // Load default colors.
    int backgroundColor = ContextCompat.getColor(getContext(),
        R.color.default_title_background);
    int textColor = ContextCompat.getColor(getContext(),
        R.color.default_title_color);

    // Check that the Vibrant swatch is available.
    if(vibrantSwatch != null){
        backgroundColor = vibrantSwatch.getRgb();
        textColor = vibrantSwatch.getTitleTextColor();
    }

    // Set the toolbar background and text colors.
    toolbar.setBackgroundColor(backgroundColor);
        toolbar.setTitleTextColor(textColor);
}