
Settings Part of Android Jetpack.
Settings let users change the functionality and behavior of an app. Settings can affect background behavior, such as how often the app synchronizes data with the cloud, or they can be wider-reaching, such as changing the contents and presentation of the user interface.
To integrate user configurable settings into your app, use the AndroidX Preference library. This library manages the user interface and interacts with storage so that you define only the individual settings that the user can configure. The library comes with a Material Design theme that provides a consistent user experience across devices and OS versions.
Get started
A Preference is the basic building
block of the Preference library. A settings screen contains a Preference
hierarchy. You can define this hierarchy as an XML resource, or you can build
a hierarchy in code.
The following sections describe how to build a simple settings screen using the AndroidX Preference library.
Before you start, add the Preference library dependency to your build.gradle
file:
Groovy
dependencies {
    implementation "androidx.preference:preference-ktx:1.2.0"
}
Kotlin
dependencies {
    implementation("androidx.preference:preference-ktx:1.2.0")
}
After a Gradle Sync, you can move on to the XML part of the task.
Create a hierarchy
In your project, navigate to res/xml folder, create a preferences.xml file,
and add the following code to it:
<PreferenceScreen
    xmlns:app="http://schemas.android.com/apk/res-auto">

    <SwitchPreferenceCompat
        app:key="notifications"
        app:title="Enable message notifications"/>

    <Preference
        app:key="feedback"
        app:title="Send feedback"
        app:summary="Report technical issues or suggest new features"/>

</PreferenceScreen>
This hierarchy contains two Preference objects: a
SwitchPreferenceCompat
that lets users toggle a setting on and off, and a basic Preference with no
widget.
When building a hierarchy, each Preference must have a unique key.
Inflate the hierarchy
To inflate a hierarchy from an XML attribute, create a
PreferenceFragmentCompat,
override
onCreatePreferences(),
and provide the XML resource to inflate, as shown in the following example:
Kotlin
class MySettingsFragment : PreferenceFragmentCompat() {
    override fun onCreatePreferences(savedInstanceState: Bundle?, rootKey: String?) {
        setPreferencesFromResource(R.xml.preferences, rootKey)
    }
}
Java
public class MySettingsFragment extends PreferenceFragmentCompat {
    @Override
    public void onCreatePreferences(Bundle savedInstanceState, String rootKey) {
        setPreferencesFromResource(R.xml.preferences, rootKey);
    }
}
You can then add this Fragment to your Activity as you do with any other
Fragment:
Kotlin
class MySettingsActivity : AppCompatActivity() {
    override fun onCreate(savedInstanceState: Bundle?) {
        super.onCreate(savedInstanceState)
        supportFragmentManager
                .beginTransaction()
                .replace(R.id.settings_container, MySettingsFragment())
                .commit()
    }
}
Java
public class MySettingsActivity extends AppCompatActivity {
    @Override
    protected void onCreate(Bundle savedInstanceState) {
        super.onCreate(savedInstanceState);
        getSupportFragmentManager()
                .beginTransaction()
                .replace(R.id.settings_container, new MySettingsFragment())
                .commit();
    }
}
The result is shown in the following image:
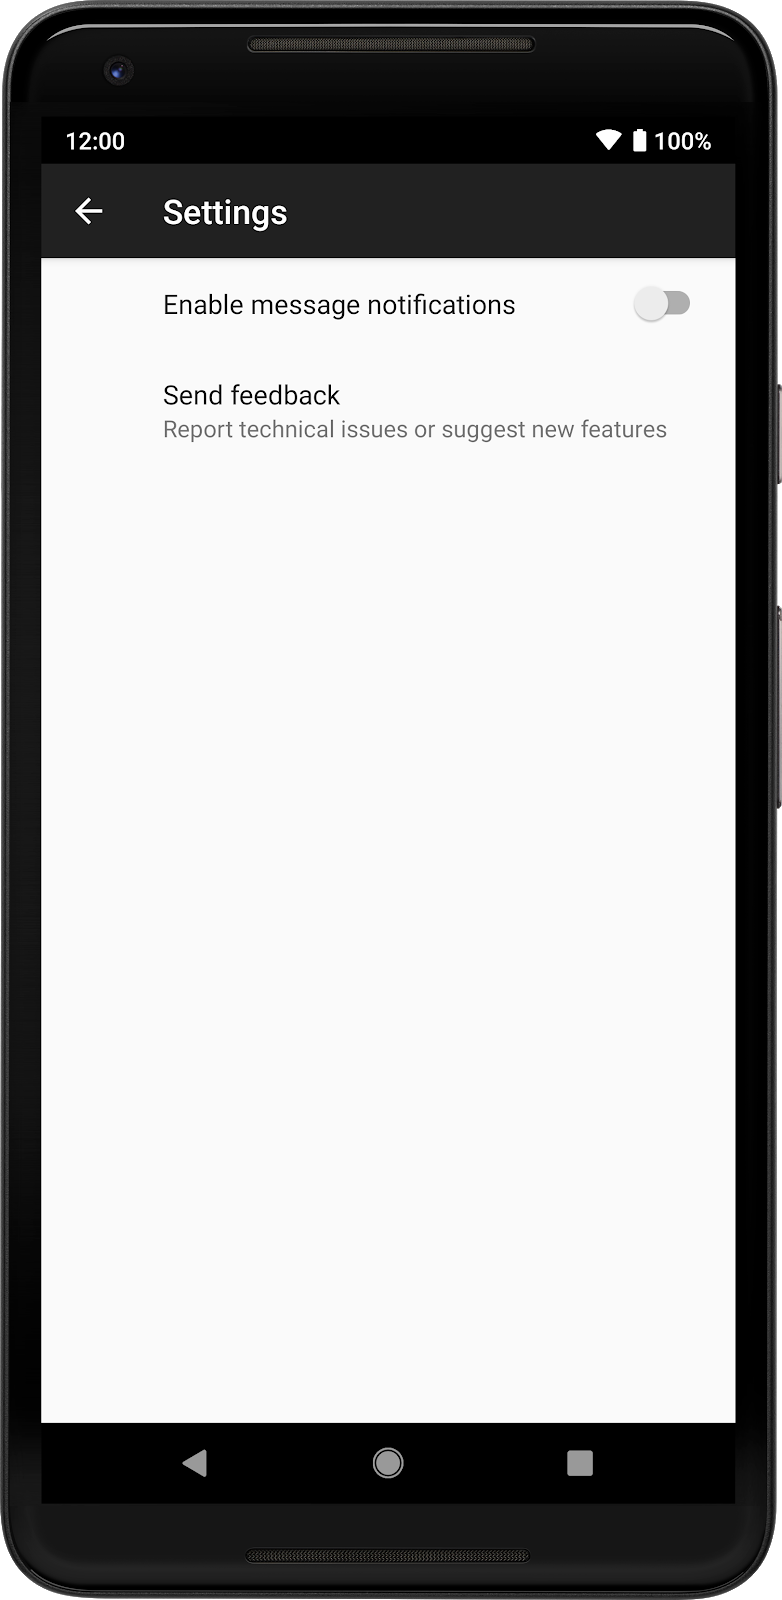
Preference
objects.
Monitor the preferences
You can get an event when a preference changes by registering a listener for it:
Kotlin
findPreference<SwitchPreferenceCompat>("notifications")
    ?.setOnPreferenceChangeListener { _, newValue ->
        Log.d("Preferences", "Notifications enabled: $newValue")
        true // Return true if the event is handled.
    }

findPreference<Preference>("feedback")
    ?.setOnPreferenceClickListener {
        Log.d("Preferences", "Feedback was clicked")
        true // Return true if the click is handled.
    }
Java
SwitchPreferenceCompat notificationsPref = findPreference("notifications");

if (notificationsPref != null) {
    notificationsPref.setOnPreferenceChangeListener((preference, newValue) -> {
        Log.d("Preferences", String.format("Notifications enabled: %s", newValue));
        return true; // Return true if the event is handled.
    });
}

Preference feedbackPref = findPreference("feedback");

if (feedbackPref != null) {
    feedbackPref.setOnPreferenceClickListener((preference) -> {
        Log.d("Preferences", "Feedback was clicked");
        return true; // Return true if the event is handled.
    });
}
Read the current preference value
PreferenceFragmentCompat hides much of the machinery involved in saving and
reading the preferences. However, everything is stored using
SharedPreferences, and you can read these values as you normally do with
SharedPreferences:
Kotlin
val preferences = PreferenceManager.getDefaultSharedPreferences(this).all

preferences.forEach {
    Log.d("Preferences", "${it.key} -> ${it.value}")
}
Java
var preferences = PreferenceManager.getDefaultSharedPreferences(context).getAll();

preferences.forEach((key, value) ->{
    Log.d("Preferences", String.format("%s -> %s", key, value));
});
The previous snippet obtains an instance of the default SharedPreferences for
the app, accesses all the stored values, loops over them, and prints them in
Logcat.