
在 OpenGL ES 環境中,投影和相機檢視畫面可讓您在 建立出類似您眼中實際物體的感覺。這張模擬 實際檢視畫面是利用已繪製物件座標的數學轉換完成:
- 投影 - 此轉換會根據
顯示該元素的位置
GLSurfaceView的寬度和高度。不含 則 OpenGL ES 繪製的物件,會因檢視區塊的不等比例偏移而偏移 視窗。一般來說,只有在 您可以在轉譯器的onSurfaceChanged()方法中建立或變更 OpenGL 檢視畫面。進一步瞭解 OpenGL ES 投影和 座標對應,請參閱 繪製的對應座標 物件。 - Camera View - 此轉換會根據
虛擬攝影機位置。需要注意的是,OpenGL ES 不會定義實際的相機鏡頭
而是提供模擬相機的公用程式方法,
繪製的物件。建立攝影機畫面時,攝影機畫面可能只會計算一次
GLSurfaceView,也可以根據使用者動作或您的 應用程式的功能
本課程將說明如何建立投影和相機檢視畫面,以及如何將其套用至繪製的形狀
您的 GLSurfaceView。
定義投影
投影轉換的資料會在 onSurfaceChanged() 中計算。
GLSurfaceView.Renderer 類別的方法。以下程式碼範例
會使用 GLSurfaceView 的高度和寬度填入
使用 Matrix.frustumM() 方法進行投影轉換 Matrix:
Kotlin
// vPMatrix is an abbreviation for "Model View Projection Matrix"
private val vPMatrix = FloatArray(16)
private val projectionMatrix = FloatArray(16)
private val viewMatrix = FloatArray(16)

override fun onSurfaceChanged(unused: GL10, width: Int, height: Int) {
    GLES20.glViewport(0, 0, width, height)

    val ratio: Float = width.toFloat() / height.toFloat()

    // this projection matrix is applied to object coordinates
    // in the onDrawFrame() method
    Matrix.frustumM(projectionMatrix, 0, -ratio, ratio, -1f, 1f, 3f, 7f)
}
Java
// vPMatrix is an abbreviation for "Model View Projection Matrix"
private final float[] vPMatrix = new float[16];
private final float[] projectionMatrix = new float[16];
private final float[] viewMatrix = new float[16];

@Override
public void onSurfaceChanged(GL10 unused, int width, int height) {
    GLES20.glViewport(0, 0, width, height);

    float ratio = (float) width / height;

    // this projection matrix is applied to object coordinates
    // in the onDrawFrame() method
    Matrix.frustumM(projectionMatrix, 0, -ratio, ratio, -1, 1, 3, 7);
}
此程式碼會填入投影矩陣 mProjectionMatrix,您可以接著將其合併
並在 onDrawFrame() 方法中使用相機檢視轉換,如下一節所示。
注意:只要將投影轉換套用至 繪圖物件通常無法顯示。一般來說,您也必須手上一台相機 查看轉換,這樣畫面上就會顯示任何項目。
定義攝影機檢視畫面
將鏡頭檢視轉換相加,即可完成繪製所繪製物件的程序。
為轉譯器中繪圖程序的一部分在以下範例程式碼中,相機檢視畫面
轉換是透過 Matrix.setLookAtM() 計算而得
方法,然後與先前計算的投影矩陣結合。結合
接著,轉換矩陣會傳遞至繪製的形狀。
Kotlin
override fun onDrawFrame(unused: GL10) {
    ...
    // Set the camera position (View matrix)
    Matrix.setLookAtM(viewMatrix, 0, 0f, 0f, 3f, 0f, 0f, 0f, 0f, 1.0f, 0.0f)

    // Calculate the projection and view transformation
    Matrix.multiplyMM(vPMatrix, 0, projectionMatrix, 0, viewMatrix, 0)

    // Draw shape
    triangle.draw(vPMatrix)
Java
@Override
public void onDrawFrame(GL10 unused) {
    ...
    // Set the camera position (View matrix)
    Matrix.setLookAtM(viewMatrix, 0, 0, 0, 3, 0f, 0f, 0f, 0f, 1.0f, 0.0f);

    // Calculate the projection and view transformation
    Matrix.multiplyMM(vPMatrix, 0, projectionMatrix, 0, viewMatrix, 0);

    // Draw shape
    triangle.draw(vPMatrix);
}
套用投影和相機轉換
如要使用合併的投影與相機檢視轉換矩陣,
預覽區段,首先在先前定義的頂點著色器中加入矩陣變數
在 Triangle 類別中:
Kotlin
class Triangle {

    private val vertexShaderCode =
            // This matrix member variable provides a hook to manipulate
            // the coordinates of the objects that use this vertex shader
            "uniform mat4 uMVPMatrix;" +
            "attribute vec4 vPosition;" +
            "void main() {" +
            // the matrix must be included as a modifier of gl_Position
            // Note that the uMVPMatrix factor *must be first* in order
            // for the matrix multiplication product to be correct.
            "  gl_Position = uMVPMatrix * vPosition;" +
            "}"

    // Use to access and set the view transformation
    private var vPMatrixHandle: Int = 0

    ...
}
Java
public class Triangle {

    private final String vertexShaderCode =
        // This matrix member variable provides a hook to manipulate
        // the coordinates of the objects that use this vertex shader
        "uniform mat4 uMVPMatrix;" +
        "attribute vec4 vPosition;" +
        "void main() {" +
        // the matrix must be included as a modifier of gl_Position
        // Note that the uMVPMatrix factor *must be first* in order
        // for the matrix multiplication product to be correct.
        "  gl_Position = uMVPMatrix * vPosition;" +
        "}";

    // Use to access and set the view transformation
    private int vPMatrixHandle;

    ...
}
接著,修改圖形物件的 draw() 方法,使其接受合併
轉換矩陣並套用至形狀:
Kotlin
fun draw(mvpMatrix: FloatArray) { // pass in the calculated transformation matrix
    ...

    // get handle to shape's transformation matrix
    vPMatrixHandle = GLES20.glGetUniformLocation(mProgram, "uMVPMatrix")

    // Pass the projection and view transformation to the shader
    GLES20.glUniformMatrix4fv(vPMatrixHandle, 1, false, mvpMatrix, 0)

    // Draw the triangle
    GLES20.glDrawArrays(GLES20.GL_TRIANGLES, 0, vertexCount)

    // Disable vertex array
    GLES20.glDisableVertexAttribArray(positionHandle)
}
Java
public void draw(float[] mvpMatrix) { // pass in the calculated transformation matrix
    ...

    // get handle to shape's transformation matrix
    vPMatrixHandle = GLES20.glGetUniformLocation(mProgram, "uMVPMatrix");

    // Pass the projection and view transformation to the shader
    GLES20.glUniformMatrix4fv(vPMatrixHandle, 1, false, mvpMatrix, 0);

    // Draw the triangle
    GLES20.glDrawArrays(GLES20.GL_TRIANGLES, 0, vertexCount);

    // Disable vertex array
    GLES20.glDisableVertexAttribArray(positionHandle);
}
正確計算並套用投影與相機檢視轉換後, 圖形物件的繪製比例正確,應如下所示:
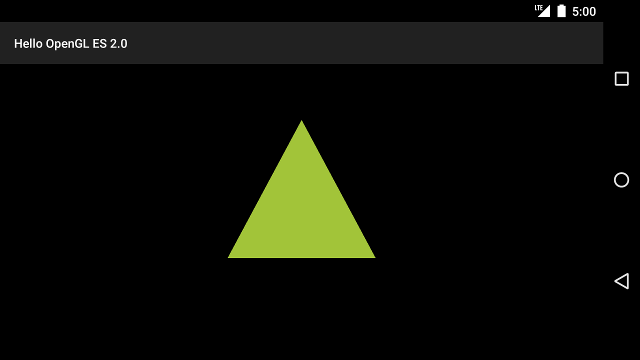
圖 1. 套用投影及相機檢視畫面的繪製三角形。
您的應用程式現在能以正確比例顯示形狀,接下來請 在圖案中加入動態效果