
Icons help your users identify your app and actions within it. Depending on the type of icon you are creating, you should use different tools and libraries:
- Custom launcher and notification icons: Use Image Asset Studio to generate adaptive launcher icons and notification assets that meet specific system requirements.
- Standard UI icons: Use clip art option in Image Asset Studio to add an image from the Material icons library.
- Custom UI icons: Use Vector Asset Studio to create scalable vector drawables for components like top app bars.
About Image Asset Studio
Android Studio includes a tool called Image Asset Studio that helps you
generate your own app icons from Material icons, custom
images, and text strings. It generates a set of icons at the appropriate
resolution for each pixel density that your app supports.
Image Asset Studio places the newly generated icons in density-specific
folders under the res/ directory in your project. At runtime, Android uses
the appropriate resource based on the screen density of the device your app is
running on.
Image Asset Studio helps you generate the following icon types:
- Launcher icons
- Notification icons
To generate custom app bar icons, use Vector Asset Studio. The following sections describe the icon types that you can create and the image and text inputs that you can use with Image Asset Studio.
Adaptive and legacy launcher icons
A launcher icon is a graphic that represents your app to users. It can do the following:
- Appear in the list of apps installed on a device and on the Home screen.
- Represent shortcuts into your app (for example, a contact shortcut icon that opens detail information for a contact).
- Be used by launcher apps.
- Help users find your app on Google Play.
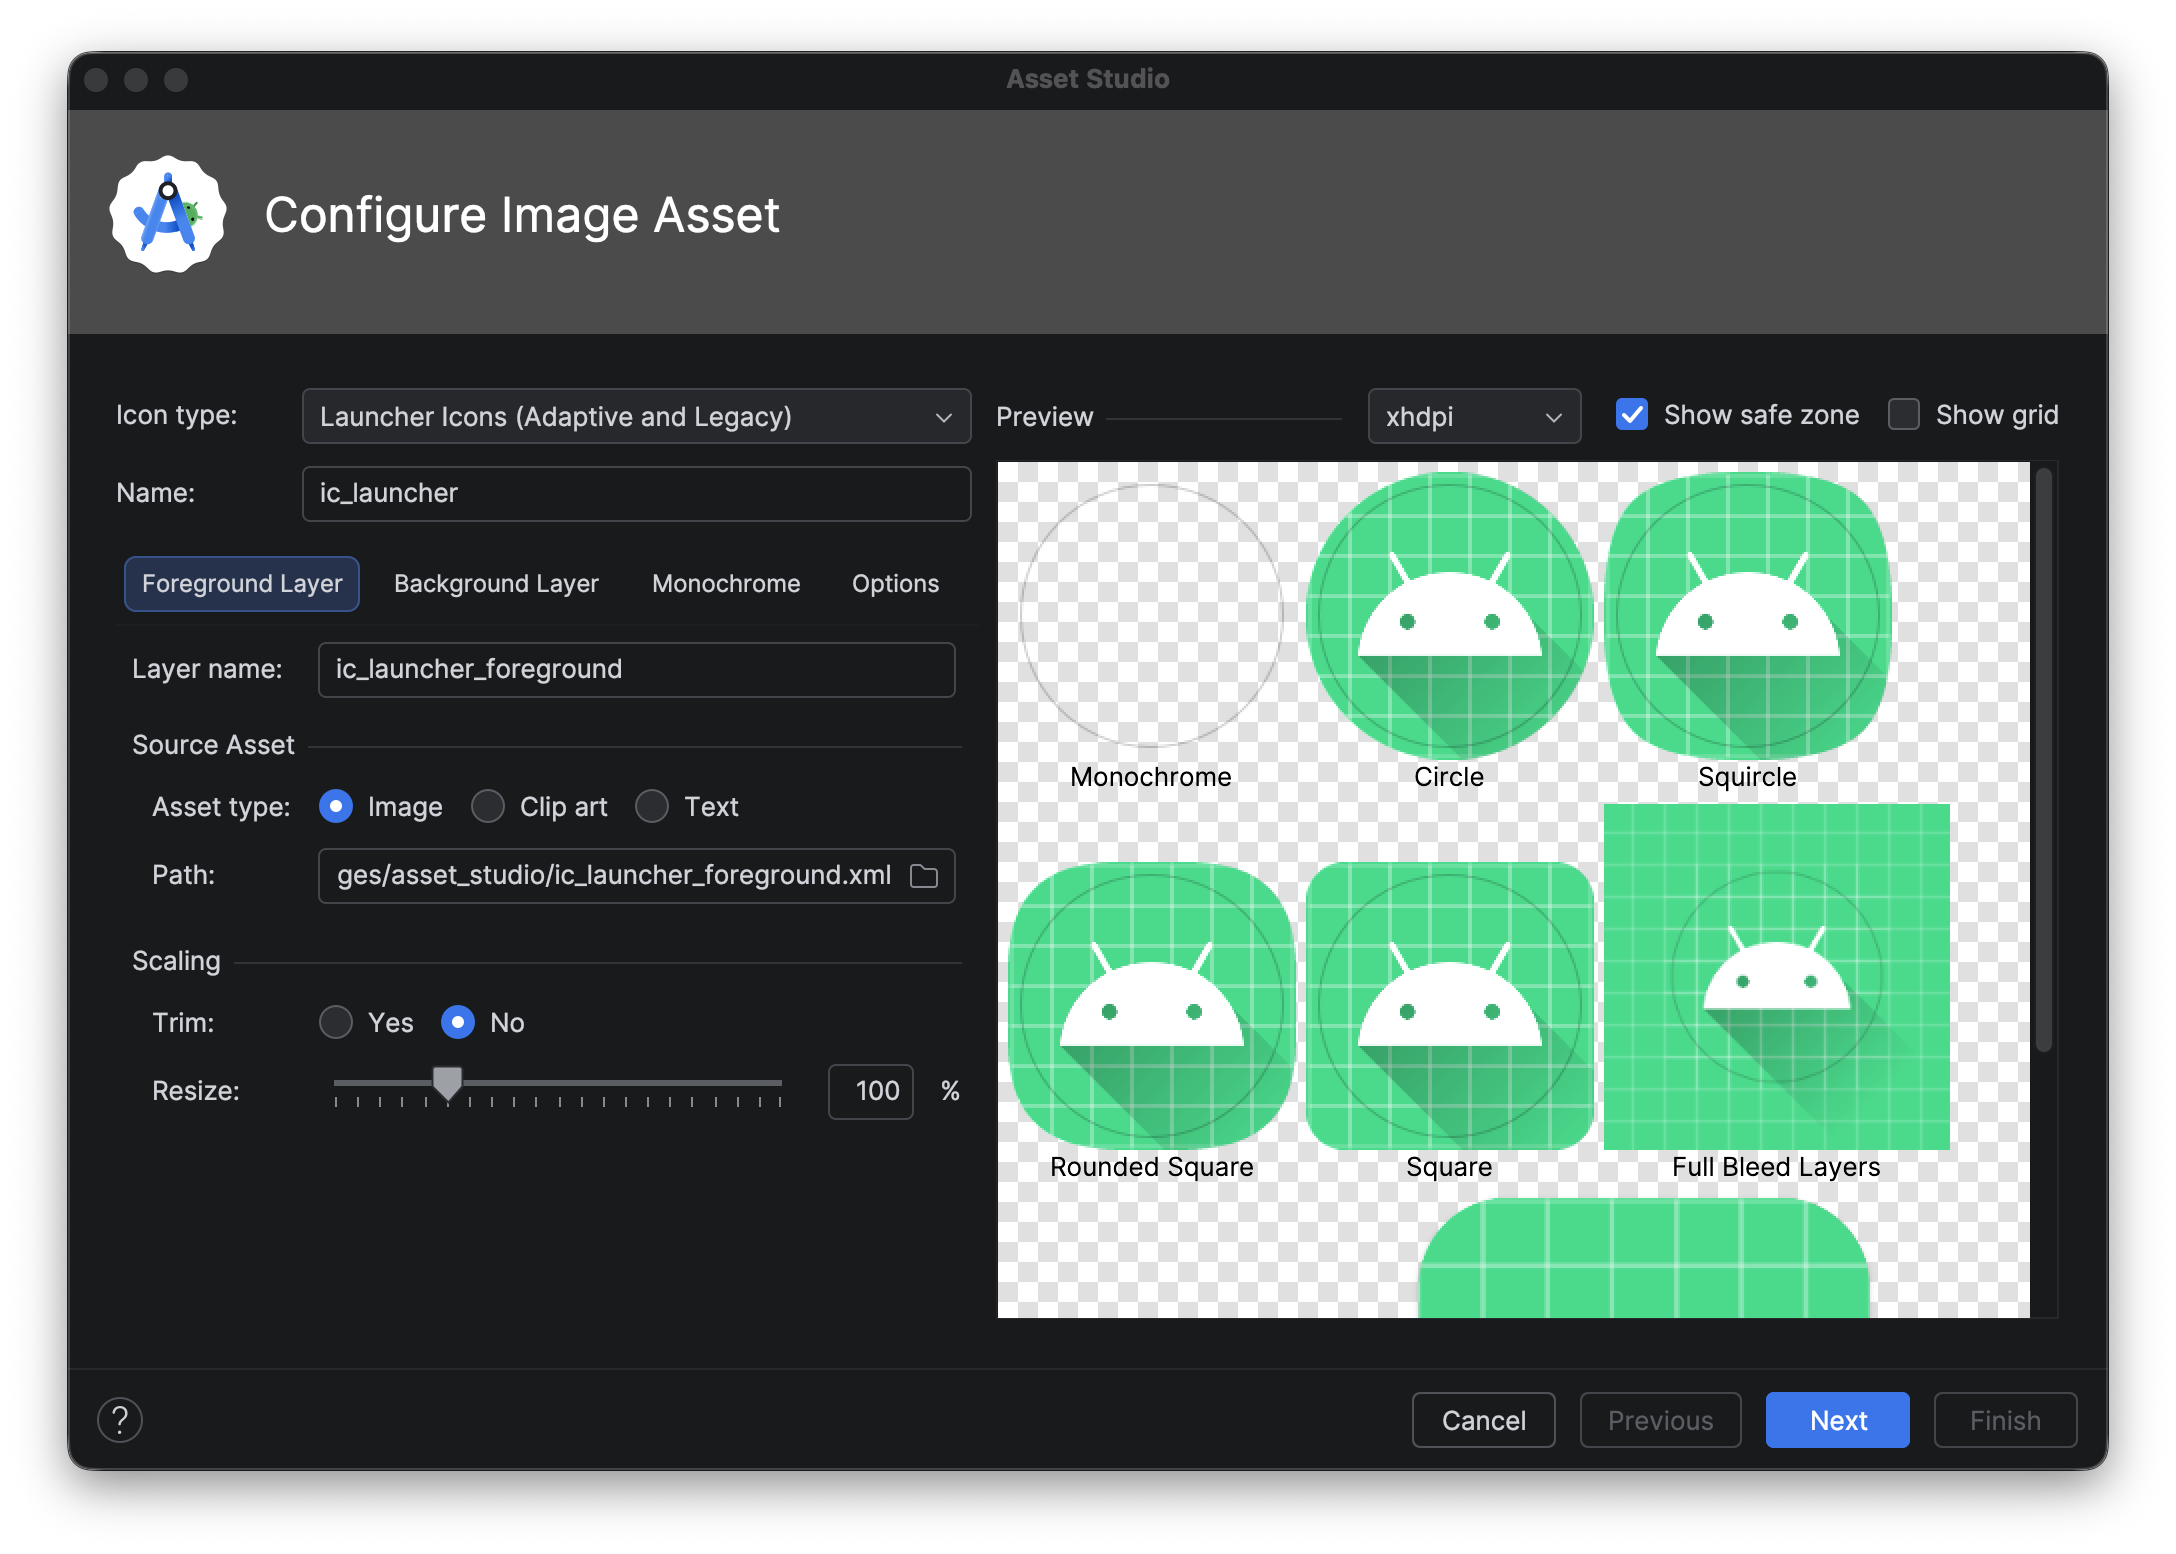
Adaptive launcher icons can display as a variety of shapes across different device models. Image Asset Studio generates previews of an adaptive icon in circle, squircle, rounded square, and square shapes, as well as a full bleed preview of the icon. Image Asset Studio also generates legacy, round, and Google Play Store previews of the icon.
A legacy launcher icon is a graphic that represents your app on a device's home screen and in the launcher window. Legacy launcher icons are intended for use on devices running Android 7.1 (API level 25) or lower, which don't support adaptive icons, and don't display as varying shapes across device models. We recommend that you use the Material Design style for launcher icons, even if you support older Android versions.
Image Asset Studio places the icons in the proper locations in the
res/mipmap-<density>/ directories. It also creates a 512 x 512 pixel image
that's appropriate for the Google Play store.
For launcher icons, the AndroidManifest.xml file must reference the
mipmap/ location. Image Asset Studio adds this code automatically. The
following manifest file code references the ic_launcher icon in the
mipmap/ directory:
<application android:name="ApplicationTitle"
          android:label="@string/app_label"
          android:icon="@mipmap/ic_launcher" >
See Adaptive Launcher Icons and Product Icons - Material Design for more information.
Notification icons
A notification is a message that you can display to the user outside of the
normal UI of your app. Image Asset Studio places notifications icons in the
proper locations in the res/drawable-<density>/ directories:
- Icons for Android 3 (API level 11) and higher are placed in
res/drawable-<density>-v11/directories. - Icons for Android 2.3 to 2.3.7 (API level 9 to 10) are placed in
res/drawable-<density>-v9/directories. - Icons for Android 2.2 (API level 8) and lower are placed in
res/drawable-<density>/directories.
If your app supports Android 2.3 to 2.3.7 (API level 9 to 10), Image Asset Studio generates a gray version of your icon. Later Android versions use the white icon that Image Asset Studio generates.
For more information, see About notifications and Notifications Material Design.
Clip art
Image Asset Studio lets you import Google Material icons in VectorDrawable and PNG formats by selecting an icon from a dialog. For more information, see Material Icons.
Images
You can import your own images and adjust them for the icon type. Image Asset Studio supports the following file types: PNG (preferred), JPG (acceptable), and GIF (discouraged).
Text strings
Image Asset Studio lets you type a text string in a variety of fonts, and places it on an icon. It converts the text-based icon into PNG files for different densities. You can use the fonts that are installed on your computer.
Run Image Asset Studio
To start Image Asset Studio, follow these steps:
- In the Project window, select the Android view.
Right-click the res folder and select New > Image Asset.
Continue by following the steps to:
Create a notification icon.
Create adaptive and legacy launcher icons
After you open Image Asset Studio, you can add adaptive and legacy icons by following these steps:
- In the Icon Type field, select Launcher Icons (Adaptive and Legacy).
- In the Foreground Layer tab, select an Asset Type, and then specify
the asset in the field underneath:
- Select Image to specify the path for an image file.
- Select Clip Art to specify an image from the Material Design icon set.
- Select Text to specify a text string and select a font.
- In the Background Layer tab, select an Asset Type, and then specify the asset in the field underneath. You can either select a color or specify an image to use as the background layer.
- In the Monochrome Layer tab, select an Asset Type (Image, Clip Art, or Text), or let Android Studio default to reusing the same asset as the foreground layer.
- In the Options tab, review the default settings and confirm you want to generate legacy, round, and Google Play Store icons.
- Optionally change the name and display settings for each of the
Foreground Layer and Background Layer tabs:
- Name - If you don't want to use the default name, type a new name. If that resource name already exists in the project, as indicated by an error at the bottom of the wizard, it's overwritten. The name can contain lowercase characters, underscores, and digits only.
- Trim - To adjust the margin between the icon graphic and border in the source asset, select Yes. This operation removes transparent space, while preserving the aspect ratio. To leave the source asset unchanged, select No.
- Color - To change the color for a Clip Art or Text icon, click the field. In the Select Color dialog, specify a color and then click Choose. The new value appears in the field.
- Resize - Use the slider to specify a scaling factor in percent to resize an Image, Clip Art, or Text icon. This control is disabled for the background layer when you specify a Color asset type.
- Click Next.
- Optionally, change the resource directory: Select the resource source set where you want to add the image asset: src/main/res, src/debug/res, src/release/res, or a custom source set. The main source set applies to all build variants, including debug and release. The debug and release source sets override the main source set and apply to one version of a build. The debug source set is for debugging only. To define a new source set, select File > Project Structure > app > Build Variants > Build Types. For example, you can define a beta source set and create a version of an icon that includes the text "BETA" in the bottom right corner. For more information, see Configure Build Variants.
- Click Finish. Image Asset Studio adds the images to the mipmap folders for the different densities.
Preview themed app icons
Android Studio lets you preview your themed app icon and
test how it adapts to the coloring of the user's wallpaper. To preview your
themed app icon, open the launcher.xml file that defines your icon and then
use the System UI Mode selector on the toolbar to switch wallpapers and see
how the icon reacts.
To learn more about how to create themed app icons, see Adaptive icons.
Create a notification icon
After you open Image Asset Studio, you can add a notification icon by following these steps:
- In the Icon Type field, select Notification Icons.
- Select an Asset Type, and then specify the asset in the field
underneath:
- In the Clip Art field, click the button. In the Select Icon dialog, select a Material icon and then click OK.
- In the Path field, specify the path and filename of the image. Click ... to use a dialog.
- In the Text field, type a text string and select a font. The icon appears in the Source Asset area on the right side, and in the preview area at the bottom of the wizard.
- Optionally change the name and display options:
- Name - If you don't want to use the default name, type a new name. If that resource name already exists in the project, as indicated by a warning at the bottom of the wizard, it's overwritten. The name can contain lowercase characters, underscores, and digits only.
- Trim - To adjust the margin between the icon graphic and border in the source asset, select Yes. This operation removes transparent space, while preserving the aspect ratio. To leave the source asset unchanged, select No.
- Padding - If you want to adjust the source asset padding on all four sides, move the slider. Select a value between -10% and 50%. If you also select Trim, the trimming happens first.
- Click Next.
- Optionally change the resource directory:
- Res Directory - Select the resource source set where you want to add the image asset: src/main/res, src/debug/res, src/release/res, or a user-defined source set. The main source set applies to all build variants, including debug and release. The debug and release source sets override the main source set and apply to one version of a build. The debug source set is for debugging only. To define a new source set, select File > Project Structure > app > Build Types. For example, you could define a beta source set and create a version of an icon that includes the text "BETA" in the bottom right corner. For more information, see Configure Build Variants.
- Click Finish. Image Asset Studio adds the images in the drawable folders for the different densities and versions.
Refer to image resources
For information about referring to icon resources, see Resources in Compose. For information about referring to full-color graphics or more complex images, see Loading images.
Delete an icon from a project
To remove an icon from a project:
- In the Project window, select the Android view.
- Expand the res/mipmap folder for a launcher icon, or the res/drawable folder for other types of icons.
- Locate a subfolder that has the name of the icon you want to delete. This folder contains the icon in different densities.
- Select the folder and press the Delete key. Alternatively, select Edit > Delete, or right-click the file and select Delete. The Safe Delete dialog appears.
- Optionally select options to find where the icon is used in the project, and click OK. Android Studio deletes the files from the project and the drive. However, if you chose to search for places in the project where the files are used and some usages are found, you can view them and decide whether to delete them. You must delete or replace these references to be able to successfully compile your project.
- Select Build > Clean Project. Android Studio removes any generated image files corresponding to the deleted image resource. It removes them from the project and the drive.
- If needed, correct any remaining errors due to portions of the code that reference the resource. Android Studio highlights these errors in your code. When you've removed all references from your code, you can successfully build your project again.