
Android Device Streaming که توسط Firebase پشتیبانی میشود، به شما امکان میدهد تا به طور ایمن به دستگاههای فیزیکی اندروید از راه دور که در مراکز داده امن گوگل و آزمایشگاههای دستگاههای همکار اندروید میزبانی میشوند، متصل شوید. این سریعترین و آسانترین راه برای آزمایش برنامه شما در برابر واحدهای فیزیکی برخی از جدیدترین دستگاههای اندرویدی، از جمله Google Pixel 9، 9a 9 Pro، Pixel Fold و مجموعهای متنوع از مدلهای سامسونگ، OPPO، OnePlus، Xiaomi، vivo و Transsion است.
در حال حاضر، استریم دستگاه برای شما در پروژههای فایربیس با طرح اسپارک به صورت رایگان در دسترس است . استفاده بیش از دقایق رایگان ماهانه ممکن است شامل هزینه شود. برای اطلاعات بیشتر به قیمتگذاری استریم دستگاه اندروید مراجعه کنید.
پس از اتصال به دستگاه، میتوانید برنامه خود را مستقر کنید، صفحه نمایش را مشاهده کنید، با دستگاه تعامل داشته باشید (از جمله چرخاندن یا باز کردن دستگاه) و هر کار دیگری را که ممکن است با دستگاهی با استفاده از اتصال ADB از طریق SSL انجام دهید، بدون نیاز به ترک اندروید استودیو انجام دهید. وقتی استفاده از دستگاه تمام شد، گوگل تمام دادههای شما را پاک میکند و دستگاه را قبل از اینکه در اختیار توسعهدهنده دیگری قرار دهد، به تنظیمات کارخانه برمیگرداند.
شروع کنید
برای شروع، این مراحل را دنبال کنید:
- اگر هنوز این کار را نکردهاید، آخرین نسخه اندروید استودیو را دانلود و نصب کنید. اگر میخواهید زودتر به ویژگیهای منتشر نشده دسترسی پیدا کنید، آخرین نسخه Canary را دانلود و نصب کنید.
- یک پروژه اندروید استودیو را باز کنید.
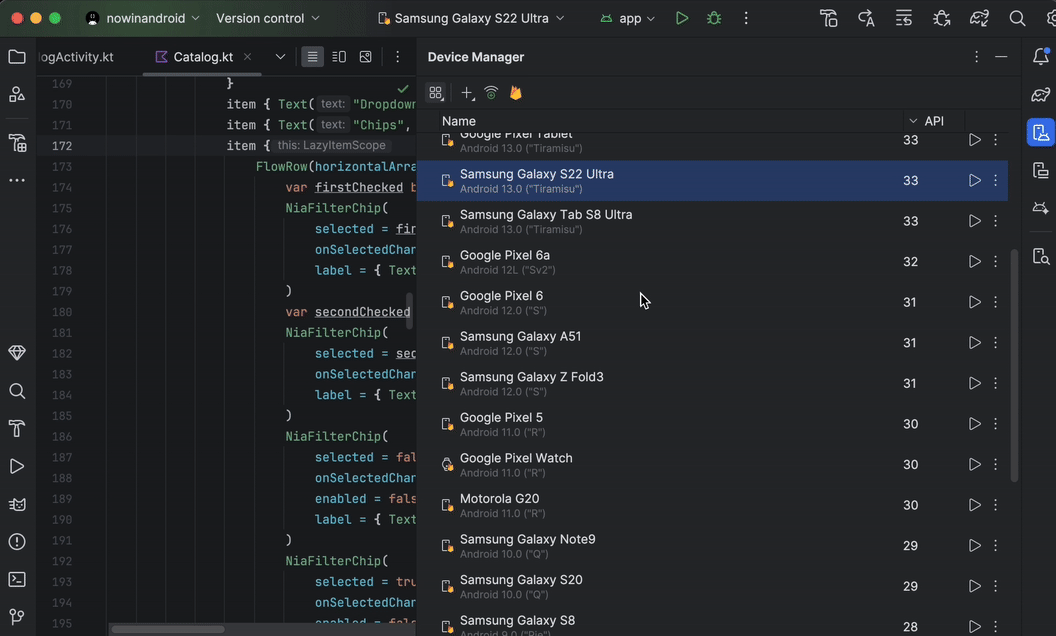
- به View > Tool Windows > Device Manager بروید و روی دکمه Firebase که نزدیک بالای پنجره قرار دارد کلیک کنید.
- اگر هنوز وارد حساب توسعهدهنده خود نشدهاید، روی «ورود به گوگل» کلیک کنید و دستورالعملها را دنبال کنید. پس از تأیید دسترسی اندروید استودیو به فایربیس، به IDE برگردید.
- یک پروژه Firebase را انتخاب کنید. همچنین میتوانید میزان سهمیه باقیمانده یا دقایق استفاده شده برای چرخه صورتحساب فعلی را مشاهده کنید.
- اگر پروژه Firebase ندارید، میتوانید آن را به صورت رایگان در کنسول Firebase ایجاد کنید. به خاطر داشته باشید، ممکن است بین ایجاد یک پروژه جدید و انتخاب آن از اندروید استودیو، کمی تأخیر وجود داشته باشد.
- اگر با خطایی مبنی بر نداشتن مجوزهای لازم برای استفاده از استریم دستگاه با پروژه انتخاب شده مواجه شدید، دستورالعملها را برای فعال کردن مجوزها دنبال کنید.
- روی تأیید کلیک کنید.
مجموعهای از دستگاههای پیشفرض باید بهطور خودکار در مدیریت دستگاهها برای استفاده شما ظاهر شوند. میتوانید با کلیک روی گزینه «شروع » در کنار دستگاه، یا با انتخاب دستگاه از منوی کشویی «هدف استقرار» در نوار ابزار اصلی و استقرار برنامه خود، مانند حالت عادی، به آن دستگاه متصل شوید.
پس از رزرو و اتصال اندروید استودیو به دستگاهی که درخواست کردهاید، پنجرهی Running Devices ظاهر میشود. برای تمدید یک جلسه، روی دکمهی Extend Reservation از نوار ابزار پنجرهی Running Devices کلیک کنید و مدت زمانی را که میخواهید جلسهی خود را تمدید کنید، انتخاب کنید.
فعال کردن مجوزها
برای استفاده از پخش جریانی دستگاه، باید از یک پروژه Firebase استفاده کنید که برای آن مجوزهای ویرایشگر یا مالک را داشته باشید.
اگر این مجوزها را برای پروژههای Firebase موجود خود ندارید، میتوانید یا به عنوان مالک (Owner) و بدون هیچ هزینهای در کنسول Firebase یک پروژه جدید ایجاد کنید، یا از کسی در تیم خود که این مجوزها را دارد بخواهید که این مراحل را دنبال کند:
- به بخش IAM در کنسول ابری گوگل بروید.
- روی مشاهده بر اساس اصول > اعطای دسترسی کلیک کنید.
- شناسههای کاربری هر کاربری که میخواهید به پخش جریانی دستگاه دسترسی داشته باشد را اضافه کنید.
- با استفاده از منوی کشویی «انتخاب یک نقش» ، نقش مدیر دسترسی مستقیم Firebase Test Lab را انتخاب کنید.
- روی «افزودن یک نقش دیگر» کلیک کنید و از منوی کشویی «انتخاب یک نقش»، «مصرفکنندهی استفاده از خدمات» را انتخاب کنید.
- با کلیک روی ذخیره، تغییرات را ذخیره کنید
کاتالوگ کامل دستگاهها را امتحان کنید
برای مرور دستگاههای اضافی و افزودن آنها به Device Manager، موارد زیر را انجام دهید:
- از مدیریت دستگاه، روی + > انتخاب دستگاه از راه دور کلیک کنید.
- در کاتالوگی که ظاهر میشود، میتوانید دستگاههای مورد نظر خود را با علامت زدن کادر کنار هر کدام انتخاب کنید.
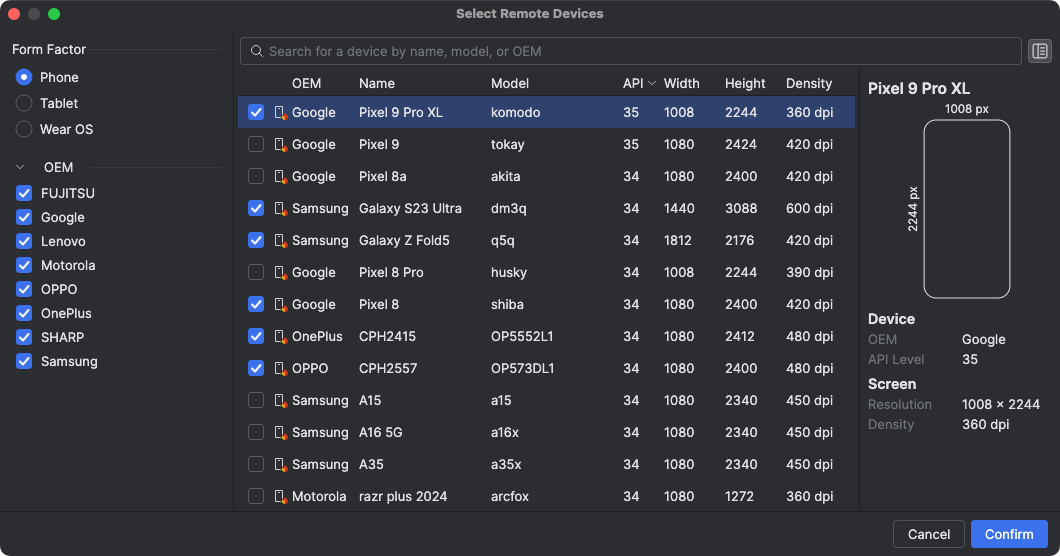
- روی تأیید کلیک کنید. دستگاه(های) انتخابی شما اکنون باید در مدیریت دستگاه ظاهر شوند.
جلسه خود را پایان دهید
وقتی کارتان با دستگاه تمام شد، به یاد داشته باشید که روی «بازگشت» و «پاک کردن دستگاه» کلیک کنید، یا از منوی سرریز مربوط به دستگاه در «مدیریت دستگاه» یا از اعلانی که پس از بستن برگه دستگاه در پنجره «دستگاههای در حال اجرا» ظاهر میشود. این کار تضمین میکند که دقایق دستگاه را بیجهت صرف نمیکنید و دستگاه شما بلافاصله پاک شده و قبل از اینکه در اختیار توسعهدهنده دیگری قرار گیرد، به تنظیمات کارخانه باز میگردد. هر دقیقه استفاده نشده از جلسه شما به پروژه شما بازگردانده میشود.
اتصال به آزمایشگاههای دستگاه شریک اندروید
آزمایشگاههای دستگاه شریک اندروید، آزمایشگاههای دستگاهی هستند که توسط شرکای گوگل مانند سامسونگ، شیائومی، اوپو، وانپلاس، ویوو، ترنسژن و دیگران اداره میشوند و انتخاب دستگاههای موجود در Android Device Streaming را گسترش میدهند. این سرویس در کانال پایدار، با شروع از Android Studio Narwhal Feature Drop، در دسترس است.
برای شروع، موارد زیر را انجام دهید:
- در مدیریت دستگاه، روی + > انتخاب دستگاههای از راه دور کلیک کنید.
- در فهرست دستگاههایی که ظاهر میشود، دستگاهی را از آزمایشگاه دستگاه شریک اندروید که میخواهید استفاده کنید، انتخاب کنید. دستگاههای آزمایشگاههای شریک با نماد دستگاه و ستون "آزمایشگاه" در فهرست مشخص میشوند. فیلترهای آزمایشگاه دستگاه به شما کمک میکنند تا دستگاههای یک یا چند آزمایشگاه دستگاه را فیلتر کنید.
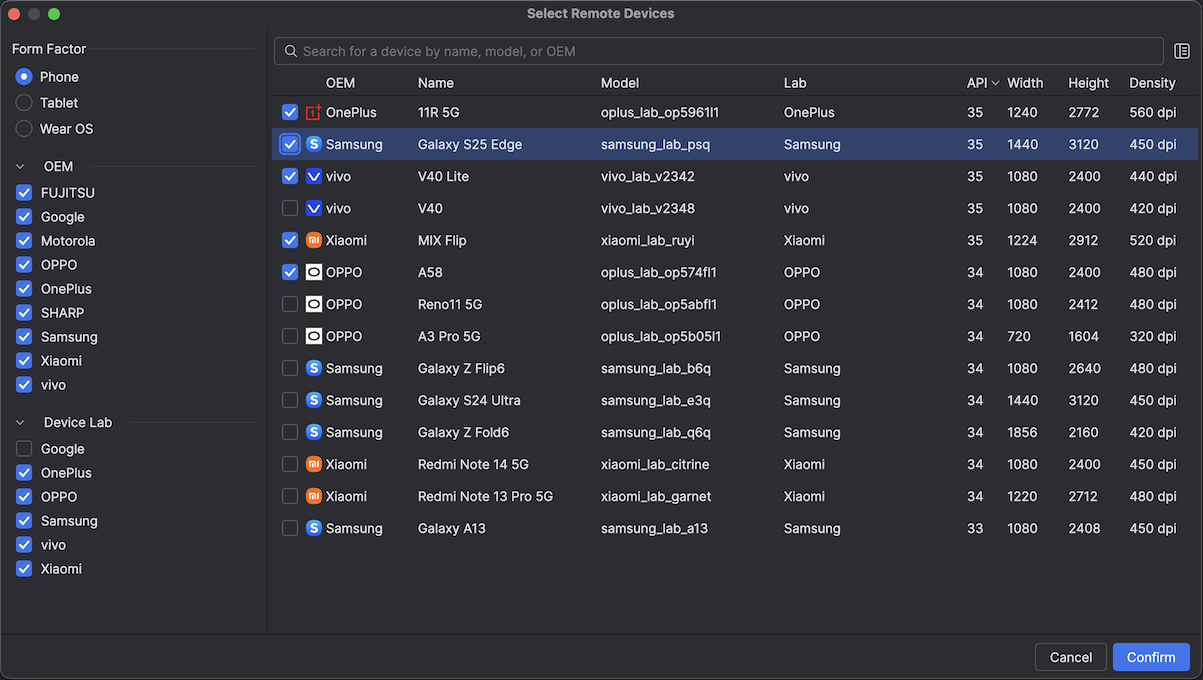
- روی تأیید کلیک کنید.
- از طریق Device Manager، میتوانید مانند هر دستگاه Android Device Streaming دیگری به دستگاه آزمایشگاه همکار متصل شوید.
فعال کردن آزمایشگاههای دستگاه شریک در کنسول ابری گوگل
اگر آزمایشگاه همکار مورد نیاز برای پروژه Firebase انتخابی شما فعال نباشد، اندروید استودیو به شما اطلاع میدهد و میتوانید دستورالعملها را برای فعال کردن آزمایشگاههای همکار انتخاب شده دنبال کنید.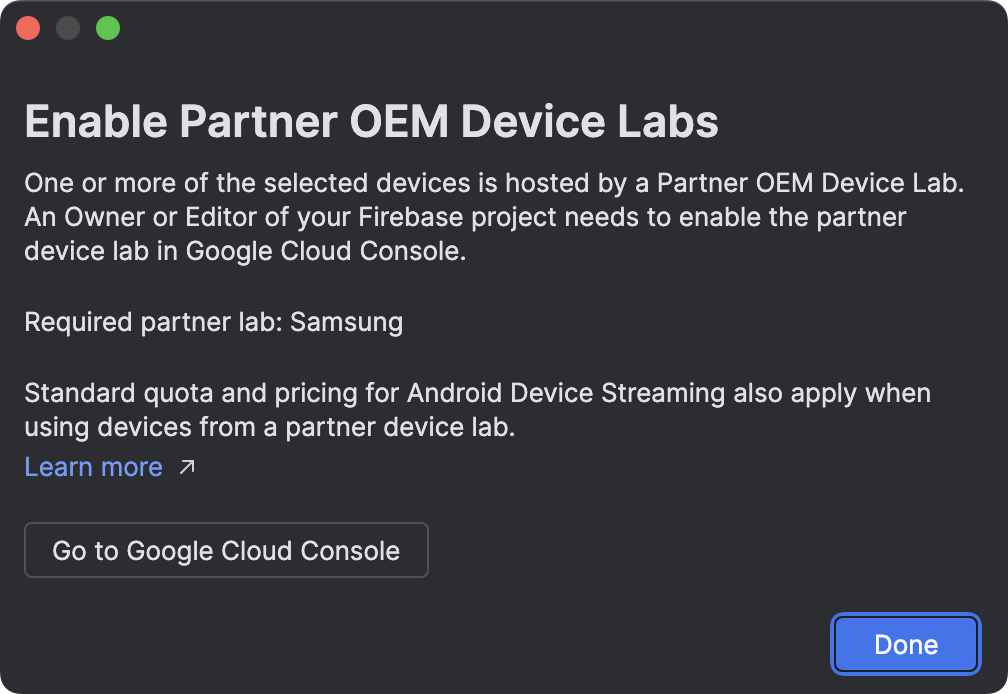
برای فعال کردن هر آزمایشگاه همکار در صفحه آزمایشگاههای دستگاه همکار در کنسول ابری گوگل، به یک ویرایشگر یا مالک پروژه نیاز است. در اینجا نحوه فعال کردن یک آزمایشگاه همکار آمده است:
- بررسی کنید که پروژه صحیح Google Cloud در بالای صفحه انتخاب شده باشد.
- روی گزینهی مربوط به آزمایشگاه دستگاهی که میخواهید فعال کنید کلیک کنید و دستورالعملها را دنبال کنید.
- پس از فعال شدن آزمایشگاه همکار، شما و تیمتان میتوانید از دستگاهها در اندروید استودیو استفاده کنید.
قیمتگذاری برای استریمینگ دستگاه اندروید
برای اطلاعات بیشتر، به سطوح استفاده، سهمیهها و قیمتگذاری Firebase مراجعه کنید.
سوالات متداول
چه چیزی Android Device Streaming که توسط Firebase ارائه میشود را متفاوت میکند؟
دستگاهها، امنیت و ویژگیها. سرویس پخش دستگاه اندروید جایی است که میتوانید انتظار داشته باشید در سریعترین زمان ممکن به برخی از جدیدترین دستگاههای اندروید دسترسی داشته باشید. علاوه بر این، این سرویس از تعداد محدودی از دستگاههای قدیمیتر پشتیبانی میکند، به طوری که شما به طیف گستردهای از پیکربندیها و سطوح API دسترسی دارید. و از آنجا که این دستگاهها در مراکز داده امن قرار دارند، جلسات شما ایمن هستند و دستگاههای شما قبل از اینکه در دسترس کاربر دیگری قرار گیرند، به تنظیمات کارخانه بازنشانی و پاک میشوند.
در نهایت، این سرویس مستقیماً با اندروید استودیو یکپارچه شده و از طریق اتصال SSL از طریق ADB قابل دسترسی است، بنابراین ابزارهایی که هر روز از طریق ADB استفاده میکنید، به طور یکپارچه با استریم دستگاه کار میکنند.
هزینه خدمات چقدر است؟
برای جزئیات قیمتگذاری، به قیمتگذاری پخش جریانی دستگاه اندروید مراجعه کنید.
آیا جلسه من امن است و وقتی جلسه من تمام شود چه اتفاقی میافتد؟
هر دستگاه در مراکز داده امن گوگل قرار دارد و با استفاده از اتصال ADB از طریق SSL به ایستگاه کاری شما متصل میشود. پس از پایان جلسه شما، دادههای دستگاه به طور کامل پاک شده و قبل از اینکه دستگاه در اختیار توسعهدهنده دیگری قرار گیرد، به تنظیمات کارخانه بازنشانی میشود.
آیا باید از اندروید استودیو استفاده کنم؟
اگرچه برای اتصال به سرویس و درخواست دستگاه، به اندروید استودیو Jellyfish یا نسخههای جدیدتر آن نیاز است، اما اتصال مستقیم ADB از طریق SSL به شما امکان میدهد پس از رزرو و اتصال به یک دستگاه، از هر ابزار یا IDE که از ADB برای ارتباط با دستگاههای آزمایشی استفاده میکند، استفاده کنید.
مجوزها
مجوزهای سرویس را ببینید.