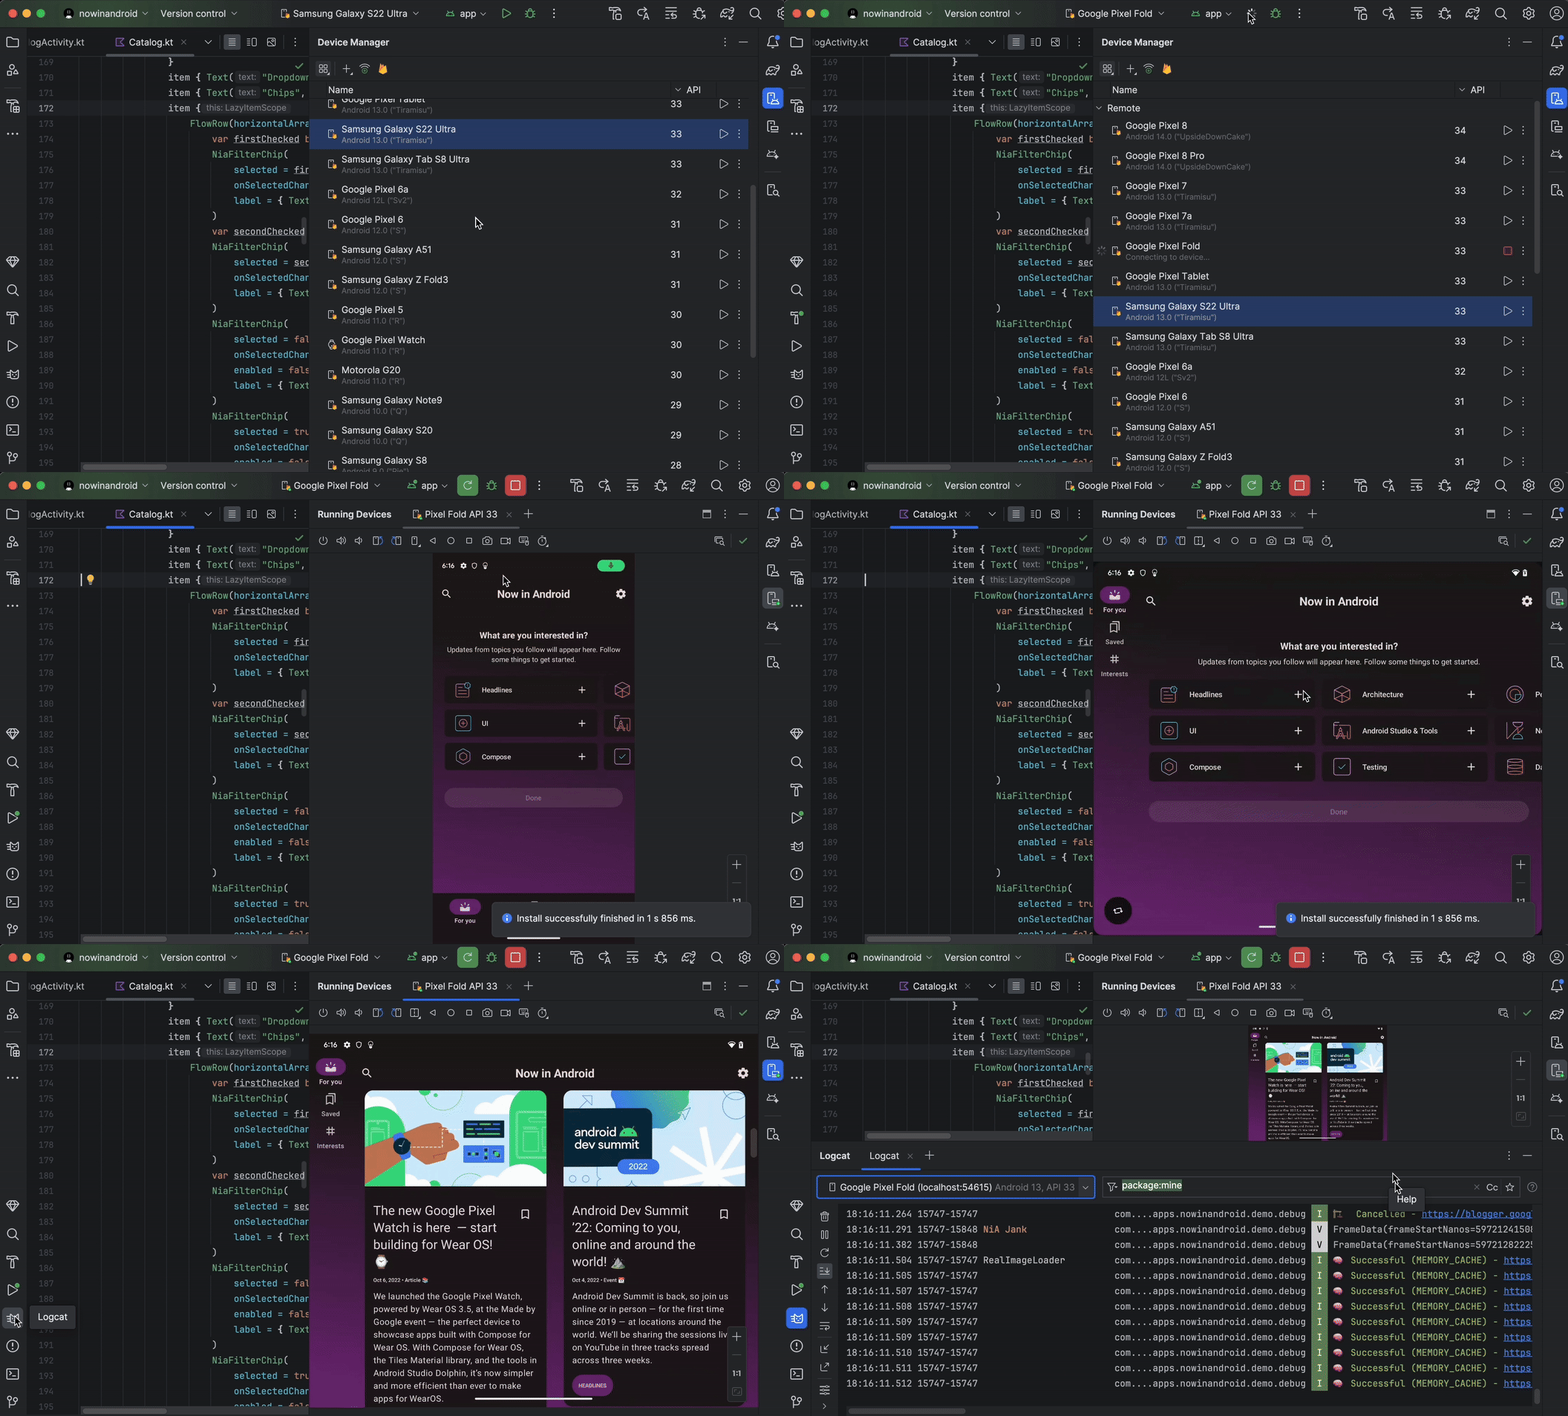
Android Device Streaming, powered by Firebase, lets you securely connect to remote physical Android devices hosted in Google's secure data centers and Android Partner Device Labs. It's the fastest and easiest way to test your app against physical units of some of the latest Android devices, including the Google Pixel 9, 9a 9 Pro, Pixel Fold, and a diverse set of models from Samsung, OPPO, OnePlus, Xiaomi, vivo, and Transsion.

Currently, device streaming is available to you to try at no cost with Firebase projects on a Spark plan. Usage beyond the monthly no cost minutes may incur billing. See Pricing for Android Device Streaming for more information.
After connecting to a device, you can deploy your app, view the display, interact with the device (including rotating or unfolding the device), and anything else you might do with a device using an ADB over SSL connection—all without leaving Android Studio. When you're done using the device, Google wipes all your data and factory resets the device before making it available to another developer.
Get started
To get started, follow these steps:
- If you haven't already done so, download and install the latest version of Android Studio. If you'd like early access to unreleased features, download and install the latest Canary release.
- Open an Android Studio project.
- Navigate to View > Tool Windows > Device Manager and click the Firebase button near the top of the window.
- If you're not already signed in to your developer account, click Log in to Google and follow the prompts. After authorizing Android Studio to access Firebase, return to the IDE.
- Select a Firebase project. You can also see the amount of quota you
have remaining or minutes used for current billing cycle.
- If you don't have a Firebase project, you can create one at no cost in the Firebase Console. Keep in mind, there might be a small delay between creating a new project and having it be selectable from Android Studio.
- If you get an error that you lack the proper permissions to use device streaming with the selected project, follow the instructions to enable permissions.
- Click Confirm.
A default set of devices should appear automatically in the Device Manager for you to use. You can connect to a device by either clicking Start action next to a device, or by selecting a device from the deploy target drop-down in the main toolbar and deploying your app, like you normally would.
After Android Studio reserves and connects to the device you requested, the Running Devices window will appear. To extend a session, click the Extend Reservation button from the Running Devices window toolbar and select the duration you want to extend your session by.
Enable permissions
To use device streaming, you need to use a Firebase project for which you have either Editor or Owner permissions.
If you don't have these permissions for your existing Firebase projects, you can either create a new one as an Owner at no cost in the Firebase Console, or ask someone on your team who does to follow these steps:
- Navigate to the IAM section of the Google Cloud Console.
- Click View by principles > Grant access.
- Add the user IDs for each user you want to be able to access device streaming.
- Using the Select a role drop-down, select the Firebase Test Lab Direct Access Admin role.
- Click Add another role and select Service Usage Consumer from the Select a role drop-down.
- Save the changes by clicking Save
Try the full catalog of devices
To browse additional devices and add them to the Device Manager, do the following:
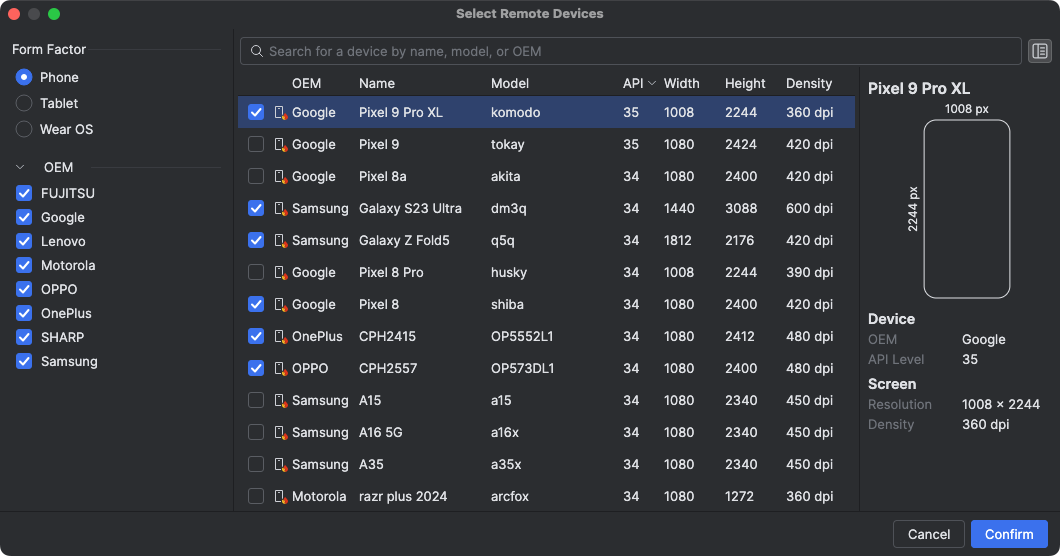
- From the Device Manager, click + > Select Remote Device.
- In the catalog that appears, you can select the devices you want by checking
the box next to each one.

- Click Confirm. The device(s) you selected should now appear in the Device Manager.
End your session
When you're done using a device, remember to click Return and Erase Device either from the overflow menu for the device in the Device Manager or from the notification that appears after closing the device tab in the Running Devices window. This ensures that you don't spend device minutes unnecessarily, and your device is immediately wiped and factory reset after before it is made available to another developer. Any unused minutes from your session are returned to your project.
Connect to Android Partner Device Labs
Android Partner Device Labs are device labs operated by Google OEM partners, such as Samsung, Xiaomi, OPPO, OnePlus, vivo, Transsion, and others, and expand the selection of devices available in Android Device Streaming. This service is available in the Stable channel, starting with Android Studio Narwhal Feature Drop.
To get started, do the following:
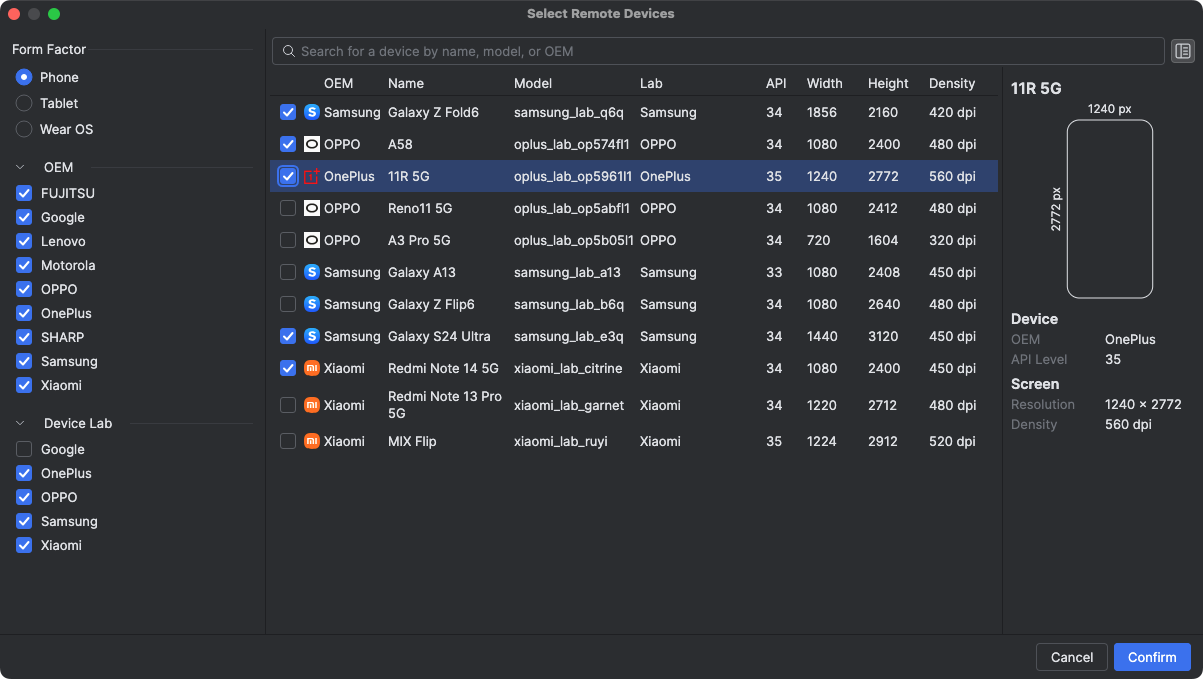
- In the Device Manager, click + > Select Remote Devices.
- In the device catalog that appears, select a device from an Android Partner
Device Lab that you’d like to use. Devices from partner labs are denoted by
their device icon and the "Lab" column in the catalog. Device Lab filters
help you filter for devices from one only or more device labs.

- Click Confirm.
- From the Device Manager, you can connect to the partner lab device like you would any other Android Device Streaming device.
Enable Partner Device Labs in Google Cloud Console
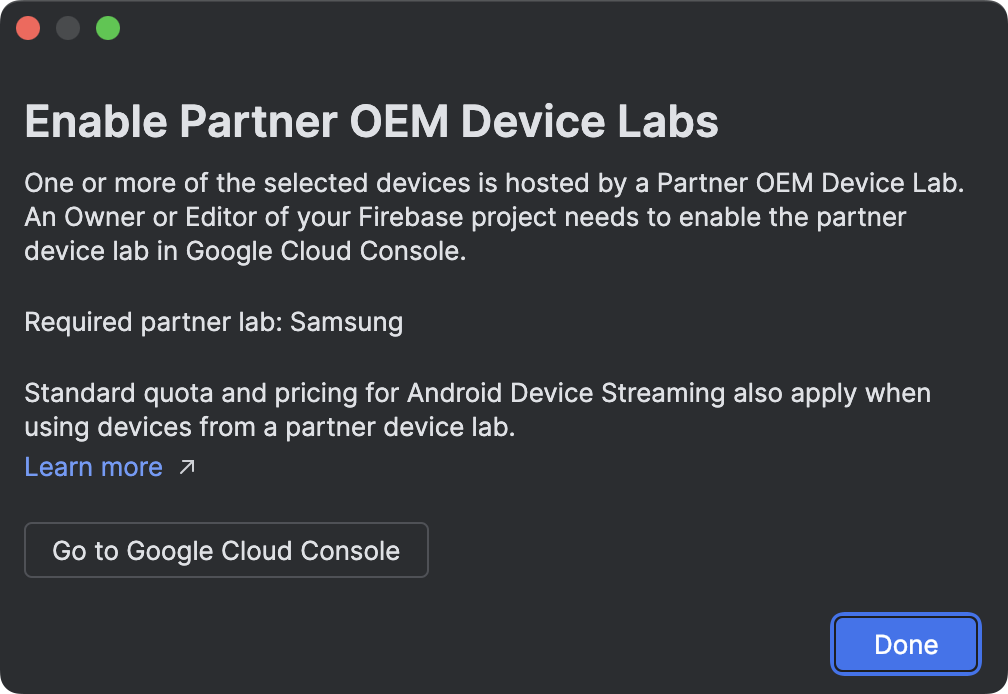
If the required partner lab is not enabled for your selected Firebase project
Android Studio will notify you, and you can follow the prompts to enable the
selected partner labs.

An Editor or Owner of the project is required to enable each partner lab on the Partner Device Labs page in Google Cloud Console. Here's how to enable a partner lab:
- Check to make sure that the correct Google Cloud project is selected at the top of the page.
- Click the toggle for the device lab you want to enable and follow the prompts.
- After the partner lab is enabled, you and your team can use the devices in Android Studio.
Pricing for Android Device Streaming
For more information, see Firebase usage levels, quotas, and pricing.
Frequently asked questions
What makes Android Device Streaming, powered by Firebase, different?
Devices, security, and features. Android Device Streaming is where you can expect to have access to some of the latest Android devices as quickly as possible. Additionally, the service supports a select number of older devices, so that you have access to a wide range of configurations and API levels. And because these devices are housed in secure data centers, your sessions are secure and your devices are factory reset and wiped before they are made available to another user.
Finally, the service is integrated directly with Android Studio and accessible over an ADB over SSL connection, so the tools you use every day over ADB work seamlessly with device streaming.
How much does the service cost?
For pricing details, see Pricing for Android Device Streaming.
Is my session secure and what happens when my session ends?
Each device is located in Google's secure data centers and connects to your workstation using an ADB over SSL connection. When your session ends, device data is fully wiped and factory reset before the device is made available to another developer.
Do I need to use Android Studio?
While Android Studio Jellyfish or later is required to connect to the service and request a device, the direct ADB over SSL connection lets you use any tools or IDEs that use ADB to communicate with test devices after you reserve and connect to a device.
Permissions
See service permissions.
