
Gemini in Android Studio's Agent Mode is designed to handle complex, multi-stage development tasks. You can describe a high-level goal, and the agent creates and executes a plan, invoking the necessary tools, making changes across multiple files, and iteratively fixing bugs. This agent-assisted workflow lets you tackle intricate challenges, accelerating your development process.
Get started
To get started in Agent Mode in Android Studio, follow these steps:
- Click Agent
 in the tool window bar. Sign in and onboard if you need to.
 Describe the task you want the agent to perform.
Figure 1: Gemini in Android Studio's Agent Mode. Review and approve any changes as the agent works to accomplish the task.
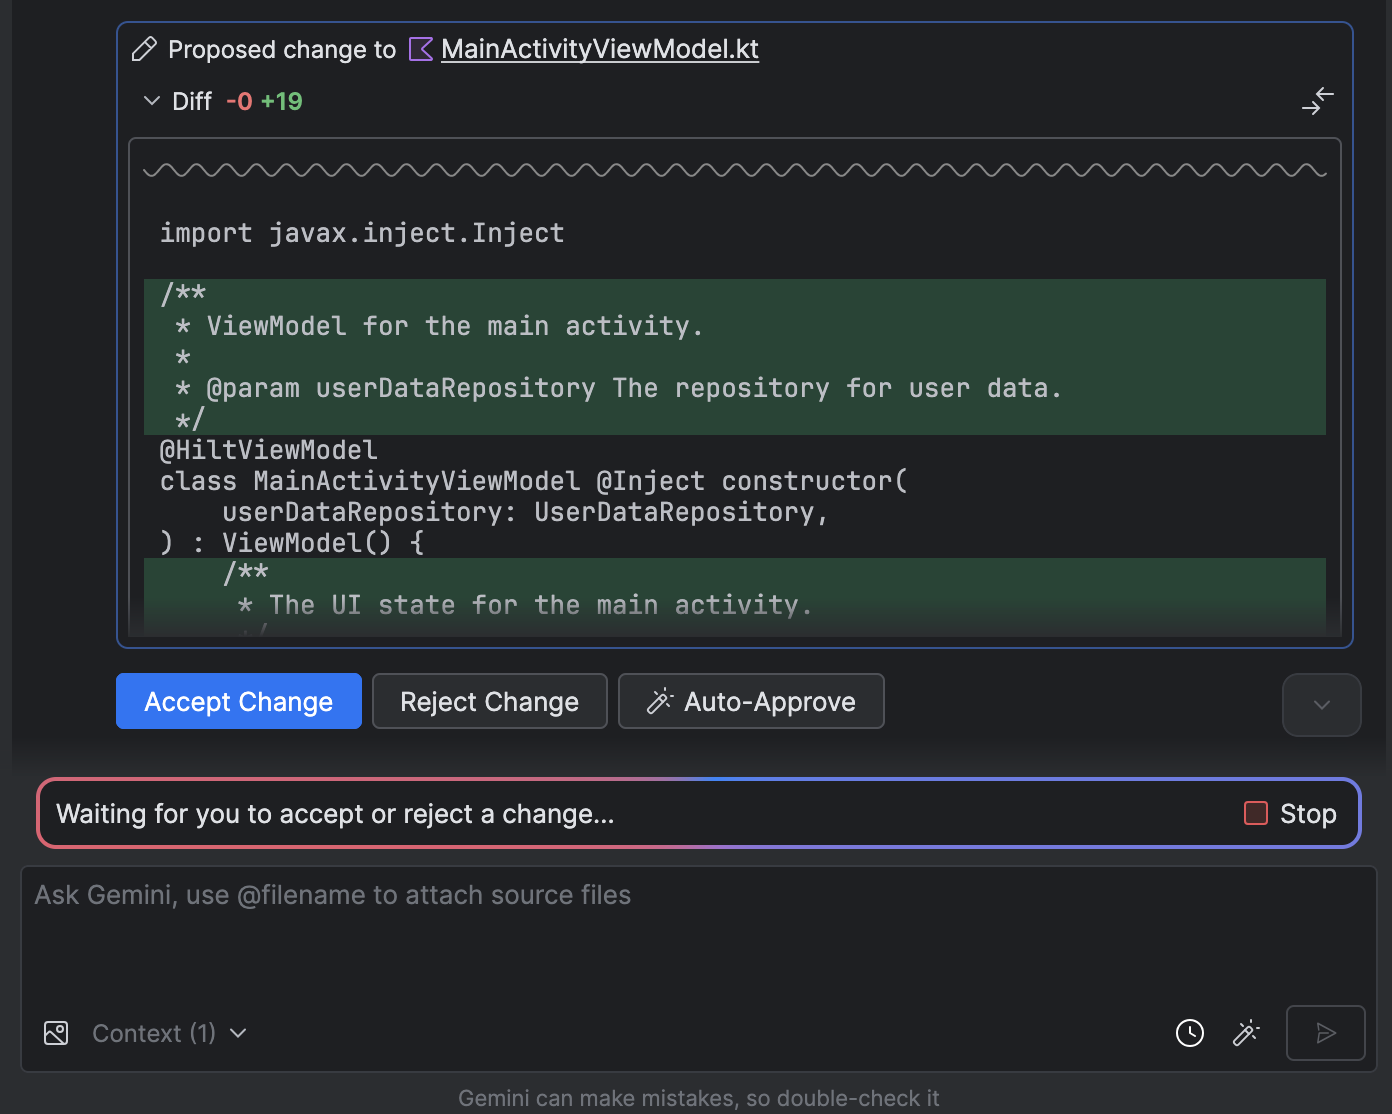
Figure 2: Agent Mode waits for you to accept or reject a change. Optional: To run multiple conversations in parallel, click New Chat
 in the Agent pane to start a new conversation thread. This lets you run
multiple tasks at the same time (for example, generating tests in one
conversation while planning a new feature in another). You can switch
between active conversations and monitor their progress using the Recent
Chats panel.
in the Agent pane to start a new conversation thread. This lets you run
multiple tasks at the same time (for example, generating tests in one
conversation while planning a new feature in another). You can switch
between active conversations and monitor their progress using the Recent
Chats panel.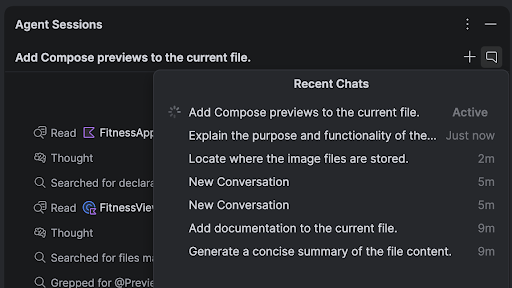
Figure 3: Multiple active chat threads in the tool window.
Use cases
Here are some examples of use cases that the agent can help you with:
Fix build errors. When you ask the agent to fix a build error using a prompt like "Fix build errors in my project," it applies a recommended fix, builds the project to verify the solution, and iterates until the issue is resolved.
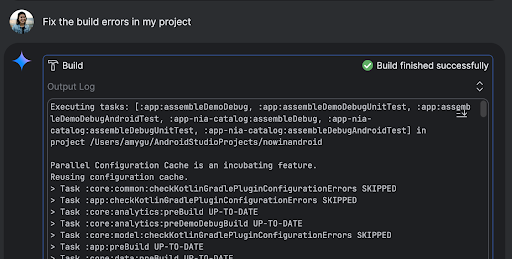
Figure 4: The agent builds your project and assesses if there are errors. Add or update UI elements. The agent can add or update UI elements. For example, ask the agent to "Make dark theme the default in user preferences" and it searches for the relevant files and suggests changes to accomplish the task. You can immediately preview the UI updates in the Running devices tool window.
Figure 5: The agent updating UI elements. Generate mock data. When prototyping and testing your app, you can ask the agent to generate mock data instead of manually creating it. For example, when prompted to "Add two more sessions to the fake data," the agent finds the relevant file and adds two more events to the
mockSessionslist.Figure 6: The agent generating mock data. Test and verify changes on a device. The AI agent in Android Studio has access to tools to deploy an app to the connected device, inspect what is shown on the screen, take screenshots, check Logcat for errors, and interact with the running app through
adb shell input. This lets the agent help you with changes or fixes that involve re-running the app, checking for errors, and verifying that a particular update was made successfully (for example, by taking and reviewing screenshots).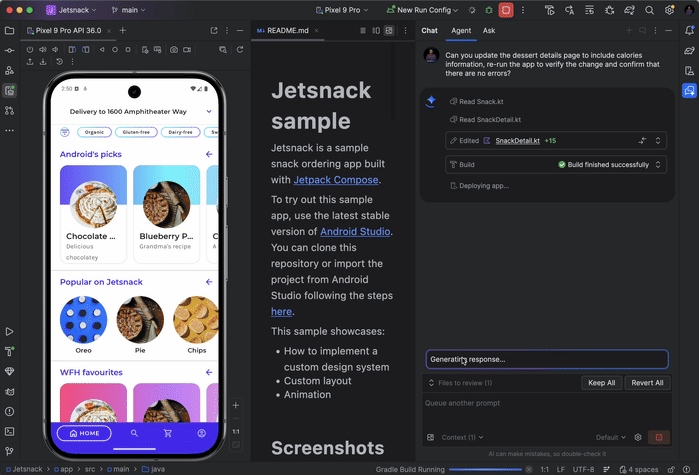
Figure 7: The agent tests and verifies changes on a device.
Some other prompts to try:
- "Write unit tests for <class> in <module>"
- "Generate documentation for the open file"
- "Change the app title from <current name> to <new name>"
- "Resolve the null pointer exception"
- "Refactor my code by moving the <composable name> composable to a new file. Verify that all imports are updated"
- "Add a new button to the app's home screen called 'Follow' that takes you to a list of topics"
- "In the <composable name> composable, reduce the padding of the <modifier name> modifier"
- "Create a share button to share to social media"
How the agent works
In Agent Mode, your prompt is sent to the Gemini API with a list of tools that are available. You can think of tools as skills: they include the ability to search for files, read files, search the text within files, use any MCP servers you have configured, and more.
When you give the agent a task, it creates a plan and determines which tools are needed. Some of these tools might need you to grant permission before the agent can use them. Once you grant permission, the agent uses the tool to perform the necessary action and sends the result back to the Gemini API. Gemini processes the result of the action and generates another response. This cycle of action and evaluation continues until the task is complete.