
Bạn có thể thêm giao diện người dùng dựa trên Compose vào một ứng dụng hiện có sử dụng thiết kế dựa trên Khung hiển thị.
Để tạo một màn hình mới hoàn toàn dựa trên Compose, hãy gọi phương thức setContent() và truyền bất kỳ hàm có khả năng kết hợp nào mà bạn muốn.
class ExampleActivity : ComponentActivity() { override fun onCreate(savedInstanceState: Bundle?) { super.onCreate(savedInstanceState) setContent { // In here, we can call composables! MaterialTheme { Greeting(name = "compose") } } } } @Composable fun Greeting(name: String) { Text(text = "Hello $name!") }
Đoạn mã trên được viết giống hệt những gì bạn sẽ thấy trong bất kỳ ứng dụng thuần Compose nào
ViewCompositionStrategy cho ComposeView
ViewCompositionStrategy xác định thời điểm cần loại bỏ Thành phần. Theo mặc định, ViewCompositionStrategy.Default sẽ xử lý Composition khi ComposeView cơ bản tách khỏi cửa sổ, trừ phi đó là một phần của vùng chứa gộp như RecyclerView. Trong một ứng dụng chỉ có Compose và chỉ có một Hoạt động, bạn sẽ muốn có hành vi mặc định này. Tuy nhiên, nếu đang tăng dần việc thêm Compose vào cơ sở mã của mình, thì hành vi này có thể gây mất trạng thái trong một số trường hợp.
Để thay đổi ViewCompositionStrategy, hãy gọi phương thức setViewCompositionStrategy() và cung cấp một chiến lược khác.
Bảng dưới đây tóm tắt các tình huống mà bạn có thể sử dụng ViewCompositionStrategy:
ViewCompositionStrategy |
Nội dung mô tả và tình huống tương tác |
|---|---|
DisposeOnDetachedFromWindow |
Composition sẽ bị huỷ khi ComposeView cơ bản bị tách khỏi cửa sổ. Đã được thay thế bằng DisposeOnDetachedFromWindowOrReleasedFromPool.Tình huống tương tác: * ComposeView cho dù đó là phần tử duy nhất trong hệ phân cấp Thành phần hiển thị hay trong bối cảnh màn hình kết hợp Thành phần hiển thị/Compose (không có trong Mảnh). |
DisposeOnDetachedFromWindowOrReleasedFromPool (Mặc định) |
Tương tự như DisposeOnDetachedFromWindow, khi Composition không nằm trong vùng chứa gộp, chẳng hạn như RecyclerView. Nếu nằm trong một vùng chứa nhóm, thì vùng chứa đó sẽ bị loại bỏ khi chính vùng chứa nhóm tách khỏi cửa sổ hoặc khi mục bị loại bỏ (tức là khi nhóm đầy).Tình huống tương tác: * ComposeView cho dù đó là phần tử duy nhất trong hệ phân cấp Chế độ xem hay trong bối cảnh màn hình kết hợp Chế độ xem/Compose (không nằm trong mảnh).* ComposeView dưới dạng một mục trong vùng chứa nhóm, chẳng hạn như RecyclerView. |
DisposeOnLifecycleDestroyed |
Thành phần kết hợp sẽ bị loại bỏ khi Lifecycle được cung cấp bị huỷ.Tình huống tương tác * ComposeView trong khung hiển thị của một mảnh. |
DisposeOnViewTreeLifecycleDestroyed |
Thành phần kết hợp sẽ bị huỷ bỏ khi Lifecycle do LifecycleOwner sở hữu được trả về bởi ViewTreeLifecycleOwner.get của cửa sổ tiếp theo mà Khung hiển thị được đính kèm sẽ bị huỷ.Tình huống tương tác: * ComposeView trong Khung hiển thị của một Phân mảnh.* ComposeView trong một Khung hiển thị mà Vòng đời chưa được biết. |
ComposeView trong Fragment (Mảnh)
Nếu bạn muốn kết hợp nội dung trên giao diện người dùng Compose trong một mảnh hoặc bố cục Khung hiển thị hiện có, hãy sử dụng lớp ComposeView và gọi phương thức setContent(). Lớp ComposeView là một lớp cơ sở View của Android.
Bạn có thể đặt lớp ComposeView vào bố cục XML giống như đối với bất kỳ lớp cơ sở View nào khác:
<LinearLayout xmlns:android="http://schemas.android.com/apk/res/android" android:orientation="vertical" android:layout_width="match_parent" android:layout_height="match_parent"> <TextView android:id="@+id/text" android:layout_width="wrap_content" android:layout_height="wrap_content" /> <androidx.compose.ui.platform.ComposeView android:id="@+id/compose_view" android:layout_width="match_parent" android:layout_height="match_parent" /> </LinearLayout>
Trong mã nguồn Kotlin, hãy tăng cường sử dụng bố cục trong tài nguyên bố cục được định nghĩa trong XML. Tiếp theo, tạo lớp ComposeView bằng mã XML, đặt chiến lược Bố cục phù hợp nhất với máy chủ View và gọi phương thức setContent() để sử dụng tính năng từ Compose.
class ExampleFragmentXml : Fragment() { override fun onCreateView( inflater: LayoutInflater, container: ViewGroup?, savedInstanceState: Bundle? ): View { val view = inflater.inflate(R.layout.fragment_example, container, false) val composeView = view.findViewById<ComposeView>(R.id.compose_view) composeView.apply { // Dispose of the Composition when the view's LifecycleOwner // is destroyed setViewCompositionStrategy(ViewCompositionStrategy.DisposeOnViewTreeLifecycleDestroyed) setContent { // In Compose world MaterialTheme { Text("Hello Compose!") } } } return view } }
Ngoài ra, bạn cũng có thể sử dụng tính năng liên kết khung hiển thị để lấy các tham chiếu đến ComposeView bằng cách tham chiếu đến lớp liên kết đã tạo cho tệp bố cục XML:
class ExampleFragment : Fragment() { private var _binding: FragmentExampleBinding? = null // This property is only valid between onCreateView and onDestroyView. private val binding get() = _binding!! override fun onCreateView( inflater: LayoutInflater, container: ViewGroup?, savedInstanceState: Bundle? ): View { _binding = FragmentExampleBinding.inflate(inflater, container, false) val view = binding.root binding.composeView.apply { // Dispose of the Composition when the view's LifecycleOwner // is destroyed setViewCompositionStrategy(ViewCompositionStrategy.DisposeOnViewTreeLifecycleDestroyed) setContent { // In Compose world MaterialTheme { Text("Hello Compose!") } } } return view } override fun onDestroyView() { super.onDestroyView() _binding = null } }
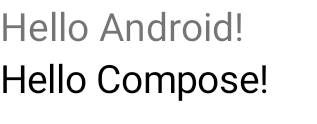
Hình 1. Hình trên thể hiện kết quả chạy của đoạn mã trên sau khi thêm các phần tử Compose vào một hệ phân cấp Giao diện người dùng. Dòng chữ "Hello Android!" ("Xin chào Android!") hiển thị nhờ tiện ích TextView. Dòng chữ "Hello Compose!" ("Xin chào Compose!") hiển thị nhờ phần tử Compose.
Bạn cũng có thể trực tiếp đưa lớp ComposeView vào một mảnh nếu chế độ toàn màn hình của bạn được tạo bằng Compose. Điều này giúp bạn tránh hoàn toàn việc sử dụng tệp bố cục XML.
class ExampleFragmentNoXml : Fragment() { override fun onCreateView( inflater: LayoutInflater, container: ViewGroup?, savedInstanceState: Bundle? ): View { return ComposeView(requireContext()).apply { // Dispose of the Composition when the view's LifecycleOwner // is destroyed setViewCompositionStrategy(ViewCompositionStrategy.DisposeOnViewTreeLifecycleDestroyed) setContent { MaterialTheme { // In Compose world Text("Hello Compose!") } } } } }
Nhiều thực thể ComposeView trong cùng một bố cục
Nếu có nhiều phần tử ComposeView trong cùng một bố cục, thì mỗi phần tử phải có một mã nhận dạng duy nhất để savedInstanceState hoạt động.
class ExampleFragmentMultipleComposeView : Fragment() { override fun onCreateView( inflater: LayoutInflater, container: ViewGroup?, savedInstanceState: Bundle? ): View = LinearLayout(requireContext()).apply { addView( ComposeView(requireContext()).apply { setViewCompositionStrategy( ViewCompositionStrategy.DisposeOnViewTreeLifecycleDestroyed ) id = R.id.compose_view_x // ... } ) addView(TextView(requireContext())) addView( ComposeView(requireContext()).apply { setViewCompositionStrategy( ViewCompositionStrategy.DisposeOnViewTreeLifecycleDestroyed ) id = R.id.compose_view_y // ... } ) } }
Mã nhận dạng ComposeView được định nghĩa trong tệp res/values/ids.xml:
<resources> <item name="compose_view_x" type="id" /> <item name="compose_view_y" type="id" /> </resources>
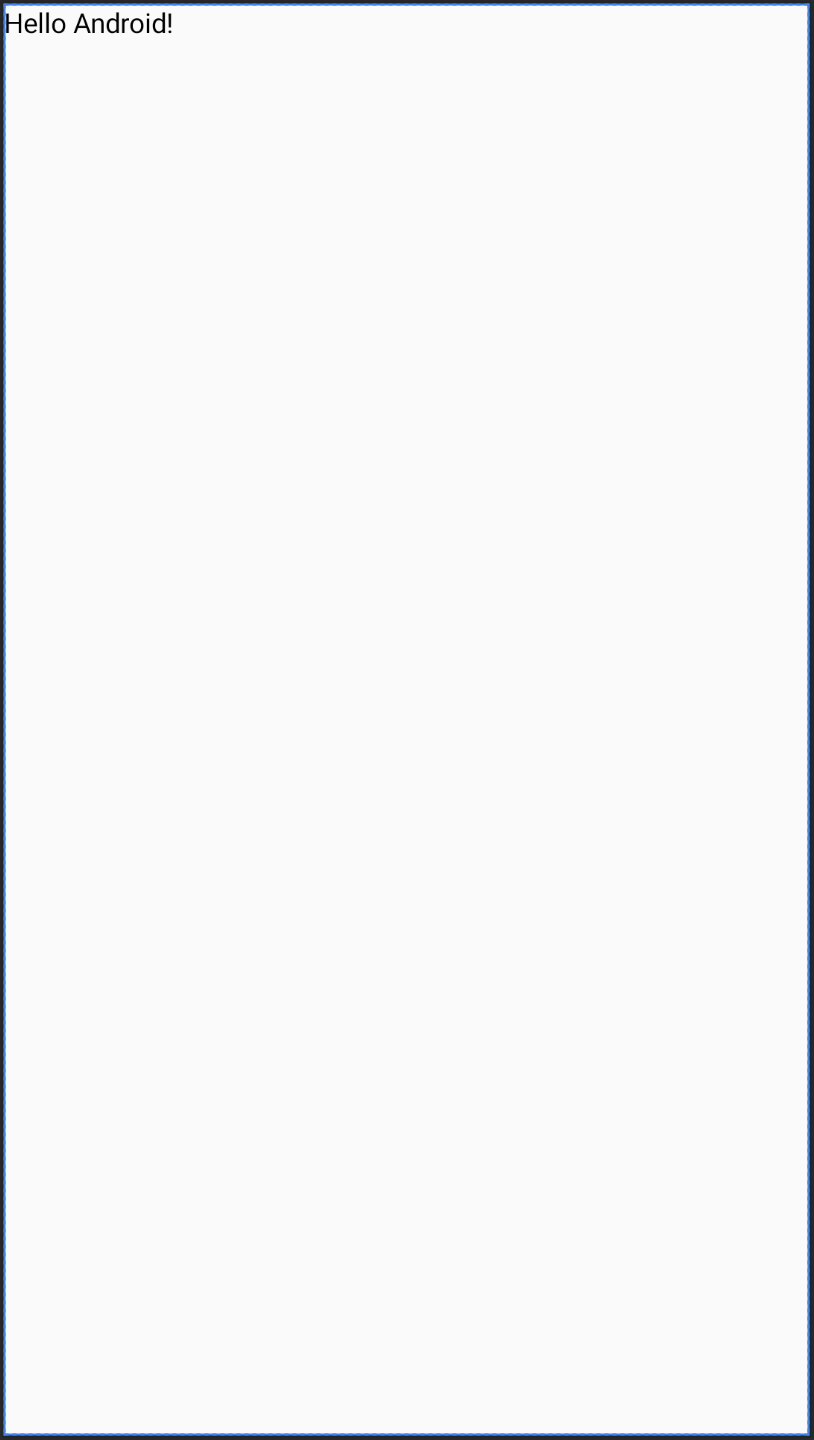
Xem trước thành phần kết hợp trong Layout Editor
Bạn cũng có thể xem trước các thành phần kết hợp trong Layout Editor cho bố cục XML có chứa một ComposeView. Khi làm như vậy, bạn có thể xem giao diện của các thành phần kết hợp trong bố cục kết hợp giữa Khung hiển thị và Compose.
Giả sử bạn muốn hiển thị thành phần kết hợp sau trong Layout Editor. Xin lưu ý rằng các thành phần kết hợp được chú giải bằng @Preview là những thành phần phù hợp để xem trước trong Layout Editor.
@Preview @Composable fun GreetingPreview() { Greeting(name = "Android") }
Để hiển thị thành phần kết hợp này, hãy sử dụng thuộc tính tools:composableName của công cụ và đặt giá trị của thuộc tính này thành tên đủ điều kiện của thành phần kết hợp để xem trước trong bố cục.
<LinearLayout xmlns:android="http://schemas.android.com/apk/res/android" xmlns:tools="http://schemas.android.com/tools" android:orientation="vertical" android:layout_width="match_parent" android:layout_height="match_parent"> <androidx.compose.ui.platform.ComposeView android:id="@+id/my_compose_view" tools:composableName="com.example.compose.snippets.interop.InteroperabilityAPIsSnippetsKt.GreetingPreview" android:layout_height="match_parent" android:layout_width="match_parent"/> </LinearLayout>
Các bước tiếp theo
Giờ đây, bạn đã biết các API có khả năng tương tác để sử dụng Compose trong Khung hiển thị, hãy tìm hiểu cách sử dụng Khung hiển thị trong Compose.
Đề xuất cho bạn
- Lưu ý: văn bản có đường liên kết sẽ hiện khi JavaScript tắt
- Những điểm khác cần cân nhắc
- Chiến lược di chuyển {:#migration-strategy}
- So sánh hiệu suất của Compose và View