
Test in Android Studio and Test from the command line explain how to set up and run basic test configurations. However, when your app and its test requirements get more advanced, you may need to adapt your test configurations further. For example, you might need advanced test setup when you want to do the following:
- Run instrumented tests only for a specific build variant or override its manifest settings.
- Change the build type your tests run against or configure its Gradle options.
- Extract your instrumented tests into their own test module.
- В рамках настройки непрерывной интеграции выполняйте более сложные виды тестирования.
This page describes various ways to configure your tests when the default settings don't fit your needs.
Create an instrumented test for a build variant
If your project includes build variants with unique source sets, you might want to include instrumented tests that correspond to those source sets. This keeps your test code organized and lets you run only the tests that apply to a given build variant.
To link instrumented tests to a build variant, place them in their own source set, located at src/androidTest VariantName .
Instrumented tests in the src/androidTest/ source set are shared by all build variants. When building a test APK for the "MyFlavor" variant of your app, Gradle combines the src/androidTest/ and src/androidTestMyFlavor/ source sets.
To add a testing source set for your build variant in Android Studio, follow these steps:
- In the Project window, click the menu and select the Project view.
- В папке соответствующего модуля щелкните правой кнопкой мыши папку src и выберите «Создать» > «Каталог» .
- For the directory name, enter "androidTest VariantName ." For example, if you have a build variant called "MyFlavor," use the directory name
androidTestMyFlavor. - Click OK .
- Щелкните правой кнопкой мыши по созданной папке и выберите «Создать» > «Папка» .
- Enter "java" as the directory name, then click OK .
Now you can add tests to this new source set by following the steps to add a new test . When you reach the Choose Destination Directory dialog, select the new variant test source set.
The following table shows an example of how instrumentation test files could reside in source sets that correspond to the app's code source sets:
Table 1. App source code and corresponding instrumentation test files
| Path to app class | Path to matching instrumentation test class |
|---|---|
src/main/kotlin+java/Example.kt | src/androidTest/java/AndroidExampleTest.kt |
src/myFlavor/kotlin+java/Example.kt | src/androidTestMyFlavor/java/AndroidExampleTest.kt |
Just as it does for your app source sets, the Gradle build merges and overrides files from different test source sets. In this case, the AndroidExampleTest.kt file in the androidTestMyFlavor source set overrides the version in the androidTest source set. This is because the product flavor source set has priority over the main source set.
When you select different flavors in the build variants selector, the appropriate androidTest folders are displayed in the Android view to show the folders that are used:
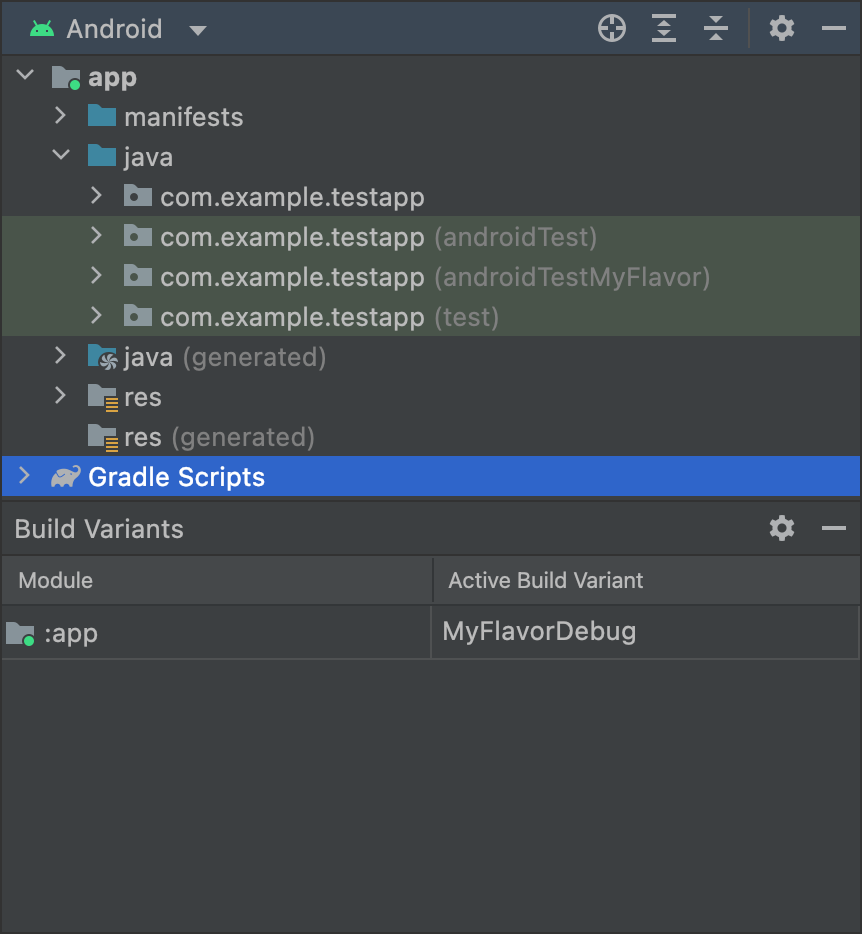
MyFlavor variant selected; the androidTestMyFlavor folder displays in the Android view. Папка androidTestMyFlavor не отображается при выборе другого варианта:
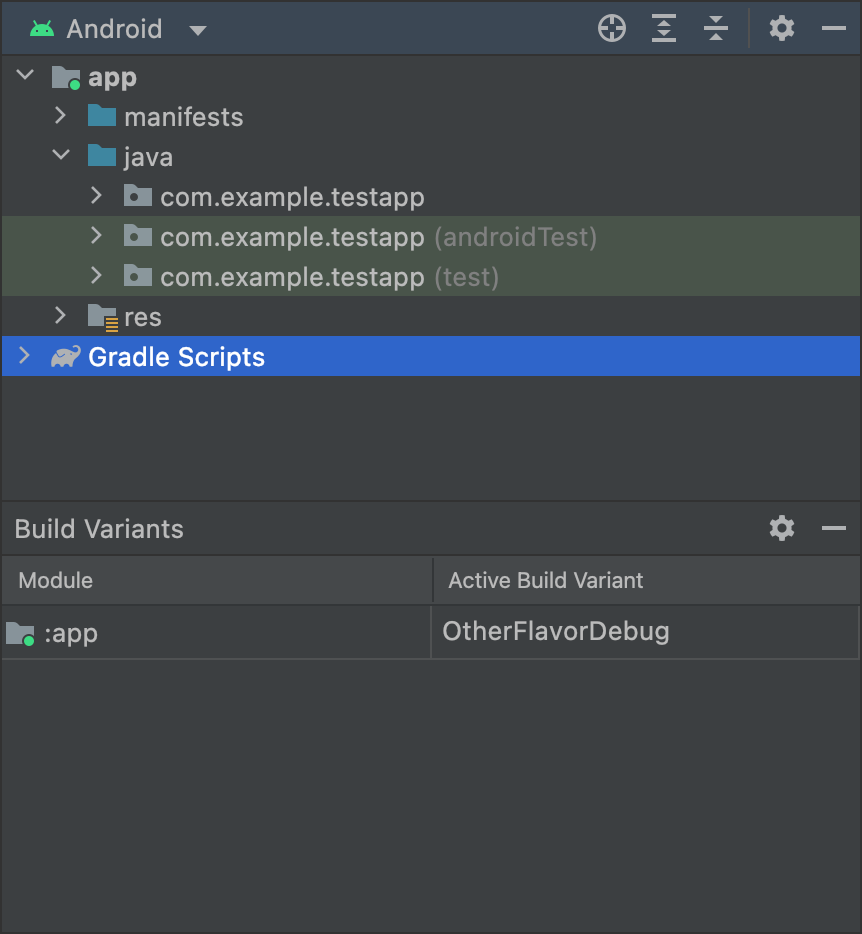
OtherFlavor variant selected; the androidTestMyFlavor folder does not show in the Android view.В режиме просмотра проекта это выглядит немного иначе, но принцип тот же:
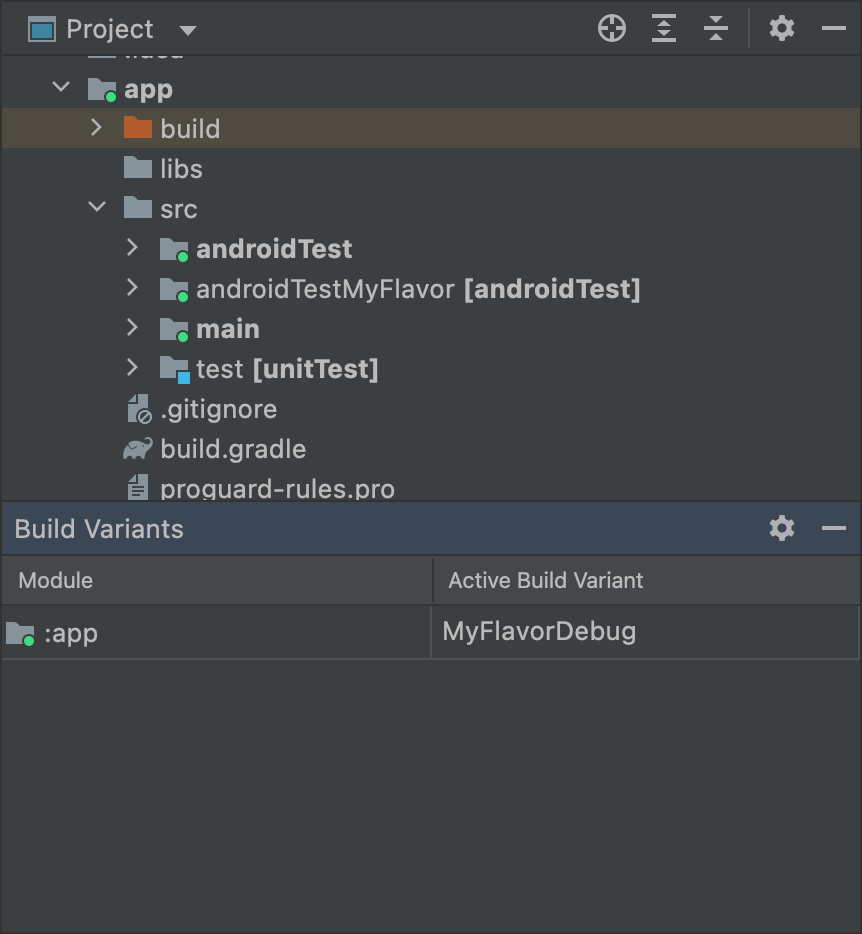
MyFlavor variant selected; the androidTestMyFlavor folder is active in the Project view. When a different variant is selected, the androidTestMyFlavor folder is still visible, but it is not shown as active:
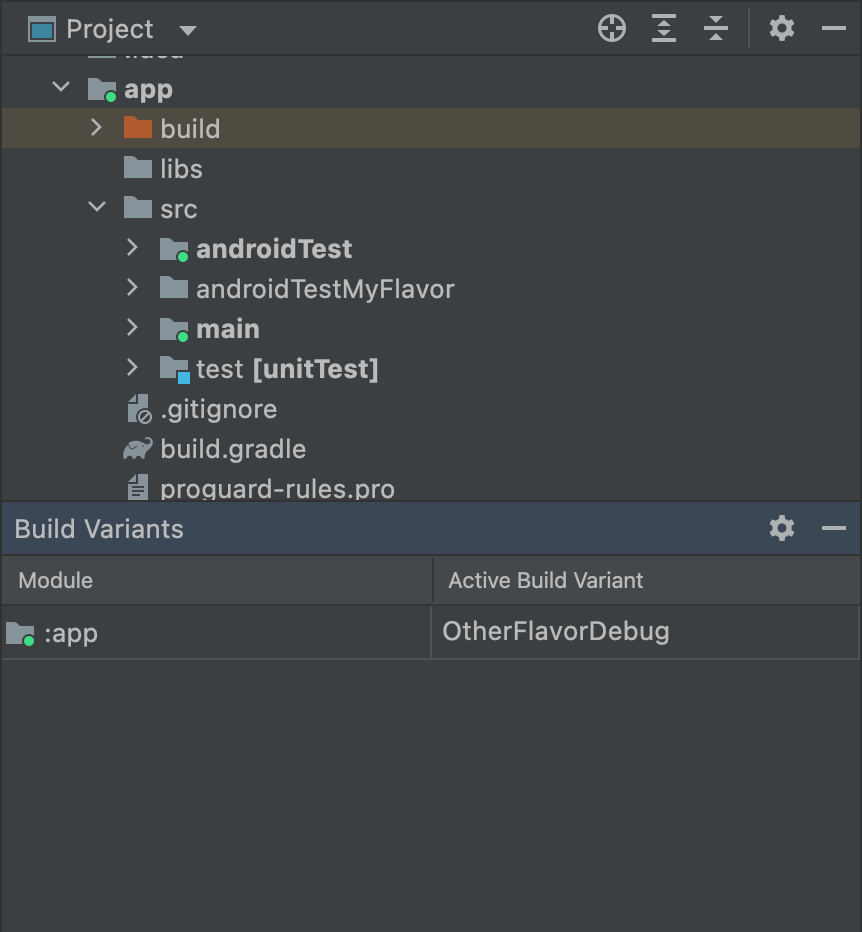
OtherFlavor variant selected; the androidTestMyFlavor folder is not active in the Project view.For more information about how source sets are merged, see Source sets .
Configure instrumentation manifest settings
Инструментированные тесты встраиваются в отдельный APK-файл со своим собственным файлом AndroidManifest.xml . Когда Gradle собирает ваш тестовый APK-файл, он автоматически генерирует файл AndroidManifest.xml и настраивает его с помощью узла <instrumentation> . Одна из причин, по которой Gradle настраивает этот узел, заключается в том, чтобы убедиться, что свойство targetPackage указывает правильное имя пакета тестируемого приложения.
To change other settings for this node, either create another manifest file in the test source set or configure your module-level build.gradle file, as shown in the following code sample. The full list of options can be found in the BaseFlavor API reference.
Котлин
android {
    ...
    defaultConfig {
        ...
        testApplicationId = "com.example.test"
        testInstrumentationRunner = "androidx.test.runner.AndroidJUnitRunner"
        testHandleProfiling = true
        testFunctionalTest = true
    }
}
Классный
android {
    ...
    defaultConfig {
        ...
        testApplicationId "com.example.test"
        testInstrumentationRunner "androidx.test.runner.AndroidJUnitRunner"
        testHandleProfiling true
        testFunctionalTest true
    }
}
Each product flavor you configure can override properties in the defaultConfig {} block. To learn more, go to Configure product flavors .
The properties in the snippet are:
| Параметр | Описание |
|---|---|
testApplicationId | Specifies the application ID for the test APK. |
testInstrumentationRunner | Указывает полное имя класса средства запуска испытательного оборудования. |
testHandleProfiling | If set to true , enables the instrumentation class to start and stop profiling.If set to false , profiling occurs the entire time the instrumentation class is running. |
testFunctionalTest | Если установлено значение true , это означает, что система Android должна запускать класс инструментирования в качестве функционального теста.The default value is false . |
Change the test build type
By default, all instrumentation tests run against the debug build type. You can change this to another build type by using the testBuildType property in your module-level build.gradle file. For example, if you want to run your tests against your staging build type, edit the file as shown in the following snippet:
Котлин
android {
    ...
    testBuildType = "staging"
}
Классный
android {
    ...
    testBuildType "staging"
}
Configure Gradle test options
The Android Gradle plugin lets you specify certain options for all or just some of your tests. In the module-level build.gradle file, use the testOptions block to specify options that change how Gradle runs all your tests:
Котлин
android {
    ...
    // Encapsulates options for running tests.
    testOptions {
        reportDir = "$rootDir/test-reports"
        resultsDir = "$rootDir/test-results"
    }
}
Классный
android {
    ...
    // Encapsulates options for running tests.
    testOptions {
        reportDir "$rootDir/test-reports"
        resultsDir "$rootDir/test-results"
    }
}
The reportDir property changes the directory where Gradle saves test reports. By default, Gradle saves test reports in the path_to_your_project / module_name /build/outputs/reports/ directory. $rootDir sets the path relative to the root directory of the current project.
The resultsDir property changes the directory where Gradle saves test results. By default, Gradle saves test results in the path_to_your_project / module_name /build/outputs/test-results/ directory. $rootDir sets the path relative to the root directory of the current project.
Чтобы указать параметры только для локальных модульных тестов, настройте блок unitTests внутри testOptions .
Котлин
android {
    ...
    testOptions {
        ...
        // Encapsulates options for local unit tests.
        unitTests {
            returnDefaultValues = true

            all {
                jvmArgs = listOf("-XX:MaxPermSize=256m")

                 if (it.name == "testDebugUnitTest") {
                    systemProperty = mapOf("debug" to "true")
                }
                ...
            }
        }
    }
}
Классный
android {
    ...
    testOptions {
        ...
        // Encapsulates options for local unit tests.
        unitTests {
            returnDefaultValues true

            all {
                jvmArgs '-XX:MaxPermSize=256m'

                if (it.name == 'testDebugUnitTest') {
                    systemProperty 'debug', 'true'
                }
                ...
            }
        }
    }
}
By default, local unit tests throw an exception any time the code you are testing tries to access Android platform APIs, unless you mock Android dependencies yourself or with a testing framework like Mockito. However, you can enable the returnDefaultValues property so that the test returns either null or zero when accessing platform APIs, rather than throwing an exception.
Блок all содержит параметры, управляющие выполнением локальных модульных тестов Gradle. Список всех доступных параметров можно найти в справочной документации Gradle .
Свойство jvmArgs задает аргументы JVM для тестируемых JVM.
Вы также можете проверить имя задачи, чтобы применить параметры только к указанным вами тестам. В приведенном примере свойство debug установлено в true , но только для задачи testDebugUnitTest .
Use separate test modules for instrumented tests
If you want to have a dedicated module for instrumented tests, to isolate the rest of your code from your tests, create a separate test module and configure its build similar to that of a library module.
To create a test module, proceed as follows:
- Create a library module .
- В файле
build.gradleна уровне модуля используйте плагинcom.android.testвместоcom.android.library. - Click Sync Project
 .
.
После создания тестового модуля вы можете включить свой тестовый код в основной или вариантный набор исходных файлов (например, src/main/kotlin+java или src/ variant /kotlin+java ). Если ваш модуль приложения определяет несколько вариантов продукта, вы можете воссоздать эти варианты в своем тестовом модуле. Используя управление зависимостями с учетом вариантов , тестовый модуль попытается протестировать соответствующий вариант в целевом модуле.
By default, test modules contain and test only a debug variant. However, you can create new build types to match the tested app project. To make the test module test a different build type and not the debug one, use VariantFilter to disable the debug variant in the test project, as shown:
Котлин
android {
    variantFilter {
        if (buildType.name == "debug") {
            ignore = true
        }
    }
}
Классный
android {
    variantFilter { variant ->
        if (variant.buildType.name.equals('debug')) {
            variant.setIgnore(true);
        }
    }
}
If you want a test module to target only certain flavors or build types of an app, you can use the matchingFallbacks property to target only the variants you want to test. This also prevents the test module from having to configure those variants for itself.