Android Studio — это официальная интегрированная среда разработки для Android, включающая в себя все необходимое для создания Android-приложений.
На этой странице перечислены новые функции и улучшения в последней версии стабильного канала Android Studio Quail 2. Вы можете обновить её прямо в Android Studio, нажав «Справка» > «Проверить наличие обновлений» (в Android Studio > «Проверить наличие обновлений» на macOS), или загрузив обновление напрямую:
Скачать Android Studio Quail 2 | 2026.1.2 Patch 1
Перед загрузкой вы должны согласиться со следующими условиями.
Условия и положения
Это лицензионное соглашение на комплект разработки программного обеспечения Android (Android Software Development Kit).1. Введение
1.1 Комплект разработки программного обеспечения Android (далее в Лицензионном соглашении именуемый «SDK» и, в частности, включающий системные файлы Android, упакованные API и дополнения Google API) предоставляется вам по лицензии в соответствии с условиями Лицензионного соглашения. Лицензионное соглашение представляет собой юридически обязывающий договор между вами и Google в отношении использования вами SDK. 1.2 «Android» означает программный стек Android для устройств, предоставляемый в рамках проекта Android Open Source Project, который находится по следующему URL-адресу: https://source.android.com, и периодически обновляется. 1.3 «Совместимая реализация» означает любое устройство Android, которое (i) соответствует документу «Определение совместимости Android», который можно найти на веб-сайте совместимости Android (https://source.android.com/compatibility) и который может периодически обновляться; и (ii) успешно проходит набор тестов совместимости Android (CTS). 1.4 «Google» означает Google LLC, зарегистрированную в соответствии с законодательством штата Делавэр, США, и осуществляющую деятельность в соответствии с законодательством США, с основным местом деятельности по адресу: 1600 Amphitheatre Parkway, Mountain View, CA 94043, США.2. Принятие настоящего лицензионного соглашения
2.1 Для использования SDK необходимо сначала согласиться с Лицензионным соглашением. Вы не можете использовать SDK, если не принимаете Лицензионное соглашение. 2.2 Нажимая кнопку «Принять» и/или используя данный SDK, вы тем самым соглашаетесь с условиями Лицензионного соглашения. 2.3 Вы не можете использовать SDK и не можете принять Лицензионное соглашение, если вы являетесь лицом, которому запрещено получать SDK в соответствии с законодательством Соединенных Штатов или других стран, включая страну вашего проживания или страну, из которой вы используете SDK. 2.4 Если вы соглашаетесь соблюдать Лицензионное соглашение от имени вашего работодателя или другого юридического лица, вы заявляете и гарантируете, что обладаете всеми необходимыми юридическими полномочиями для заключения Лицензионного соглашения от имени вашего работодателя или такого юридического лица. Если у вас нет необходимых полномочий, вы не можете принять Лицензионное соглашение или использовать SDK от имени вашего работодателя или другого юридического лица.3. Лицензия SDK от Google.
3.1 В соответствии с условиями Лицензионного соглашения, Google предоставляет вам ограниченную, всемирную, безвозмездную, непередаваемую, неисключительную и не подлежащую сублицензированию лицензию на использование SDK исключительно для разработки приложений для совместимых реализаций Android. 3.2 Вы не можете использовать этот SDK для разработки приложений для других платформ (включая несовместимые реализации Android) или для разработки другого SDK. Вы, конечно, можете разрабатывать приложения для других платформ, включая несовместимые реализации Android, при условии, что этот SDK не используется для этой цели. 3.3 Вы соглашаетесь с тем, что Google или третьи стороны владеют всеми законными правами, титулами и интересами в отношении SDK, включая любые права интеллектуальной собственности, существующие в отношении SDK. «Права интеллектуальной собственности» означают любые и все права в соответствии с патентным правом, авторским правом, правом на коммерческую тайну, правом на товарные знаки и любыми другими правами собственности. Google оставляет за собой все права, прямо не предоставленные вам. 3.4 Вы не можете использовать SDK для каких-либо целей, прямо не разрешенных Лицензионным соглашением. За исключением случаев, когда это требуется в соответствии с применимыми лицензиями третьих лиц, вы не имеете права копировать (за исключением целей резервного копирования), изменять, адаптировать, распространять, декомпилировать, осуществлять обратное проектирование, разбирать или создавать производные работы SDK или любой его части. 3.5 Использование, воспроизведение и распространение компонентов SDK, лицензированных в соответствии с лицензией на программное обеспечение с открытым исходным кодом, регулируются исключительно условиями этой лицензии на программное обеспечение с открытым исходным кодом, а не настоящим Лицензионным соглашением. 3.6 Вы соглашаетесь с тем, что форма и характер предоставляемого Google SDK могут изменяться без предварительного уведомления, и что будущие версии SDK могут быть несовместимы с приложениями, разработанными на основе предыдущих версий SDK. Вы соглашаетесь с тем, что Google может прекратить (навсегда или временно) предоставление вам или пользователям в целом SDK по своему собственному усмотрению без предварительного уведомления. 3.7 Ничто в настоящем Лицензионном соглашении не дает вам права использовать какие-либо фирменные наименования, товарные знаки, знаки обслуживания, логотипы, доменные имена или другие отличительные элементы бренда Google. 3.8 Вы соглашаетесь не удалять, не скрывать и не изменять какие-либо уведомления о правах собственности (включая уведомления об авторских правах и товарных знаках), которые могут быть прикреплены к SDK или содержаться в нем.4. Использование SDK вами
4.1 Google соглашается с тем, что не получает от вас (или ваших лицензиаров) никаких прав, титулов или интересов в отношении любых программных приложений, которые вы разрабатываете с использованием SDK, включая любые права интеллектуальной собственности, существующие в этих приложениях. 4.2 Вы соглашаетесь использовать SDK и создавать приложения только для целей, разрешенных (а) Лицензионным соглашением и (б) любым применимым законом, положением или общепринятой практикой или руководящими принципами в соответствующих юрисдикциях (включая любые законы, касающиеся экспорта данных или программного обеспечения в Соединенные Штаты или другие соответствующие страны и из них). 4.3 Вы соглашаетесь с тем, что если вы используете SDK для разработки приложений для обычных пользователей, вы будете защищать конфиденциальность и законные права этих пользователей. Если пользователи предоставляют вам имена пользователей, пароли или другую информацию для входа в систему или личную информацию, вы должны уведомить пользователей о том, что эта информация будет доступна вашему приложению, и вы должны обеспечить юридически адекватное уведомление о конфиденциальности и защиту для этих пользователей. Если ваше приложение хранит личную или конфиденциальную информацию, предоставленную пользователями, оно должно делать это безопасным образом. Если пользователь предоставляет вашему приложению информацию об учетной записи Google, ваше приложение может использовать эту информацию для доступа к учетной записи Google пользователя только тогда и в ограниченных целях, на которые пользователь дал вам разрешение. 4.4 Вы соглашаетесь, что не будете заниматься какой-либо деятельностью с SDK, включая разработку или распространение приложения, которая препятствует, нарушает, повреждает или несанкционированно получает доступ к серверам, сетям или другим ресурсам или услугам любой третьей стороны, включая, помимо прочего, Google или любого оператора мобильной связи. 4.5 Вы соглашаетесь, что несете единоличную ответственность за (и что Google не несет никакой ответственности перед вами или любой третьей стороной за) любые данные, контент или ресурсы, которые вы создаете, передаете или отображаете через Android и/или приложения для Android, а также за последствия ваших действий (включая любые убытки или ущерб, которые может понести Google). 4.6 Вы соглашаетесь с тем, что несете единоличную ответственность за любое нарушение ваших обязательств по Лицензионному соглашению, любому применимому договору с третьей стороной или Условиям обслуживания, а также за любой применимый закон или нормативный акт, а также за последствия (включая любые убытки или ущерб, которые может понести Google или любая третья сторона) любого такого нарушения (и что Google не несет за них никакой ответственности).5. Ваши учетные данные разработчика
5.1 Вы соглашаетесь с тем, что несете ответственность за сохранение конфиденциальности любых учетных данных разработчика, которые могут быть выданы вам компанией Google или которые вы можете выбрать самостоятельно, и что вы будете нести единоличную ответственность за все приложения, разработанные с использованием ваших учетных данных разработчика.6. Конфиденциальность и информация
6.1 В целях постоянного совершенствования и улучшения SDK компания Google может собирать определенную статистику использования программного обеспечения, включая, помимо прочего, уникальный идентификатор, связанный IP-адрес, номер версии программного обеспечения, а также информацию о том, какие инструменты и/или сервисы в SDK используются и как они используются. Перед сбором любой из этих данных SDK уведомит вас и запросит ваше согласие. Если вы откажетесь дать согласие, информация не будет собрана. 6.2 Собранные данные анализируются в совокупности для улучшения SDK и хранятся в соответствии с Политикой конфиденциальности Google, которая находится по следующему адресу: https://policies.google.com/privacy 6.3 Анонимизированные и агрегированные наборы данных могут быть переданы партнерам Google для улучшения SDK.7. Сторонние приложения
7.1 Если вы используете SDK для запуска приложений, разработанных третьей стороной, или приложений, получающих доступ к данным, контенту или ресурсам, предоставляемым третьей стороной, вы соглашаетесь с тем, что Google не несет ответственности за эти приложения, данные, контент или ресурсы. Вы понимаете, что все данные, контент или ресурсы, к которым вы можете получить доступ через такие приложения третьих сторон, являются исключительной ответственностью лица, от которого они исходят, и что Google не несет ответственности за любые убытки или ущерб, которые вы можете понести в результате использования или доступа к любым из этих приложений, данных, контента или ресурсов третьих сторон. 7.2 Вам следует знать, что данные, контент и ресурсы, предоставляемые вам через такое приложение третьей стороны, могут быть защищены правами интеллектуальной собственности, принадлежащими поставщикам (или другим лицам или компаниям от их имени). Вы не можете изменять, сдавать в аренду, предоставлять в лизинг, давать взаймы, продавать, распространять или создавать производные работы на основе этих данных, контента или ресурсов (полностью или частично), если вы не получили на это специальное разрешение от соответствующих владельцев. 7.3 Вы признаете, что использование вами таких сторонних приложений, данных, контента или ресурсов может регулироваться отдельными условиями между вами и соответствующей третьей стороной. В этом случае Лицензионное соглашение не влияет на ваши правовые отношения с этими третьими сторонами.8. Использование API Android
8.1 API данных Google 8.1.1 Если вы используете какой-либо API для получения данных от Google, вы подтверждаете, что эти данные могут быть защищены правами интеллектуальной собственности, принадлежащими Google или сторонам, предоставляющим данные (или другим лицам или компаниям от их имени). Использование вами любого такого API может регулироваться дополнительными Условиями обслуживания. Вы не имеете права изменять, сдавать в аренду, предоставлять в лизинг, давать взаймы, продавать, распространять или создавать производные работы на основе этих данных (полностью или частично), если это не разрешено соответствующими Условиями обслуживания. 8.1.2 Если вы используете какой-либо API для получения данных пользователя от Google, вы подтверждаете и соглашаетесь с тем, что будете получать данные только с явного согласия пользователя и только тогда и для ограниченных целей, для которых пользователь дал вам разрешение на это. Используя API службы распознавания речи Android, документацию по которому можно найти по следующему адресу: https://developer.android.com/reference/android/speech/RecognitionService (с периодическими обновлениями), вы подтверждаете, что использование API регулируется Дополнением к соглашению об обработке данных для продуктов, в которых Google выступает в качестве обработчика данных, которое находится по следующему адресу: https://privacy.google.com/businesses/gdprprocessorterms/ (с периодическими обновлениями). Нажимая кнопку «Принять», вы тем самым соглашаетесь с условиями Дополнения к соглашению об обработке данных для продуктов, в которых Google выступает в качестве обработчика данных.9. Расторжение настоящего лицензионного соглашения
9.1 Лицензионное соглашение будет продолжать действовать до тех пор, пока оно не будет расторгнуто вами или Google в соответствии с условиями, изложенными ниже. 9.2 Если вы хотите расторгнуть Лицензионное соглашение, вы можете сделать это, прекратив использование SDK и любых соответствующих учетных данных разработчика. 9.3 Google может в любое время расторгнуть с вами Лицензионное соглашение, если: (A) вы нарушили какое-либо положение Лицензионного соглашения; или (B) Google обязан сделать это по закону; или (C) партнер, с которым Google предоставлял вам определенные части SDK (например, API), прекратил свои отношения с Google или перестал предоставлять вам определенные части SDK; или (D) Google принимает решение больше не предоставлять SDK или определенные части SDK пользователям в стране, в которой вы проживаете или из которой вы используете услугу, или предоставление вам SDK или определенных услуг SDK компанией Google, по собственному усмотрению Google, больше не является коммерчески целесообразным. 9.4. После прекращения действия Лицензионного соглашения все юридические права, обязанности и ответственность, которыми вы и Google пользовались, которым подчинялись (или которые возникли с течением времени, пока Лицензионное соглашение действовало) или которые, как указано, сохраняются бессрочно, остаются в силе, и положения пункта 14.7 продолжают применяться к таким правам, обязанностям и ответственности бессрочно.10. ОТКАЗ ОТ ГАРАНТИЙ
10.1 Вы прямо понимаете и соглашаетесь с тем, что использование вами SDK осуществляется на ваш собственный риск, и что SDK предоставляется «как есть» и «в наличии» без каких-либо гарантий со стороны Google. 10.2 Использование вами SDK и любых материалов, загруженных или иным образом полученных посредством использования SDK, осуществляется на ваше собственное усмотрение и риск, и вы несете единоличную ответственность за любой ущерб вашей компьютерной системе или другому устройству, а также за потерю данных, возникшие в результате такого использования. 10.3 Компания Google также прямо отказывается от всех гарантий и условий любого рода, как явных, так и подразумеваемых, включая, помимо прочего, подразумеваемые гарантии и условия товарной пригодности, пригодности для определенной цели и отсутствия нарушений прав.11. Ограничение ответственности
11.1 Вы прямо понимаете и соглашаетесь с тем, что Google, его дочерние компании и аффилированные лица, а также его лицензиары не будут нести перед вами никакой ответственности по какой бы то ни было теории ответственности за любые прямые, косвенные, случайные, специальные, последующие или штрафные убытки, которые могут быть понесены вами, включая любую потерю данных, независимо от того, были ли Google или его представители уведомлены или должны были знать о возможности возникновения таких убытков.12. Возмещение убытков
12.1 В максимальной степени, разрешенной законом, вы соглашаетесь защищать, возмещать убытки и ограждать Google, его аффилированные компании и их соответствующих директоров, должностных лиц, сотрудников и агентов от любых и всех претензий, исков, судебных разбирательств, а также от любых и всех потерь, обязательств, убытков, затрат и расходов (включая разумные гонорары адвокатов), возникающих в результате или связанных с (а) использованием вами SDK, (б) любым приложением, разработанным вами на основе SDK, которое нарушает авторские права, товарные знаки, коммерческую тайну, фирменный стиль, патенты или другие права интеллектуальной собственности любого лица, порочит любое лицо или нарушает его права на публичность или неприкосновенность частной жизни, и (в) любым несоблюдением вами условий Лицензионного соглашения.13. Изменения в Лицензионном соглашении
13.1 Google может вносить изменения в Лицензионное соглашение по мере распространения новых версий SDK. После внесения этих изменений Google разместит новую версию Лицензионного соглашения на веб-сайте, где доступен SDK.14. Общие юридические термины
14.1 Настоящее Лицензионное соглашение представляет собой полное юридическое соглашение между вами и Google и регулирует ваше использование SDK (за исключением любых услуг, которые Google может предоставлять вам в соответствии с отдельным письменным соглашением), и полностью заменяет любые предыдущие соглашения между вами и Google в отношении SDK. 14.2 Вы соглашаетесь с тем, что если Google не воспользуется или не обеспечит соблюдение какого-либо юридического права или средства правовой защиты, предусмотренного в Лицензионном соглашении (или которым Google обладает в соответствии с любым применимым законодательством), это не будет считаться формальным отказом от прав Google, и эти права или средства правовой защиты по-прежнему будут доступны Google. 14.3 Если какой-либо суд, обладающий юрисдикцией для принятия решения по данному вопросу, признает какое-либо положение Лицензионного соглашения недействительным, то это положение будет исключено из Лицензионного соглашения без ущерба для остальных положений Лицензионного соглашения. Остальные положения Лицензионного соглашения останутся действительными и подлежащими исполнению. 14.4 Вы признаете и соглашаетесь с тем, что каждый член группы компаний, материнской компанией которой является Google, будет являться третьим лицом-бенефициаром Лицензионного соглашения, и что такие другие компании будут иметь право напрямую применять и полагаться на любое положение Лицензионного соглашения, которое предоставляет им выгоду (или права в их пользу). Помимо этого, никакое другое лицо или компания не будут являться третьими лицами-бенефициарами Лицензионного соглашения. 14.5 ОГРАНИЧЕНИЯ НА ЭКСПОРТ. SDK ПОДЛЕЖИТ ДЕЙСТВИЮ ЗАКОНОВ И ПРАВИЛ ЭКСПОРТА СОЕДИНЕННЫХ ШТАТОВ. ВЫ ДОЛЖНЫ СОБЛЮДАТЬ ВСЕ ВНУТРЕННИЕ И МЕЖДУНАРОДНЫЕ ЗАКОНЫ И ПРАВИЛА ЭКСПОРТА, ПРИМЕНЯЕМЫЕ К SDK. ЭТИ ЗАКОНЫ ВКЛЮЧАЮТ ОГРАНИЧЕНИЯ НА НАПРАВЛЕНИЯ, КОНЕЧНЫХ ПОЛЬЗОВАТЕЛЕЙ И КОНЕЧНОЕ ИСПОЛЬЗОВАНИЕ. 14.6 Права, предоставленные в Лицензионном соглашении, не могут быть переданы или переуступлены ни вами, ни Google без предварительного письменного согласия другой стороны. Ни вам, ни Google не разрешается делегировать свои обязанности или обязательства по Лицензионному соглашению без предварительного письменного согласия другой стороны. 14.7 Лицензионное соглашение и ваши отношения с Google в соответствии с Лицензионным соглашением регулируются законами штата Калифорния без учета коллизионных норм. Вы и Google соглашаетесь подчиниться исключительной юрисдикции судов, расположенных в округе Санта-Клара, штат Калифорния, для разрешения любых юридических вопросов, возникающих из Лицензионного соглашения. Несмотря на это, вы соглашаетесь с тем, что Google по-прежнему будет иметь право подавать заявления о применении обеспечительных мер (или эквивалентного вида срочной юридической защиты) в любой юрисдикции. 28 апреля 2026 г.Скачать Android Studio Quail 2 | 2026.1.2 Patch 1
Перед загрузкой вы должны согласиться со следующими условиями.
Условия и положения
Это лицензионное соглашение на комплект разработки программного обеспечения Android (Android Software Development Kit).1. Введение
1.1 Комплект разработки программного обеспечения Android (далее в Лицензионном соглашении именуемый «SDK» и, в частности, включающий системные файлы Android, упакованные API и дополнения Google API) предоставляется вам по лицензии в соответствии с условиями Лицензионного соглашения. Лицензионное соглашение представляет собой юридически обязывающий договор между вами и Google в отношении использования вами SDK. 1.2 «Android» означает программный стек Android для устройств, предоставляемый в рамках проекта Android Open Source Project, который находится по следующему URL-адресу: https://source.android.com, и периодически обновляется. 1.3 «Совместимая реализация» означает любое устройство Android, которое (i) соответствует документу «Определение совместимости Android», который можно найти на веб-сайте совместимости Android (https://source.android.com/compatibility) и который может периодически обновляться; и (ii) успешно проходит набор тестов совместимости Android (CTS). 1.4 «Google» означает Google LLC, зарегистрированную в соответствии с законодательством штата Делавэр, США, и осуществляющую деятельность в соответствии с законодательством США, с основным местом деятельности по адресу: 1600 Amphitheatre Parkway, Mountain View, CA 94043, США.2. Принятие настоящего лицензионного соглашения
2.1 Для использования SDK необходимо сначала согласиться с Лицензионным соглашением. Вы не можете использовать SDK, если не принимаете Лицензионное соглашение. 2.2 Нажимая кнопку «Принять» и/или используя данный SDK, вы тем самым соглашаетесь с условиями Лицензионного соглашения. 2.3 Вы не можете использовать SDK и не можете принять Лицензионное соглашение, если вы являетесь лицом, которому запрещено получать SDK в соответствии с законодательством Соединенных Штатов или других стран, включая страну вашего проживания или страну, из которой вы используете SDK. 2.4 Если вы соглашаетесь соблюдать Лицензионное соглашение от имени вашего работодателя или другого юридического лица, вы заявляете и гарантируете, что обладаете всеми необходимыми юридическими полномочиями для заключения Лицензионного соглашения от имени вашего работодателя или такого юридического лица. Если у вас нет необходимых полномочий, вы не можете принять Лицензионное соглашение или использовать SDK от имени вашего работодателя или другого юридического лица.3. Лицензия SDK от Google.
3.1 В соответствии с условиями Лицензионного соглашения, Google предоставляет вам ограниченную, всемирную, безвозмездную, непередаваемую, неисключительную и не подлежащую сублицензированию лицензию на использование SDK исключительно для разработки приложений для совместимых реализаций Android. 3.2 Вы не можете использовать этот SDK для разработки приложений для других платформ (включая несовместимые реализации Android) или для разработки другого SDK. Вы, конечно, можете разрабатывать приложения для других платформ, включая несовместимые реализации Android, при условии, что этот SDK не используется для этой цели. 3.3 Вы соглашаетесь с тем, что Google или третьи стороны владеют всеми законными правами, титулами и интересами в отношении SDK, включая любые права интеллектуальной собственности, существующие в отношении SDK. «Права интеллектуальной собственности» означают любые и все права в соответствии с патентным правом, авторским правом, правом на коммерческую тайну, правом на товарные знаки и любыми другими правами собственности. Google оставляет за собой все права, прямо не предоставленные вам. 3.4 Вы не можете использовать SDK для каких-либо целей, прямо не разрешенных Лицензионным соглашением. За исключением случаев, когда это требуется в соответствии с применимыми лицензиями третьих лиц, вы не имеете права копировать (за исключением целей резервного копирования), изменять, адаптировать, распространять, декомпилировать, осуществлять обратное проектирование, разбирать или создавать производные работы SDK или любой его части. 3.5 Использование, воспроизведение и распространение компонентов SDK, лицензированных в соответствии с лицензией на программное обеспечение с открытым исходным кодом, регулируются исключительно условиями этой лицензии на программное обеспечение с открытым исходным кодом, а не настоящим Лицензионным соглашением. 3.6 Вы соглашаетесь с тем, что форма и характер предоставляемого Google SDK могут изменяться без предварительного уведомления, и что будущие версии SDK могут быть несовместимы с приложениями, разработанными на основе предыдущих версий SDK. Вы соглашаетесь с тем, что Google может прекратить (навсегда или временно) предоставление вам или пользователям в целом SDK по своему собственному усмотрению без предварительного уведомления. 3.7 Ничто в настоящем Лицензионном соглашении не дает вам права использовать какие-либо фирменные наименования, товарные знаки, знаки обслуживания, логотипы, доменные имена или другие отличительные элементы бренда Google. 3.8 Вы соглашаетесь не удалять, не скрывать и не изменять какие-либо уведомления о правах собственности (включая уведомления об авторских правах и товарных знаках), которые могут быть прикреплены к SDK или содержаться в нем.4. Использование SDK вами
4.1 Google соглашается с тем, что не получает от вас (или ваших лицензиаров) никаких прав, титулов или интересов в отношении любых программных приложений, которые вы разрабатываете с использованием SDK, включая любые права интеллектуальной собственности, существующие в этих приложениях. 4.2 Вы соглашаетесь использовать SDK и создавать приложения только для целей, разрешенных (а) Лицензионным соглашением и (б) любым применимым законом, положением или общепринятой практикой или руководящими принципами в соответствующих юрисдикциях (включая любые законы, касающиеся экспорта данных или программного обеспечения в Соединенные Штаты или другие соответствующие страны и из них). 4.3 Вы соглашаетесь с тем, что если вы используете SDK для разработки приложений для обычных пользователей, вы будете защищать конфиденциальность и законные права этих пользователей. Если пользователи предоставляют вам имена пользователей, пароли или другую информацию для входа в систему или личную информацию, вы должны уведомить пользователей о том, что эта информация будет доступна вашему приложению, и вы должны обеспечить юридически адекватное уведомление о конфиденциальности и защиту для этих пользователей. Если ваше приложение хранит личную или конфиденциальную информацию, предоставленную пользователями, оно должно делать это безопасным образом. Если пользователь предоставляет вашему приложению информацию об учетной записи Google, ваше приложение может использовать эту информацию для доступа к учетной записи Google пользователя только тогда и в ограниченных целях, на которые пользователь дал вам разрешение. 4.4 Вы соглашаетесь, что не будете заниматься какой-либо деятельностью с SDK, включая разработку или распространение приложения, которая препятствует, нарушает, повреждает или несанкционированно получает доступ к серверам, сетям или другим ресурсам или услугам любой третьей стороны, включая, помимо прочего, Google или любого оператора мобильной связи. 4.5 Вы соглашаетесь, что несете единоличную ответственность за (и что Google не несет никакой ответственности перед вами или любой третьей стороной за) любые данные, контент или ресурсы, которые вы создаете, передаете или отображаете через Android и/или приложения для Android, а также за последствия ваших действий (включая любые убытки или ущерб, которые может понести Google). 4.6 Вы соглашаетесь с тем, что несете единоличную ответственность за любое нарушение ваших обязательств по Лицензионному соглашению, любому применимому договору с третьей стороной или Условиям обслуживания, а также за любой применимый закон или нормативный акт, а также за последствия (включая любые убытки или ущерб, которые может понести Google или любая третья сторона) любого такого нарушения (и что Google не несет за них никакой ответственности).5. Ваши учетные данные разработчика
5.1 Вы соглашаетесь с тем, что несете ответственность за сохранение конфиденциальности любых учетных данных разработчика, которые могут быть выданы вам компанией Google или которые вы можете выбрать самостоятельно, и что вы будете нести единоличную ответственность за все приложения, разработанные с использованием ваших учетных данных разработчика.6. Конфиденциальность и информация
6.1 В целях постоянного совершенствования и улучшения SDK компания Google может собирать определенную статистику использования программного обеспечения, включая, помимо прочего, уникальный идентификатор, связанный IP-адрес, номер версии программного обеспечения, а также информацию о том, какие инструменты и/или сервисы в SDK используются и как они используются. Перед сбором любой из этих данных SDK уведомит вас и запросит ваше согласие. Если вы откажетесь дать согласие, информация не будет собрана. 6.2 Собранные данные анализируются в совокупности для улучшения SDK и хранятся в соответствии с Политикой конфиденциальности Google, которая находится по следующему адресу: https://policies.google.com/privacy 6.3 Анонимизированные и агрегированные наборы данных могут быть переданы партнерам Google для улучшения SDK.7. Сторонние приложения
7.1 Если вы используете SDK для запуска приложений, разработанных третьей стороной, или приложений, получающих доступ к данным, контенту или ресурсам, предоставляемым третьей стороной, вы соглашаетесь с тем, что Google не несет ответственности за эти приложения, данные, контент или ресурсы. Вы понимаете, что все данные, контент или ресурсы, к которым вы можете получить доступ через такие приложения третьих сторон, являются исключительной ответственностью лица, от которого они исходят, и что Google не несет ответственности за любые убытки или ущерб, которые вы можете понести в результате использования или доступа к любым из этих приложений, данных, контента или ресурсов третьих сторон. 7.2 Вам следует знать, что данные, контент и ресурсы, предоставляемые вам через такое приложение третьей стороны, могут быть защищены правами интеллектуальной собственности, принадлежащими поставщикам (или другим лицам или компаниям от их имени). Вы не можете изменять, сдавать в аренду, предоставлять в лизинг, давать взаймы, продавать, распространять или создавать производные работы на основе этих данных, контента или ресурсов (полностью или частично), если вы не получили на это специальное разрешение от соответствующих владельцев. 7.3 Вы признаете, что использование вами таких сторонних приложений, данных, контента или ресурсов может регулироваться отдельными условиями между вами и соответствующей третьей стороной. В этом случае Лицензионное соглашение не влияет на ваши правовые отношения с этими третьими сторонами.8. Использование API Android
8.1 API данных Google 8.1.1 Если вы используете какой-либо API для получения данных от Google, вы подтверждаете, что эти данные могут быть защищены правами интеллектуальной собственности, принадлежащими Google или сторонам, предоставляющим данные (или другим лицам или компаниям от их имени). Использование вами любого такого API может регулироваться дополнительными Условиями обслуживания. Вы не имеете права изменять, сдавать в аренду, предоставлять в лизинг, давать взаймы, продавать, распространять или создавать производные работы на основе этих данных (полностью или частично), если это не разрешено соответствующими Условиями обслуживания. 8.1.2 Если вы используете какой-либо API для получения данных пользователя от Google, вы подтверждаете и соглашаетесь с тем, что будете получать данные только с явного согласия пользователя и только тогда и для ограниченных целей, для которых пользователь дал вам разрешение на это. Используя API службы распознавания речи Android, документацию по которому можно найти по следующему адресу: https://developer.android.com/reference/android/speech/RecognitionService (с периодическими обновлениями), вы подтверждаете, что использование API регулируется Дополнением к соглашению об обработке данных для продуктов, в которых Google выступает в качестве обработчика данных, которое находится по следующему адресу: https://privacy.google.com/businesses/gdprprocessorterms/ (с периодическими обновлениями). Нажимая кнопку «Принять», вы тем самым соглашаетесь с условиями Дополнения к соглашению об обработке данных для продуктов, в которых Google выступает в качестве обработчика данных.9. Расторжение настоящего лицензионного соглашения
9.1 Лицензионное соглашение будет продолжать действовать до тех пор, пока оно не будет расторгнуто вами или Google в соответствии с условиями, изложенными ниже. 9.2 Если вы хотите расторгнуть Лицензионное соглашение, вы можете сделать это, прекратив использование SDK и любых соответствующих учетных данных разработчика. 9.3 Google может в любое время расторгнуть с вами Лицензионное соглашение, если: (A) вы нарушили какое-либо положение Лицензионного соглашения; или (B) Google обязан сделать это по закону; или (C) партнер, с которым Google предоставлял вам определенные части SDK (например, API), прекратил свои отношения с Google или перестал предоставлять вам определенные части SDK; или (D) Google принимает решение больше не предоставлять SDK или определенные части SDK пользователям в стране, в которой вы проживаете или из которой вы используете услугу, или предоставление вам SDK или определенных услуг SDK компанией Google, по собственному усмотрению Google, больше не является коммерчески целесообразным. 9.4. После прекращения действия Лицензионного соглашения все юридические права, обязанности и ответственность, которыми вы и Google пользовались, которым подчинялись (или которые возникли с течением времени, пока Лицензионное соглашение действовало) или которые, как указано, сохраняются бессрочно, остаются в силе, и положения пункта 14.7 продолжают применяться к таким правам, обязанностям и ответственности бессрочно.10. ОТКАЗ ОТ ГАРАНТИЙ
10.1 Вы прямо понимаете и соглашаетесь с тем, что использование вами SDK осуществляется на ваш собственный риск, и что SDK предоставляется «как есть» и «в наличии» без каких-либо гарантий со стороны Google. 10.2 Использование вами SDK и любых материалов, загруженных или иным образом полученных посредством использования SDK, осуществляется на ваше собственное усмотрение и риск, и вы несете единоличную ответственность за любой ущерб вашей компьютерной системе или другому устройству, а также за потерю данных, возникшие в результате такого использования. 10.3 Компания Google также прямо отказывается от всех гарантий и условий любого рода, как явных, так и подразумеваемых, включая, помимо прочего, подразумеваемые гарантии и условия товарной пригодности, пригодности для определенной цели и отсутствия нарушений прав.11. Ограничение ответственности
11.1 Вы прямо понимаете и соглашаетесь с тем, что Google, его дочерние компании и аффилированные лица, а также его лицензиары не будут нести перед вами никакой ответственности по какой бы то ни было теории ответственности за любые прямые, косвенные, случайные, специальные, последующие или штрафные убытки, которые могут быть понесены вами, включая любую потерю данных, независимо от того, были ли Google или его представители уведомлены или должны были знать о возможности возникновения таких убытков.12. Возмещение убытков
12.1 В максимальной степени, разрешенной законом, вы соглашаетесь защищать, возмещать убытки и ограждать Google, его аффилированные компании и их соответствующих директоров, должностных лиц, сотрудников и агентов от любых и всех претензий, исков, судебных разбирательств, а также от любых и всех потерь, обязательств, убытков, затрат и расходов (включая разумные гонорары адвокатов), возникающих в результате или связанных с (а) использованием вами SDK, (б) любым приложением, разработанным вами на основе SDK, которое нарушает авторские права, товарные знаки, коммерческую тайну, фирменный стиль, патенты или другие права интеллектуальной собственности любого лица, порочит любое лицо или нарушает его права на публичность или неприкосновенность частной жизни, и (в) любым несоблюдением вами условий Лицензионного соглашения.13. Изменения в Лицензионном соглашении
13.1 Google может вносить изменения в Лицензионное соглашение по мере распространения новых версий SDK. После внесения этих изменений Google разместит новую версию Лицензионного соглашения на веб-сайте, где доступен SDK.14. Общие юридические термины
14.1 Настоящее Лицензионное соглашение представляет собой полное юридическое соглашение между вами и Google и регулирует ваше использование SDK (за исключением любых услуг, которые Google может предоставлять вам в соответствии с отдельным письменным соглашением), и полностью заменяет любые предыдущие соглашения между вами и Google в отношении SDK. 14.2 Вы соглашаетесь с тем, что если Google не воспользуется или не обеспечит соблюдение какого-либо юридического права или средства правовой защиты, предусмотренного в Лицензионном соглашении (или которым Google обладает в соответствии с любым применимым законодательством), это не будет считаться формальным отказом от прав Google, и эти права или средства правовой защиты по-прежнему будут доступны Google. 14.3 Если какой-либо суд, обладающий юрисдикцией для принятия решения по данному вопросу, признает какое-либо положение Лицензионного соглашения недействительным, то это положение будет исключено из Лицензионного соглашения без ущерба для остальных положений Лицензионного соглашения. Остальные положения Лицензионного соглашения останутся действительными и подлежащими исполнению. 14.4 Вы признаете и соглашаетесь с тем, что каждый член группы компаний, материнской компанией которой является Google, будет являться третьим лицом-бенефициаром Лицензионного соглашения, и что такие другие компании будут иметь право напрямую применять и полагаться на любое положение Лицензионного соглашения, которое предоставляет им выгоду (или права в их пользу). Помимо этого, никакое другое лицо или компания не будут являться третьими лицами-бенефициарами Лицензионного соглашения. 14.5 ОГРАНИЧЕНИЯ НА ЭКСПОРТ. SDK ПОДЛЕЖИТ ДЕЙСТВИЮ ЗАКОНОВ И ПРАВИЛ ЭКСПОРТА СОЕДИНЕННЫХ ШТАТОВ. ВЫ ДОЛЖНЫ СОБЛЮДАТЬ ВСЕ ВНУТРЕННИЕ И МЕЖДУНАРОДНЫЕ ЗАКОНЫ И ПРАВИЛА ЭКСПОРТА, ПРИМЕНЯЕМЫЕ К SDK. ЭТИ ЗАКОНЫ ВКЛЮЧАЮТ ОГРАНИЧЕНИЯ НА НАПРАВЛЕНИЯ, КОНЕЧНЫХ ПОЛЬЗОВАТЕЛЕЙ И КОНЕЧНОЕ ИСПОЛЬЗОВАНИЕ. 14.6 Права, предоставленные в Лицензионном соглашении, не могут быть переданы или переуступлены ни вами, ни Google без предварительного письменного согласия другой стороны. Ни вам, ни Google не разрешается делегировать свои обязанности или обязательства по Лицензионному соглашению без предварительного письменного согласия другой стороны. 14.7 Лицензионное соглашение и ваши отношения с Google в соответствии с Лицензионным соглашением регулируются законами штата Калифорния без учета коллизионных норм. Вы и Google соглашаетесь подчиниться исключительной юрисдикции судов, расположенных в округе Санта-Клара, штат Калифорния, для разрешения любых юридических вопросов, возникающих из Лицензионного соглашения. Несмотря на это, вы соглашаетесь с тем, что Google по-прежнему будет иметь право подавать заявления о применении обеспечительных мер (или эквивалентного вида срочной юридической защиты) в любой юрисдикции. 28 апреля 2026 г.Скачать Android Command Line Tools
Перед загрузкой вы должны согласиться со следующими условиями.
Условия и положения
Это лицензионное соглашение на комплект разработки программного обеспечения Android (Android Software Development Kit).1. Введение
1.1 Комплект разработки программного обеспечения Android (далее в Лицензионном соглашении именуемый «SDK» и, в частности, включающий системные файлы Android, упакованные API и дополнения Google API) предоставляется вам по лицензии в соответствии с условиями Лицензионного соглашения. Лицензионное соглашение представляет собой юридически обязывающий договор между вами и Google в отношении использования вами SDK. 1.2 «Android» означает программный стек Android для устройств, предоставляемый в рамках проекта Android Open Source Project, который находится по следующему URL-адресу: https://source.android.com, и периодически обновляется. 1.3 «Совместимая реализация» означает любое устройство Android, которое (i) соответствует документу «Определение совместимости Android», который можно найти на веб-сайте совместимости Android (https://source.android.com/compatibility) и который может периодически обновляться; и (ii) успешно проходит набор тестов совместимости Android (CTS). 1.4 «Google» означает Google LLC, зарегистрированную в соответствии с законодательством штата Делавэр, США, и осуществляющую деятельность в соответствии с законодательством США, с основным местом деятельности по адресу: 1600 Amphitheatre Parkway, Mountain View, CA 94043, США.2. Принятие настоящего лицензионного соглашения
2.1 Для использования SDK необходимо сначала согласиться с Лицензионным соглашением. Вы не можете использовать SDK, если не принимаете Лицензионное соглашение. 2.2 Нажимая кнопку «Принять» и/или используя данный SDK, вы тем самым соглашаетесь с условиями Лицензионного соглашения. 2.3 Вы не можете использовать SDK и не можете принять Лицензионное соглашение, если вы являетесь лицом, которому запрещено получать SDK в соответствии с законодательством Соединенных Штатов или других стран, включая страну вашего проживания или страну, из которой вы используете SDK. 2.4 Если вы соглашаетесь соблюдать Лицензионное соглашение от имени вашего работодателя или другого юридического лица, вы заявляете и гарантируете, что обладаете всеми необходимыми юридическими полномочиями для заключения Лицензионного соглашения от имени вашего работодателя или такого юридического лица. Если у вас нет необходимых полномочий, вы не можете принять Лицензионное соглашение или использовать SDK от имени вашего работодателя или другого юридического лица.3. Лицензия SDK от Google.
3.1 В соответствии с условиями Лицензионного соглашения, Google предоставляет вам ограниченную, всемирную, безвозмездную, непередаваемую, неисключительную и не подлежащую сублицензированию лицензию на использование SDK исключительно для разработки приложений для совместимых реализаций Android. 3.2 Вы не можете использовать этот SDK для разработки приложений для других платформ (включая несовместимые реализации Android) или для разработки другого SDK. Вы, конечно, можете разрабатывать приложения для других платформ, включая несовместимые реализации Android, при условии, что этот SDK не используется для этой цели. 3.3 Вы соглашаетесь с тем, что Google или третьи стороны владеют всеми законными правами, титулами и интересами в отношении SDK, включая любые права интеллектуальной собственности, существующие в отношении SDK. «Права интеллектуальной собственности» означают любые и все права в соответствии с патентным правом, авторским правом, правом на коммерческую тайну, правом на товарные знаки и любыми другими правами собственности. Google оставляет за собой все права, прямо не предоставленные вам. 3.4 Вы не можете использовать SDK для каких-либо целей, прямо не разрешенных Лицензионным соглашением. За исключением случаев, когда это требуется в соответствии с применимыми лицензиями третьих лиц, вы не имеете права копировать (за исключением целей резервного копирования), изменять, адаптировать, распространять, декомпилировать, осуществлять обратное проектирование, разбирать или создавать производные работы SDK или любой его части. 3.5 Использование, воспроизведение и распространение компонентов SDK, лицензированных в соответствии с лицензией на программное обеспечение с открытым исходным кодом, регулируются исключительно условиями этой лицензии на программное обеспечение с открытым исходным кодом, а не настоящим Лицензионным соглашением. 3.6 Вы соглашаетесь с тем, что форма и характер предоставляемого Google SDK могут изменяться без предварительного уведомления, и что будущие версии SDK могут быть несовместимы с приложениями, разработанными на основе предыдущих версий SDK. Вы соглашаетесь с тем, что Google может прекратить (навсегда или временно) предоставление вам или пользователям в целом SDK по своему собственному усмотрению без предварительного уведомления. 3.7 Ничто в настоящем Лицензионном соглашении не дает вам права использовать какие-либо фирменные наименования, товарные знаки, знаки обслуживания, логотипы, доменные имена или другие отличительные элементы бренда Google. 3.8 Вы соглашаетесь не удалять, не скрывать и не изменять какие-либо уведомления о правах собственности (включая уведомления об авторских правах и товарных знаках), которые могут быть прикреплены к SDK или содержаться в нем.4. Использование SDK вами
4.1 Google соглашается с тем, что не получает от вас (или ваших лицензиаров) никаких прав, титулов или интересов в отношении любых программных приложений, которые вы разрабатываете с использованием SDK, включая любые права интеллектуальной собственности, существующие в этих приложениях. 4.2 Вы соглашаетесь использовать SDK и создавать приложения только для целей, разрешенных (а) Лицензионным соглашением и (б) любым применимым законом, положением или общепринятой практикой или руководящими принципами в соответствующих юрисдикциях (включая любые законы, касающиеся экспорта данных или программного обеспечения в Соединенные Штаты или другие соответствующие страны и из них). 4.3 Вы соглашаетесь с тем, что если вы используете SDK для разработки приложений для обычных пользователей, вы будете защищать конфиденциальность и законные права этих пользователей. Если пользователи предоставляют вам имена пользователей, пароли или другую информацию для входа в систему или личную информацию, вы должны уведомить пользователей о том, что эта информация будет доступна вашему приложению, и вы должны обеспечить юридически адекватное уведомление о конфиденциальности и защиту для этих пользователей. Если ваше приложение хранит личную или конфиденциальную информацию, предоставленную пользователями, оно должно делать это безопасным образом. Если пользователь предоставляет вашему приложению информацию об учетной записи Google, ваше приложение может использовать эту информацию для доступа к учетной записи Google пользователя только тогда и в ограниченных целях, на которые пользователь дал вам разрешение. 4.4 Вы соглашаетесь, что не будете заниматься какой-либо деятельностью с SDK, включая разработку или распространение приложения, которая препятствует, нарушает, повреждает или несанкционированно получает доступ к серверам, сетям или другим ресурсам или услугам любой третьей стороны, включая, помимо прочего, Google или любого оператора мобильной связи. 4.5 Вы соглашаетесь, что несете единоличную ответственность за (и что Google не несет никакой ответственности перед вами или любой третьей стороной за) любые данные, контент или ресурсы, которые вы создаете, передаете или отображаете через Android и/или приложения для Android, а также за последствия ваших действий (включая любые убытки или ущерб, которые может понести Google). 4.6 Вы соглашаетесь с тем, что несете единоличную ответственность за любое нарушение ваших обязательств по Лицензионному соглашению, любому применимому договору с третьей стороной или Условиям обслуживания, а также за любой применимый закон или нормативный акт, а также за последствия (включая любые убытки или ущерб, которые может понести Google или любая третья сторона) любого такого нарушения (и что Google не несет за них никакой ответственности).5. Ваши учетные данные разработчика
5.1 Вы соглашаетесь с тем, что несете ответственность за сохранение конфиденциальности любых учетных данных разработчика, которые могут быть выданы вам компанией Google или которые вы можете выбрать самостоятельно, и что вы будете нести единоличную ответственность за все приложения, разработанные с использованием ваших учетных данных разработчика.6. Конфиденциальность и информация
6.1 В целях постоянного совершенствования и улучшения SDK компания Google может собирать определенную статистику использования программного обеспечения, включая, помимо прочего, уникальный идентификатор, связанный IP-адрес, номер версии программного обеспечения, а также информацию о том, какие инструменты и/или сервисы в SDK используются и как они используются. Перед сбором любой из этих данных SDK уведомит вас и запросит ваше согласие. Если вы откажетесь дать согласие, информация не будет собрана. 6.2 Собранные данные анализируются в совокупности для улучшения SDK и хранятся в соответствии с Политикой конфиденциальности Google, которая находится по следующему адресу: https://policies.google.com/privacy 6.3 Анонимизированные и агрегированные наборы данных могут быть переданы партнерам Google для улучшения SDK.7. Сторонние приложения
7.1 Если вы используете SDK для запуска приложений, разработанных третьей стороной, или приложений, получающих доступ к данным, контенту или ресурсам, предоставляемым третьей стороной, вы соглашаетесь с тем, что Google не несет ответственности за эти приложения, данные, контент или ресурсы. Вы понимаете, что все данные, контент или ресурсы, к которым вы можете получить доступ через такие приложения третьих сторон, являются исключительной ответственностью лица, от которого они исходят, и что Google не несет ответственности за любые убытки или ущерб, которые вы можете понести в результате использования или доступа к любым из этих приложений, данных, контента или ресурсов третьих сторон. 7.2 Вам следует знать, что данные, контент и ресурсы, предоставляемые вам через такое приложение третьей стороны, могут быть защищены правами интеллектуальной собственности, принадлежащими поставщикам (или другим лицам или компаниям от их имени). Вы не можете изменять, сдавать в аренду, предоставлять в лизинг, давать взаймы, продавать, распространять или создавать производные работы на основе этих данных, контента или ресурсов (полностью или частично), если вы не получили на это специальное разрешение от соответствующих владельцев. 7.3 Вы признаете, что использование вами таких сторонних приложений, данных, контента или ресурсов может регулироваться отдельными условиями между вами и соответствующей третьей стороной. В этом случае Лицензионное соглашение не влияет на ваши правовые отношения с этими третьими сторонами.8. Использование API Android
8.1 API данных Google 8.1.1 Если вы используете какой-либо API для получения данных от Google, вы подтверждаете, что эти данные могут быть защищены правами интеллектуальной собственности, принадлежащими Google или сторонам, предоставляющим данные (или другим лицам или компаниям от их имени). Использование вами любого такого API может регулироваться дополнительными Условиями обслуживания. Вы не имеете права изменять, сдавать в аренду, предоставлять в лизинг, давать взаймы, продавать, распространять или создавать производные работы на основе этих данных (полностью или частично), если это не разрешено соответствующими Условиями обслуживания. 8.1.2 Если вы используете какой-либо API для получения данных пользователя от Google, вы подтверждаете и соглашаетесь с тем, что будете получать данные только с явного согласия пользователя и только тогда и для ограниченных целей, для которых пользователь дал вам разрешение на это. Используя API службы распознавания речи Android, документацию по которому можно найти по следующему адресу: https://developer.android.com/reference/android/speech/RecognitionService (с периодическими обновлениями), вы подтверждаете, что использование API регулируется Дополнением к соглашению об обработке данных для продуктов, в которых Google выступает в качестве обработчика данных, которое находится по следующему адресу: https://privacy.google.com/businesses/gdprprocessorterms/ (с периодическими обновлениями). Нажимая кнопку «Принять», вы тем самым соглашаетесь с условиями Дополнения к соглашению об обработке данных для продуктов, в которых Google выступает в качестве обработчика данных.9. Расторжение настоящего лицензионного соглашения
9.1 Лицензионное соглашение будет продолжать действовать до тех пор, пока оно не будет расторгнуто вами или Google в соответствии с условиями, изложенными ниже. 9.2 Если вы хотите расторгнуть Лицензионное соглашение, вы можете сделать это, прекратив использование SDK и любых соответствующих учетных данных разработчика. 9.3 Google может в любое время расторгнуть с вами Лицензионное соглашение, если: (A) вы нарушили какое-либо положение Лицензионного соглашения; или (B) Google обязан сделать это по закону; или (C) партнер, с которым Google предоставлял вам определенные части SDK (например, API), прекратил свои отношения с Google или перестал предоставлять вам определенные части SDK; или (D) Google принимает решение больше не предоставлять SDK или определенные части SDK пользователям в стране, в которой вы проживаете или из которой вы используете услугу, или предоставление вам SDK или определенных услуг SDK компанией Google, по собственному усмотрению Google, больше не является коммерчески целесообразным. 9.4. После прекращения действия Лицензионного соглашения все юридические права, обязанности и ответственность, которыми вы и Google пользовались, которым подчинялись (или которые возникли с течением времени, пока Лицензионное соглашение действовало) или которые, как указано, сохраняются бессрочно, остаются в силе, и положения пункта 14.7 продолжают применяться к таким правам, обязанностям и ответственности бессрочно.10. ОТКАЗ ОТ ГАРАНТИЙ
10.1 Вы прямо понимаете и соглашаетесь с тем, что использование вами SDK осуществляется на ваш собственный риск, и что SDK предоставляется «как есть» и «в наличии» без каких-либо гарантий со стороны Google. 10.2 Использование вами SDK и любых материалов, загруженных или иным образом полученных посредством использования SDK, осуществляется на ваше собственное усмотрение и риск, и вы несете единоличную ответственность за любой ущерб вашей компьютерной системе или другому устройству, а также за потерю данных, возникшие в результате такого использования. 10.3 Компания Google также прямо отказывается от всех гарантий и условий любого рода, как явных, так и подразумеваемых, включая, помимо прочего, подразумеваемые гарантии и условия товарной пригодности, пригодности для определенной цели и отсутствия нарушений прав.11. Ограничение ответственности
11.1 Вы прямо понимаете и соглашаетесь с тем, что Google, его дочерние компании и аффилированные лица, а также его лицензиары не будут нести перед вами никакой ответственности по какой бы то ни было теории ответственности за любые прямые, косвенные, случайные, специальные, последующие или штрафные убытки, которые могут быть понесены вами, включая любую потерю данных, независимо от того, были ли Google или его представители уведомлены или должны были знать о возможности возникновения таких убытков.12. Возмещение убытков
12.1 В максимальной степени, разрешенной законом, вы соглашаетесь защищать, возмещать убытки и ограждать Google, его аффилированные компании и их соответствующих директоров, должностных лиц, сотрудников и агентов от любых и всех претензий, исков, судебных разбирательств, а также от любых и всех потерь, обязательств, убытков, затрат и расходов (включая разумные гонорары адвокатов), возникающих в результате или связанных с (а) использованием вами SDK, (б) любым приложением, разработанным вами на основе SDK, которое нарушает авторские права, товарные знаки, коммерческую тайну, фирменный стиль, патенты или другие права интеллектуальной собственности любого лица, порочит любое лицо или нарушает его права на публичность или неприкосновенность частной жизни, и (в) любым несоблюдением вами условий Лицензионного соглашения.13. Изменения в Лицензионном соглашении
13.1 Google может вносить изменения в Лицензионное соглашение по мере распространения новых версий SDK. После внесения этих изменений Google разместит новую версию Лицензионного соглашения на веб-сайте, где доступен SDK.14. Общие юридические термины
14.1 Настоящее Лицензионное соглашение представляет собой полное юридическое соглашение между вами и Google и регулирует ваше использование SDK (за исключением любых услуг, которые Google может предоставлять вам в соответствии с отдельным письменным соглашением), и полностью заменяет любые предыдущие соглашения между вами и Google в отношении SDK. 14.2 Вы соглашаетесь с тем, что если Google не воспользуется или не обеспечит соблюдение какого-либо юридического права или средства правовой защиты, предусмотренного в Лицензионном соглашении (или которым Google обладает в соответствии с любым применимым законодательством), это не будет считаться формальным отказом от прав Google, и эти права или средства правовой защиты по-прежнему будут доступны Google. 14.3 Если какой-либо суд, обладающий юрисдикцией для принятия решения по данному вопросу, признает какое-либо положение Лицензионного соглашения недействительным, то это положение будет исключено из Лицензионного соглашения без ущерба для остальных положений Лицензионного соглашения. Остальные положения Лицензионного соглашения останутся действительными и подлежащими исполнению. 14.4 Вы признаете и соглашаетесь с тем, что каждый член группы компаний, материнской компанией которой является Google, будет являться третьим лицом-бенефициаром Лицензионного соглашения, и что такие другие компании будут иметь право напрямую применять и полагаться на любое положение Лицензионного соглашения, которое предоставляет им выгоду (или права в их пользу). Помимо этого, никакое другое лицо или компания не будут являться третьими лицами-бенефициарами Лицензионного соглашения. 14.5 ОГРАНИЧЕНИЯ НА ЭКСПОРТ. SDK ПОДЛЕЖИТ ДЕЙСТВИЮ ЗАКОНОВ И ПРАВИЛ ЭКСПОРТА СОЕДИНЕННЫХ ШТАТОВ. ВЫ ДОЛЖНЫ СОБЛЮДАТЬ ВСЕ ВНУТРЕННИЕ И МЕЖДУНАРОДНЫЕ ЗАКОНЫ И ПРАВИЛА ЭКСПОРТА, ПРИМЕНЯЕМЫЕ К SDK. ЭТИ ЗАКОНЫ ВКЛЮЧАЮТ ОГРАНИЧЕНИЯ НА НАПРАВЛЕНИЯ, КОНЕЧНЫХ ПОЛЬЗОВАТЕЛЕЙ И КОНЕЧНОЕ ИСПОЛЬЗОВАНИЕ. 14.6 Права, предоставленные в Лицензионном соглашении, не могут быть переданы или переуступлены ни вами, ни Google без предварительного письменного согласия другой стороны. Ни вам, ни Google не разрешается делегировать свои обязанности или обязательства по Лицензионному соглашению без предварительного письменного согласия другой стороны. 14.7 Лицензионное соглашение и ваши отношения с Google в соответствии с Лицензионным соглашением регулируются законами штата Калифорния без учета коллизионных норм. Вы и Google соглашаетесь подчиниться исключительной юрисдикции судов, расположенных в округе Санта-Клара, штат Калифорния, для разрешения любых юридических вопросов, возникающих из Лицензионного соглашения. Несмотря на это, вы соглашаетесь с тем, что Google по-прежнему будет иметь право подавать заявления о применении обеспечительных мер (или эквивалентного вида срочной юридической защиты) в любой юрисдикции. 28 апреля 2026 г. Ваше текущее устройство не поддерживается.
Ознакомьтесь с системными требованиями .
Это стабильная версия Android Studio. Обратите внимание, что патчи могут содержать новые незначительные функции и исправления ошибок. См. раздел «Названия версий Android Studio» , чтобы понять систему именования версий Android Studio.
Чтобы узнать, что было исправлено в этой версии Android Studio, ознакомьтесь с закрытыми проблемами .
Чтобы ознакомиться с примечаниями к выпуску более старых версий Android Studio, см. раздел «Предыдущие выпуски» .
Чтобы получить ранний доступ к будущим функциям и улучшениям, ознакомьтесь с предварительными сборками Android Studio .
Если у вас возникли проблемы в Android Studio, проверьте страницу «Известные проблемы» или страницу «Устранение неполадок» .
Совместимость с плагином Android Gradle и Android Studio.
Система сборки Android Studio основана на Gradle, а плагин Android Gradle (AGP) добавляет несколько функций, специфичных для сборки приложений Android. В следующей таблице указано, какая версия AGP требуется для каждой версии Android Studio.
| версия Android Studio | Требуемая версия AGP |
|---|---|
| Перепел 2 | 2026.1.2 | 7.1-9.3 |
| Перепел 1 | 2026.1.1 | 7.1-9.2 |
| Панда 4 | 2025.3.4 | 7.1-9.2 |
| Панда 3 | 2025.3.3 | 7.0-9.1 |
| Панда 2 | 2025.3.2 | 7.0-9.1 |
| Панда 1 | 2025.3.1 | 7.0-9.0 |
| Обновление функционала Otter 3 | 2025.2.3 | 4.2-9.0 |
| Обновление функционала Otter 2 | 2025.2.2 | 4.1-8.13 |
| Выдра | 2025.2.1 | 4.0-8.13 |
| Обновление Narwhal 4 | 04.01.2025 | 4.0-8.13 |
| Обновление Narwhal 3 | 03.01.2025 | 4.0-8.13 |
| Выпуск новой функции «Нарвал» | 2.01.2025 | 4.0-8.12 |
| Нарвал | 2025.1.1 | 3.2-8.11 |
| Обновление функционала Meerkat | 2.03.2024 | 3.2-8.10 |
| Сурикаты | 2024.3.1 | 3.2-8.9 |
Более старые версии
| версия Android Studio | Требуемая версия AGP |
|---|---|
| Обновление функционала Ladybug | 2.2.2024 | 3.2-8.8 |
| Божья коровка | 2024.2.1 | 3.2-8.7 |
| Обновление функционала Koala | 2.1.2024 | 3.2-8.6 |
| Коала | 2024.1.1 | 3.2-8.5 |
| Медузы | 2023.3.1 | 3.2-8.4 |
| Игуана | 2023.2.1 | 3.2-8.3 |
| Ёж | 2023.1.1 | 3.2-8.2 |
| Жираф | 2022.3.1 | 3.2-8.1 |
| Фламинго | 2022.2.1 | 3.2-8.0 |
| Электрический угорь | 1.01.2022 | 3.2-7.4 |
| Дельфин | 2021.3.1 | 3.2-7.3 |
| Бурундук | 2021.2.1 | 3.2-7.2 |
| Шмель | 2021.1.1 | 3.2-7.1 |
| Арктическая лиса | 2020.3.1 | 3.1-7.0 |
Для получения информации о нововведениях в плагине Android Gradle см. примечания к выпуску плагина Android Gradle .
Минимальные версии инструментов для уровня Android API
Существуют минимальные версии Android Studio и AGP, поддерживающие определённый уровень API. Использование более старых версий Android Studio или AGP, чем требуется для targetSdk или compileSdk вашего проекта, может привести к непредвиденным проблемам. Мы рекомендуем использовать последнюю предварительную версию Android Studio и AGP для работы над проектами, ориентированными на предварительные версии ОС Android. Вы можете установить предварительные версии Android Studio вместе со стабильной версией .
Минимальные версии Android Studio и AGP следующие:
| Уровень API | Минимальная версия Android Studio | Минимальная версия AGP |
|---|---|---|
| 37.0 | Panda 3 | Патч 1 (2025.3.3) | 9.1.1 |
| 36.1 | Обновление Narwhal 3 | 03.01.2025 | 8.13.0 |
| 36 | Сурикат | Патч 1, версия 2024.3.1 | 8.9.1 |
| 35 | Обновление функционала Koala | 2024.2.1 | 8.6.0 |
| 34 | Ёж | 2023.1.1 | 8.1.1 |
| 33 | Фламинго | 2022.2.1 | 7.2 |
Совместимость с Android Studio и облачными сервисами.
Android Studio включает в себя интеграцию с сервисами, которая помогает вам и вашей команде быстрее продвигаться в разработке, выпуске и поддержке приложений для Android. Это включает в себя облачные сервисы, такие как Gemini в Android Studio, Play Vitals и Firebase Crashlytics. Облачные сервисы доступны только в последней стабильной версии Android Studio и в основных версиях (включая их исправления), выпущенных за последние 10 месяцев. Если версия выходит за пределы этого диапазона совместимости, интеграция с сервисами отключается, и вам необходимо обновить Android Studio.
Версии Android Studio, которые в настоящее время совместимы с облачными сервисами.
В настоящее время поддержка обновления Android Studio Narwhal 4 Feature Drop устарела и будет полностью отключена в следующем крупном релизе. Все более новые версии поддерживаются.
Студийные лаборатории
Studio Labs позволяет опробовать новейшие экспериментальные функции ИИ в стабильной версии Android Studio, что поможет вам быстрее интегрировать наши решения по поддержке ИИ в ваш рабочий процесс разработки. Для получения дополнительной информации см. Studio Labs .
Ниже перечислены функции, доступные в Studio Labs на данный момент.
| Особенность | Описание | Документы |
|---|---|---|
| Journeys for Android Studio | Используйте естественный язык для описания шагов и утверждений для сквозного тестирования. | Journeys for Android Studio |
Ниже перечислены новые функции Android Studio Quail 2.
Параллельные разговоры
В режиме агента можно одновременно вести несколько диалогов, что позволяет более эффективно выполнять многозадачность внутри IDE. Например, в одном диалоге можно запустить длительную задачу, такую как генерация тестов, во втором — спланировать новую функцию, а в третьем — составить документацию — и все это одновременно.
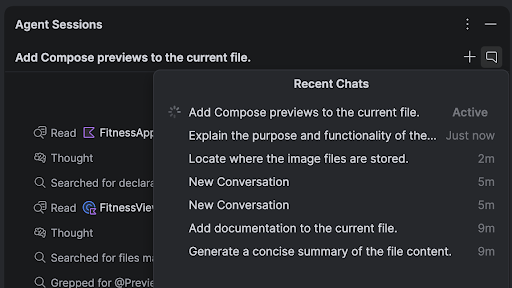
LeakCanary в профилировщике Android Studio
В Android Studio Panda интеграция с LeakCanary реализована непосредственно в профилировщике Android Studio в виде отдельной задачи.
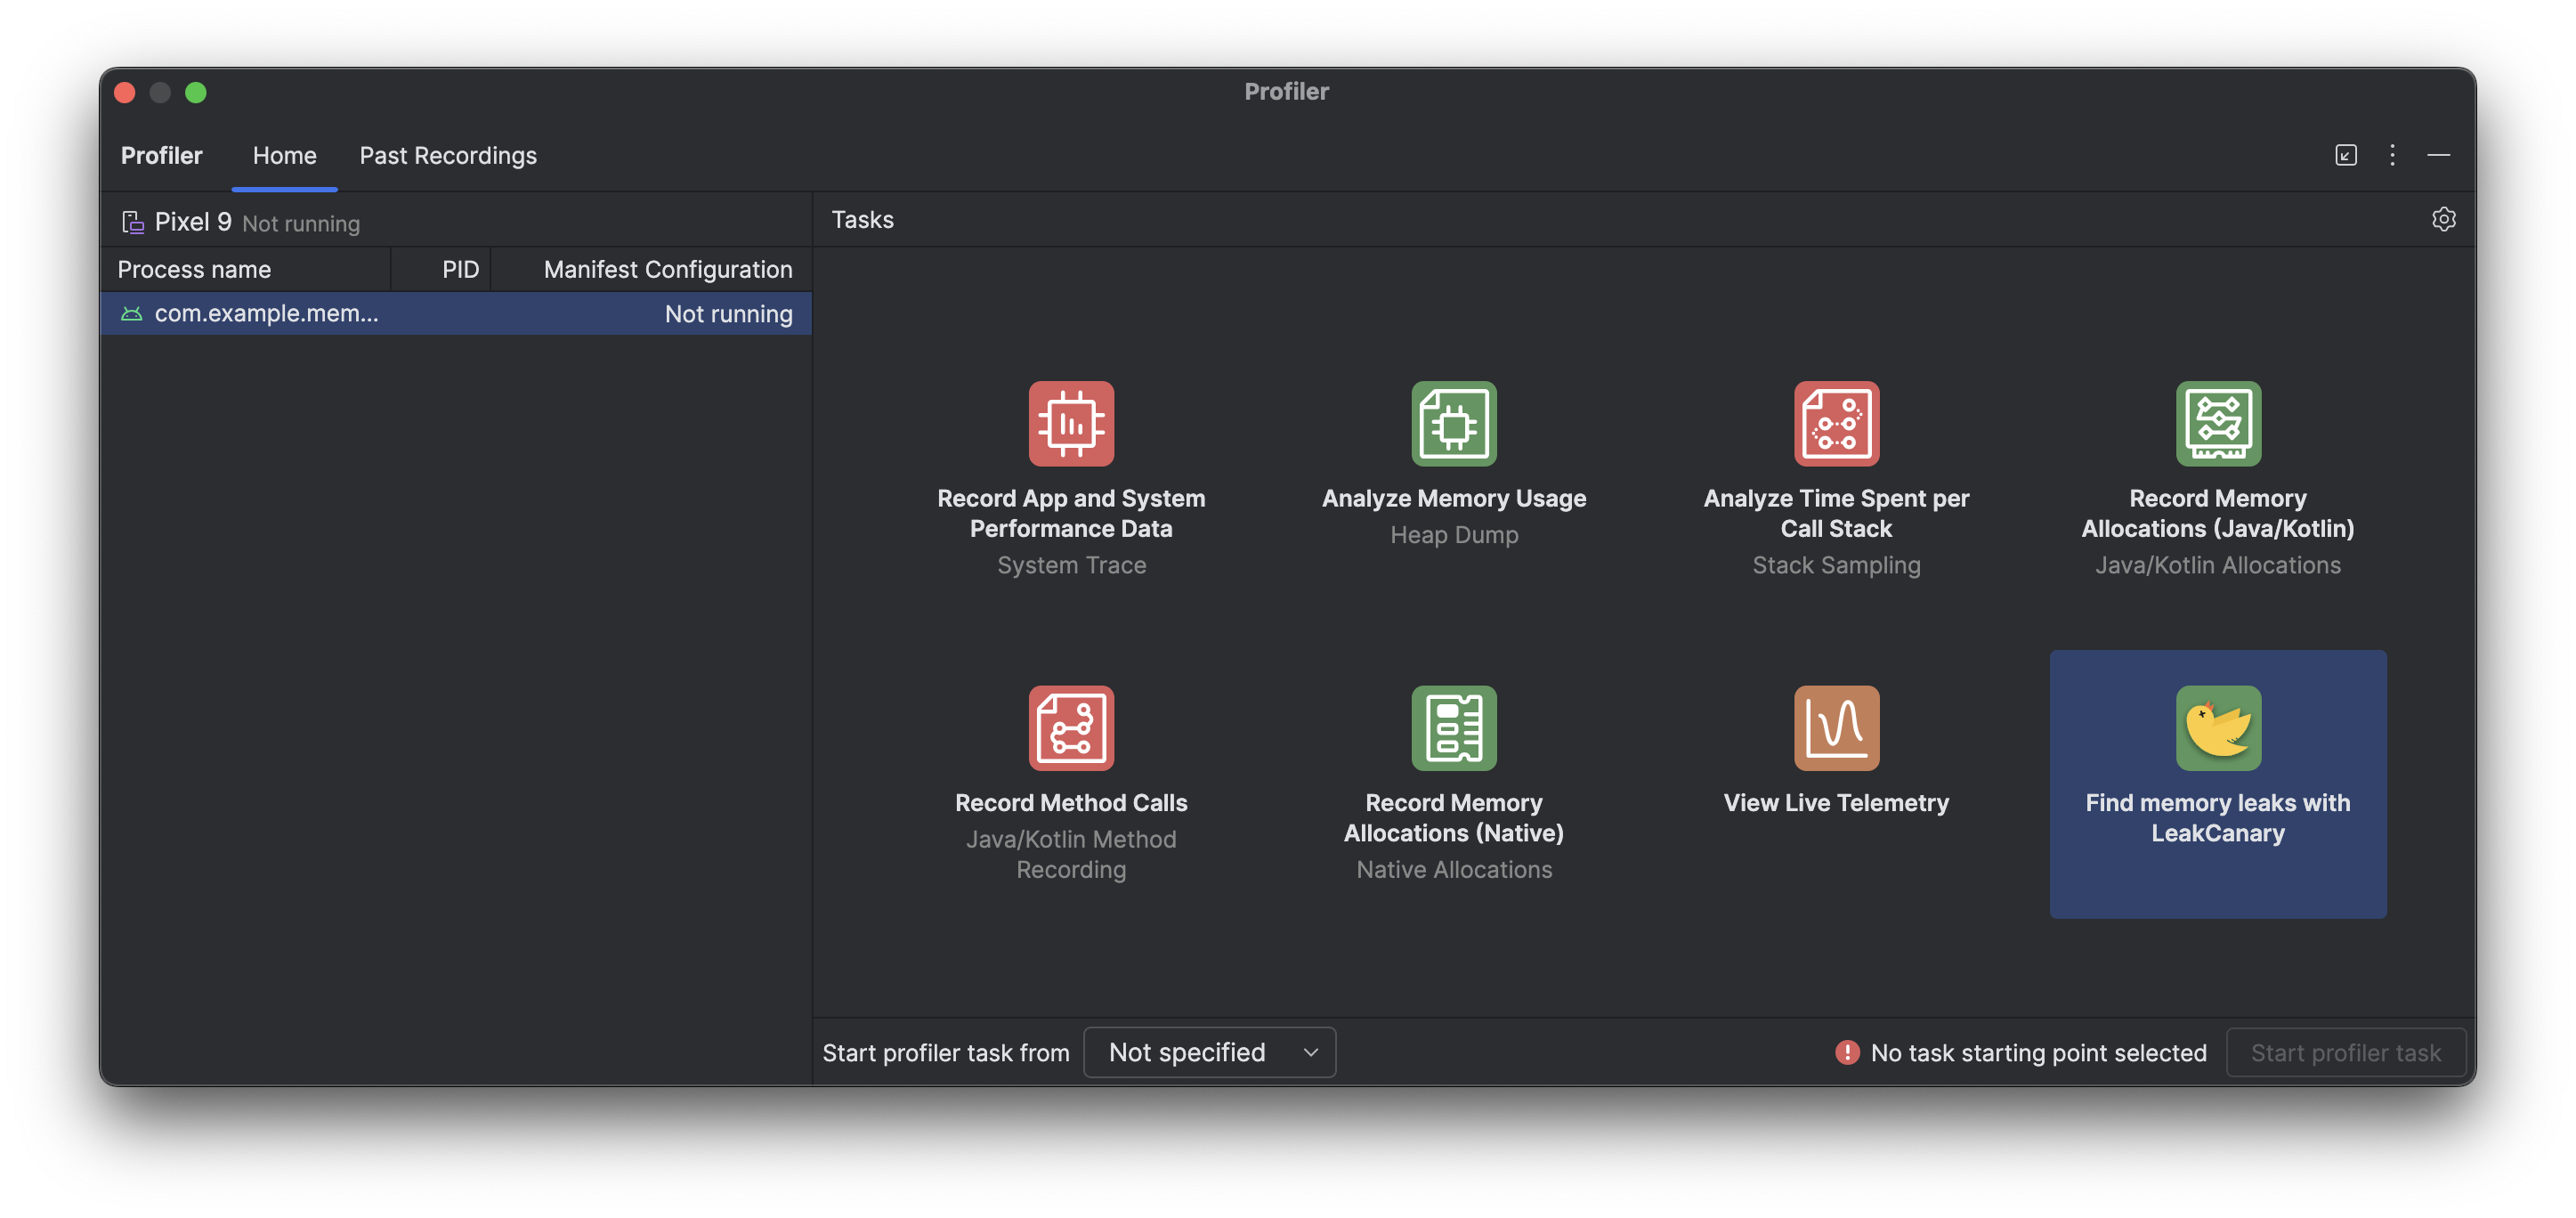
Задача профилирования LeakCanary в Android Studio активно переносит анализ утечек памяти с вашего устройства на вашу машину разработчика, что приводит к значительному повышению производительности на этапе анализа утечек по сравнению с анализом утечек на самом устройстве.
Кроме того, анализ утечек теперь контекстуализирован в IDE и полностью интегрирован с исходным кодом, предоставляя такие функции, как переход к исходному коду и другие полезные связи с кодом, которые значительно сокращают время и усилия, необходимые для исследования и устранения утечек памяти. Вы также можете скопировать весь анализ утечек для дальнейшей обработки с помощью Gemini. Это может значительно повысить вашу производительность и улучшить рабочий процесс на этапе разработки.