
Для компиляции и отладки нативного кода вашего приложения вам потребуются следующие компоненты:
- Android Native Development Kit (NDK): набор инструментов, позволяющий использовать код на C и C++ в Android.
- CMake: внешний инструмент сборки, работающий совместно с Gradle для сборки вашей нативной библиотеки. Этот компонент вам не понадобится, если вы планируете использовать только ndk-build.
- LLDB: отладчик, используемый Android Studio для отладки нативного кода. По умолчанию LLDB устанавливается вместе с Android Studio.
На этой странице описано, как установить эти компоненты автоматически, или как загрузить и установить их вручную с помощью Android Studio или инструмента sdkmanager .
Установка NDK и CMake происходит автоматически.
Плагин Android Gradle версии 4.2.0+ может автоматически установить необходимые NDK и CMake при первой сборке проекта, если их лицензии были предварительно приняты. Если вы уже прочитали и согласны с условиями лицензии, вы можете предварительно принять лицензии в скриптах с помощью следующей команды:
yes | ${sdk}/cmdline-tools/latest/bin/sdkmanager --licenses
Установите NDK и CMake.
При установке NDK Android Studio выбирает последнюю доступную версию. Для большинства проектов достаточно установить эту версию NDK по умолчанию. Однако, если вашему проекту требуется одна или несколько конкретных версий NDK, вы можете загрузить и настроить их . Это поможет обеспечить воспроизводимость сборок в разных проектах, каждый из которых зависит от определенной версии NDK. Android Studio устанавливает все версии NDK в каталог android-sdk /ndk/ .
Для установки CMake и стандартного NDK в Android Studio выполните следующие действия:
Открыв проект, нажмите Инструменты > Менеджер SDK .
Перейдите на вкладку «Инструменты SDK» .
Установите флажки NDK (Side by side) и CMake .
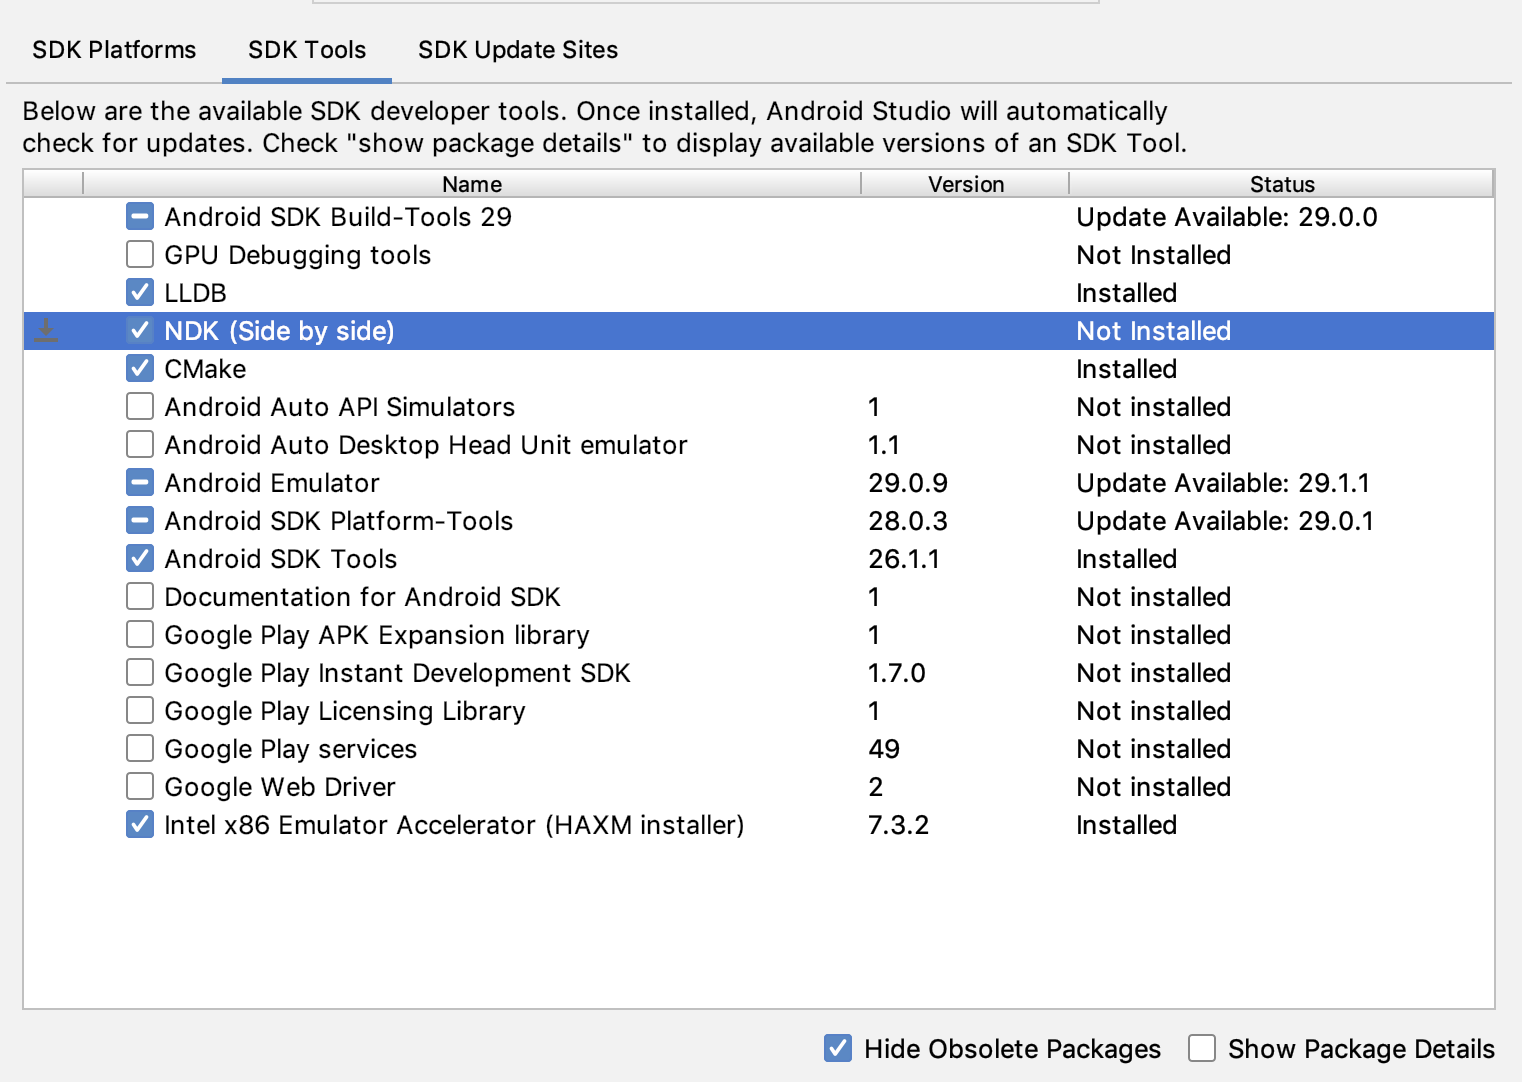 Рисунок 1. Окно «Инструменты SDK» , отображающее опцию NDK (Side by side).
Нажмите ОК .
В диалоговом окне отображается информация о том, сколько места на диске занимает пакет NDK.
Нажмите ОК .
После завершения установки нажмите кнопку «Готово» .
Ваш проект автоматически синхронизирует файл сборки и выполняет сборку. Устраните все возникшие ошибки.
Настройте конкретную версию CMake.
Менеджер SDK включает в себя форкнутую версию CMake 3.6.0 и версию 3.10.2. Проекты, в которых не указана конкретная версия CMake, собираются с использованием CMake 3.10.2. Чтобы указать версию CMake, добавьте следующее в файл build.gradle вашего модуля:
Классный
android {
    ...
    externalNativeBuild {
        cmake {
            ...
            version "cmake-version"
        }
    }
}
Котлин
android {
    ...
    externalNativeBuild {
        cmake {
            ...
            version = "cmake-version"
        }
    }
}
Если вы хотите использовать версию CMake, которая не входит в состав SDK Manager, выполните следующие действия:
- Загрузите и установите CMake с официального сайта CMake.
- Укажите версию CMake, которую Gradle должен использовать, в файле
build.gradleвашего модуля. Либо добавьте путь к установке CMake в переменную среды
PATH, либо укажите его в файлеlocal.propertiesвашего проекта, как показано. Если Gradle не сможет найти версию CMake, указанную в файлеbuild.gradle, вы получите ошибку сборки.# If you set this property, Gradle no longer uses PATH to find CMake. cmake.dir = "path-to-cmake"</pre>Если у вас еще не установлена система сборки Ninja на вашей рабочей станции, перейдите на официальный сайт Ninja и загрузите и установите последнюю доступную для вашей ОС версию Ninja. Обязательно добавьте путь к установке Ninja в переменную среды
PATH.
Установите определённую версию NDK.
Для установки определенной версии NDK выполните следующие действия:
Открыв проект, нажмите Инструменты > Менеджер SDK .
Перейдите на вкладку «Инструменты SDK» .
Установите флажок «Показать сведения о пакете» .
Выберите флажок NDK (Side by side) и флажки под ним, соответствующие версиям NDK, которые вы хотите установить. Android Studio установит все версии NDK в каталог
android-sdk /ndk/.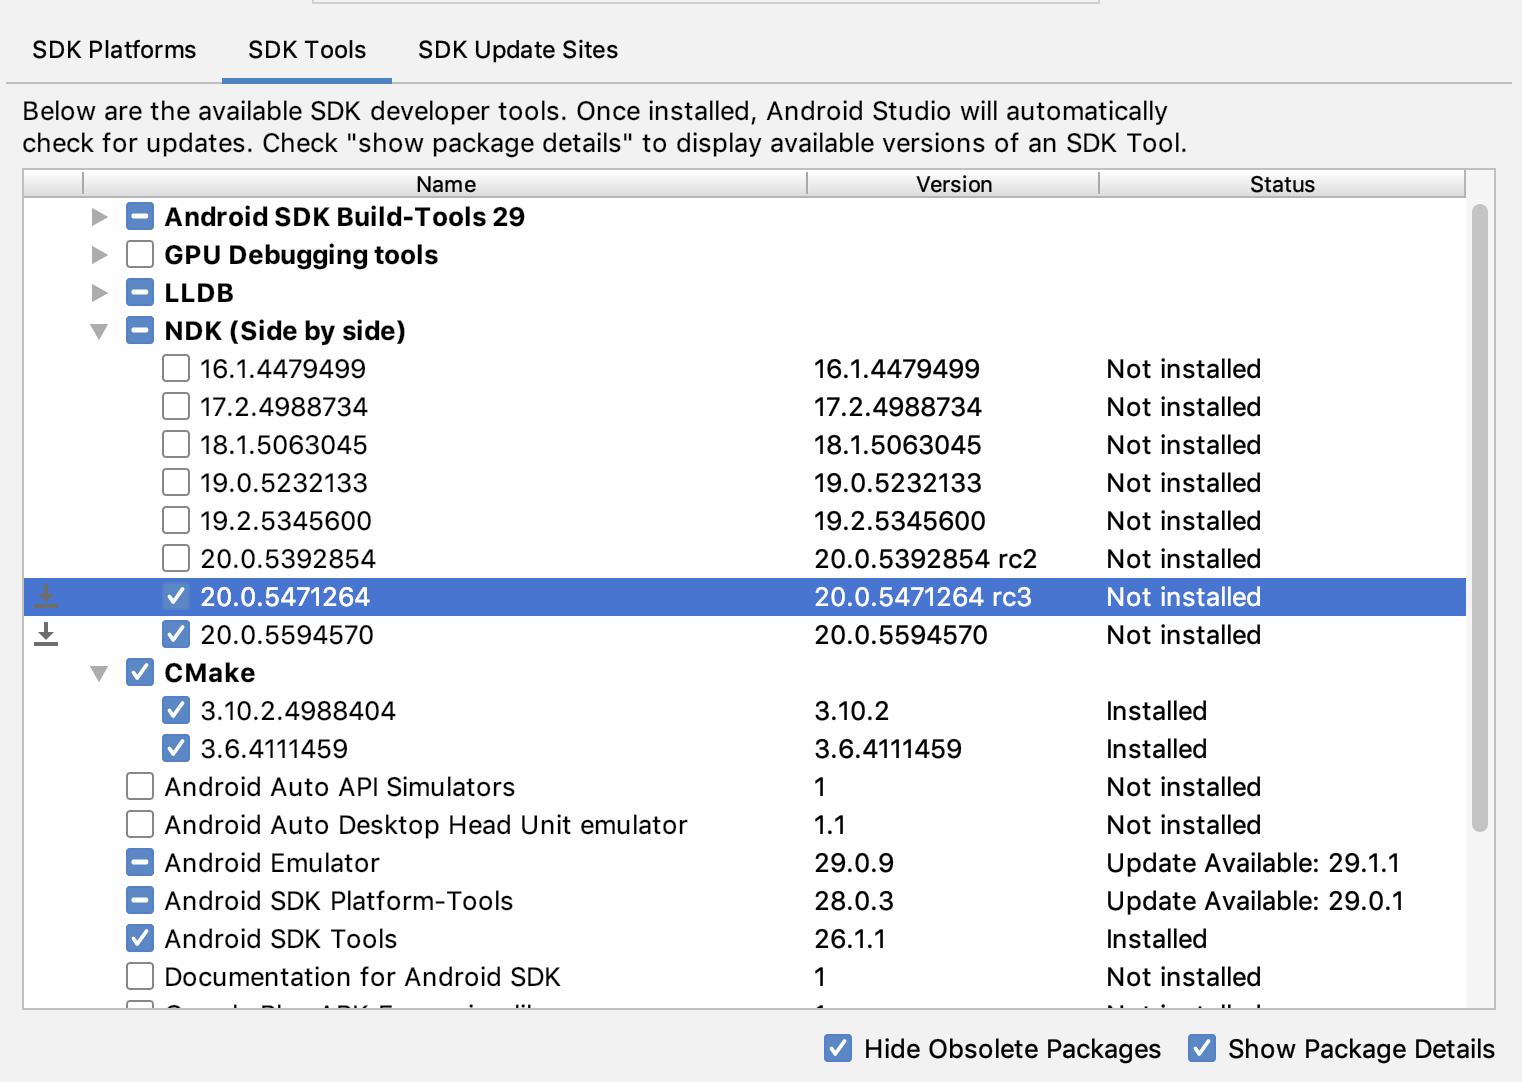 Рисунок 2. Окно «Инструменты SDK» , отображающее параметры NDK (Side by side).
Нажмите ОК .
В диалоговом окне отображается информация о том, сколько места занимают пакеты NDK.
Нажмите ОК .
После завершения установки нажмите кнопку «Готово» .
Ваш проект автоматически синхронизирует файл сборки и выполняет сборку. Устраните все возникшие ошибки.
Для каждого модуля укажите версию NDK, которую вы хотите использовать. При использовании Android Studio 3.6 или выше, если вы не укажете версию, плагин Android Gradle выберет версию, с которой он заведомо совместим.
Настройте конкретные версии NDK в вашем проекте.
Возможно, вам потребуется настроить версию NDK в вашем проекте, если выполняется одно из следующих условий:
- Ваш проект наследуется, и вам необходимо использовать определенные версии NDK и плагина Android Gradle (AGP). Для получения дополнительной информации см. раздел «Настройка NDK для плагина Android Gradle» .
У вас установлено несколько версий NDK, и вы хотите использовать определённую из них. В этом случае укажите версию с помощью свойства
android.ndkVersionв файлеbuild.gradleмодуля, как показано в следующем примере кода.Классный
android {
    ndkVersion "major.minor.build" // e.g.,  ndkVersion "21.3.6528147"
}
Котлин
android {
    ndkVersion = "major.minor.build" // e.g.,  ndkVersion "21.3.6528147"
}
Версия NDK по умолчанию для каждой версии AGP
Перед выпуском каждая версия AGP тщательно тестируется с последней стабильной версией NDK на тот момент. Эта версия NDK используется для сборки ваших проектов, если вы не указываете версию NDK в файле build.gradle . Версии NDK по умолчанию для разных версий AGP описаны в примечаниях к выпуску AGP и в примечаниях к предыдущим выпускам AGP .