
Android Studio makes it easy to create Android apps for various form factors, such as phones, tablets, TVs, and Wear devices. This page explains how to start a new Android app project or import an existing project.
If you don't have a project opened, create a new project by clicking New Project on the Android Studio Welcome screen.
If you do have a project opened, create a new project by selecting File > New > New Project from the main menu.
Choose your project type
In the New Project screen that appears, you can select the type of project you want to create from categories of device form factors, shown in the Templates pane. For example, figure 1 shows the project templates for phone and tablet.
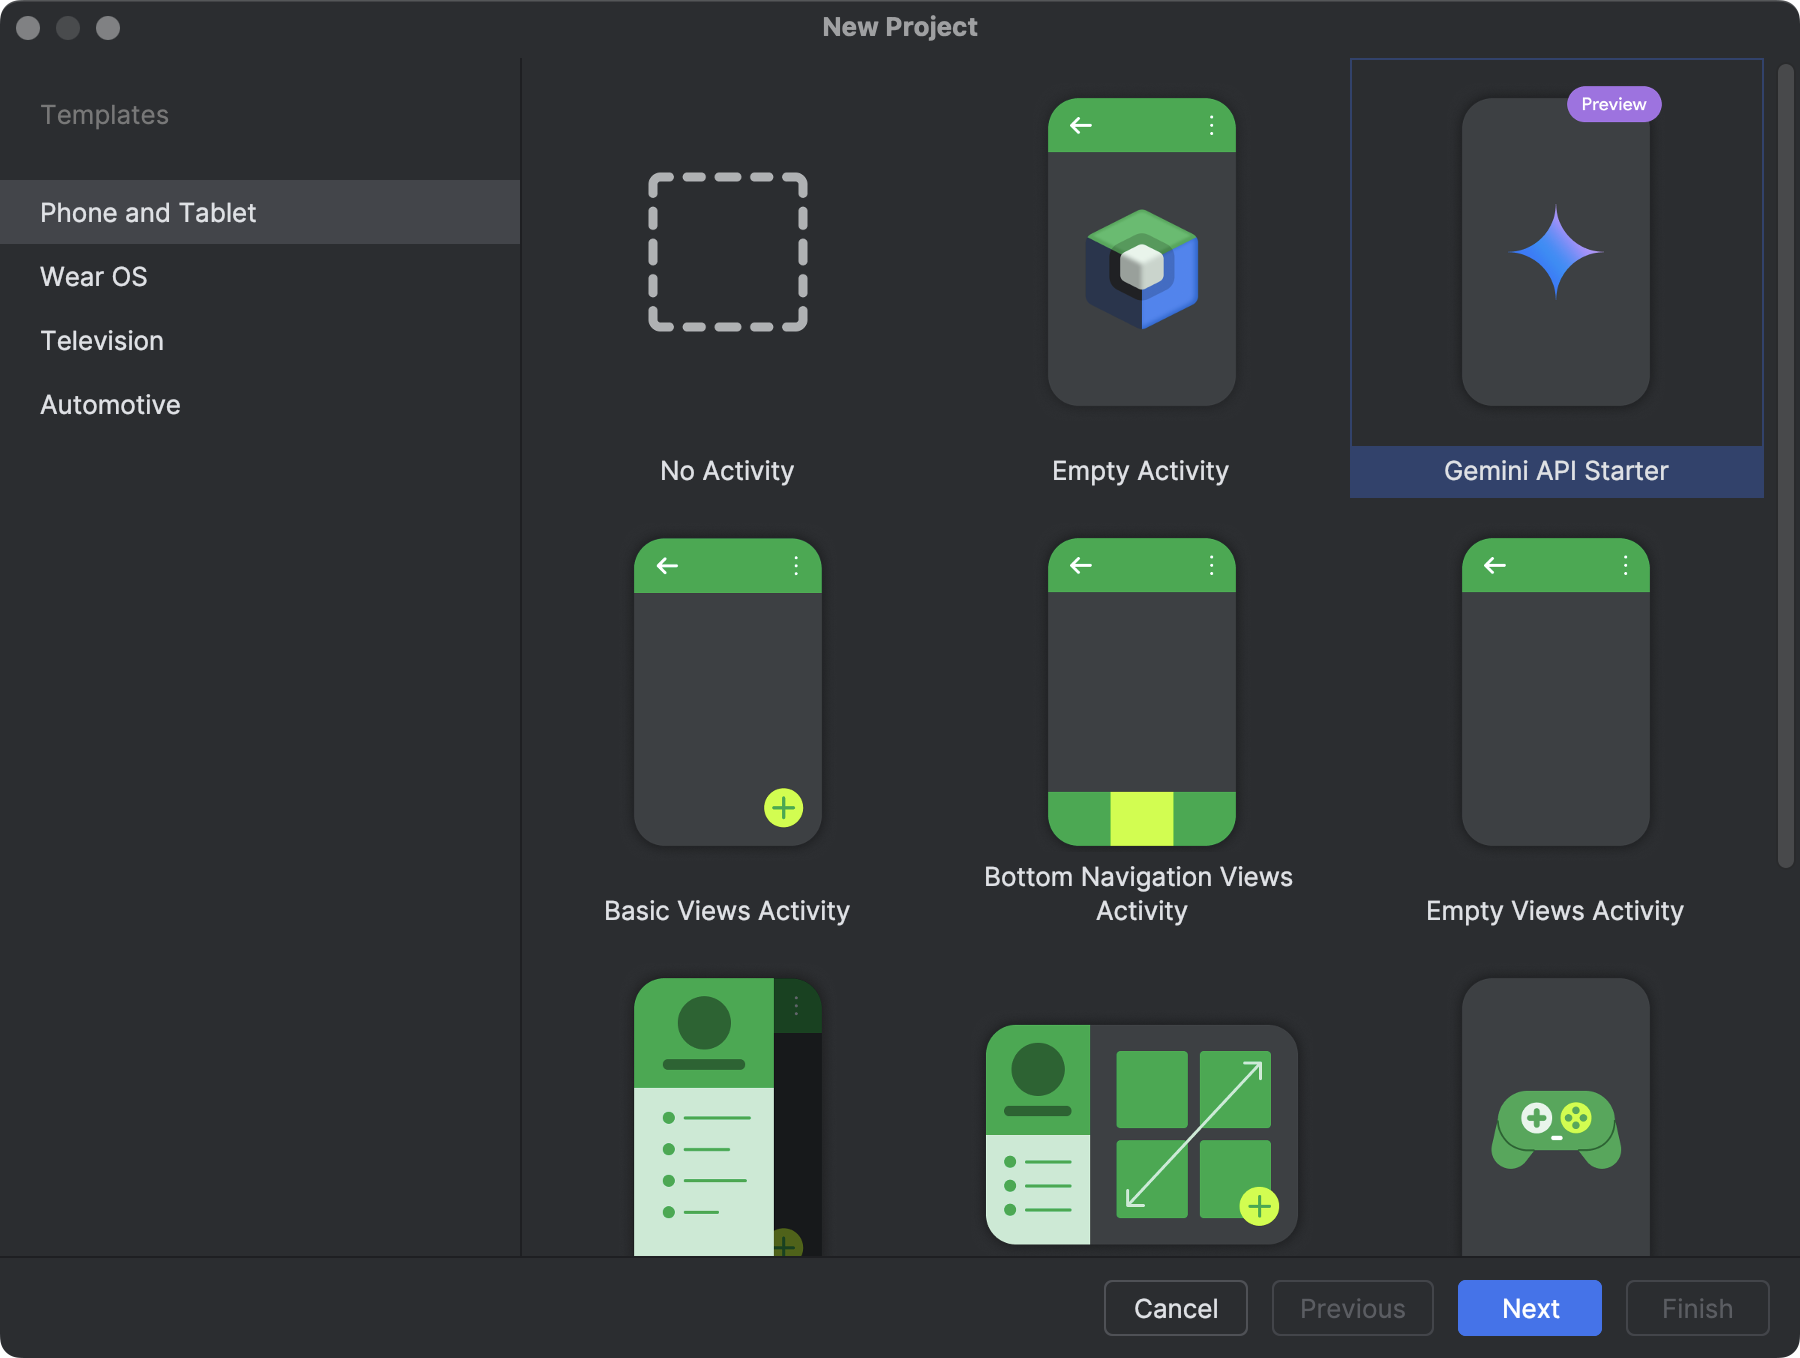
Selecting the type of project you want to create lets Android Studio include sample code and resources in your project to help you get started.
For Compose projects, Empty Activity is the recommended starting point for all new projects. It includes Compose dependencies and Material Design setup, providing a modern, declarative foundation. Use the other templates only if you are maintaining or migrating a legacy codebase.
Once you select your project type, click Next.
Configure your project
The next step in creating your project is to configure some settings, as shown in figure 2. If you're creating a Native C++ project, read Create a new project with C/C++ support to learn more about the options you need to configure.
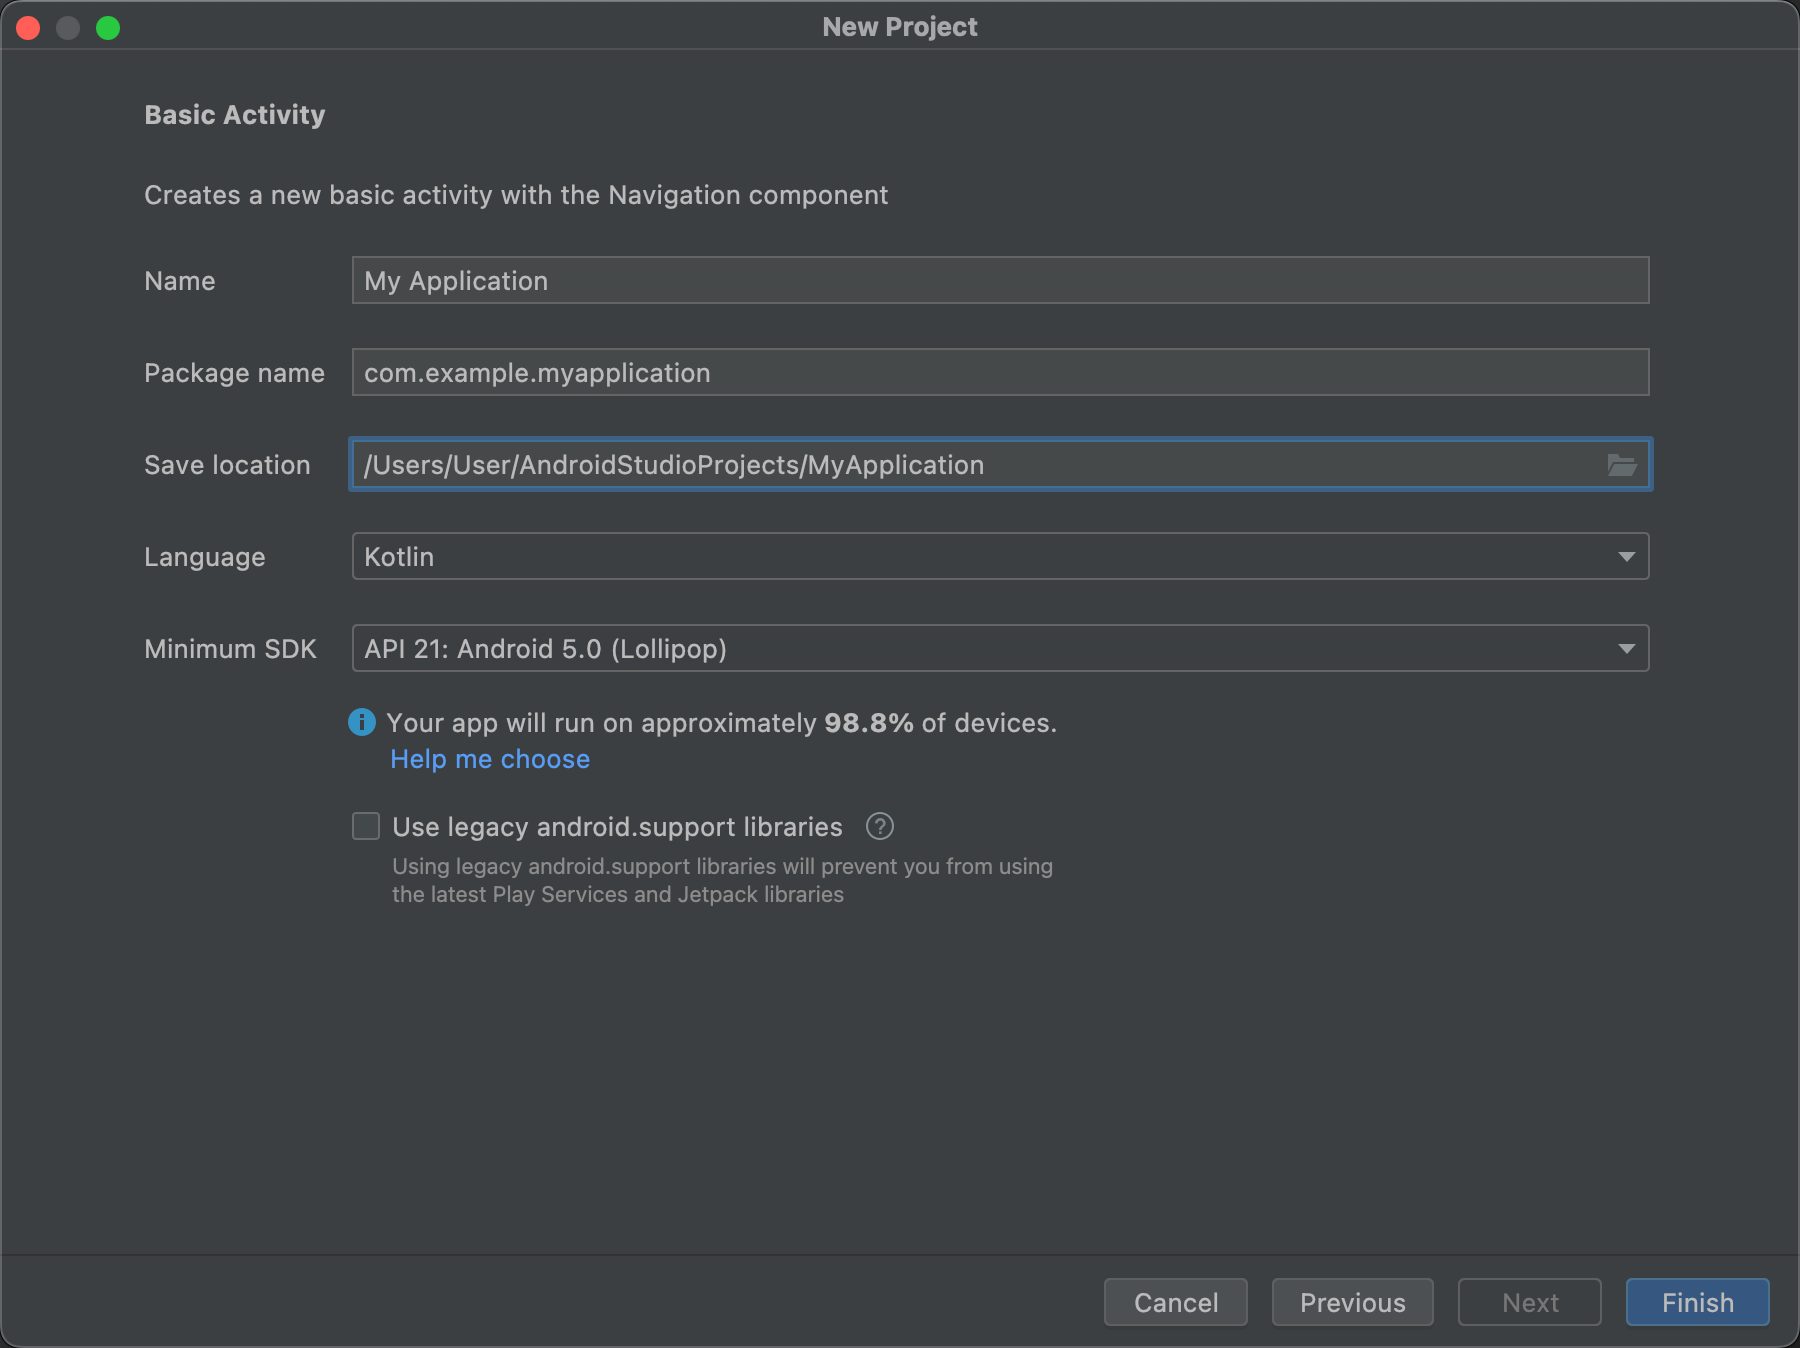
- Specify the Name of your project.
- Specify the Package name. By default, this package name becomes your project's namespace (used to access your project resources) and your project's application ID (used as the ID for publishing). To learn more, see Configure the app module.
Specify the Save location where you want to locally store your project.
Select the Language you want Android Studio to use when creating sample code for your new project. Kotlin is the recommended language and is required for modern frameworks like Jetpack Compose. Java is supported but not recommended for new projects.
Select the Minimum API level you want your app to support. When you select a lower API level, your app can't use as many modern Android APIs. However, a larger percentage of Android devices can run your app. The opposite is true when selecting a higher API level.
If you want to see more data to help you decide, click Help me choose. This displays a dialog showing the cumulative distribution for the API level you have selected and lets you see the impact of using different minimum API levels.
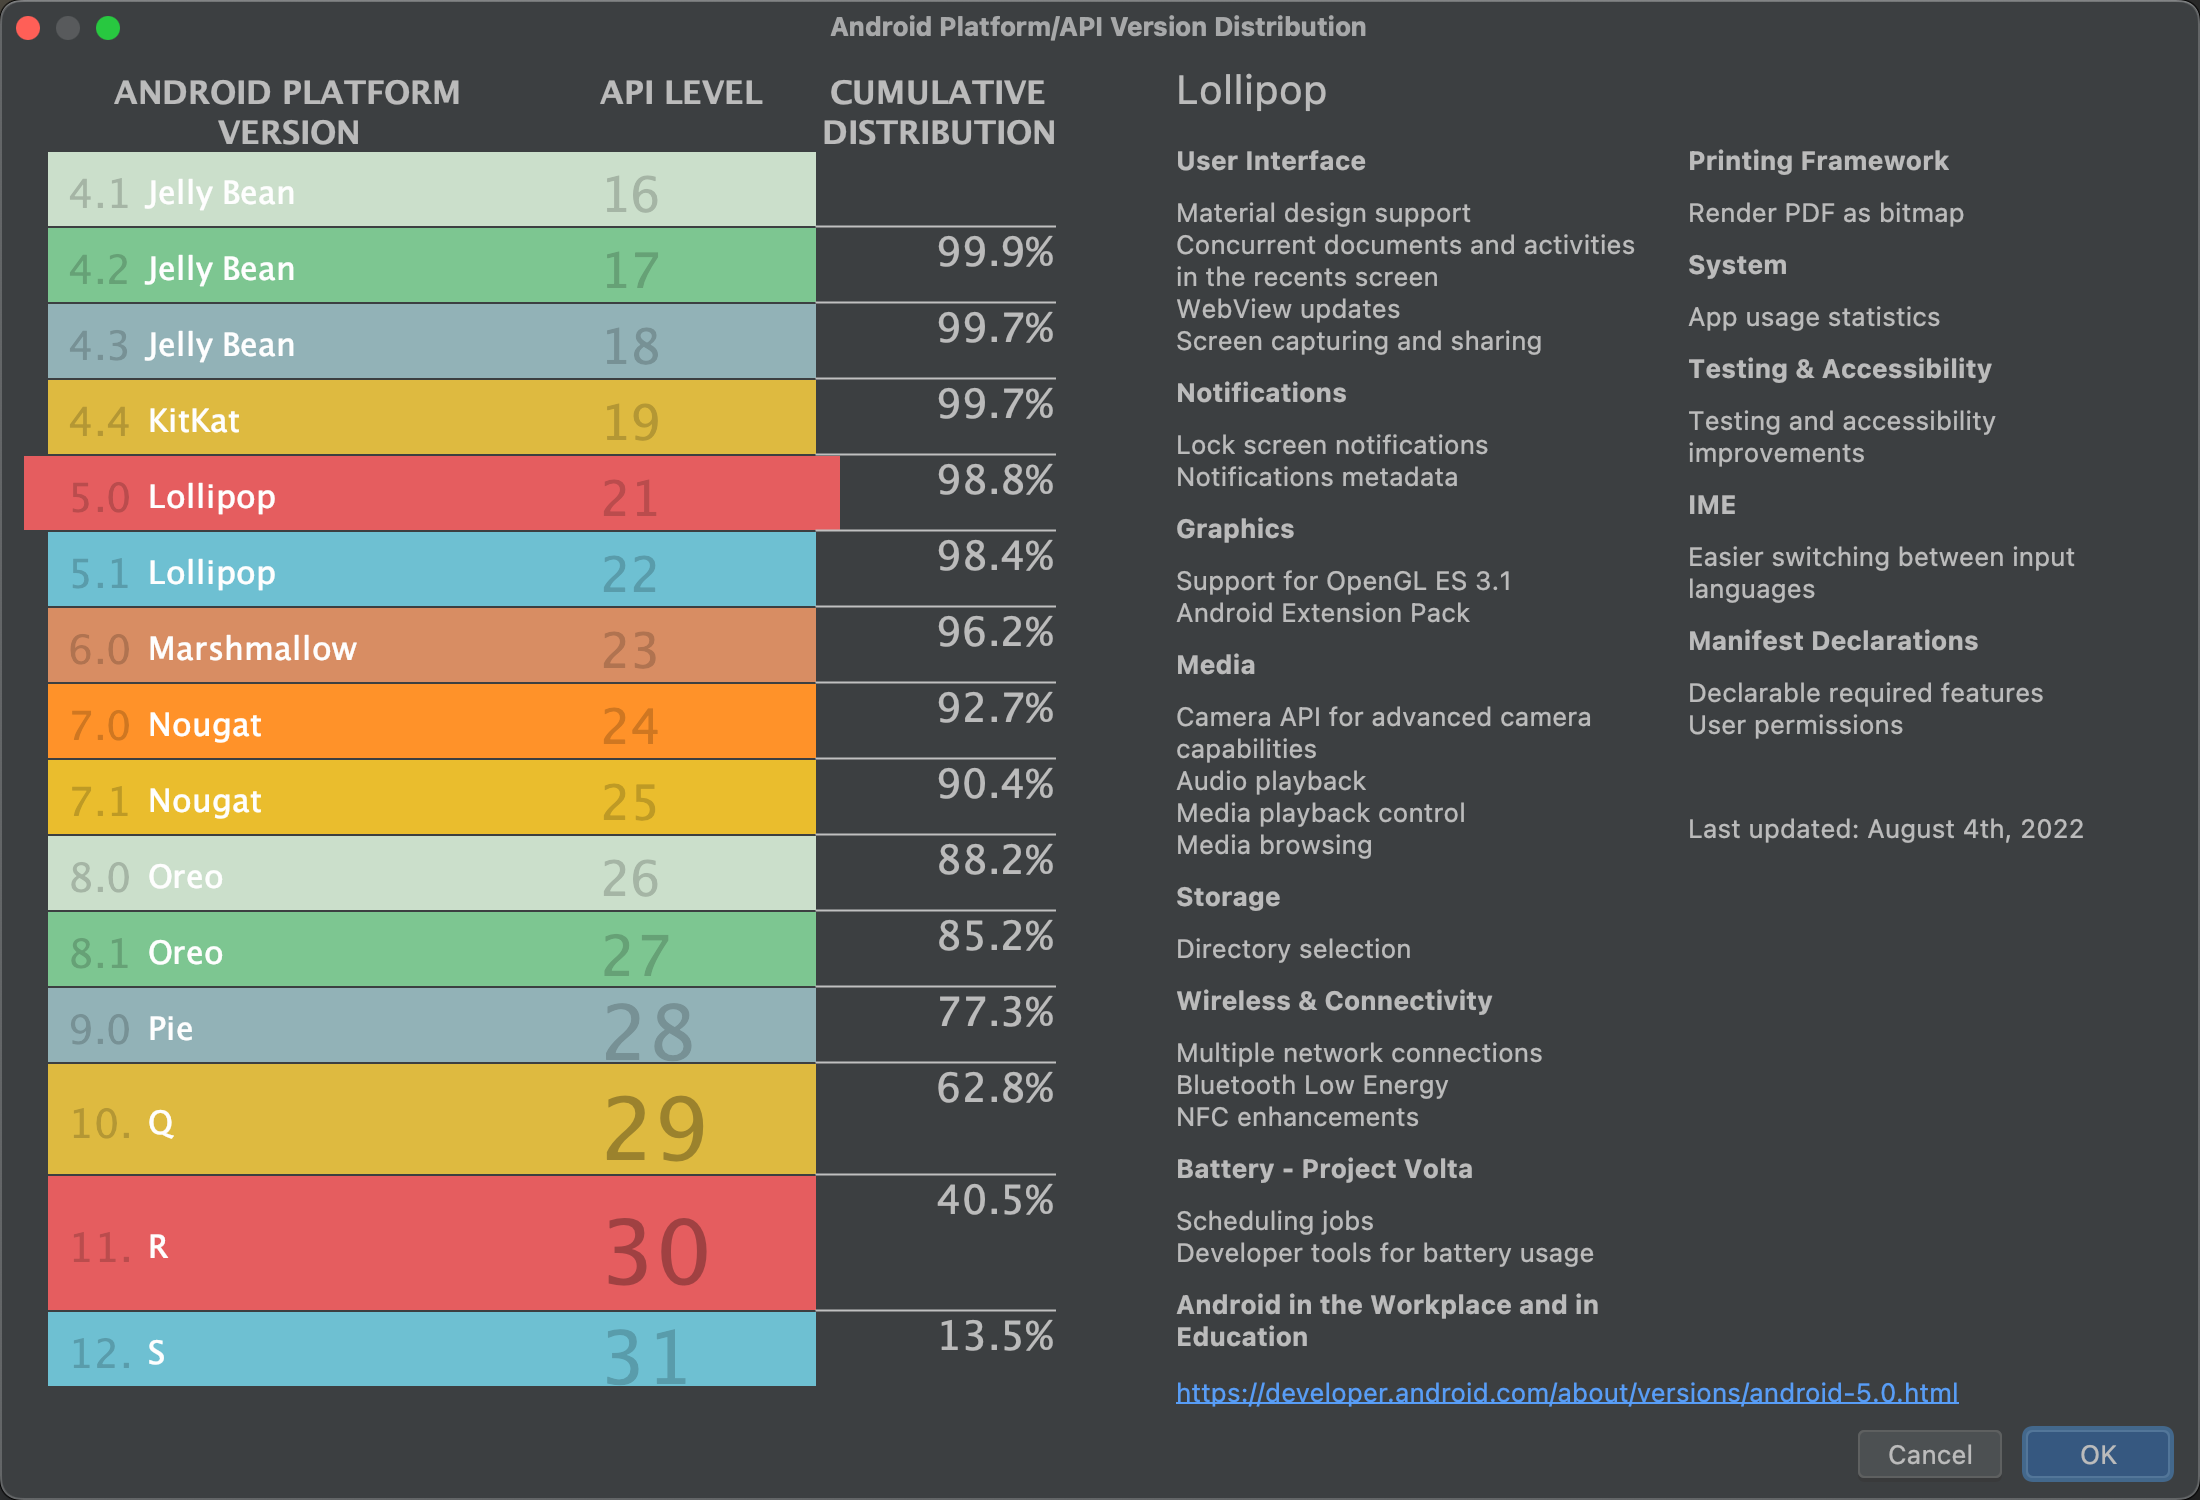
Figure 3. A help screen that shows the cumulative distribution of different API levels. Your project is configured to use AndroidX libraries by default, which replace the Android Support libraries. To use the legacy support libraries instead, select Use legacy android.support libraries. However, this is not recommended, as the legacy support libraries are no longer supported. To learn more, read the AndroidX overview.
When you're ready to create your project, click Finish.
Android Studio creates your new project with some basic code and resources to get you started. If you decide to add support for a different device form factor later, you can add a module to your project. And if you want to share code and resources between modules, you can do so by creating an Android library.
For more information about the Android project structure and module types, read the Projects overview. If you're new to Android development altogether, see Get started with Android.
Import an existing project
To import an existing local project into Android Studio, proceed as follows:
- Click File > New > Import Project.
- In the window that appears, navigate to the root directory of the project you want to import.
- Click OK.
Android Studio opens the project in a new IDE window and indexes its contents.
If you are importing a project from version control, select File > New > Project from Version Control. For more information about importing projects from version control, read IntelliJ's information about version control.
Build and run your app
Now that you've created your project, the next step is to build it and run it on a virtual or physical device. Android Studio sets up a default run configuration to help you get started.
To learn more, see Build and run your app and the guides that cover running on the Android Emulator and on physical hardware devices.