
Compose에는 Canvas 컴포저블 외에도 맞춤 콘텐츠를 그리는 데 도움이 되는 여러 유용한 그래픽 Modifiers가 있습니다. 이러한 수정자는 모든 컴포저블에 적용할 수 있으므로 유용합니다.
그리기 수정자
모든 그리기 명령어는 Compose에서 그리기 수정자를 사용하여 실행됩니다. Compose에는 세 가지 주요 그리기 수정자가 있습니다.
기본 그리기 수정자는 drawWithContent입니다. 여기서 컴포저블의 그리기 순서와 수정자 내에서 실행되는 그리기 명령어를 결정할 수 있습니다. drawBehind는 컴포저블의 콘텐츠 뒤로 그리기 순서가 설정되어 있는 drawWithContent의 편리한 래퍼입니다. drawWithCache는 내부에서 onDrawBehind 또는 onDrawWithContent를 호출하고, 생성된 객체를 캐시하는 메커니즘을 제공합니다.
Modifier.drawWithContent: 그리기 순서 선택
Modifier.drawWithContent를 사용하면 컴포저블 콘텐츠 앞이나 뒤에 DrawScope 작업을 실행할 수 있습니다. drawContent를 호출하여 컴포저블의 실제 콘텐츠를 렌더링해야 합니다. 맞춤 그리기 작업 전이나 후에 콘텐츠를 그리려면 이 수정자를 사용하여 작업 순서를 결정할 수 있습니다.
예를 들어 콘텐츠 위에 방사형 그래디언트를 렌더링하여 UI에 손전등 키홀 효과를 만들려면 다음을 실행하면 됩니다.
var pointerOffset by remember { mutableStateOf(Offset(0f, 0f)) } Column( modifier = Modifier .fillMaxSize() .pointerInput("dragging") { detectDragGestures { change, dragAmount -> pointerOffset += dragAmount } } .onSizeChanged { pointerOffset = Offset(it.width / 2f, it.height / 2f) } .drawWithContent { drawContent() // draws a fully black area with a small keyhole at pointerOffset that’ll show part of the UI. drawRect( Brush.radialGradient( listOf(Color.Transparent, Color.Black), center = pointerOffset, radius = 100.dp.toPx(), ) ) } ) { // Your composables here }
Modifier.drawBehind: 컴포저블 뒤에 그리기
Modifier.drawBehind를 사용하면 화면에 그려지는 컴포저블 콘텐츠 뒤에서 DrawScope 작업을 실행할 수 있습니다. Canvas의 구현을 살펴보면 Modifier.drawBehind의 편리한 래퍼임을 알 수 있습니다.
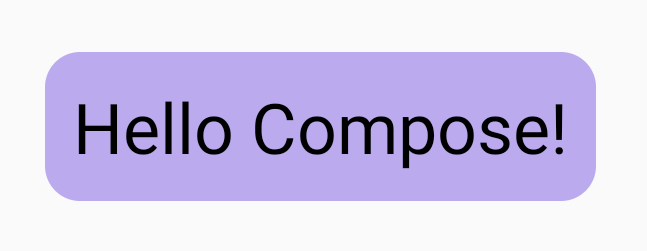
Text 뒤에 둥근 직사각형을 그리려면 다음을 실행하세요.
Text( "Hello Compose!", modifier = Modifier .drawBehind { drawRoundRect( Color(0xFFBBAAEE), cornerRadius = CornerRadius(10.dp.toPx()) ) } .padding(4.dp) )
그러면 다음과 같은 결과가 표시됩니다.
Modifier.drawWithCache: 그리기 객체 그리기 및 캐싱
Modifier.drawWithCache는 내부에서 생성된 객체를 캐시된 상태로 유지합니다. 객체는 그리기 영역의 크기가 같거나 읽은 상태 객체가 변경되지 않은 한 캐시됩니다. 이 수정자는 그리기 호출의 성능을 개선하는 데 유용합니다. 그리기에서 만들어진 객체(Brush, Shader, Path 등)를 재할당하지 않아도 되기 때문입니다.
또는 수정자 외부에서 remember를 사용하여 객체를 캐시할 수도 있습니다. 그러나 이는 불가능할 수도 있습니다. 항상 컴포지션에 액세스할 수 있는 것은 아니기 때문입니다. 객체가 그리기에만 사용되면 drawWithCache를 사용하는 것이 더 효과적일 수 있습니다.
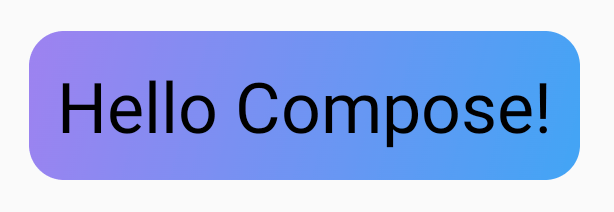
예를 들어 Text 뒤에 그래디언트를 그리기 위해 Brush를 만드는 경우 drawWithCache를 사용하면 그리기 영역의 크기가 변경될 때까지 Brush 객체를 캐시합니다.
Text( "Hello Compose!", modifier = Modifier .drawWithCache { val brush = Brush.linearGradient( listOf( Color(0xFF9E82F0), Color(0xFF42A5F5) ) ) onDrawBehind { drawRoundRect( brush, cornerRadius = CornerRadius(10.dp.toPx()) ) } } )
그래픽 수정자
Modifier.graphicsLayer: 컴포저블에 변환 적용
Modifier.graphicsLayer는 컴포저블의 콘텐츠를 그리기 레이어에 그리는 수정자입니다. 레이어는 다음과 같은 몇 가지 함수를 제공합니다.
- 그리기 명령에 관한 격리(
RenderNode와 유사). 레이어의 일부로 캡처된 그리기 명령은 애플리케이션 코드를 다시 실행하지 않고도 렌더링 파이프라인에서 효율적으로 재실행할 수 있습니다. - 레이어에 포함된 모든 그리기 명령에 적용되는 변환
- 컴포지션 기능 래스터화 레이어가 래스터화되면 그리기 명령이 실행되고 출력이 오프스크린 버퍼에 캡처됩니다. 후속 프레임에 관해 이러한 버퍼를 컴포지션하는 것은 개별 명령을 실행하는 것보다 빠르지만 크기 조정 또는 회전과 같은 변환이 적용되면 비트맵으로 동작합니다.
변환
Modifier.graphicsLayer는 그리기 명령에 관한 격리를 제공합니다. 예를 들어 Modifier.graphicsLayer를 사용하여 다양한 변환을 적용할 수 있습니다.
그리기 람다를 다시 실행할 필요 없이 애니메이션 처리하거나 수정할 수 있습니다.
Modifier.graphicsLayer는 그리기 단계에만 영향을 미치므로 컴포저블의 측정된 크기나 배치를 변경하지 않습니다. 즉, 레이아웃 경계 외부에 그리게 될 경우 컴포저블이 다른 컴포저블과 겹칠 수 있습니다.
이 수정자를 사용하여 다음 변환을 적용할 수 있습니다.
배율 - 크기 확대
scaleX 및 scaleY는 각각 콘텐츠를 가로 또는 세로 방향으로 확대하거나 축소합니다. 값 1.0f는 배율이 변경되지 않음을 나타냅니다. 값 0.5f는 크기의 절반을 의미합니다.
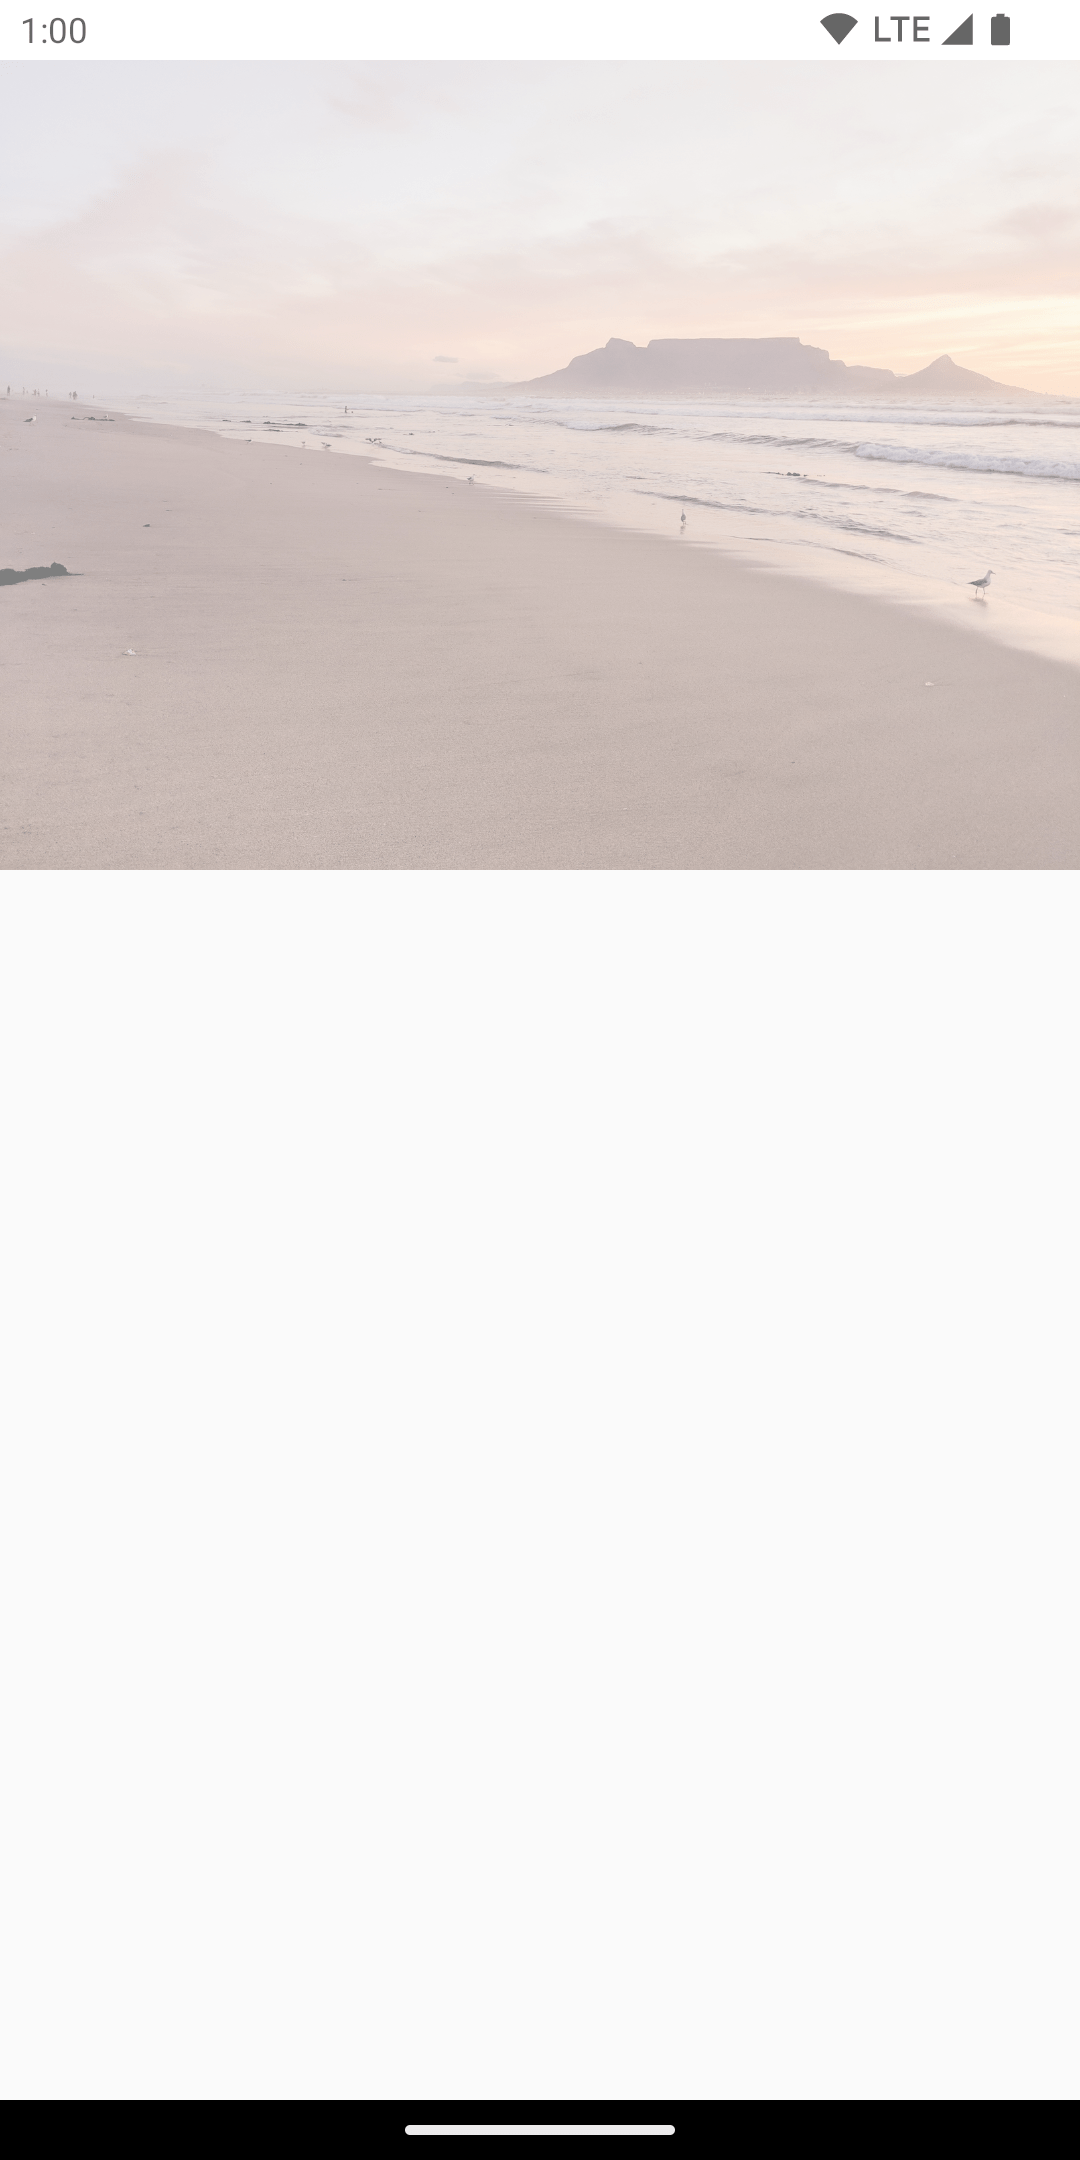
Image( painter = painterResource(id = R.drawable.sunset), contentDescription = "Sunset", modifier = Modifier .graphicsLayer { this.scaleX = 1.2f this.scaleY = 0.8f } )
변환
translationX 및 translationY는 graphicsLayer로 변경할 수 있으며 translationX는 컴포저블을 왼쪽이나 오른쪽으로 이동합니다. translationY는 컴포저블을 위아래로 이동합니다.
Image( painter = painterResource(id = R.drawable.sunset), contentDescription = "Sunset", modifier = Modifier .graphicsLayer { this.translationX = 100.dp.toPx() this.translationY = 10.dp.toPx() } )
회전
rotationX는 가로로 회전하고 rotationY는 세로로 회전하며 rotationZ는 Z축을 기준으로 회전하도록 설정합니다(표준 회전). 이 값은 도 단위(0~360)로 지정됩니다.
Image( painter = painterResource(id = R.drawable.sunset), contentDescription = "Sunset", modifier = Modifier .graphicsLayer { this.rotationX = 90f this.rotationY = 275f this.rotationZ = 180f } )
출발지
transformOrigin을 지정할 수 있습니다. 지정된 출발지는 변환이 발생하는 지점으로 사용됩니다. 지금까지의 모든 예에서는 (0.5f, 0.5f)에 있는 TransformOrigin.Center를 사용했습니다. 출발지를 (0f, 0f)로 지정하면 변환이 컴포저블의 왼쪽 상단에서 시작됩니다.
rotationZ 변환을 사용하여 출발지를 변경하면 항목이 컴포저블의 왼쪽 상단을 중심으로 회전하는 것을 확인할 수 있습니다.
Image( painter = painterResource(id = R.drawable.sunset), contentDescription = "Sunset", modifier = Modifier .graphicsLayer { this.transformOrigin = TransformOrigin(0f, 0f) this.rotationX = 90f this.rotationY = 275f this.rotationZ = 180f } )
클립 및 도형
도형은 clip = true일 때 콘텐츠가 잘리는 윤곽선을 지정합니다. 이 예에서는 두 개의 상자에 두 개의 클립이 포함되도록 설정합니다. 하나는 graphicsLayer 클립 변수를 사용하고 다른 하나는 편리한 래퍼 Modifier.clip을 사용합니다.
Column(modifier = Modifier.padding(16.dp)) { Box( modifier = Modifier .size(200.dp) .graphicsLayer { clip = true shape = CircleShape } .background(Color(0xFFF06292)) ) { Text( "Hello Compose", style = TextStyle(color = Color.Black, fontSize = 46.sp), modifier = Modifier.align(Alignment.Center) ) } Box( modifier = Modifier .size(200.dp) .clip(CircleShape) .background(Color(0xFF4DB6AC)) ) }
첫 번째 상자의 콘텐츠('Hello Compose'라는 텍스트)는 원형으로 잘립니다.
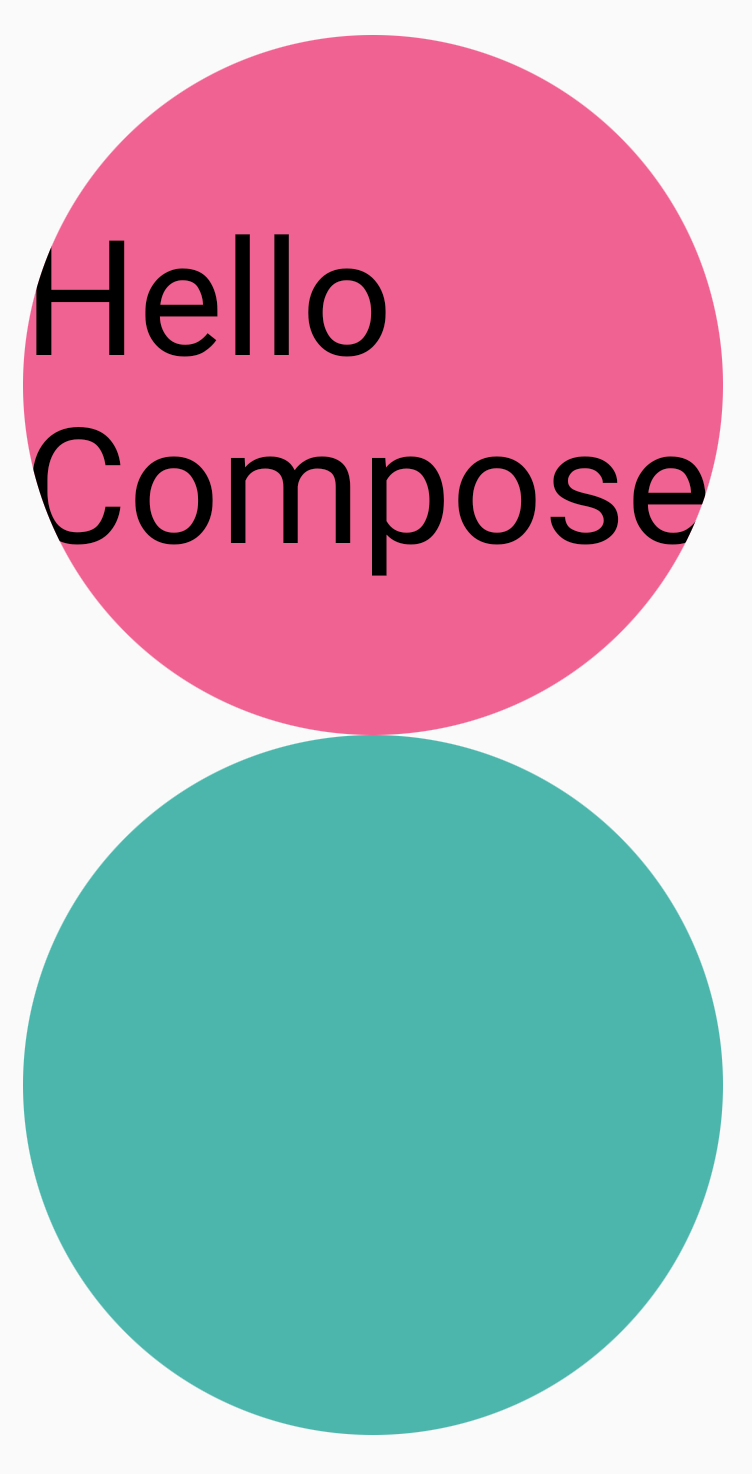
그런 다음 translationY를 상단 분홍색 원에 적용하면 컴포저블의 경계가 여전히 동일하게 유지되지만 원이 하단 원 아래와 그 경계 외부에 그려집니다.
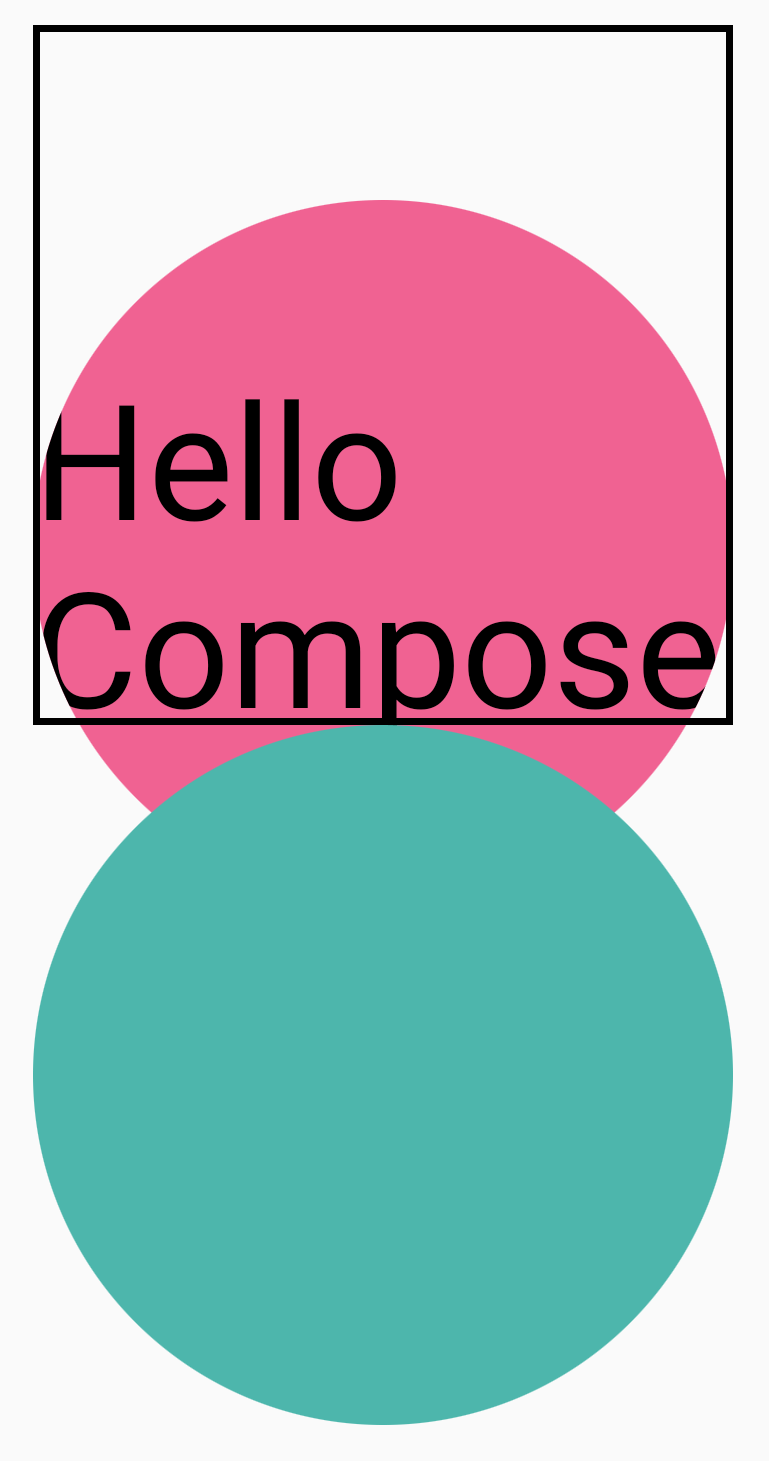
컴포저블이 그려진 영역으로 컴포저블을 자르려면 수정자 체인의 시작 부분에 다른 Modifier.clip(RectangleShape)를 추가하면 됩니다. 그러면 콘텐츠가 원래 경계 내에 유지됩니다.
Column(modifier = Modifier.padding(16.dp)) { Box( modifier = Modifier .clip(RectangleShape) .size(200.dp) .border(2.dp, Color.Black) .graphicsLayer { clip = true shape = CircleShape translationY = 50.dp.toPx() } .background(Color(0xFFF06292)) ) { Text( "Hello Compose", style = TextStyle(color = Color.Black, fontSize = 46.sp), modifier = Modifier.align(Alignment.Center) ) } Box( modifier = Modifier .size(200.dp) .clip(RoundedCornerShape(500.dp)) .background(Color(0xFF4DB6AC)) ) }

알파
Modifier.graphicsLayer를 사용하여 전체 레이어의 alpha(불투명도)를 설정할 수 있습니다. 1.0f는 완전히 불투명하고 0.0f는 표시되지 않습니다.
Image( painter = painterResource(id = R.drawable.sunset), contentDescription = "clock", modifier = Modifier .graphicsLayer { this.alpha = 0.5f } )
컴포지션 전략
알파와 투명도를 사용하는 것은 단일 알파 값을 변경하는 것만큼 간단하지 않을 수 있습니다. 알파를 변경하는 것 외에도 graphicsLayer에 CompositingStrategy를 설정하는 옵션도 있습니다. CompositingStrategy는 컴포저블의 콘텐츠가 화면에 이미 그려진 다른 콘텐츠와 컴포지션(결합)되는 방식을 결정합니다.
다양한 전략은 다음과 같습니다.
자동(기본값)
컴포지션 전략은 나머지 graphicsLayer 매개변수에 의해 결정됩니다. 이 전략은 알파가 1.0f 미만이거나 RenderEffect가 설정된 경우 레이어를 오프스크린 버퍼로 렌더링합니다. 알파가 1f보다 작을 때면 언제나 컴포지션 레이어가 자동으로 생성되어 콘텐츠를 렌더링한 다음 이 오프스크린 버퍼를 상응하는 알파가 있는 대상에 그립니다. RenderEffect 또는 오버스크롤을 설정하면 CompositingStrategy 설정과 관계없이 콘텐츠를 항상 오프스크린 버퍼로 렌더링합니다.
오프스크린
컴포저블의 콘텐츠는 대상에 렌더링되기 전에 항상 오프스크린 텍스처 또는 비트맵으로 래스터화됩니다. BlendMode 작업을 적용하여 콘텐츠를 마스킹하고 복잡한 그리기 명령 집합을 렌더링하는 성능을 높이는 데 유용합니다.
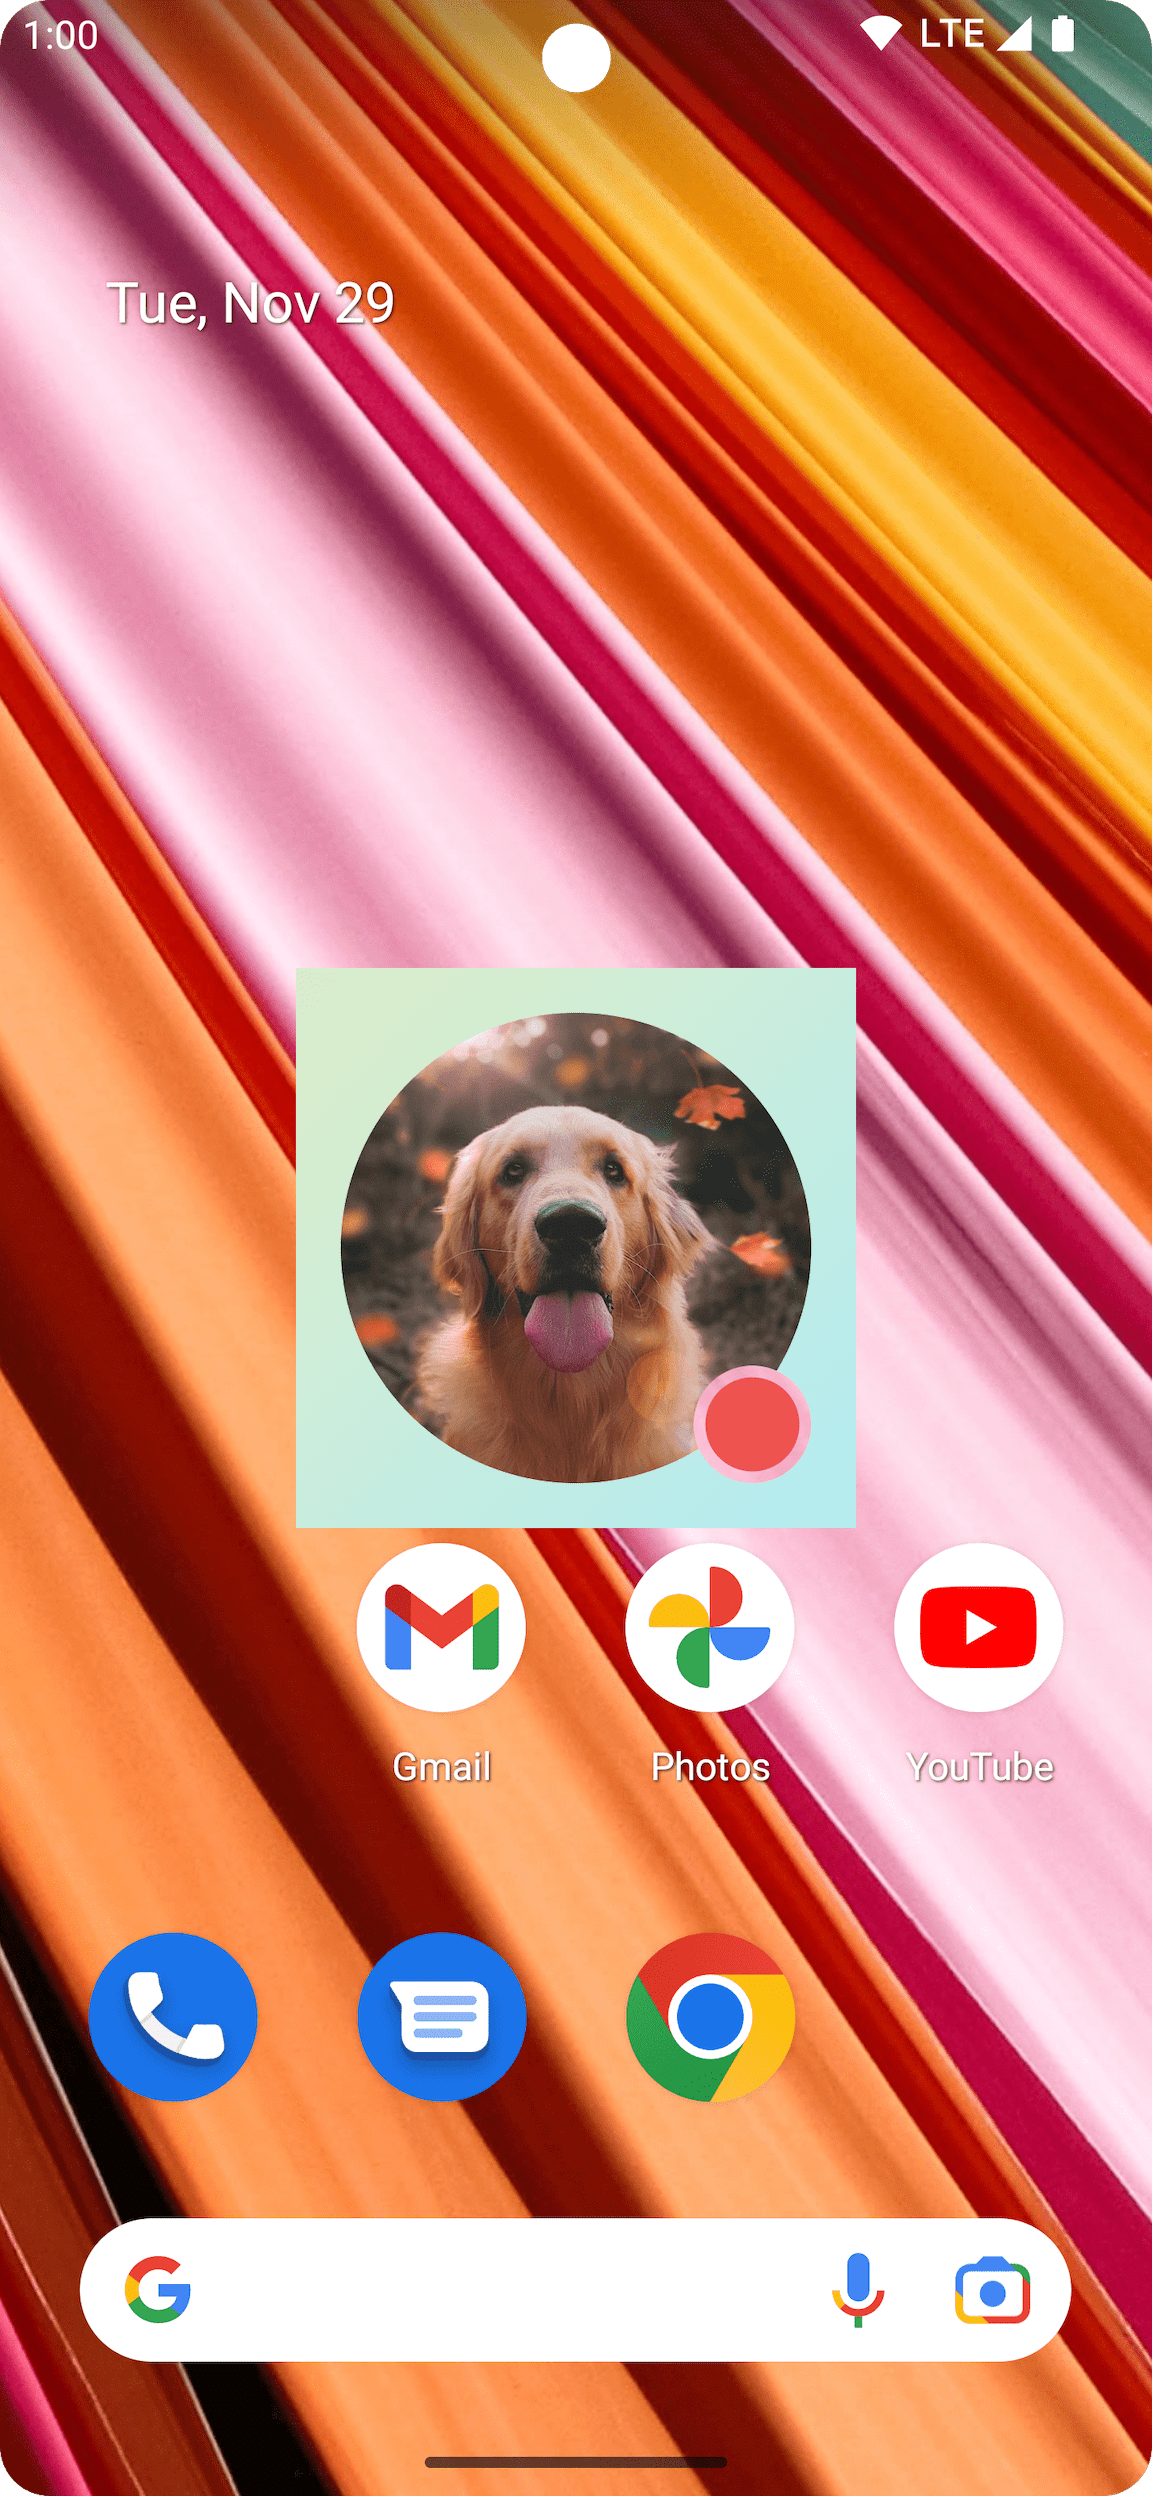
CompositingStrategy.Offscreen을 사용하는 예는 BlendModes에 있습니다. 아래 예에서 BlendMode.Clear를 사용하는 그리기 명령어를 실행하여 Image 컴포저블의 일부를 삭제한다고 가정해 보겠습니다. compositingStrategy를 CompositingStrategy.Offscreen으로 설정하지 않으면 BlendMode가 그 아래의 모든 콘텐츠와 상호작용합니다.
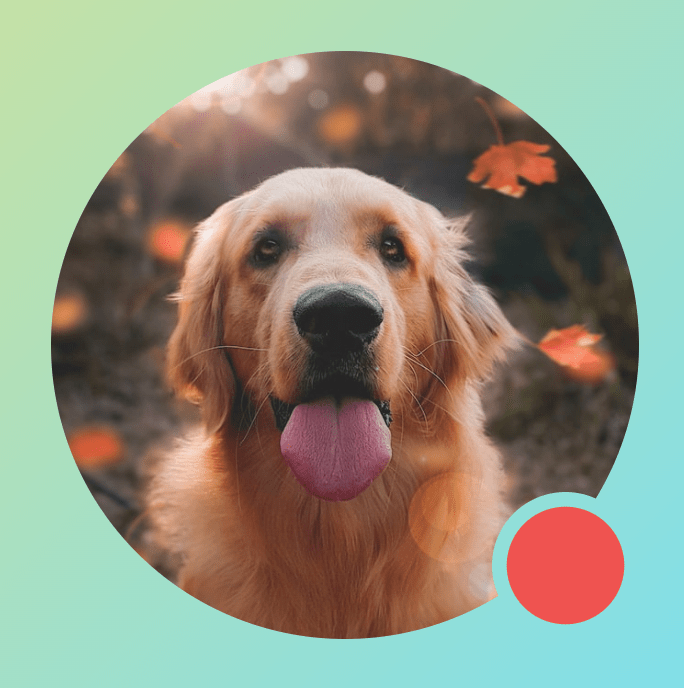
Image( painter = painterResource(id = R.drawable.dog), contentDescription = "Dog", contentScale = ContentScale.Crop, modifier = Modifier .size(120.dp) .aspectRatio(1f) .background( Brush.linearGradient( listOf( Color(0xFFC5E1A5), Color(0xFF80DEEA) ) ) ) .padding(8.dp) .graphicsLayer { compositingStrategy = CompositingStrategy.Offscreen } .drawWithCache { val path = Path() path.addOval( Rect( topLeft = Offset.Zero, bottomRight = Offset(size.width, size.height) ) ) onDrawWithContent { clipPath(path) { // this draws the actual image - if you don't call drawContent, it wont // render anything this@onDrawWithContent.drawContent() } val dotSize = size.width / 8f // Clip a white border for the content drawCircle( Color.Black, radius = dotSize, center = Offset( x = size.width - dotSize, y = size.height - dotSize ), blendMode = BlendMode.Clear ) // draw the red circle indication drawCircle( Color(0xFFEF5350), radius = dotSize * 0.8f, center = Offset( x = size.width - dotSize, y = size.height - dotSize ) ) } } )
CompositingStrategy를 Offscreen으로 설정하면 명령어를 실행할 오프스크린 텍스처가 만들어집니다(이 컴포저블의 콘텐츠에만 BlendMode 적용). 그런 다음 화면에서 이미 렌더링된 콘텐츠 위에 렌더링하므로 이미 그려진 콘텐츠에는 영향을 미치지 않습니다.
CompositingStrategy.Offscreen을 사용하지 않은 경우 BlendMode.Clear 적용 결과는 이미 설정된 내용과 관계없이 대상의 모든 픽셀을 지우므로 창의 렌더링 버퍼(검은색)가 표시된 채로 유지됩니다. 알파를 포함하는 많은 BlendModes는 오프스크린 버퍼 없이는 예상대로 작동하지 않습니다. 빨간색 원 표시기 주변의 검은색 링을 확인하세요.

이를 좀 더 자세히 알아보려면: 앱에 반투명 창 배경이 있고 CompositingStrategy.Offscreen을 사용하지 않은 경우 BlendMode가 전체 앱과 상호작용합니다. 다음 예와 같이 아래의 앱 또는 배경화면을 표시하기 위해 모든 픽셀을 지웁니다.
CompositingStrategy.Offscreen을 사용할 때 그리기 영역의 크기인 오프스크린 텍스처가 생성되어 화면에 다시 렌더링됩니다. 이 전략을 사용하여 실행하는 모든 그리기 명령어는 기본적으로 이 영역으로 잘립니다. 아래 코드 스니펫은 오프스크린 텍스처를 사용하도록 전환할 때의 차이점을 보여줍니다.
@Composable fun CompositingStrategyExamples() { Column( modifier = Modifier .fillMaxSize() .wrapContentSize(Alignment.Center) ) { // Does not clip content even with a graphics layer usage here. By default, graphicsLayer // does not allocate + rasterize content into a separate layer but instead is used // for isolation. That is draw invalidations made outside of this graphicsLayer will not // re-record the drawing instructions in this composable as they have not changed Canvas( modifier = Modifier .graphicsLayer() .size(100.dp) // Note size of 100 dp here .border(2.dp, color = Color.Blue) ) { // ... and drawing a size of 200 dp here outside the bounds drawRect(color = Color.Magenta, size = Size(200.dp.toPx(), 200.dp.toPx())) } Spacer(modifier = Modifier.size(300.dp)) /* Clips content as alpha usage here creates an offscreen buffer to rasterize content into first then draws to the original destination */ Canvas( modifier = Modifier // force to an offscreen buffer .graphicsLayer(compositingStrategy = CompositingStrategy.Offscreen) .size(100.dp) // Note size of 100 dp here .border(2.dp, color = Color.Blue) ) { /* ... and drawing a size of 200 dp. However, because of the CompositingStrategy.Offscreen usage above, the content gets clipped */ drawRect(color = Color.Red, size = Size(200.dp.toPx(), 200.dp.toPx())) } } }

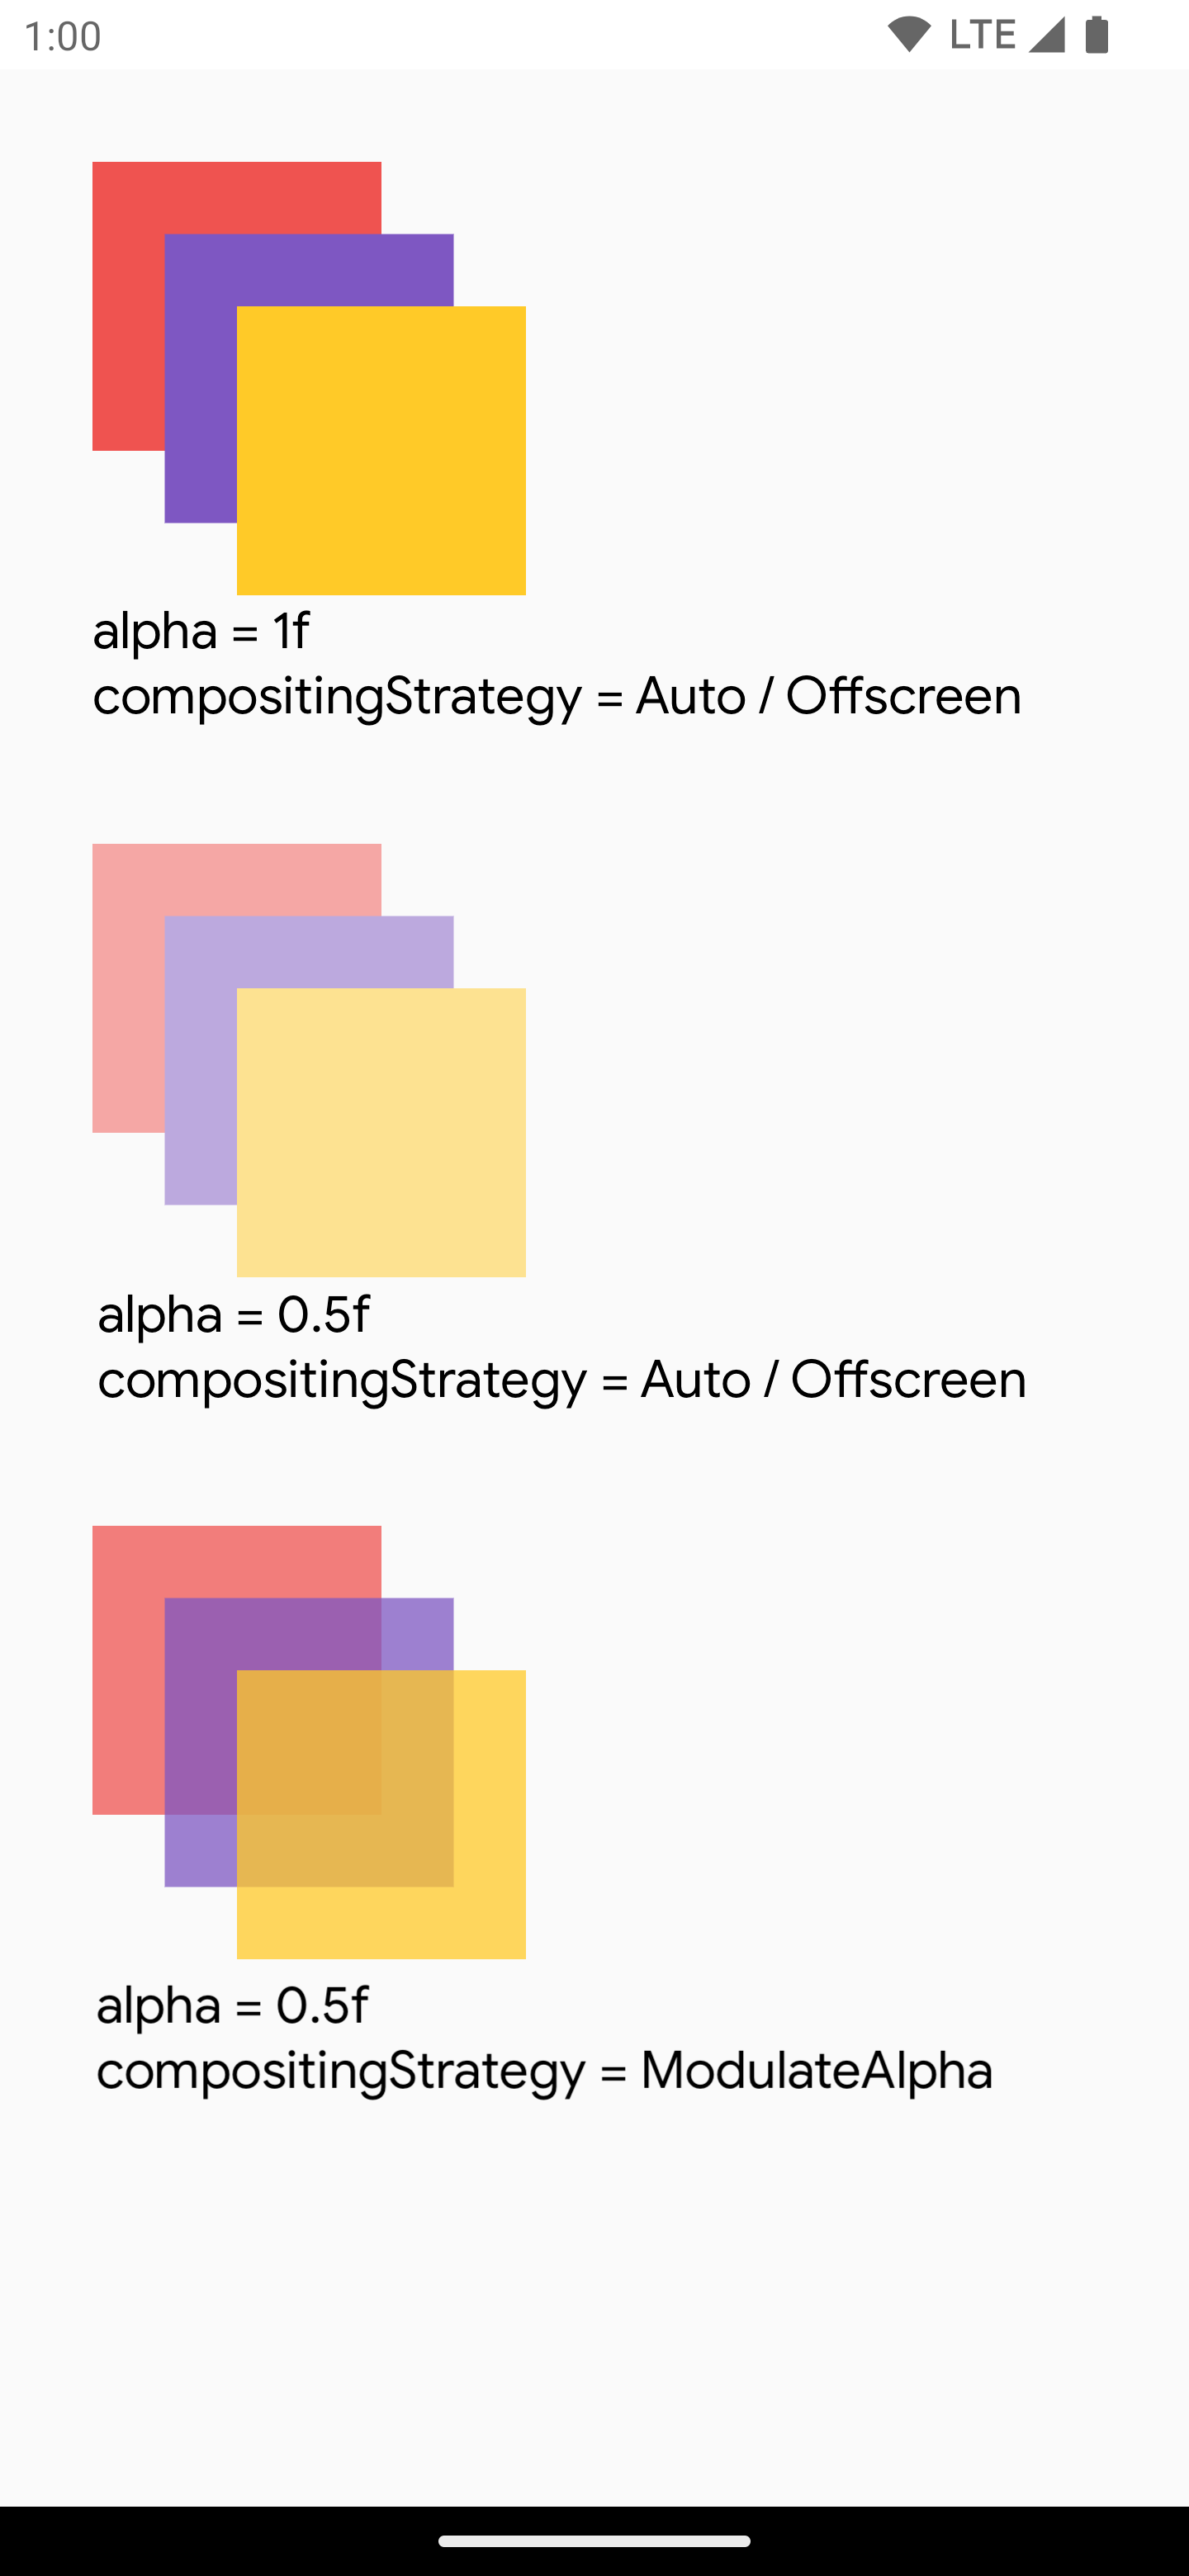
ModulateAlpha
이 컴포지션 전략은 graphicsLayer 내에 기록된 각 그리기 명령의 알파를 조정합니다. RenderEffect를 설정하지 않으면 1.0f 미만 알파의 오프스크린 버퍼가 만들어지지 않으므로 알파 렌더링에 더 효율적일 수 있습니다. 그러나 겹치는 콘텐츠에 대해 다른 결과를 제공할 수 있습니다. 콘텐츠가 겹치지 않는다고 사전에 알려진 사용 사례의 경우 알파 값이 1보다 작은 CompositingStrategy.Auto보다 더 나은 성능을 제공할 수 있습니다.
다른 컴포지션 전략의 또 다른 예는 아래에 나와 있습니다. 컴포저블의 여러 부분에 다양한 알파를 적용하고 Modulate 전략을 적용하는 것입니다.
@Preview @Composable fun CompositingStrategy_ModulateAlpha() { Column( modifier = Modifier .fillMaxSize() .padding(32.dp) ) { // Base drawing, no alpha applied Canvas( modifier = Modifier.size(200.dp) ) { drawSquares() } Spacer(modifier = Modifier.size(36.dp)) // Alpha 0.5f applied to whole composable Canvas( modifier = Modifier .size(200.dp) .graphicsLayer { alpha = 0.5f } ) { drawSquares() } Spacer(modifier = Modifier.size(36.dp)) // 0.75f alpha applied to each draw call when using ModulateAlpha Canvas( modifier = Modifier .size(200.dp) .graphicsLayer { compositingStrategy = CompositingStrategy.ModulateAlpha alpha = 0.75f } ) { drawSquares() } } } private fun DrawScope.drawSquares() { val size = Size(100.dp.toPx(), 100.dp.toPx()) drawRect(color = Red, size = size) drawRect( color = Purple, size = size, topLeft = Offset(size.width / 4f, size.height / 4f) ) drawRect( color = Yellow, size = size, topLeft = Offset(size.width / 4f * 2f, size.height / 4f * 2f) ) } val Purple = Color(0xFF7E57C2) val Yellow = Color(0xFFFFCA28) val Red = Color(0xFFEF5350)
컴포저블의 콘텐츠를 비트맵에 작성
일반적인 사용 사례는 컴포저블에서 Bitmap를 만드는 것입니다. 컴포저블의 콘텐츠를 Bitmap에 복사하려면 rememberGraphicsLayer()를 사용하여 GraphicsLayer를 만드세요.
drawWithContent() 및 graphicsLayer.record{}를 사용하여 그리기 명령어를 새 레이어로 리디렉션합니다. 그런 다음 drawLayer를 사용하여 표시되는 캔버스에 레이어를 그립니다.
val coroutineScope = rememberCoroutineScope() val graphicsLayer = rememberGraphicsLayer() Box( modifier = Modifier .drawWithContent { // call record to capture the content in the graphics layer graphicsLayer.record { // draw the contents of the composable into the graphics layer this@drawWithContent.drawContent() } // draw the graphics layer on the visible canvas drawLayer(graphicsLayer) } .clickable { coroutineScope.launch { val bitmap = graphicsLayer.toImageBitmap() // do something with the newly acquired bitmap } } .background(Color.White) ) { Text("Hello Android", fontSize = 26.sp) }
비트맵을 디스크에 저장하고 공유할 수 있습니다. 자세한 내용은 전체 예시 스니펫을 참고하세요. 디스크에 저장하려고 하기 전에 기기 내 권한을 확인해야 합니다.
맞춤 그리기 수정자
자체 맞춤 수정자를 만들려면 DrawModifier 인터페이스를 구현합니다. 이렇게 하면 Modifier.drawWithContent()를 사용할 때 노출되는 것과 동일한 ContentDrawScope에 액세스할 수 있습니다. 그러면 일반적인 그리기 작업을 맞춤 그리기 수정자에 추출하여 코드를 정리하고 편리한 래퍼를 제공할 수 있습니다. 예를 들어 Modifier.background()는 편리한 DrawModifier입니다.
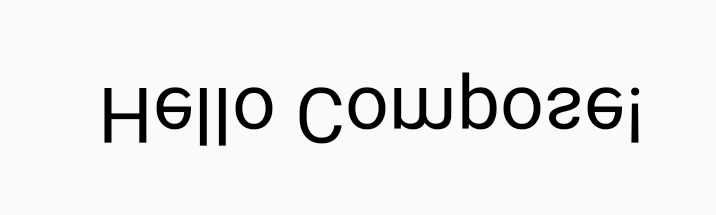
예를 들어 콘텐츠를 세로로 뒤집는 Modifier를 구현하려면 다음과 같이 만들면 됩니다.
class FlippedModifier : DrawModifier { override fun ContentDrawScope.draw() { scale(1f, -1f) { this@draw.drawContent() } } } fun Modifier.flipped() = this.then(FlippedModifier())
그런 다음 Text에 적용된 flipped 수정자를 사용합니다.
Text( "Hello Compose!", modifier = Modifier .flipped() )
추가 리소스
graphicsLayer 및 맞춤 그리기를 사용하는 더 많은 예는 다음 리소스를 확인하세요.
추천 서비스
- 참고: JavaScript가 사용 중지되어 있으면 링크 텍스트가 표시됩니다.
- Compose의 그래픽
- 이미지 맞춤설정 {:#customize-image}
- Jetpack Compose용 Kotlin