Compose में, ऐनिमेशन के सामान्य इस्तेमाल के उदाहरणों को हैंडल करने के लिए, पहले से मौजूद कंपोज़ेबल और मॉडिफ़ायर होते हैं.
पहले से मौजूद ऐनिमेटेड कंपोज़ेबल
Compose में कई कंपोज़ेबल उपलब्ध हैं. इनकी मदद से, कॉन्टेंट के दिखने, गायब होने, और लेआउट में बदलाव होने पर ऐनिमेशन दिखाया जा सकता है.
दिखने और गायब होने की सुविधा को ऐनिमेट करना

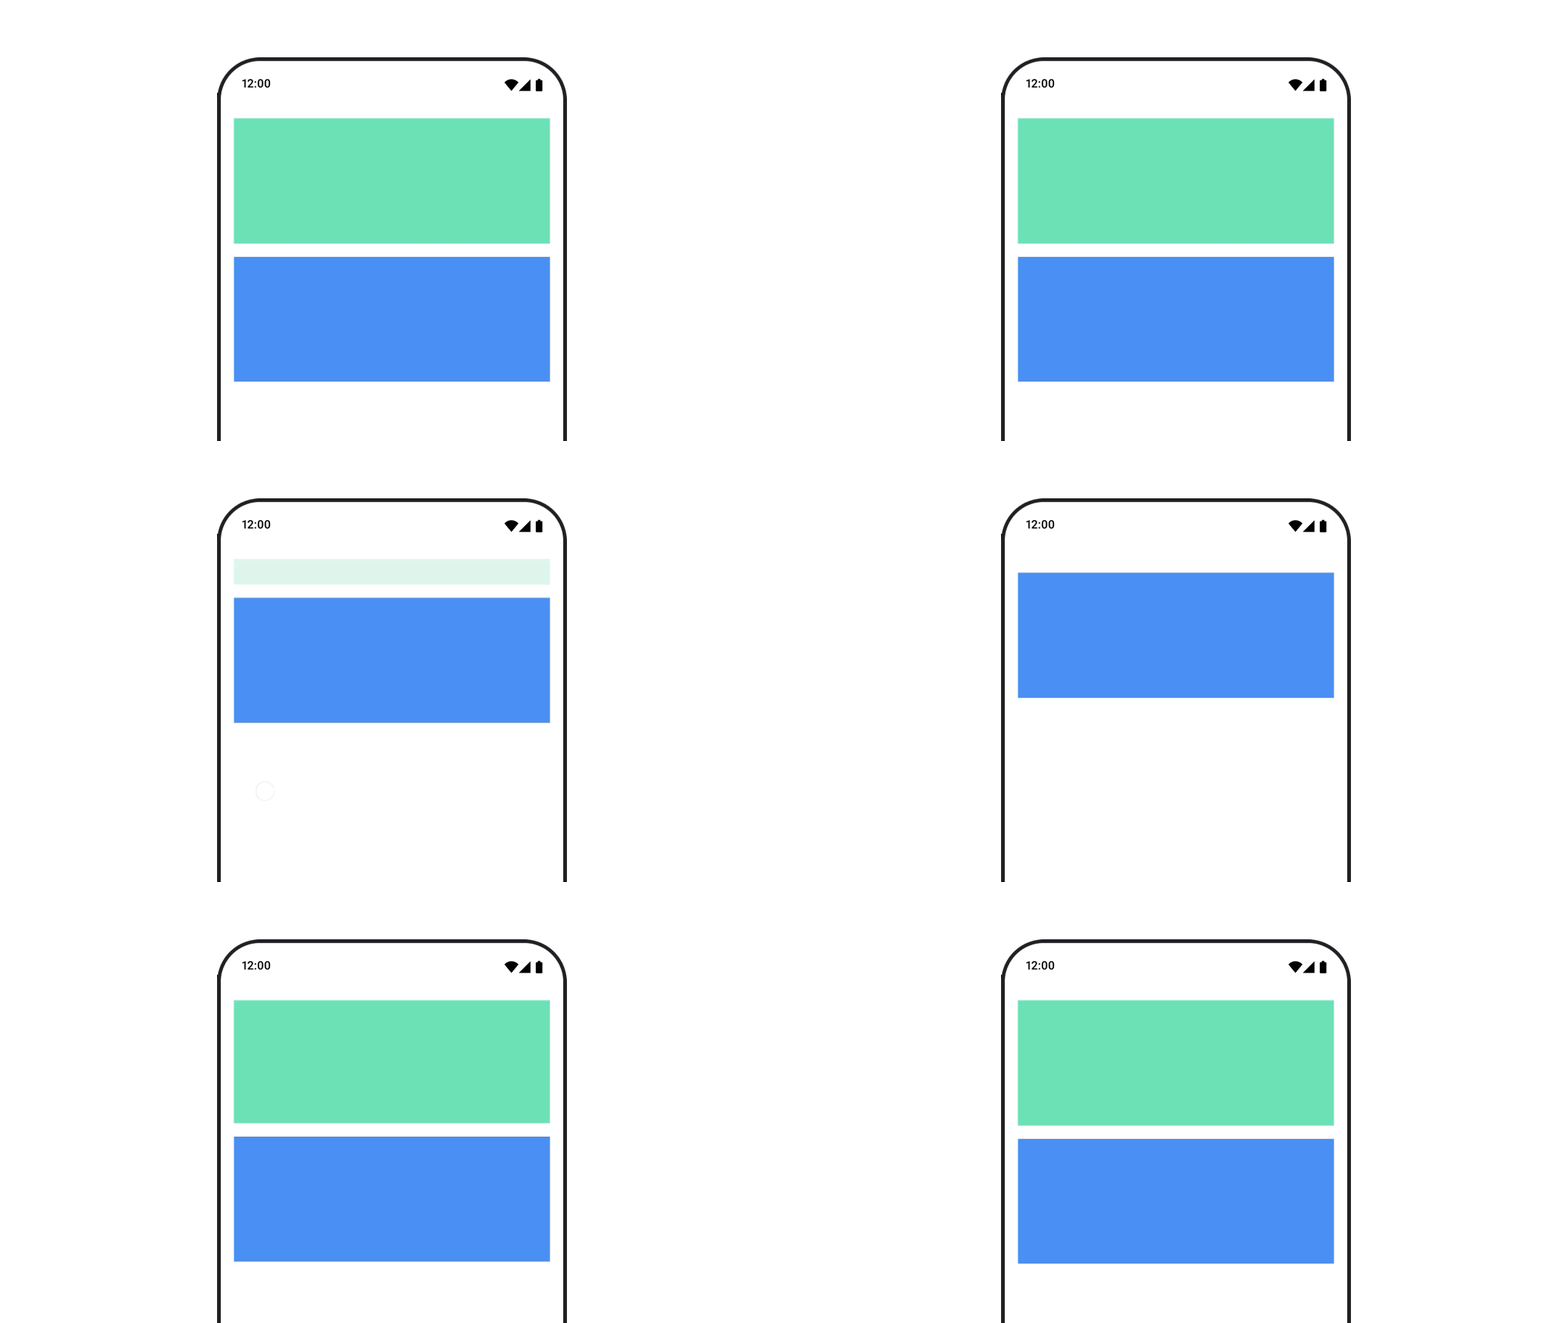
AnimatedVisibility कंपोज़ेबल, अपने कॉन्टेंट को दिखाने और छिपाने के लिए ऐनिमेशन का इस्तेमाल करता है.
var visible by remember { mutableStateOf(true) } // Animated visibility will eventually remove the item from the composition once the animation has finished. AnimatedVisibility(visible) { // your composable here // ... }
डिफ़ॉल्ट रूप से, कॉन्टेंट फ़ेड इन और बड़ा होकर दिखता है. साथ ही, फ़ेड आउट और छोटा होकर गायब हो जाता है. EnterTransition और ExitTransition ऑब्जेक्ट तय करके, इस ट्रांज़िशन को पसंद के मुताबिक बनाएं.
var visible by remember { mutableStateOf(true) } val density = LocalDensity.current AnimatedVisibility( visible = visible, enter = slideInVertically { // Slide in from 40 dp from the top. with(density) { -40.dp.roundToPx() } } + expandVertically( // Expand from the top. expandFrom = Alignment.Top ) + fadeIn( // Fade in with the initial alpha of 0.3f. initialAlpha = 0.3f ), exit = slideOutVertically() + shrinkVertically() + fadeOut() ) { Text( "Hello", Modifier .fillMaxWidth() .height(200.dp) ) }
ऊपर दिए गए उदाहरण में दिखाया गया है कि + ऑपरेटर के साथ कई EnterTransition
या ExitTransition ऑब्जेक्ट को जोड़ा जा सकता है. साथ ही, हर ऑब्जेक्ट में अपने हिसाब से पैरामीटर सेट करने का विकल्प होता है. ज़्यादा जानकारी के लिए, रेफ़रंस पेज देखें.
एंटर और एक्ज़िट ट्रांज़िशन के उदाहरण
AnimatedVisibility एक ऐसा वैरिएंट भी उपलब्ध कराता है जो MutableTransitionState आर्ग्युमेंट लेता है. इसकी मदद से, कंपोज़िशन ट्री में AnimatedVisibility कंपोज़ेबल को जोड़ते ही ऐनिमेशन ट्रिगर किया जा सकता है. यह ऐनिमेशन की स्थिति को देखने के लिए भी उपयोगी है.
// Create a MutableTransitionState<Boolean> for the AnimatedVisibility. val state = remember { MutableTransitionState(false).apply { // Start the animation immediately. targetState = true } } Column { AnimatedVisibility(visibleState = state) { Text(text = "Hello, world!") } // Use the MutableTransitionState to know the current animation state // of the AnimatedVisibility. Text( text = when { state.isIdle && state.currentState -> "Visible" !state.isIdle && state.currentState -> "Disappearing" state.isIdle && !state.currentState -> "Invisible" else -> "Appearing" } ) }
बच्चों के लिए, ऑब्जेक्ट को सीन में शामिल करने और हटाने पर ऐनिमेशन जोड़ना
AnimatedVisibility (सीधे तौर पर या किसी अन्य एलिमेंट के ज़रिए जुड़े हुए चाइल्ड एलिमेंट) में मौजूद कॉन्टेंट, animateEnterExit मॉडिफ़ायर का इस्तेमाल कर सकता है. इससे हर चाइल्ड एलिमेंट के लिए, ऐनिमेशन के अलग-अलग तरीके तय किए जा सकते हैं. इनमें से हर चाइल्ड के लिए विज़ुअल इफ़ेक्ट, AnimatedVisibility कंपोज़ेबल में तय किए गए ऐनिमेशन और चाइल्ड के अपने एंटर और एक्ज़िट ऐनिमेशन का कॉम्बिनेशन होता है.
var visible by remember { mutableStateOf(true) } AnimatedVisibility( visible = visible, enter = fadeIn(), exit = fadeOut() ) { // Fade in/out the background and the foreground. Box( Modifier .fillMaxSize() .background(Color.DarkGray) ) { Box( Modifier .align(Alignment.Center) .animateEnterExit( // Slide in/out the inner box. enter = slideInVertically(), exit = slideOutVertically() ) .sizeIn(minWidth = 256.dp, minHeight = 64.dp) .background(Color.Red) ) { // Content of the notification… } } }
कुछ मामलों में, आपको AnimatedVisibility में कोई भी ऐनिमेशन लागू नहीं करना पड़ सकता, ताकि बच्चे animateEnterExit का इस्तेमाल करके, अपने हिसाब से अलग-अलग ऐनिमेशन बना सकें. इसके लिए, AnimatedVisibility कंपोज़ेबल पर EnterTransition.None और ExitTransition.None तय करें.
अपनी पसंद के मुताबिक ऐनिमेशन जोड़ना
अगर आपको एंटर और एग्ज़िट करने के लिए, पहले से मौजूद ऐनिमेशन के अलावा कस्टम ऐनिमेशन इफ़ेक्ट जोड़ने हैं, तो AnimatedVisibility के लिए कॉन्टेंट लैम्डा में मौजूद transition प्रॉपर्टी का इस्तेमाल करके, Transition इंस्टेंस को ऐक्सेस करें. ट्रांज़िशन इंस्टेंस में जोड़े गए सभी ऐनिमेशन स्टेट, AnimatedVisibility के एंटर और एक्ज़िट ऐनिमेशन के साथ एक साथ चलेंगे. AnimatedVisibility, Transition में मौजूद सभी ऐनिमेशन के खत्म होने तक इंतज़ार करता है. इसके बाद ही, वह अपना कॉन्टेंट हटाता है.
Transition से अलग बनाए गए एग्ज़िट ऐनिमेशन (जैसे कि animate*AsState का इस्तेमाल करके), AnimatedVisibility उन्हें ध्यान में नहीं रख पाएगा. इसलिए, हो सकता है कि वह ऐनिमेशन पूरा होने से पहले ही, कंपोज़ किए जा सकने वाले कॉन्टेंट को हटा दे.
var visible by remember { mutableStateOf(true) } AnimatedVisibility( visible = visible, enter = fadeIn(), exit = fadeOut() ) { // this: AnimatedVisibilityScope // Use AnimatedVisibilityScope#transition to add a custom animation // to the AnimatedVisibility. val background by transition.animateColor(label = "color") { state -> if (state == EnterExitState.Visible) Color.Blue else Color.Gray } Box( modifier = Modifier .size(128.dp) .background(background) ) }
ऐनिमेशन मैनेज करने के लिए Transition का इस्तेमाल करने के बारे में ज़्यादा जानने के लिए, ट्रांज़िशन की मदद से एक साथ कई प्रॉपर्टी को ऐनिमेट करना लेख पढ़ें.
टारगेट की स्थिति के आधार पर ऐनिमेशन
AnimatedContent कंपोज़ेबल, टारगेट की स्थिति के आधार पर अपने कॉन्टेंट में बदलाव करता है.
Row { var count by remember { mutableIntStateOf(0) } Button(onClick = { count++ }) { Text("Add") } AnimatedContent( targetState = count, label = "animated content" ) { targetCount -> // Make sure to use `targetCount`, not `count`. Text(text = "Count: $targetCount") } }
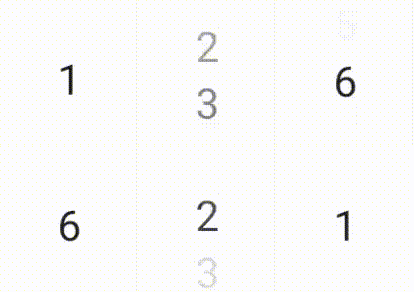
डिफ़ॉल्ट रूप से, शुरुआती कॉन्टेंट धीरे-धीरे गायब हो जाता है. इसके बाद, टारगेट कॉन्टेंट धीरे-धीरे दिखने लगता है
(इस व्यवहार को फ़ेड थ्रू कहा जाता है). ContentTransform ऑब्जेक्ट को transitionSpec पैरामीटर में जोड़कर, इस ऐनिमेशन के व्यवहार को अपनी ज़रूरत के मुताबिक बनाया जा सकता है. with इनफ़िक्स फ़ंक्शन का इस्तेमाल करके, EnterTransition ऑब्जेक्ट को ExitTransition ऑब्जेक्ट के साथ मिलाकर, ContentTransform का इंस्टेंस बनाया जा सकता है. using इनफ़िक्स फ़ंक्शन का इस्तेमाल करके, ContentTransform ऑब्जेक्ट में SizeTransform लागू किया जा सकता है.
AnimatedContent( targetState = count, transitionSpec = { // Compare the incoming number with the previous number. if (targetState > initialState) { // If the target number is larger, it slides up and fades in // while the initial (smaller) number slides up and fades out. slideInVertically { height -> height } + fadeIn() togetherWith slideOutVertically { height -> -height } + fadeOut() } else { // If the target number is smaller, it slides down and fades in // while the initial number slides down and fades out. slideInVertically { height -> -height } + fadeIn() togetherWith slideOutVertically { height -> height } + fadeOut() }.using( // Disable clipping since the faded slide-in/out should // be displayed out of bounds. SizeTransform(clip = false) ) }, label = "animated content" ) { targetCount -> Text(text = "$targetCount") }

EnterTransition से यह तय होता है कि टारगेट किया गया कॉन्टेंट कैसे दिखेगा. वहीं, ExitTransition से यह तय होता है कि शुरुआती कॉन्टेंट कैसे गायब होगा. AnimatedVisibility के लिए उपलब्ध EnterTransition और ExitTransition के सभी फ़ंक्शन के अलावा, AnimatedContent में slideIntoContainer और slideOutOfContainer की सुविधा भी मिलती है.
ये slideInHorizontally/Vertically और slideOutHorizontally/Vertically के सुविधाजनक विकल्प हैं. ये AnimatedContent कॉन्टेंट के शुरुआती कॉन्टेंट और टारगेट कॉन्टेंट के साइज़ के आधार पर स्लाइड की दूरी का हिसाब लगाते हैं.
SizeTransform से यह तय होता है कि शुरुआती और टारगेट कॉन्टेंट के बीच साइज़ में बदलाव कैसे होना चाहिए. ऐनिमेशन बनाते समय, आपके पास शुरुआती साइज़ और टारगेट साइज़, दोनों का ऐक्सेस होता है. SizeTransform यह भी कंट्रोल करता है कि ऐनिमेशन के दौरान, कॉन्टेंट को कॉम्पोनेंट के साइज़ के हिसाब से काटा जाना चाहिए या नहीं.
var expanded by remember { mutableStateOf(false) } Surface( color = MaterialTheme.colorScheme.primary, onClick = { expanded = !expanded } ) { AnimatedContent( targetState = expanded, transitionSpec = { fadeIn(animationSpec = tween(150, 150)) togetherWith fadeOut(animationSpec = tween(150)) using SizeTransform { initialSize, targetSize -> if (targetState) { keyframes { // Expand horizontally first. IntSize(targetSize.width, initialSize.height) at 150 durationMillis = 300 } } else { keyframes { // Shrink vertically first. IntSize(initialSize.width, targetSize.height) at 150 durationMillis = 300 } } } }, label = "size transform" ) { targetExpanded -> if (targetExpanded) { Expanded() } else { ContentIcon() } } }

चाइल्ड ट्रांज़िशन को सीन में शामिल करने और हटाने पर ऐनिमेट करना
AnimatedVisibility की तरह ही, animateEnterExit
मॉडिफ़ायर, AnimatedContent के कॉन्टेंट लैम्डा में उपलब्ध होता है. इस टैग का इस्तेमाल करके, डायरेक्ट या इनडायरेक्ट तौर पर जुड़े हर चाइल्ड एलिमेंट पर EnterAnimation और ExitAnimation को अलग-अलग लागू करें.
अपनी पसंद के मुताबिक ऐनिमेशन जोड़ना
AnimatedVisibility की तरह, transition फ़ील्ड भी AnimatedContent के कॉन्टेंट लैम्डा में उपलब्ध होता है. इसका इस्तेमाल, कस्टम ऐनिमेशन इफ़ेक्ट बनाने के लिए करें. यह AnimatedContent ट्रांज़िशन के साथ-साथ चलता है. ज़्यादा जानकारी के लिए, updateTransition देखें.
दो लेआउट के बीच ऐनिमेशन बनाना
Crossfade, क्रॉसफ़ेड ऐनिमेशन के साथ दो लेआउट के बीच ऐनिमेट करता है. current पैरामीटर को पास की गई वैल्यू को टॉगल करने पर, कॉन्टेंट को क्रॉसफ़ेड ऐनिमेशन के साथ स्विच किया जाता है.
var currentPage by remember { mutableStateOf("A") } Crossfade(targetState = currentPage, label = "cross fade") { screen -> when (screen) { "A" -> Text("Page A") "B" -> Text("Page B") } }
पहले से मौजूद ऐनिमेशन मॉडिफ़ायर
Compose, कंपोज़ेबल पर सीधे तौर पर कुछ बदलावों को ऐनिमेट करने के लिए मॉडिफ़ायर उपलब्ध कराता है.
कंपोज़ेबल के साइज़ में होने वाले बदलावों को ऐनिमेट करना

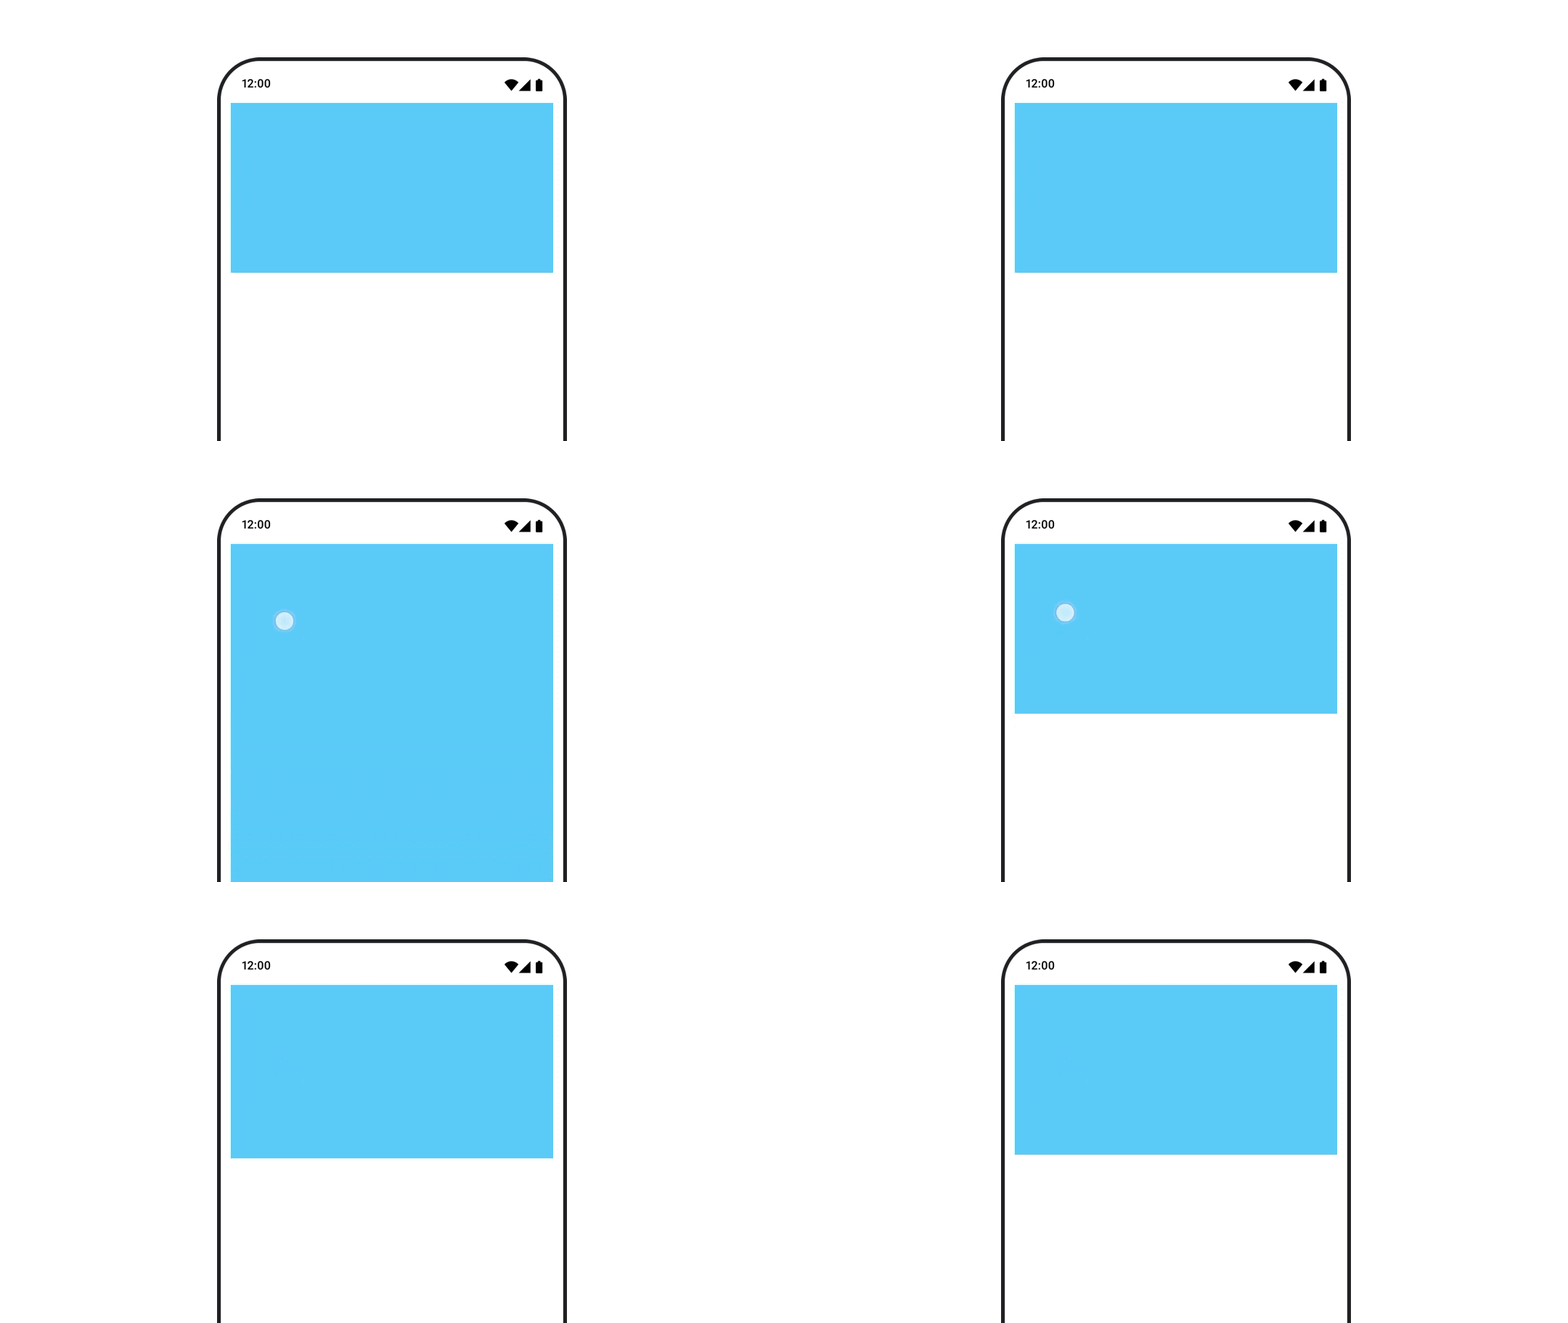
animateContentSize मॉडिफ़ायर, साइज़ में होने वाले बदलाव को ऐनिमेट करता है.
var expanded by remember { mutableStateOf(false) } Box( modifier = Modifier .background(colorBlue) .animateContentSize() .height(if (expanded) 400.dp else 200.dp) .fillMaxWidth() .clickable( interactionSource = remember { MutableInteractionSource() }, indication = null ) { expanded = !expanded } ) { }
सूची में शामिल आइटम के ऐनिमेशन
अगर आपको लेज़ी लिस्ट या ग्रिड में आइटम के क्रम बदलने की प्रोसेस को एनिमेट करना है, तो लेज़ी लेआउट आइटम के ऐनिमेशन से जुड़े दस्तावेज़ देखें.
आपके लिए सुझाव
- ध्यान दें: JavaScript बंद होने पर लिंक का टेक्स्ट दिखता है
- वैल्यू के आधार पर ऐनिमेशन
- Compose में ऐनिमेशन
- ऐनिमेशन टूलिंग की सुविधा {:#tooling}


