
In der OpenGL ES-Umgebung können Sie mit Projektions- und Kameraansichten gezeichnete Objekte in einem die der Wahrnehmung physischer Objekte mit Ihren Augen ähnelt. Diese Simulation von Die physische Betrachtung erfolgt mit mathematischen Transformationen gezeichneter Objektkoordinaten:
- Projection: Mit dieser Transformation werden die Koordinaten gezeichneter Objekte basierend auf
Breite und Höhe von
GLSurfaceView, wo sie angezeigt werden. Ohne Bei dieser Berechnung werden von OpenGL ES gezeichnete Objekte durch die ungleichen Proportionen der Ansicht verzerrt . Eine Projektionstransformation muss normalerweise nur berechnet werden, wenn die Anteile des OpenGL-Ansicht wird in deronSurfaceChanged()-Methode Ihres Renderers erstellt oder geändert. Weitere Informationen zu OpenGL ES-Projektionen und Koordinatenkarten erstellen, Kartografieren von gezeichneten Objekte. - Kameraansicht: Bei dieser Transformation werden die Koordinaten von gezeichneten Objekten basierend auf einer
Position der virtuellen Kamera. Wichtig: OpenGL ES definiert keine tatsächliche Kamera,
-Objekt, sondern bietet stattdessen Dienstprogrammmethoden, die eine Kamera simulieren, indem die Anzeige von
gezeichneten Objekten. Eine Umwandlung der Kameraansicht wird möglicherweise nur einmal berechnet, wenn Sie
GLSurfaceViewoder kann sich je nach Nutzeraktionen oder Ihren die Funktion der Anwendung.
In dieser Lektion wird beschrieben, wie Sie eine Projektion und eine Kameraansicht erstellen und auf Formen anwenden, die in
GLSurfaceView
Projektion definieren
Die Daten für eine Projektionstransformation werden in der onSurfaceChanged() berechnet.
Ihrer GLSurfaceView.Renderer-Klasse. Der folgende Beispielcode
nimmt die Höhe und Breite von GLSurfaceView und füllt damit
Projektionstransformation Matrix mit der Methode Matrix.frustumM():
Kotlin
// vPMatrix is an abbreviation for "Model View Projection Matrix"
private val vPMatrix = FloatArray(16)
private val projectionMatrix = FloatArray(16)
private val viewMatrix = FloatArray(16)

override fun onSurfaceChanged(unused: GL10, width: Int, height: Int) {
    GLES20.glViewport(0, 0, width, height)

    val ratio: Float = width.toFloat() / height.toFloat()

    // this projection matrix is applied to object coordinates
    // in the onDrawFrame() method
    Matrix.frustumM(projectionMatrix, 0, -ratio, ratio, -1f, 1f, 3f, 7f)
}
Java
// vPMatrix is an abbreviation for "Model View Projection Matrix"
private final float[] vPMatrix = new float[16];
private final float[] projectionMatrix = new float[16];
private final float[] viewMatrix = new float[16];

@Override
public void onSurfaceChanged(GL10 unused, int width, int height) {
    GLES20.glViewport(0, 0, width, height);

    float ratio = (float) width / height;

    // this projection matrix is applied to object coordinates
    // in the onDrawFrame() method
    Matrix.frustumM(projectionMatrix, 0, -ratio, ratio, -1, 1, 3, 7);
}
Dieser Code füllt eine Projektionsmatrix mProjectionMatrix aus, die Sie dann kombinieren können.
mit einer Kameraansichtstransformation in der onDrawFrame()-Methode, die im nächsten Abschnitt beschrieben wird.
Hinweis:Wenn Sie nur eine Projektionstransformation auf Ihre führt in der Regel zu einer sehr leeren Anzeige. Im Allgemeinen müssen Sie auch eine Kamera bis alles auf dem Bildschirm erscheint.
Kameraansicht definieren
Schließen Sie das Transformieren Ihrer gezeichneten Objekte ab, indem Sie eine Kameraansichtstransformation als
Teil des Zeichenprozesses im Renderer ist. Im folgenden Beispielcode zeigt die Kameraansicht
Transformation mit dem Matrix.setLookAtM() berechnet.
und dann mit der zuvor berechneten Projektionsmatrix kombiniert werden. Die kombinierten
Transformationsmatrizen an die gezeichnete Form übergeben.
Kotlin
override fun onDrawFrame(unused: GL10) {
    ...
    // Set the camera position (View matrix)
    Matrix.setLookAtM(viewMatrix, 0, 0f, 0f, 3f, 0f, 0f, 0f, 0f, 1.0f, 0.0f)

    // Calculate the projection and view transformation
    Matrix.multiplyMM(vPMatrix, 0, projectionMatrix, 0, viewMatrix, 0)

    // Draw shape
    triangle.draw(vPMatrix)
Java
@Override
public void onDrawFrame(GL10 unused) {
    ...
    // Set the camera position (View matrix)
    Matrix.setLookAtM(viewMatrix, 0, 0, 0, 3, 0f, 0f, 0f, 0f, 1.0f, 0.0f);

    // Calculate the projection and view transformation
    Matrix.multiplyMM(vPMatrix, 0, projectionMatrix, 0, viewMatrix, 0);

    // Draw shape
    triangle.draw(vPMatrix);
}
Projektions- und Kameratransformationen anwenden
Um die kombinierte Transformationsmatrix für Projektion und Kameraansicht zu verwenden, die in der
fügen Sie dem zuvor definierten Vertex-Shader eine Matrixvariable hinzu.
in der Klasse Triangle:
Kotlin
class Triangle {

    private val vertexShaderCode =
            // This matrix member variable provides a hook to manipulate
            // the coordinates of the objects that use this vertex shader
            "uniform mat4 uMVPMatrix;" +
            "attribute vec4 vPosition;" +
            "void main() {" +
            // the matrix must be included as a modifier of gl_Position
            // Note that the uMVPMatrix factor *must be first* in order
            // for the matrix multiplication product to be correct.
            "  gl_Position = uMVPMatrix * vPosition;" +
            "}"

    // Use to access and set the view transformation
    private var vPMatrixHandle: Int = 0

    ...
}
Java
public class Triangle {

    private final String vertexShaderCode =
        // This matrix member variable provides a hook to manipulate
        // the coordinates of the objects that use this vertex shader
        "uniform mat4 uMVPMatrix;" +
        "attribute vec4 vPosition;" +
        "void main() {" +
        // the matrix must be included as a modifier of gl_Position
        // Note that the uMVPMatrix factor *must be first* in order
        // for the matrix multiplication product to be correct.
        "  gl_Position = uMVPMatrix * vPosition;" +
        "}";

    // Use to access and set the view transformation
    private int vPMatrixHandle;

    ...
}
Ändern Sie als Nächstes die Methode draw() Ihrer Grafikobjekte, sodass die kombinierten Werte akzeptiert werden.
Transformationsmatrix und wenden sie auf die Form an:
Kotlin
fun draw(mvpMatrix: FloatArray) { // pass in the calculated transformation matrix
    ...

    // get handle to shape's transformation matrix
    vPMatrixHandle = GLES20.glGetUniformLocation(mProgram, "uMVPMatrix")

    // Pass the projection and view transformation to the shader
    GLES20.glUniformMatrix4fv(vPMatrixHandle, 1, false, mvpMatrix, 0)

    // Draw the triangle
    GLES20.glDrawArrays(GLES20.GL_TRIANGLES, 0, vertexCount)

    // Disable vertex array
    GLES20.glDisableVertexAttribArray(positionHandle)
}
Java
public void draw(float[] mvpMatrix) { // pass in the calculated transformation matrix
    ...

    // get handle to shape's transformation matrix
    vPMatrixHandle = GLES20.glGetUniformLocation(mProgram, "uMVPMatrix");

    // Pass the projection and view transformation to the shader
    GLES20.glUniformMatrix4fv(vPMatrixHandle, 1, false, mvpMatrix, 0);

    // Draw the triangle
    GLES20.glDrawArrays(GLES20.GL_TRIANGLES, 0, vertexCount);

    // Disable vertex array
    GLES20.glDisableVertexAttribArray(positionHandle);
}
Nachdem Sie die Transformationen für Projektion und Kameraansicht korrekt berechnet und angewendet haben, Ihre Grafikobjekte werden im richtigen Verhältnis gezeichnet und sollten wie folgt aussehen:
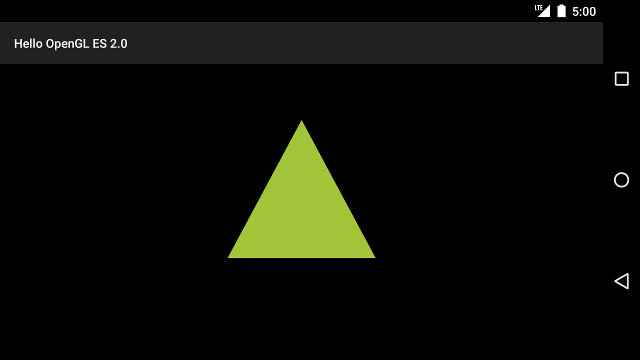
Abbildung 1: Dreieck mit angewendeter Projektion und Kameraansicht.
Da Sie nun über eine Anwendung verfügen, die Ihre Formen im richtigen Verhältnis anzeigt, ist es an der Zeit, und fügen Sie Bewegungselemente hinzu.