
「Resource Manager」是一個工具視窗,可用於在應用程式中匯入、建立、管理及使用資源。如要開啟這個視窗,請在選單內依序選取「View」>「Tool Windows」>「Resource Manager」,或選取左側列中的「Resource Manager」。
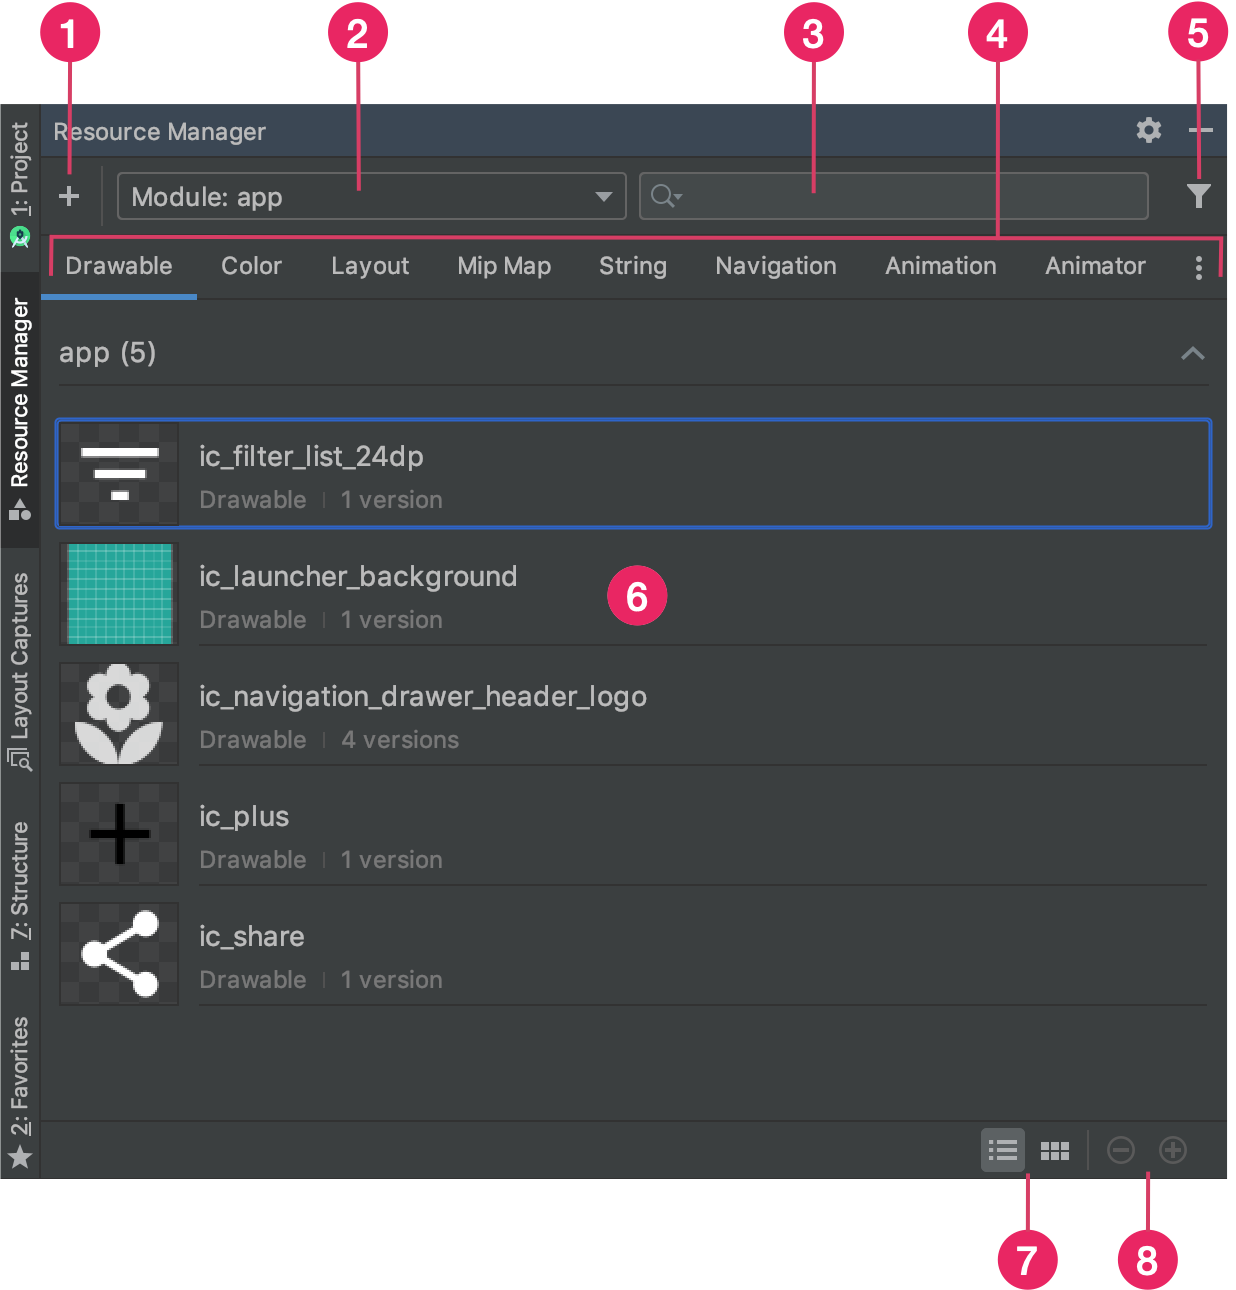
圖 1:「Resource Manager」工具視窗。
- 按一下「Add」圖示
 ,即可在專案中加入新資源。您可以新增圖片素材資源、向量素材資源、字型、資源檔案和值,也可以匯入可繪項目到專案。
 - 選取模組,即可查看該模組專屬的資源。
- 使用搜尋列,即可搜尋專案內所有模組的資源。
- 依據資源管理工具中的類型顯示資源。您可以利用這些分頁切換資源類型。按一下溢位圖示
 ,即可顯示其他資源類型。
 - 點選篩選器按鈕,即可篩選本機相依模組、外部程式庫和 Android 架構的所列資源。您也可以使用篩選器顯示主題屬性。
- 在主要內容區域中預覽資源。在資源上按一下滑鼠右鍵,即可查看內容選單。透過這個選單,您可以重新命名資源,以及搜尋應用程式中使用資源的位置。
- 按一下這些按鈕,就能以圖塊或清單的形式查看資源。
- 按一下這些按鈕,即可變更資源的預覽大小。
除了上述功能外,資源管理工具也能讓您大量匯入可繪項目到專案中。如要大量匯入,您可以採取下列其中一種做法:
- 將 SVG 等圖片檔直接拖曳到資源管理工具。
- 使用「Import Drawables」精靈。
詳情請參閱「在專案中匯入可繪項目」一節。
如要查看更多詳細資訊,請在資源管理工具中按兩下任一資源。如果資源有多個版本,則此詳細資料檢視畫面會顯示每個版本以及任何相關聯的限定詞,如圖 2 所示。在此處按兩下特定版本,即可在編輯器視窗中開啟。

圖 2:資源管理工具顯示不同螢幕密度的圖片資源版本。
在專案中匯入可繪項目
您可以使用資源管理工具,將圖片資源匯入專案。如需支援的圖片類型清單,請參閱「圖片支援」。
如要在專案中匯入圖片資源,請按照下列步驟操作:
將圖片直接拖曳到 Android Studio 中的「Resource Manager」視窗。
- 您也可以採取以下做法:
- 按一下加號圖示 +。
- 選擇「Import Drawables」,如圖 3 所示。
- 選取要匯入的檔案和資料夾。
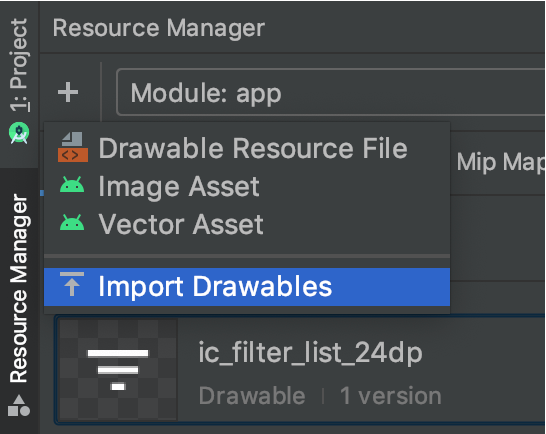
圖 3:在選單中選取「Import Drawables」。
- 您也可以採取以下做法:
畫面上會出現「Import Drawables」對話方塊,如圖 4 所示。這個對話方塊會顯示一份清單,列出您要匯入的資源。如要重新命名資源,請點選資源預覽上方的方塊。
如果想提供同一資源的多個版本,請新增裝置設定限定詞 (詳情請見下節),說明每項資源支援的特定設定。
舉例來說,如要針對不同螢幕密度提供同一資源的多個版本,可以為各版本新增像素密度限定詞。請注意,如有兩個以上資源的名稱和限定詞相同,系統只會匯入一個版本。
如要進一步瞭解資源限定詞,請參閱「提供額外資源」。
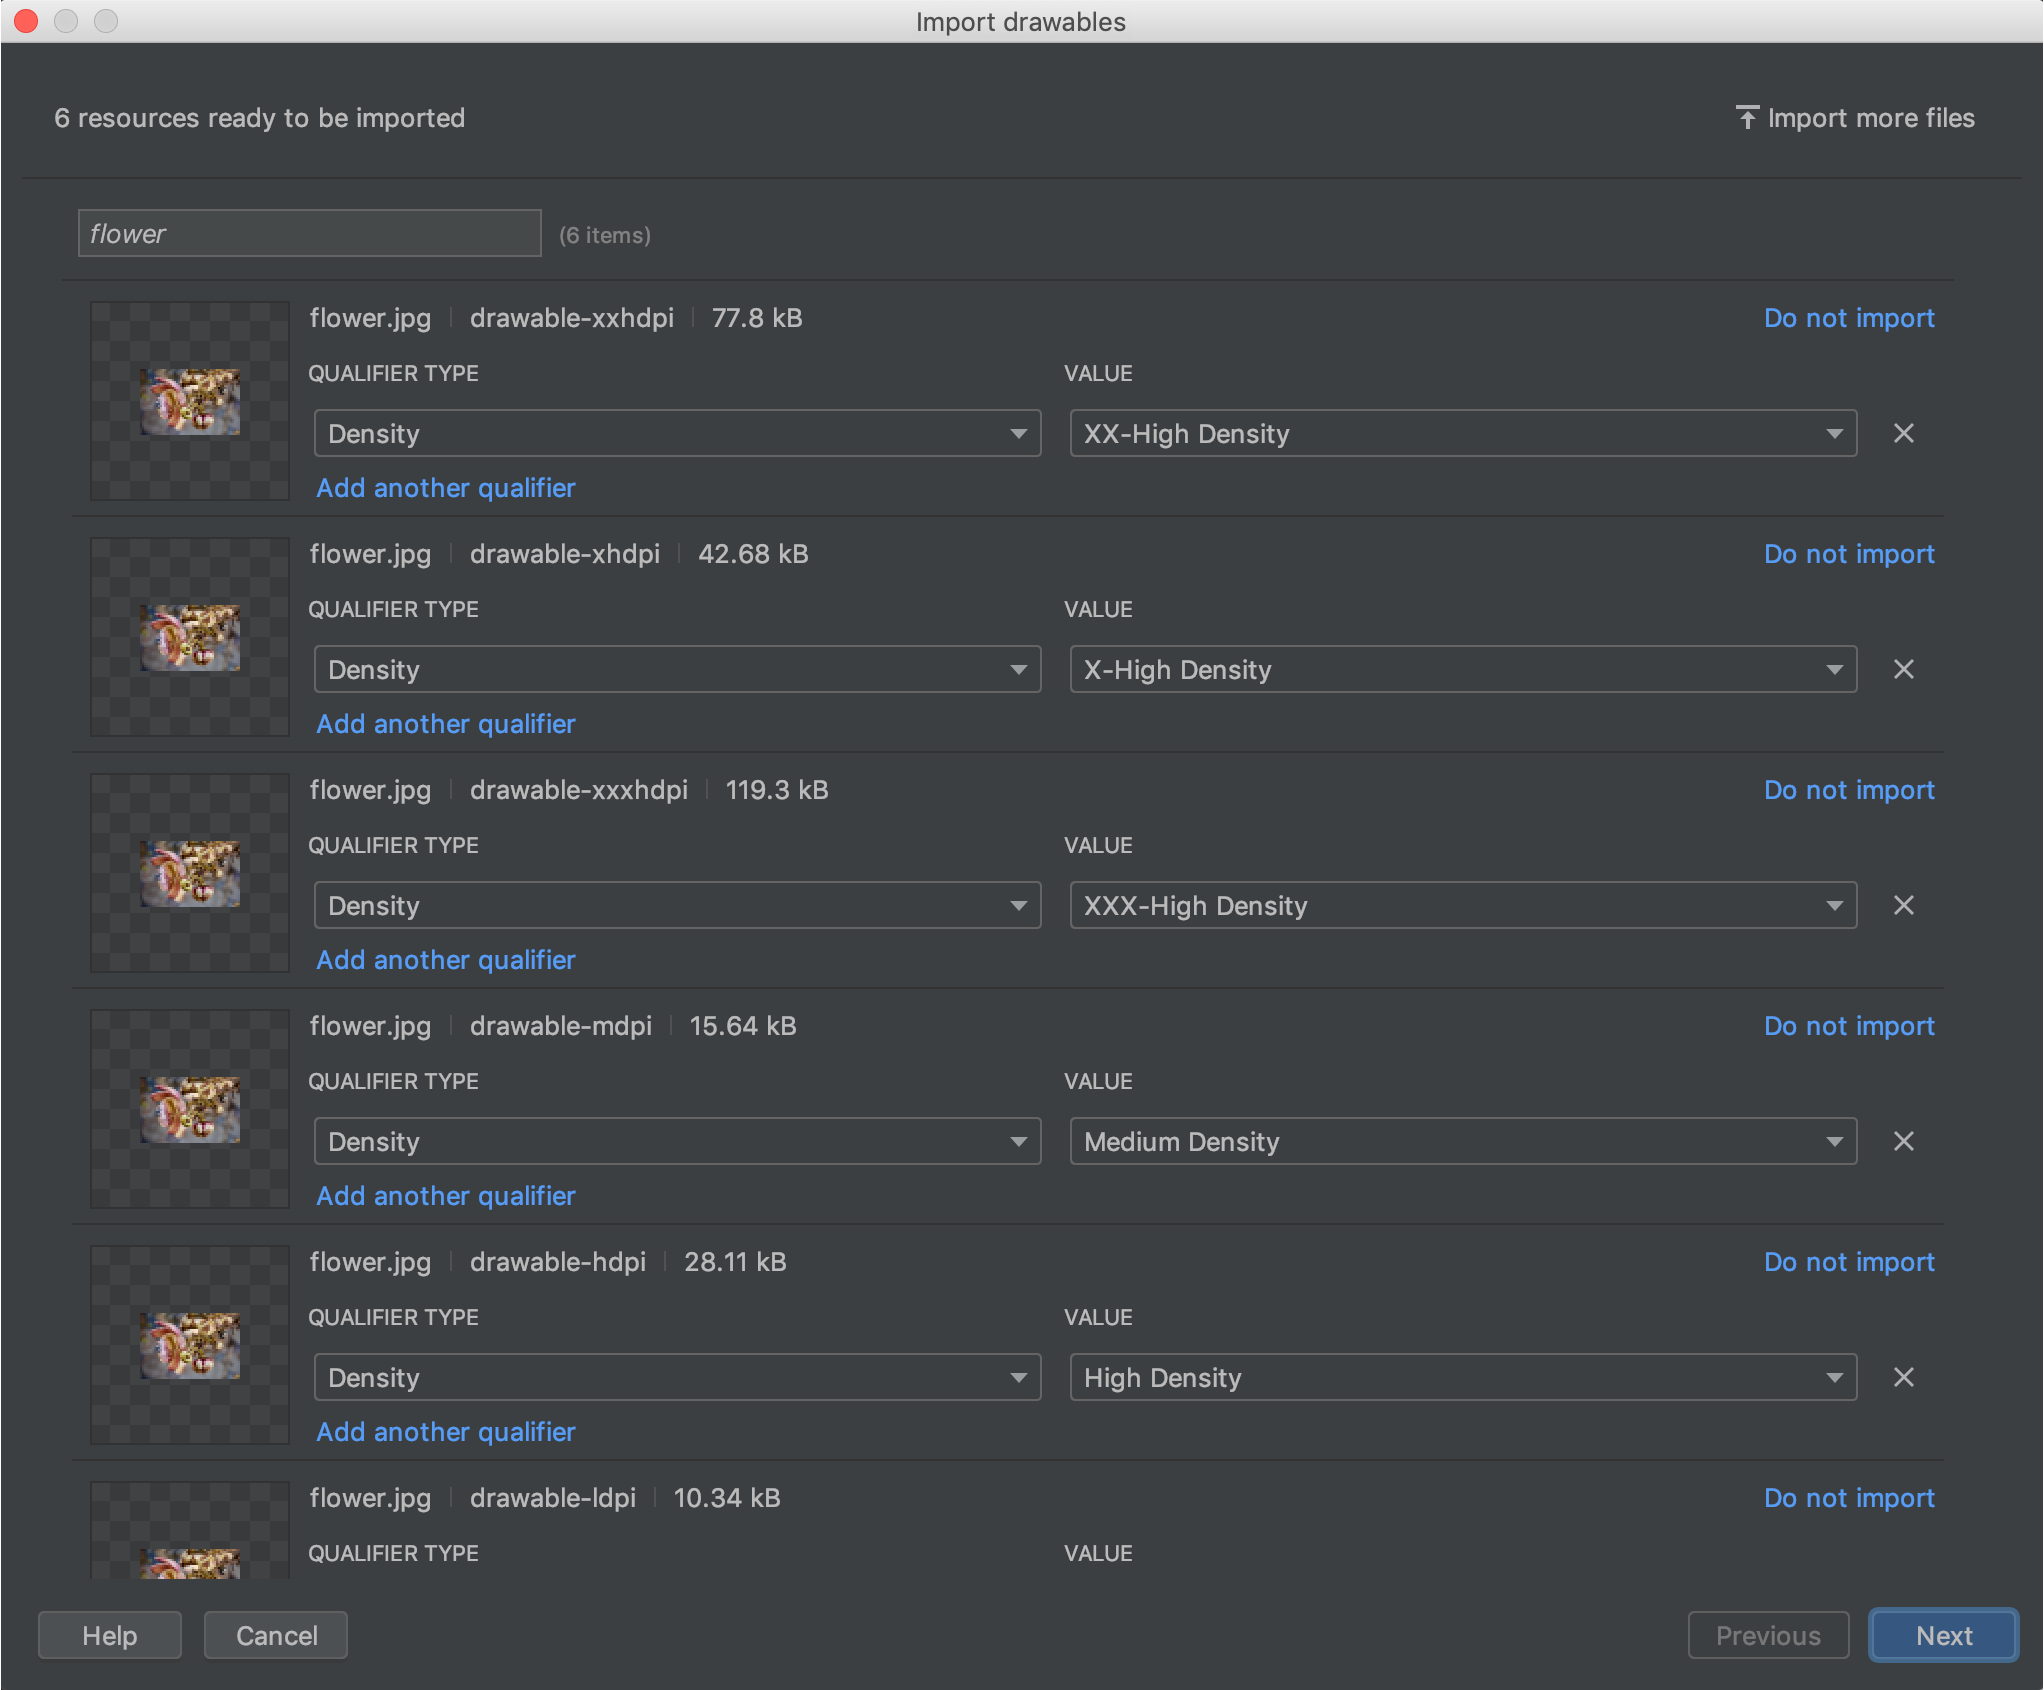
圖 4:「Import Drawables」對話方塊。
命名資源並新增所有必要的限定詞後,請按一下「Next」。
下一個畫面會顯示匯入資源的摘要。準備好要匯入時,請按一下「Import」。
「Resource Manager」視窗中現在會顯示可用於專案的資源,如圖 5 所示。
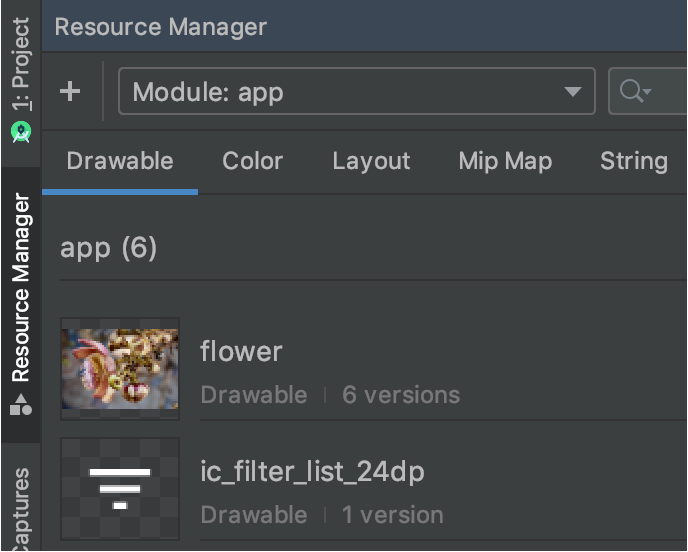
圖 5:資源管理工具現在會顯示您匯入的圖片。
自動剖析可繪項目密度
匯入檔案或資料夾時,如果路徑中包含像素密度限定詞,Resource Manager 會在匯入期間自動套用這類限定詞。資源管理工具可剖析 Android 像素密度限定詞,以及 iOS 縮放比例係數。
下表列出 Android 和 iOS 所支援不同密度的表示方式:
| 密度 | Android 像素密度限定詞 | iOS 縮放比例係數 |
|---|---|---|
| 低密度 (約 120 dpi) | ldpi |
不支援 |
| 中密度 (約 160 dpi) | mdpi |
原始縮放比例 |
| 高密度 (約 240 dpi) | hdpi |
不支援 |
| 超高密度 (約 320 dpi) | xhdpi |
@2x |
| 特別超高密度 (約 480 dpi) | xxhdpi |
@3x |
| 極致超高密度 (約 640 dpi) | xxxhdpi |
@4x |
以下列舉幾個例子,說明輸入路徑在匯入後如何轉換為資源路徑:
- Android 像素密度限定詞:
hdpi - 輸入路徑:/UserFolder/icon1/hdpi/icon.png
資源路徑:<projectFolder>/<moduleFolder>/src/main/res/drawable-hdpi/icon.png - Android 像素密度限定詞:
xxhdpi - 輸入路徑:/UserFolder/icon1/abc-xxhdpi/icon.png
資源路徑:<projectFolder>/<moduleFolder>/src/main/res/drawable-xxhdpi/icon.png - iOS 縮放比例係數:@2x
- 輸入路徑:/UserFolder/icon1/icon@2x.png
資源路徑:<projectFolder>/<moduleFolder>/src/main/res/drawable-xhdpi/icon.png - iOS 縮放比例係數:@2x
- 輸入路徑:/UserFolder/icon1/icon@2x_alternate.png
資源路徑:<projectFolder>/<moduleFolder>/src/main/res/drawable-xhdpi/icon_alternate.png
如要進一步瞭解如何支援具有不同像素密度的裝置,請參閱「支援不同的像素密度」。
在 Jetpack Compose 中使用資源
使用 Jetpack Compose 建構應用程式時,您可以透過最佳化 API 直接從 Kotlin 程式碼存取資源,確保 UI 邏輯和資源參照保持同步。
- 圖片:在
Image可組合函式中使用painterResource(id = R.drawable.your_image)。 - 字串:使用
stringResource(id = R.string.your_string)擷取本地化 UI 文字。 - 顏色:使用
colorResource(id = R.color.your_color)套用主題定義的顏色。
Resource Manager 可確保這些 ID 正確產生,讓您從 Compose UI 階層無縫參照資產。
如要瞭解進階資源處理方式,包括動態字型載入、設定專屬資源和 Compose 專屬資源庫,請參閱「Compose 中的資源」文件。