
অ্যান্ড্রয়েড স্টুডিও উইজার্ড এবং টেমপ্লেট সরবরাহ করে যা আপনার সিস্টেমের প্রয়োজনীয়তা, যেমন জাভা ডেভেলপমেন্ট কিট (JDK) এবং উপলব্ধ র্যাম যাচাই করে এবং ডিফল্ট সেটিংস, যেমন একটি অপ্টিমাইজ করা ডিফল্ট অ্যান্ড্রয়েড ভার্চুয়াল ডিভাইস (AVD) এমুলেশন এবং আপডেট করা সিস্টেম ইমেজ কনফিগার করে। এই ডকুমেন্টটিতে অ্যান্ড্রয়েড স্টুডিও ব্যবহারের অভিজ্ঞতাকে নিজের মতো করে সাজানোর জন্য অতিরিক্ত কনফিগারেশন সেটিংস বর্ণনা করা হয়েছে।
অ্যান্ড্রয়েড স্টুডিও হেল্প মেনুর মাধ্যমে দুটি কনফিগারেশন ফাইল অ্যাক্সেস করার সুযোগ দেয়:
-
studio.vmoptions: অ্যান্ড্রয়েড স্টুডিও-এর জাভা ভার্চুয়াল মেশিন (JVM)-এর জন্য হিপ সাইজ এবং ক্যাশ সাইজের মতো অপশনগুলো কাস্টমাইজ করুন। উল্লেখ্য যে, আপনার অ্যান্ড্রয়েড স্টুডিও-এর ভার্সনের উপর নির্ভর করে লিনাক্স মেশিনে এই ফাইলটির নামstudio64.vmoptionsহতে পারে। -
idea.properties: অ্যান্ড্রয়েড স্টুডিও-এর প্রোপার্টিগুলো কাস্টমাইজ করুন, যেমন প্লাগইন ফোল্ডারের পাথ বা সর্বোচ্চ সমর্থিত ফাইলের আকার।
এমুলেটর ও ডিভাইস সেটআপ এবং ব্যবহার সম্পর্কিত নির্দিষ্ট তথ্যের জন্য, নিম্নলিখিত বিষয়গুলো দেখুন:
- ভার্চুয়াল ডিভাইস তৈরি এবং পরিচালনা করুন
- হার্ডওয়্যার ডিভাইসে অ্যাপ চালান
- OEM USB ড্রাইভার ইনস্টল করুন
আপনার কনফিগারেশন ফাইলগুলি খুঁজুন
উভয় কনফিগারেশন ফাইলই অ্যান্ড্রয়েড স্টুডিও-এর কনফিগারেশন ডিরেক্টরিতে সংরক্ষিত থাকে। কনফিগারেশন ডিরেক্টরিটি খুঁজে পেতে, ডিরেক্টরিসমূহ (Directories) দেখুন।
অন্যত্র নির্দিষ্ট ওভাররাইড ফাইল নির্দেশ করার জন্য আপনি নিম্নলিখিত এনভায়রনমেন্ট ভেরিয়েবলগুলো ব্যবহার করতে পারেন:
-
STUDIO_VM_OPTIONS:.vmoptionsফাইলের নাম ও অবস্থান নির্ধারণ করুন। -
STUDIO_PROPERTIES:.propertiesফাইলের নাম এবং অবস্থান নির্ধারণ করুন।
অ্যান্ড্রয়েড বিল্ডে থাকা জাভা ভার্সনগুলো দেখে আপনি কোন কোন জেডিকে (JDK) ব্যবহৃত হবে তা কনফিগার করতে পারেন।
আপনার ভিএম বিকল্পগুলি কাস্টমাইজ করুন
studio.vmoptions ফাইলটি আপনাকে অ্যান্ড্রয়েড স্টুডিওর JVM-এর অপশনগুলো কাস্টমাইজ করার সুযোগ দেয়। অ্যান্ড্রয়েড স্টুডিওর পারফরম্যান্স উন্নত করার জন্য, সবচেয়ে সাধারণ যে অপশনটি অ্যাডজাস্ট করা হয় তা হলো ম্যাক্সিমাম হিপ সাইজ, কিন্তু আপনি studio.vmoptions ফাইলটি ব্যবহার করে ইনিশিয়াল হিপ সাইজ, ক্যাশ সাইজ এবং জাভা গার্বেজ কালেকশন সুইচের মতো অন্যান্য ডিফল্ট সেটিংসও ওভাররাইড করতে পারেন।
একটি নতুন studio.vmoptions ফাইল তৈরি করতে বা আপনার বিদ্যমান ফাইলটি খুলতে, এই ধাপগুলো অনুসরণ করুন:
- Help > Edit Custom VM Options-এ ক্লিক করুন। আপনি যদি আগে কখনও Android Studio-র জন্য VM অপশন এডিট না করে থাকেন, তাহলে IDE আপনাকে একটি নতুন
studio.vmoptionsফাইল তৈরি করতে বলবে। ফাইলটি তৈরি করতে Create-এ ক্লিক করুন। -
studio.vmoptionsফাইলটি অ্যান্ড্রয়েড স্টুডিও-এর এডিটর উইন্ডোতে খোলে। আপনার নিজস্ব ভিএম অপশন যোগ করতে ফাইলটি সম্পাদনা করুন। কাস্টমাইজযোগ্য জেভিএম অপশনগুলোর সম্পূর্ণ তালিকার জন্য, ওরাকলের জাভা হটস্পট ভিএম অপশনস পৃষ্ঠাটি দেখুন।
আপনার তৈরি করা studio.vmoptions ফাইলটি আপনার অ্যান্ড্রয়েড স্টুডিও ইনস্টলেশন ফোল্ডারের bin/ ডিরেক্টরিতে অবস্থিত ডিফল্ট studio.vmoptions ফাইলের সাথে যুক্ত হয়।
অ্যান্ড্রয়েড স্টুডিও প্রোগ্রাম ফোল্ডারের ভিতরে থাকা studio.vmoptions ফাইলটি সরাসরি সম্পাদনা করবেন না। যদিও আপনি অ্যান্ড্রয়েড স্টুডিও-এর ডিফল্ট ভিএম অপশনগুলো দেখার জন্য ফাইলটি অ্যাক্সেস করতে পারেন, শুধুমাত্র আপনার নিজের studio.vmoptions ফাইলটি সম্পাদনা করলে এটি নিশ্চিত হয় যে আপনি অ্যান্ড্রয়েড স্টুডিও-এর গুরুত্বপূর্ণ ডিফল্ট সেটিংস ওভাররাইড করছেন না। অতএব, আপনার studio.vmoptions ফাইলে, শুধুমাত্র সেই অ্যাট্রিবিউটগুলো ওভাররাইড করুন যেগুলো আপনার প্রয়োজন এবং যে অ্যাট্রিবিউটগুলো আপনি পরিবর্তন করেননি সেগুলোর জন্য অ্যান্ড্রয়েড স্টুডিওকে ডিফল্ট মান ব্যবহার করতে দিন।
সর্বোচ্চ হিপ সাইজ
ডিফল্টরূপে, অ্যান্ড্রয়েড স্টুডিওর সর্বোচ্চ হিপ সাইজ হলো ১২৮০ মেগাবাইট। আপনি যদি কোনো বড় প্রজেক্টে কাজ করেন, অথবা আপনার সিস্টেমে প্রচুর র্যাম থাকে, তাহলে অ্যান্ড্রয়েড স্টুডিওর কোর আইডিই, গ্রেডল ডেমন এবং কোটলিন ডেমন-এর মতো প্রসেসগুলোর সর্বোচ্চ হিপ সাইজ বাড়িয়ে পারফরম্যান্স উন্নত করতে পারেন।
অ্যান্ড্রয়েড স্টুডিও স্বয়ংক্রিয়ভাবে সম্ভাব্য হিপ সাইজ অপ্টিমাইজেশন পরীক্ষা করে এবং পারফরম্যান্স উন্নত করার সুযোগ আছে বলে শনাক্ত করলে আপনাকে অবহিত করে।
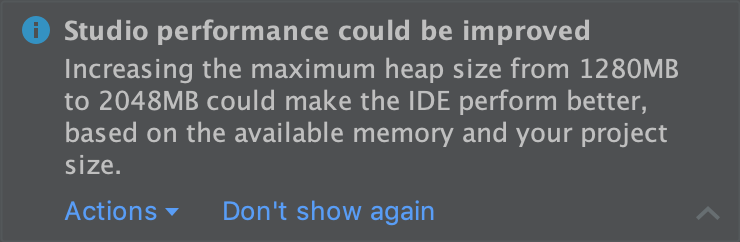
চিত্র ১. প্রস্তাবিত মেমরি সেটিংস সম্পর্কিত একটি বিজ্ঞপ্তি।
যদি আপনি এমন একটি ৬৪-বিট সিস্টেম ব্যবহার করেন যাতে কমপক্ষে ৫ জিবি র্যাম আছে, তাহলে আপনি আপনার প্রোজেক্টের হিপ সাইজ ম্যানুয়ালিও অ্যাডজাস্ট করতে পারেন। তা করতে, এই ধাপগুলো অনুসরণ করুন:
- মেনু বার থেকে ফাইল > সেটিংস-এ ক্লিক করুন (macOS-এ Android Studio > Preferences )।
Appearance & Behavior > System Settings > Memory Settings- এ ক্লিক করুন।
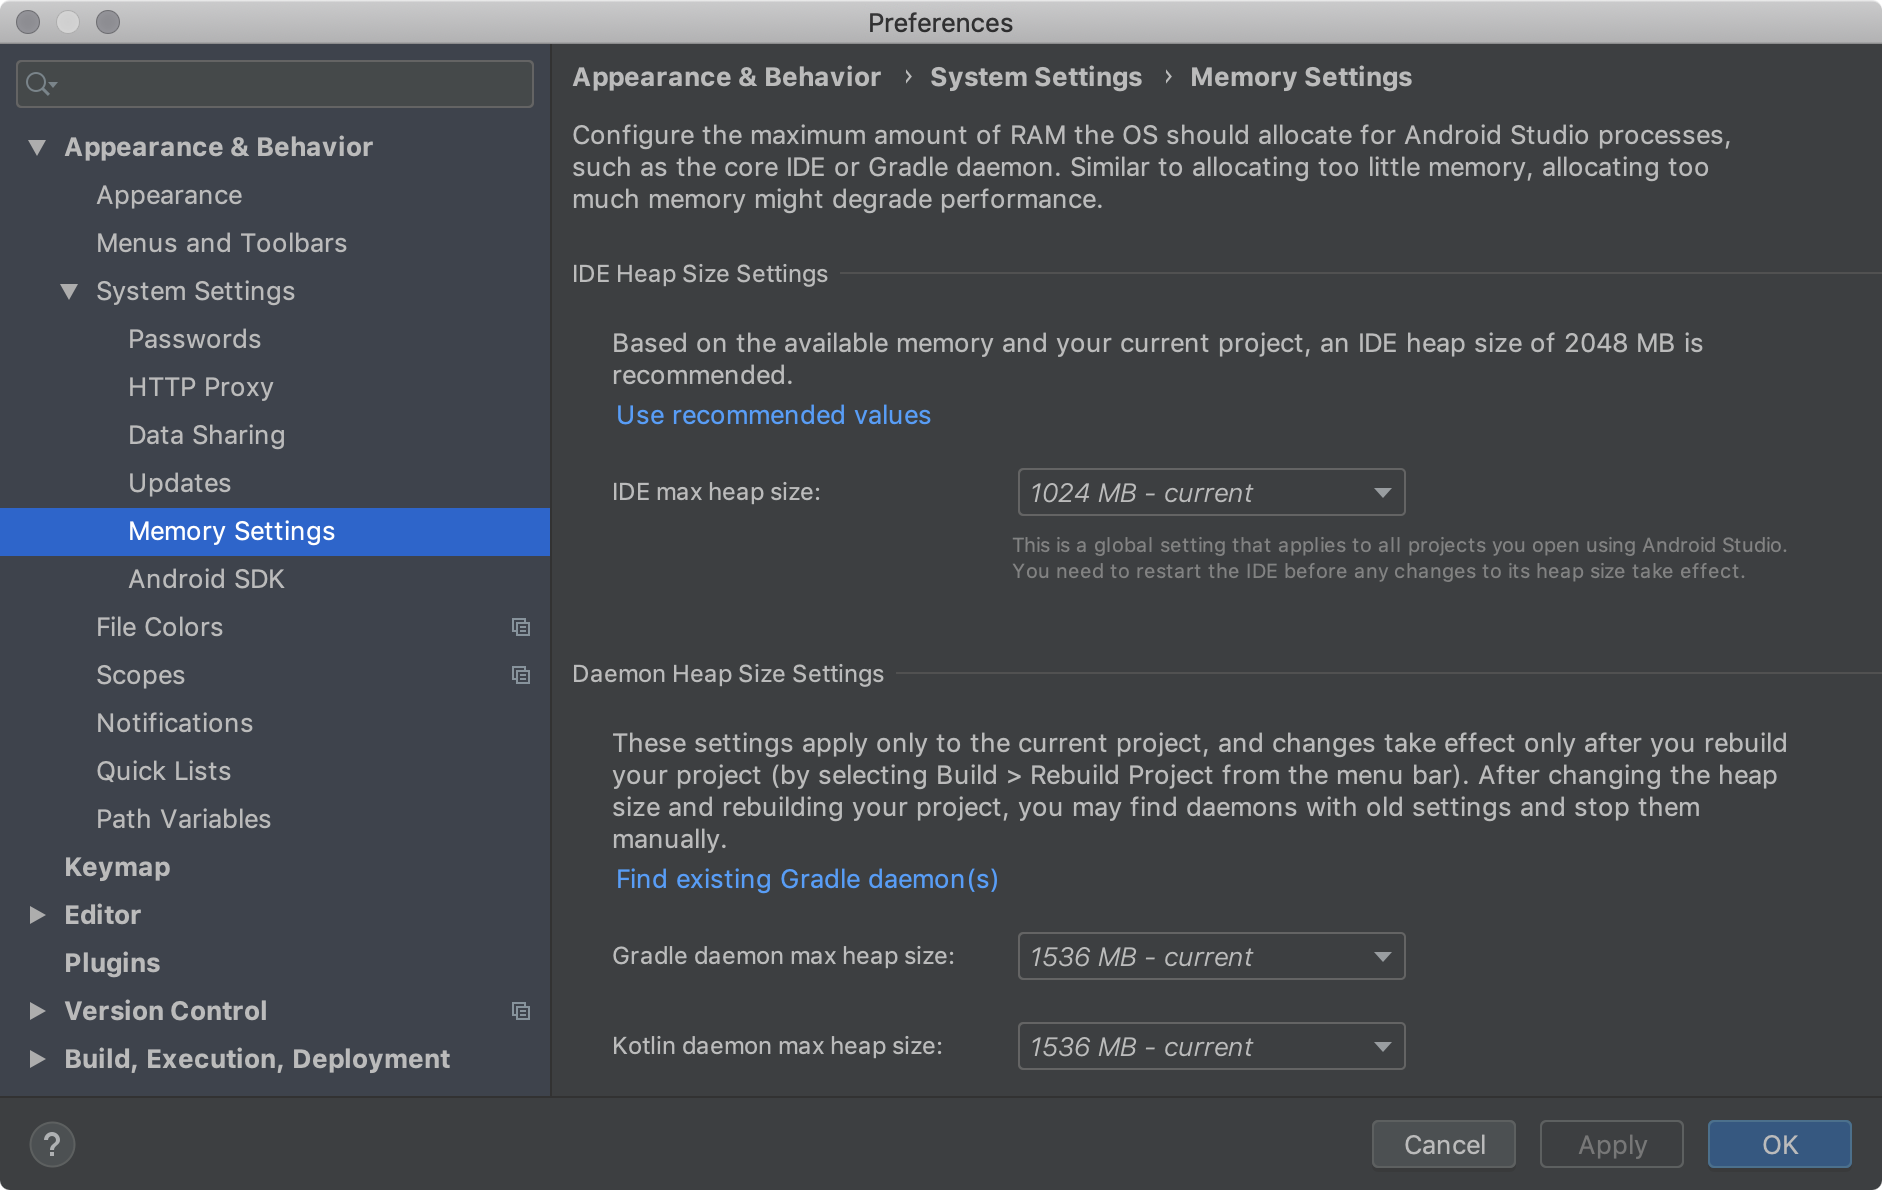
চিত্র ২। মেমরি সেটিংসে র্যামের সর্বোচ্চ পরিমাণ নির্ধারণ করুন।
স্তূপের আকারগুলো সমন্বয় করুন।
প্রয়োগ করুন- এ ক্লিক করুন।
আপনি যদি IDE-এর হিপ সাইজ পরিবর্তন করেন, তাহলে নতুন মেমোরি সেটিংস প্রয়োগ হওয়ার আগে আপনাকে অবশ্যই অ্যান্ড্রয়েড স্টুডিও রিস্টার্ট করতে হবে।
IDE সেটিংস রপ্তানি এবং আমদানি করুন
আপনার কীম্যাপ, কোড এডিটর সেটিংস, সিস্টেম সেটিংস এবং আরও অনেক কিছুর মতো সেটিংস সিঙ্ক করতে আপনি ক্লাউড স্টোরেজে IDE সেটিংস ব্যাক আপ করতে পারেন। এই ফিচারটি সেট আপ করতে, এই ধাপগুলো অনুসরণ করুন:
সেটিংস > ব্যাকআপ এবং সিঙ্ক- এ যান।
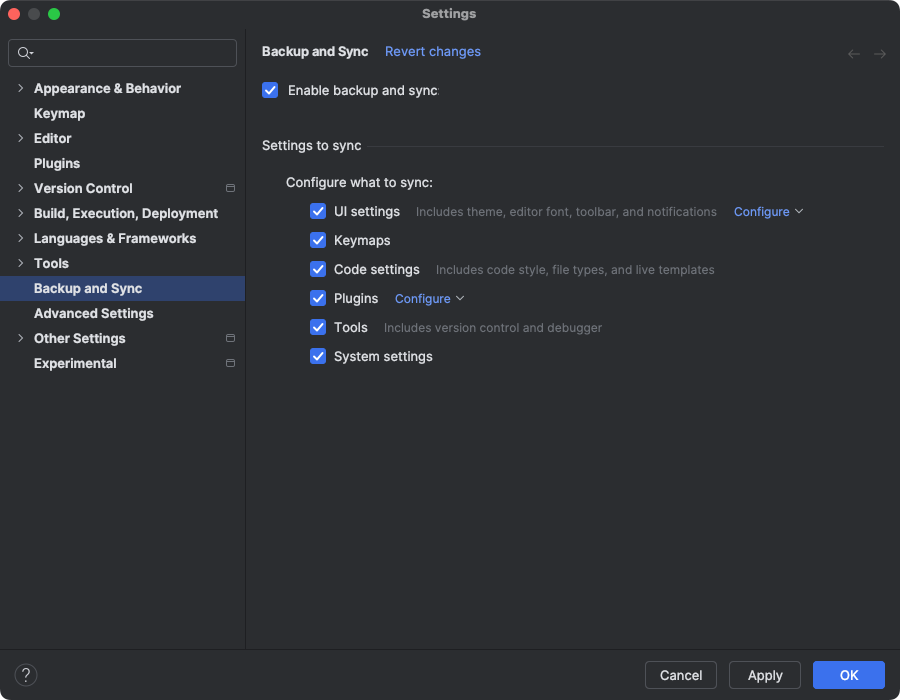
চিত্র ৩. স্টুডিও সেটিংস মেনুতে ব্যাকআপ ও সিঙ্ক। অ্যান্ড্রয়েড স্টুডিও ইনস্টলেশনগুলোর মধ্যে সিঙ্ক করার জন্য আপনার গুগল অ্যাকাউন্ট স্টোরেজ ব্যবহার করতে গুগল নির্বাচন করুন, অথবা ইন্টেলিজ এবং অ্যান্ড্রয়েড স্টুডিও ইনস্টলেশনগুলোর মধ্যে সিঙ্ক করার জন্য আপনার জেটব্রেইনস অ্যাকাউন্ট ব্যবহার করতে জেটব্রেইনস নির্বাচন করুন। উভয় ক্ষেত্রেই, অ্যান্ড্রয়েড স্টুডিও একটি ব্রাউজার উইন্ডো খোলে যেখানে আপনি অনুমোদন প্রদান করতে পারেন।
আপনার পছন্দের অ্যাকাউন্টের স্টোরেজ অ্যাক্সেস করার জন্য অ্যান্ড্রয়েড স্টুডিওকে অনুমোদন দিতে নির্দেশাবলী অনুসরণ করার পর, অ্যান্ড্রয়েড স্টুডিওতে ফিরে যান।
ব্যাকআপ এবং সিঙ্ক সেটিংস পৃষ্ঠায় ফিরে এসে, আপনার অ্যাকাউন্টে যে অ্যাপ ডেটার বিভাগগুলি সিঙ্ক করতে চান তা পর্যালোচনা করুন এবং প্রয়োজনীয় পরিবর্তন করুন। ফিচারটি সম্পূর্ণরূপে নিষ্ক্রিয় করতে, ‘Enable backup and sync’ থেকে টিক চিহ্নটি তুলে দিন।
আপনি File > Manage IDE Settings > Export Settings- এ গিয়ে সরাসরি একটি Settings.jar ফাইল এক্সপোর্ট করতে পারেন, যেটিতে একটি প্রোজেক্টের জন্য আপনার পছন্দের সমস্ত বা কিছু IDE সেটিংস অন্তর্ভুক্ত থাকে। এরপর আপনি JAR ফাইলটি আপনার অন্যান্য প্রোজেক্টে ইম্পোর্ট করতে পারেন অথবা আপনার সহকর্মীদের তাদের প্রোজেক্টে ইম্পোর্ট করার জন্য উপলব্ধ করতে পারেন। একটি সেটিংস ফাইল ইম্পোর্ট করতে, File > Manage IDE Settings > Import Settings- এ যান।
আপনার IDE প্রোপার্টিগুলো কাস্টমাইজ করুন
idea.properties ফাইলটি আপনাকে অ্যান্ড্রয়েড স্টুডিওর জন্য IDE প্রোপার্টিগুলো কাস্টমাইজ করার সুযোগ দেয়, যেমন ব্যবহারকারী-ইনস্টল করা প্লাগইনগুলোর পাথ এবং IDE দ্বারা সমর্থিত সর্বোচ্চ ফাইলের আকার। idea.properties ফাইলটি IDE-এর ডিফল্ট প্রোপার্টিগুলোর সাথে একীভূত থাকে, তাই আপনি শুধুমাত্র ওভাররাইড প্রোপার্টিগুলোই নির্দিষ্ট করতে পারেন।
একটি নতুন idea.properties ফাইল তৈরি করতে বা আপনার বিদ্যমান ফাইলটি খুলতে, এই ধাপগুলো অনুসরণ করুন:
- Help > Edit Custom Properties- এ ক্লিক করুন। আপনি যদি আগে কখনও IDE প্রোপার্টিজ এডিট না করে থাকেন, তাহলে Android Studio আপনাকে একটি নতুন
idea.propertiesফাইল তৈরি করতে বলবে। ফাইলটি তৈরি করতে Yes-এ ক্লিক করুন। -
idea.propertiesফাইলটি অ্যান্ড্রয়েড স্টুডিওর এডিটর উইন্ডোতে খোলে। আপনার নিজস্ব IDE প্রোপার্টিগুলো যোগ করতে ফাইলটি সম্পাদনা করুন।
নিম্নলিখিত idea.properties ফাইলটিতে সাধারণত কাস্টমাইজ করা IDE প্রপার্টিগুলো অন্তর্ভুক্ত রয়েছে। প্রপার্টিগুলোর সম্পূর্ণ তালিকার জন্য, IntelliJ IDEA-এর idea.properties ফাইল সম্পর্কে পড়ুন।
#---------------------------------------------------------------------
# Uncomment this option if you want to customize path to user installed plugins folder. Make sure
# you're using forward slashes.
#---------------------------------------------------------------------
# idea.plugins.path=${idea.config.path}/plugins
#---------------------------------------------------------------------
# Maximum file size (kilobytes) IDE should provide code assistance for.
# The larger the file is, the slower its editor works and higher overall system memory requirements are
# if code assistance is enabled. Remove this property or set to very large number if you need
# code assistance for any files available regardless their size.
#---------------------------------------------------------------------
idea.max.intellisense.filesize=2500
#---------------------------------------------------------------------
# This option controls console cyclic buffer: keeps the console output size not higher than the
# specified buffer size (Kb). Older lines are deleted. In order to disable cycle buffer use
# idea.cycle.buffer.size=disabled
#---------------------------------------------------------------------
idea.cycle.buffer.size=1024
#---------------------------------------------------------------------
# Configure if a special launcher should be used when running processes from within IDE.
# Using Launcher enables "soft exit" and "thread dump" features.
#---------------------------------------------------------------------
idea.no.launcher=false
#---------------------------------------------------------------------
# To avoid too long classpath
#---------------------------------------------------------------------
idea.dynamic.classpath=false
#---------------------------------------------------------------------
# There are two possible values of idea.popup.weight property: "heavy" and "medium".
# If you have WM configured as "Focus follows mouse with Auto Raise", then you have to
# set this property to "medium". It prevents problems with popup menus on some
# configurations.
#---------------------------------------------------------------------
idea.popup.weight=heavy
#---------------------------------------------------------------------
# Use default anti-aliasing in system, i.e. override value of
# "Settings|Editor|Appearance|Use anti-aliased font" option. May be useful when using Windows
# Remote Desktop Connection for instance.
#---------------------------------------------------------------------
idea.use.default.antialiasing.in.editor=false
#---------------------------------------------------------------------
# Disabling this property may lead to visual glitches like blinking and fail to repaint
# on certain display adapter cards.
#---------------------------------------------------------------------
sun.java2d.noddraw=true
#---------------------------------------------------------------------
# Removing this property may lead to editor performance degradation under Windows.
#---------------------------------------------------------------------
sun.java2d.d3d=false
#---------------------------------------------------------------------
# Workaround for slow scrolling in JDK6.
#---------------------------------------------------------------------
swing.bufferPerWindow=false
#---------------------------------------------------------------------
# Removing this property may lead to editor performance degradation under X Window.
#---------------------------------------------------------------------
sun.java2d.pmoffscreen=false
#---------------------------------------------------------------------
# Workaround to avoid long hangs while accessing clipboard under Mac OS X.
#---------------------------------------------------------------------
# ide.mac.useNativeClipboard=True
#---------------------------------------------------------------------
# Maximum size (kilobytes) IDEA will load for showing past file contents -
# in Show Diff or when calculating Digest Diff.
#---------------------------------------------------------------------
# idea.max.vcs.loaded.size.kb=20480
কম মেমোরির মেশিনের জন্য IDE কনফিগার করুন।
আপনি যদি প্রস্তাবিত স্পেসিফিকেশনের চেয়ে কম স্পেসিফিকেশনের কোনো মেশিনে অ্যান্ড্রয়েড স্টুডিও চালান ( সিস্টেম রিকোয়ারমেন্টস দেখুন), তাহলে আপনার মেশিনের পারফরম্যান্স উন্নত করার জন্য নিম্নলিখিত উপায়ে IDE-টি কাস্টমাইজ করতে পারেন:
- অ্যান্ড্রয়েড স্টুডিও-এর জন্য উপলব্ধ সর্বোচ্চ হিপ সাইজ হ্রাস করুন: অ্যান্ড্রয়েড স্টুডিও-এর সর্বোচ্চ হিপ সাইজ কমিয়ে ৫১২ মেগাবাইট করুন। সর্বোচ্চ হিপ সাইজ পরিবর্তন করার বিষয়ে আরও তথ্যের জন্য, সর্বোচ্চ হিপ সাইজ দেখুন।
- Gradle এবং Android Gradle প্লাগইন আপডেট করুন: সর্বশেষ পারফরম্যান্সের উন্নতিগুলোর সুবিধা নিতে Gradle এবং Android Gradle প্লাগইনের সর্বশেষ সংস্করণে আপডেট করুন। Gradle এবং Android Gradle প্লাগইন আপডেট করার বিষয়ে আরও তথ্যের জন্য, Android Gradle প্লাগইনের রিলিজ নোট দেখুন।
- পাওয়ার সেভ মোড চালু করুন: এরর হাইলাইটিং ও অন-দ্য-ফ্লাই ইন্সপেকশন, অটো-পপআপ কোড কমপ্লিশন এবং অটোমেটিক ইনক্রিমেন্টাল ব্যাকগ্রাউন্ড কম্পাইলেশন-সহ বেশ কিছু মেমোরি ও ব্যাটারি-নিবিড় ব্যাকগ্রাউন্ড অপারেশন বন্ধ করতে পাওয়ার সেভ মোড চালু করুন। পাওয়ার সেভ মোড চালু করতে, ফাইল > পাওয়ার সেভ মোড-এ ক্লিক করুন।
অপ্রয়োজনীয় লিন্ট চেক নিষ্ক্রিয় করুন: অ্যান্ড্রয়েড স্টুডিও আপনার কোডে কোন লিন্ট চেকগুলো চালাবে তা পরিবর্তন করতে, নিম্নলিখিত পদক্ষেপগুলো অনুসরণ করুন:
- সেটিংস ডায়ালগটি খুলতে ফাইল > সেটিংস (macOS-এ, Android Studio > প্রেফারেন্সেস )-এ ক্লিক করুন।
- বাম প্যানে, এডিটর সেকশনটি এক্সপ্যান্ড করুন এবং ইন্সপেকশনস-এ ক্লিক করুন।
- আপনার প্রোজেক্টের প্রয়োজন অনুযায়ী লিন্ট চেক নির্বাচন বা অনির্বাচন করতে চেকবক্সগুলোতে ক্লিক করুন।
- আপনার পরিবর্তনগুলি সংরক্ষণ করতে 'Apply' বা 'OK'- তে ক্লিক করুন।
ফিজিক্যাল ডিভাইসে ডিবাগ করুন: ফিজিক্যাল ডিভাইসে ডিবাগ করার মাধ্যমে অ্যান্ড্রয়েড স্টুডিও-র সার্বিক পারফরম্যান্স উন্নত করুন। ফিজিক্যাল ডিভাইসের তুলনায় এমুলেটরে ডিবাগ করলে বেশি মেমরি ব্যবহৃত হয়।
শুধুমাত্র প্রয়োজনীয় গুগল প্লে সার্ভিসগুলোকে ডিপেন্ডেন্সি হিসেবে অন্তর্ভুক্ত করুন: আপনার প্রোজেক্টে শুধুমাত্র প্রয়োজনীয় গুগল প্লে সার্ভিসগুলোকে ডিপেন্ডেন্সি হিসেবে অন্তর্ভুক্ত করুন। ডিপেন্ডেন্সিগুলো প্রয়োজনীয় মেমরির পরিমাণ বাড়িয়ে দেয়, তাই এগুলো সীমিত রাখলে মেমরির ব্যবহার এবং পারফরম্যান্স উন্নত হয়। আরও তথ্যের জন্য, গুগল প্লে সার্ভিসের জন্য ডিপেন্ডেন্সি ঘোষণা দেখুন।
Gradle-এর জন্য উপলব্ধ সর্বোচ্চ হিপ সাইজ হ্রাস করুন:
gradle.propertiesফাইলেorg.gradle.jvmargsপ্রপার্টিটি ওভাররাইড করে Gradle-এর সর্বোচ্চ হিপ সাইজের ডিফল্ট মান ১,৫৩৬ MB থেকে হ্রাস করুন, যেমনটি দেখানো হয়েছে:# Make sure to gradually decrease this value and note # changes in performance. Allocating too little memory can # also decrease performance. org.gradle.jvmargs = -Xmx1536mনিশ্চিত করুন যে প্যারালাল কম্পাইলেশন চালু নেই: অ্যান্ড্রয়েড স্টুডিও স্বাধীন মডিউলগুলোকে সমান্তরালভাবে কম্পাইল করতে পারে, কিন্তু আপনার সিস্টেমে মেমোরি কম থাকলে এই ফিচারটি বন্ধ রাখুন। এই সেটিংটি পরীক্ষা করতে, নিম্নলিখিত পদক্ষেপগুলো অনুসরণ করুন:
- সেটিংস ডায়ালগটি খুলতে ফাইল > সেটিংস (macOS-এ, Android Studio > প্রেফারেন্সেস )-এ ক্লিক করুন।
- বাম প্যানে, Build, Execution, Deployment প্রসারিত করুন এবং তারপর Compiler-এ ক্লিক করুন।
- নিশ্চিত করুন যে ‘Compile independent modules in parallel’ অপশনটি আনচেক করা আছে।
- আপনি যদি কোনো পরিবর্তন করে থাকেন, তবে আপনার পরিবর্তনটি কার্যকর করার জন্য 'Apply' বা ' OK'- তে ক্লিক করুন।
প্রক্সি সেটিংস সেট করুন
প্রক্সিগুলি HTTP ক্লায়েন্ট এবং ওয়েব সার্ভারের মধ্যে মধ্যবর্তী সংযোগ বিন্দু হিসাবে কাজ করে, যা ইন্টারনেট সংযোগে নিরাপত্তা ও গোপনীয়তা যোগ করে।
ফায়ারওয়ালের পিছনে অ্যান্ড্রয়েড স্টুডিও চালানোর সুবিধা পেতে, অ্যান্ড্রয়েড স্টুডিও আইডিই-এর HTTP প্রক্সি সেটিংস পৃষ্ঠা ব্যবহার করে HTTP প্রক্সি সেটিংস সেট করুন।
কমান্ড লাইন থেকে অথবা যেসব মেশিনে অ্যান্ড্রয়েড স্টুডিও ইনস্টল করা নেই, যেমন কন্টিনিউয়াস ইন্টিগ্রেশন সার্ভার, সেখানে অ্যান্ড্রয়েড গ্রেডল প্লাগইন চালানোর সময় গ্রেডল বিল্ড ফাইলে প্রক্সি সেটিংস সেট করুন।
অ্যান্ড্রয়েড স্টুডিও প্রক্সি সেট আপ করুন
অ্যান্ড্রয়েড স্টুডিও HTTP প্রক্সি সেটিংস সমর্থন করে, ফলে আপনি ফায়ারওয়াল বা সুরক্ষিত নেটওয়ার্কের পেছনে অ্যান্ড্রয়েড স্টুডিও চালাতে পারেন। অ্যান্ড্রয়েড স্টুডিওতে HTTP প্রক্সি সেটিংস সেট করতে:
- মেনু বার থেকে, ফাইল > সেটিংস-এ ক্লিক করুন (macOS-এ, অ্যান্ড্রয়েড স্টুডিও > প্রেফারেন্সেস-এ ক্লিক করুন)।
- বাম প্যানে, Appearance & Behavior > System Settings > HTTP Proxy-তে ক্লিক করুন। HTTP Proxy পেজটি প্রদর্শিত হবে।
- প্রক্সি সেটিংসের জন্য একটি স্বয়ংক্রিয় প্রক্সি কনফিগারেশন ইউআরএল ব্যবহার করতে ‘অটো-ডিটেক্ট প্রক্সি সেটিংস’ নির্বাচন করুন, অথবা প্রতিটি সেটিংস নিজে প্রবেশ করাতে ‘ম্যানুয়াল প্রক্সি কনফিগারেশন’ নির্বাচন করুন। এই সেটিংসগুলির বিস্তারিত ব্যাখ্যার জন্য, ‘এইচটিটিপি প্রক্সি’ দেখুন।
- আপনার পরিবর্তনগুলি কার্যকর করতে 'Apply' বা 'OK'- তে ক্লিক করুন।
গ্রেডল HTTP প্রক্সি সেটিংসের জন্য অ্যান্ড্রয়েড প্লাগইন
কমান্ড লাইন থেকে অথবা যেসব মেশিনে অ্যান্ড্রয়েড স্টুডিও ইনস্টল করা নেই, সেখানে অ্যান্ড্রয়েড প্লাগইন চালানোর সময় গ্রেডল বিল্ড ফাইলে অ্যান্ড্রয়েড গ্রেডল প্লাগইন প্রক্সি সেটিংস সেট করুন।
অ্যাপ্লিকেশন-নির্দিষ্ট HTTP প্রক্সি সেটিংসের জন্য, প্রতিটি অ্যাপ্লিকেশন মডিউলের প্রয়োজন অনুযায়ী build.gradle ফাইলে প্রক্সি সেটিংস সেট করুন:
plugins {
  id 'com.android.application'
}

android {
    ...

    defaultConfig {
        ...
        systemProp.http.proxyHost=proxy.company.com
        systemProp.http.proxyPort=443
        systemProp.http.proxyUser=userid
        systemProp.http.proxyPassword=password
        systemProp.http.auth.ntlm.domain=domain
    }
    ...
}
প্রজেক্ট-ব্যাপী HTTP প্রক্সি সেটিংসের জন্য, gradle/gradle.properties ফাইলে প্রক্সি সেটিংস সেট করুন:
# Project-wide Gradle settings.
...

systemProp.http.proxyHost=proxy.company.com
systemProp.http.proxyPort=443
systemProp.http.proxyUser=username
systemProp.http.proxyPassword=password
systemProp.http.auth.ntlm.domain=domain

systemProp.https.proxyHost=proxy.company.com
systemProp.https.proxyPort=443
systemProp.https.proxyUser=username
systemProp.https.proxyPassword=password
systemProp.https.auth.ntlm.domain=domain

...
প্রক্সি সেটিংসের জন্য গ্রেডল প্রোপার্টি ব্যবহার সম্পর্কে জানতে, গ্রেডল ইউজার গাইড দেখুন।
উইন্ডোজে অ্যান্ড্রয়েড স্টুডিওর পারফরম্যান্স অপ্টিমাইজ করুন
উইন্ডোজে অ্যান্ড্রয়েড স্টুডিওর পারফরম্যান্স বিভিন্ন কারণে প্রভাবিত হতে পারে। এই অংশে বর্ণনা করা হয়েছে, কীভাবে আপনি উইন্ডোজে সর্বোত্তম পারফরম্যান্স পাওয়ার জন্য অ্যান্ড্রয়েড স্টুডিওর সেটিংস অপ্টিমাইজ করতে পারেন।
বিল্ড স্পিডের উপর অ্যান্টিভাইরাস সফটওয়্যারের প্রভাব কমান।
কিছু অ্যান্টিভাইরাস সফটওয়্যার অ্যান্ড্রয়েড স্টুডিও বিল্ড প্রক্রিয়ায় হস্তক্ষেপ করতে পারে, যার ফলে বিল্ডগুলো নাটকীয়ভাবে ধীর হয়ে যায়। আপনি যখন অ্যান্ড্রয়েড স্টুডিওতে একটি বিল্ড চালান, তখন গ্রেডল (Gradle) আপনার অ্যাপের রিসোর্স এবং সোর্স কোড কম্পাইল করে এবং তারপর কম্পাইল করা রিসোর্সগুলোকে একসাথে একটি APK বা AAB ফাইলে প্যাকেজ করে। এই প্রক্রিয়া চলাকালীন, আপনার কম্পিউটারে অনেক ফাইল তৈরি হয়। যদি আপনার অ্যান্টিভাইরাস সফটওয়্যারে রিয়েল-টাইম স্ক্যানিং চালু থাকে, তবে কোনো ফাইল তৈরি হওয়ার পর সেটিকে স্ক্যান করার সময় অ্যান্টিভাইরাস সফটওয়্যারটি বিল্ড প্রক্রিয়াটিকে থামিয়ে দিতে পারে।
এই সমস্যা এড়াতে, আপনি আপনার অ্যান্টিভাইরাস সফটওয়্যারে রিয়েল-টাইম স্ক্যানিং থেকে নির্দিষ্ট কিছু ডিরেক্টরি বাদ দিতে পারেন। উইন্ডোজের জন্য, বিল্ড অ্যানালাইজার আপনাকে সক্রিয় স্ক্যানিং থেকে বাদ দেওয়ার মতো ডিরেক্টরিগুলো শনাক্ত করতে এবং সেগুলোকে বাদ দিতে সাহায্য করতে পারে।
নিম্নলিখিত তালিকাটিতে প্রতিটি অ্যান্ড্রয়েড স্টুডিও ডিরেক্টরির ডিফল্ট অবস্থান দেখানো হয়েছে, যেগুলোকে আপনি রিয়েল-টাইম স্ক্যানিং থেকে বাদ দিতে পারেন:
- গ্রেডল ক্যাশে
-
%USERPROFILE%\.gradle - অ্যান্ড্রয়েড স্টুডিও প্রকল্পগুলি
-
%USERPROFILE%\AndroidStudioProjects - অ্যান্ড্রয়েড এসডিকে
-
%USERPROFILE%\AppData\Local\Android\SDK
অ্যান্ড্রয়েড স্টুডিও সিস্টেম ফাইল
সিনট্যাক্স: %LOCALAPPDATA%\Google\ <product><version>
উদাহরণ: C:\Users\YourUserName\AppData\Local\Google\AndroidStudio4.1
গ্রুপ পলিসি নিয়ন্ত্রিত পরিবেশের জন্য ডিরেক্টরির অবস্থান কাস্টমাইজ করুন
যদি কোনো গ্রুপ পলিসি আপনার কম্পিউটারে রিয়েল-টাইম স্ক্যানিং থেকে বাদ দেওয়া ডিরেক্টরিগুলোকে সীমাবদ্ধ করে, তাহলে আপনি আপনার অ্যান্ড্রয়েড স্টুডিও ডিরেক্টরিগুলোকে সেই স্থানগুলোর কোনো একটিতে সরিয়ে নিতে পারেন যেখান থেকে কেন্দ্রীয় গ্রুপ পলিসিটি ইতিমধ্যেই বাদ দিয়েছে।
নিম্নলিখিত তালিকাটি দেখায় কিভাবে প্রতিটি অ্যান্ড্রয়েড স্টুডিও ডিরেক্টরির অবস্থান কাস্টমাইজ করতে হয়, যেখানে C:\WorkFolder হলো সেই ডিরেক্টরি যা আপনার গ্রুপ পলিসি ইতিমধ্যেই বাদ দিয়েছে:
- গ্রেডল ক্যাশে
-
GRADLE_USER_HOMEএনভায়রনমেন্ট ভেরিয়েবলটিকেC:\WorkFolder \.gradleএর দিকে নির্দেশ করার জন্য সংজ্ঞায়িত করুন। - অ্যান্ড্রয়েড স্টুডিও প্রকল্পগুলি
- প্রজেক্ট ডিরেক্টরিগুলো
C:\WorkFolderএর একটি উপযুক্ত সাবডিরেক্টরিতে সরান বা তৈরি করুন। উদাহরণস্বরূপ,C:\WorkFolder \AndroidStudioProjects। - অ্যান্ড্রয়েড এসডিকে
অবস্থান কাস্টমাইজ করতে এই ধাপগুলো অনুসরণ করুন:
অ্যান্ড্রয়েড স্টুডিওতে, সেটিংস ডায়ালগটি খুলুন (macOS-এ প্রেফারেন্সেস ), তারপর অ্যাপিয়ারেন্স অ্যান্ড বিহেভিয়ার > সিস্টেম সেটিংস > অ্যান্ড্রয়েড এসডিকে- তে যান।
Android SDK Location- এর মান পরিবর্তন করে
C:\WorkFolder \AndroidSDK।এসডিকে পুনরায় ডাউনলোড করা এড়াতে, ডিফল্টরূপে
%USERPROFILE%\AppData\Local\Android\SDKতে অবস্থিত বিদ্যমান এসডিকে ডিরেক্টরিটি নতুন অবস্থানে কপি করুন।
- অ্যান্ড্রয়েড স্টুডিও সিস্টেম ফাইল
অবস্থান কাস্টমাইজ করতে এই ধাপগুলো অনুসরণ করুন:
অ্যান্ড্রয়েড স্টুডিওতে, Help > Edit Custom Properties-এ ক্লিক করুন।
আপনার যদি
idea.propertiesফাইল না থাকে, তাহলে Android Studio আপনাকে একটি তৈরি করতে বলবে।আপনার
idea.propertiesফাইলে নিম্নলিখিত লাইনটি যোগ করুন:idea.system.path=c:/workfolder/studio/caches/trunk-system