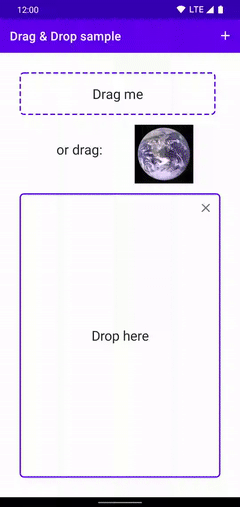
Android 드래그 앤 드롭 프레임워크를 사용하면 사용자가 그래픽 드래그 앤 드롭 동작을 사용하여 한 보기에서 다른 보기로 데이터를 이동할 수 있습니다. 프레임워크로는 드래그 이벤트 클래스, 드래그 리스너, 도우미 메서드, 클래스 등이 있습니다.
프레임워크는 주로 데이터 이동에 맞게 디자인되었지만 다른 UI 작업에 사용할 수도 있습니다. 예를 들어 사용자가 색상 아이콘을 다른 아이콘 위로 드래그하면 색상을 혼합하는 앱을 만들 수 있습니다. 이 주제의 나머지 부분에서는 데이터 이동과 관련하여 프레임워크를 설명합니다.
다음 관련 리소스도 참고하세요.
개요
드래그 앤 드롭 작업은 사용자가 데이터 드래그를 시작하는 신호로 인식되는 동작을 하면 시작됩니다. 이에 응답하여 애플리케이션에서 드래그가 시작됨을 시스템에 알립니다. 시스템에서 드래그되는 데이터의 표현을 가져오기 위해 다시 애플리케이션을 호출합니다. 사용자가 손가락을 이용하여 이 표현('드래그 섀도우')을 현재 레이아웃 위로 이동하면 시스템에서 레이아웃의 View
객체와 연관된 드래그 이벤트 콜백 메서드와 드래그 이벤트 리스너 객체에 드래그 이벤트를 전송합니다.
사용자가 드래그 섀도우를 놓으면 시스템에서 드래그 작업을 종료합니다.
View.OnDragListener
를 구현하는 클래스에서 드래그 이벤트 리스너 객체('리스너')를 만듭니다. View 객체의 setOnDragListener()
메서드로 View의 드래그 이벤트 리스너 객체를 설정합니다.
각 View 객체에는 onDragEvent()
콜백 메서드도 있습니다. 이 두 메서드는 드래그 이벤트 리스너 및 콜백 메서드 섹션에서 자세히 설명합니다.
참고: 간단히 설명하기 위해 다음 섹션에서는 드래그 이벤트를 받는 루틴을 '드래그 이벤트 리스너'라고 합니다. 그러나 이 루틴은 실제로는 콜백 메서드일 수 있습니다.
드래그를 시작하면 이동할 데이터와 이 데이터를 설명하는 메타데이터가 모두 시스템 호출의 일부로 포함됩니다. 드래그하는 동안 시스템에서 레이아웃에 있는 각 View의 드래그 이벤트 리스너 또는 콜백 메서드로 드래그 이벤트를 보냅니다. 리스너 또는 콜백 메서드에서는 메타데이터를 사용하여 데이터를 드롭할 때 데이터 수락 여부를 결정할 수 있습니다. 사용자가 View 객체 위로 데이터를 드롭하고 이 View 객체의 리스너 또는 콜백 메서드에서 이미 시스템에 드롭을 수락하도록 알렸으면, 시스템에서 드래그 이벤트의 리스너 또는 콜백 메서드로 데이터를 보냅니다.
애플리케이션에서는 startDrag()
메서드를 호출하여 드래그를 시작하도록 시스템에 알립니다. 그러면 드래그 이벤트 전송을 시작하도록 시스템에 지시합니다. 이 메서드에서는 드래그 중인 데이터도 전송합니다.
현재 레이아웃에서 연결된 모든 View에 사용하도록 startDrag()
를 호출할 수 있습니다. 시스템에서는 View 객체만 사용하여 레이아웃의 전역 설정에 액세스합니다.
애플리케이션에서 startDrag()
를 호출하고 나면 프로세스의 나머지 부분에서는 시스템이 현재 레이아웃에 있는 View 객체에 보내는 이벤트를 사용합니다.
참고: 앱이 멀티 윈도우 모드에서 실행 중이면 사용자가 한 앱에서 다른 앱으로 데이터를 드래그 앤 드롭할 수 있습니다. 자세한 내용은 드래그 앤 드롭 지원을 참고하세요.
드래그 앤 드롭 프로세스
드래그 앤 드롭 프로세스에는 기본적으로 4개의 단계 또는 상태가 있습니다.
- 시작일
- 드래그를 시작하는 사용자의 동작에 응답으로 애플리케이션에서는
startDrag()
를 호출하여 드래그를 시작하도록 시스템에 지시합니다. 인수startDrag()
에서는 드래그할 데이터, 이 데이터의 메타데이터, 드래그 섀도우를 그리는 콜백을 제공합니다.시스템에서는 먼저 드래그 섀도우를 얻기 위해 애플리케이션을 다시 호출하여 응답합니다. 그런 다음 기기에 드래그 섀도우를 표시합니다.
다음으로 시스템에서 작업 유형이
ACTION_DRAG_STARTED
인 드래그 이벤트를 현재 레이아웃에 있는 모든 View 객체의 드래그 이벤트 리스너로 보냅니다. 가능한 드롭 이벤트를 포함하여 드래그 이벤트를 계속 수신하려면 드래그 이벤트 리스너에서true
를 반환해야 합니다. 그러면 리스너가 시스템에 등록됩니다. 등록된 리스너만 드래그 이벤트를 계속 수신합니다. 이때, 리스너에서 드롭 이벤트를 수락할 수 있음을 표시하기 위해 View 객체의 모양도 변경할 수 있습니다.드래그 이벤트 리스너에서
false
를 반환하면 시스템에서 작업 유형이ACTION_DRAG_ENDED
인 드래그 이벤트를 보낼 때까지 현재 작업의 드래그 이벤트를 받지 않습니다. 리스너에서false
를 전송하여 드래그 작업에 관심이 없으며 드래그된 데이터를 수락하기를 원하지 않는다고 시스템에 알립니다. - 계속
- 사용자가 드래그를 계속합니다. 드래그 섀도우가 View 객체의 경계 상자를 교차하면 시스템에서 하나 이상의 드래그 이벤트를 View 객체의 드래그 이벤트 리스너로 보냅니다(이벤트를 수신하도록 등록된 경우). 리스너에서는 이벤트에 응답하여 View 객체의 모양을 변경하도록 선택할 수 있습니다. 예를 들어 이벤트에서 드래그 섀도우가 View의 경계 상자에 진입했음을 나타내면(작업 유형
ACTION_DRAG_ENTERED
), 리스너에서 View를 강조표시하여 반응할 수 있습니다 - 드롭됨
- 사용자가 데이터를 수락할 수 있는 View의 경계 상자 안에 드래그 섀도우를 놓습니다. 그러면 시스템에서 View 객체의 리스너에 작업 유형이
ACTION_DROP
인 드래그 이벤트를 보냅니다. 이 드래그 이벤트에는 작업을 시작한startDrag()
호출을 통해 시스템에 전달된 데이터가 포함됩니다. 드롭을 수락하는 코드가 성공하면 리스너에서 시스템에 부울 값true
를 반환해야 합니다.이 단계는 리스너가 드래그 이벤트를 수신하도록 등록된 View의 경계 상자 내에서 사용자가 드래그 섀도우를 드롭하는 경우에만 발생합니다. 사용자가 그 외에 다른 상황에서 드래그 섀도우를 놓으면
ACTION_DROP
드래그 이벤트가 전송되지 않습니다. - 종료됨
- 사용자가 드래그 섀도우를 놓고 (필요한 경우) 시스템에서 작업 유형이
ACTION_DROP
인 드래그 이벤트를 전송한 후에는 시스템에서 작업 유형이ACTION_DRAG_ENDED
인 드래그 이벤트를 전송하여 드래그 작업이 종료되었음을 나타냅니다. 이 동작은 사용자가 드래그 섀도우를 놓는 위치와 상관없이 완료됩니다. 이 이벤트는 리스너가ACTION_DROP
이벤트를 수신한 경우에도 드래그 이벤트를 받도록 등록된 모든 리스너에 전송됩니다.
네 단계는 각각 드래그 앤 드롭 작업 디자인 섹션에 자세히 설명되어 있습니다.
드래그 이벤트 리스너 및 콜백 메서드
View에서는 View.OnDragListener
를 구현하는 드래그 이벤트 리스너 또는 onDragEvent(DragEvent)
콜백 메서드를 사용하여 드래그 이벤트를 수신합니다.
시스템에서 이 메서드나 리스너를 호출할 때 이 이벤트에 DragEvent
객체를 전달합니다.
대부분의 경우 리스너를 사용하는 것이 좋습니다. UI를 디자인할 때 일반적으로는 View 클래스의 서브클래스를 생성하지 않지만, 콜백 메서드를 사용하면 이 메서드를 재정의하기 위해 서브클래스를 생성해야 합니다. 이와 달리 리스너에서는 하나의 리스너 클래스를 구현하여 여러 다양한 View 객체에 사용할 수 있습니다. 또한 이 클래스를 익명 인라인 클래스로도 구현할 수 있습니다. View 객체의 리스너를 설정하려면 setOnDragListener()
를 호출합니다.
View 객체의 리스너 및 콜백 메서드를 모두 구성할 수 있습니다. 그러면 시스템에서 리스너를 먼저 호출합니다. 리스너에서 false
를 반환하지 않는 한, 시스템에서는 콜백 메서드를 호출하지 않습니다.
onDragEvent(DragEvent)
메서드와 View.OnDragListener
를 함께 사용하는 것은 터치 이벤트에서 onTouchEvent()
와 View.OnTouchListener
를 함께 사용하는 것과 유사합니다.
드래그 이벤트
시스템에서는 드래그 이벤트를 DragEvent
객체 형태로 전송합니다. 이 객체에는 리스너에 드래그/드롭 프로세스의 진행 상태를 알리는 작업 유형이 포함되어 있습니다. 작업 유형에 따라 이 객체에 다른 데이터가 포함됩니다.
작업 유형을 가져오기 위해 리스너에서는 getAction()
을 호출합니다. DragEvent
클래스에서 상수로 정의된 6개의 값을 사용할 수 있습니다. 이 값은 표 1에 나열되어 있습니다.
DragEvent
객체에는 애플리케이션에서 startDrag()
호출을 통해 시스템에 제공한 데이터도 들어 있습니다.
이 데이터 중 일부는 특정 작업 유형에만 유효합니다. 각 작업 유형에 유효한 데이터는 표 2에 요약되어 있습니다. 드래그 앤 드롭 작업 디자인 섹션에도 이러한 데이터가 유효한 이벤트와 함께 자세히 설명되어 있습니다.
표 1. DragEvent 작업 유형
getAction() 값 | 의미 |
---|---|
ACTION_DRAG_STARTED |
View 객체의 드래그 이벤트 리스너에서는 애플리케이션이 startDrag() 를 호출하고 드래그 섀도우를 가져온 직후에 이 이벤트 작업 유형을 수신합니다. |
ACTION_DRAG_ENTERED |
View 객체의 드래그 이벤트 리스너는 드래그 섀도우가 View의 경계 상자에 막 진입했을 때 이 이벤트 작업 유형을 수신합니다. 이것이 드래그 섀도우가 경계 상자에 들어갈 때 리스너에서 수신하는 첫 번째 이벤트 작업 유형입니다. 리스너에서 이 작업의 드래그 이벤트를 계속 수신하려면 부울 값 true 를 시스템에 반환해야 합니다.
|
ACTION_DRAG_LOCATION |
View 객체의 드래그 이벤트 리스너에서는 드래그 섀도우가 아직 View의 경계 상자에 있는 동안 ACTION_DRAG_ENTERED 이벤트를 수신한 후에 이 이벤트 작업 유형을 수신합니다. |
ACTION_DRAG_EXITED |
View 객체의 드래그 이벤트 리스너에서는 ACTION_DRAG_ENTERED 및 하나 이상의 ACTION_DRAG_LOCATION 이벤트를 수신하고, 사용자가 View의 경계 상자 밖으로 드래그 섀도우를 이동한 후에 이 이벤트 작업 유형을 수신합니다. |
ACTION_DROP |
View 객체의 드래그 이벤트 리스너에서는 사용자가 View 객체 위에 드래그 섀도우를 놓을 때 이 이벤트 작업 유형을 수신합니다. 이 작업 유형은 리스너에서 ACTION_DRAG_STARTED 드래그 이벤트의 응답으로 부울 값 true 를 반환한 경우에만 View 객체의 리스너로 전송됩니다. 사용자가 리스너가 등록되지 않은 View에 드래그 섀도우를 놓거나 현재 레이아웃에 포함되지 않은 항목에 드래그 섀도우를 놓으면 이 작업 유형이 전송되지 않습니다.
드롭이 아무 문제 없이 처리되면 리스너에서 부울 값 |
ACTION_DRAG_ENDED |
View 객체의 드래그 이벤트 리스너에서는 시스템에서 드래그 작업을 종료할 때 이 이벤트 작업 유형을 받습니다. 이 작업 유형이 반드시 ACTION_DROP 이벤트 다음에 발생하는 것은 아닙니다. 시스템에서 ACTION_DROP 을 전송하면 ACTION_DRAG_ENDED 작업 유형을 수신하더라도 드롭 작업이 성공했음을 의미하지는 않습니다. 리스너에서 getResult() 를 호출하여 ACTION_DROP 에 대한 응답으로 반환된 값을 가져와야 합니다. ACTION_DROP 이벤트가 전송되지 않으면 getResult() 에서 false 를 반환합니다.
|
표 2. 작업 유형별 유효한 DragEvent 데이터
getAction() 값 |
getClipDescription() 값 |
getLocalState() 값 |
getX() 값 |
getY() 값 |
getClipData() 값 |
getResult() 값 |
---|---|---|---|---|---|---|
ACTION_DRAG_STARTED |
X | X | X | |||
ACTION_DRAG_ENTERED |
X | X | X | X | ||
ACTION_DRAG_LOCATION |
X | X | X | X | ||
ACTION_DRAG_EXITED |
X | X | ||||
ACTION_DROP |
X | X | X | X | X | |
ACTION_DRAG_ENDED |
X | X | X |
getAction()
, describeContents()
, writeToParcel()
및 toString()
메서드에서는 항상 유효한 데이터를 반환합니다.
메서드가 특정 작업 유형에 유효한 데이터를 포함하지 않으면 결과 유형에 따라 null
또는 0을 반환합니다.
드래그 섀도우
드래그 앤 드롭 작업 중에 시스템에서 사용자가 드래그하는 이미지를 표시합니다. 데이터 이동 작업에서 이 이미지는 드래그되는 데이터를 나타냅니다. 그 외에 다른 작업에서 이 이미지는 드래그 작업의 특정 측면을 나타냅니다.
이 이미지를 드래그 섀도우라고 합니다. View.DragShadowBuilder
객체용으로 선언하는 메서드를 사용하여 드래그 섀도우를 생성한 후, startDrag()
를 사용하여 드래그를 시작할 때 시스템에 전달합니다.
startDrag()
에 대한 응답의 일부로 시스템에서는 View.DragShadowBuilder
에 정의한 콜백 메서드를 호출하여 드래그 섀도우를 가져옵니다.
View.DragShadowBuilder
클래스에는 다음과 같은 두 가지 생성자가 있습니다.
View.DragShadowBuilder(View)
- 이 생성자는 모든 애플리케이션의
View
객체를 수락합니다. 이 생성자는 View 객체를View.DragShadowBuilder
객체에 저장하므로 드래그 섀도우를 생성할 때 콜백이 실행되는 동안 View 객체에 액세스할 수 있습니다. 이 생성자는 사용자가 드래그 작업을 시작할 때 선택한 View(있는 경우)와 연결할 필요가 없습니다.이 생성자를 사용하면
View.DragShadowBuilder
를 확장하거나 메서드를 재정의할 필요가 없습니다. 기본적으로 드래그 섀도우는 인수로 전달하는 View와 동일한 모양이고, 사용자가 화면을 터치하는 위치 아래를 중심으로 표시됩니다. View.DragShadowBuilder()
- 이 생성자를 사용하면
View.DragShadowBuilder
객체에서 사용할 수 있는 View 객체가 없습니다(이 필드는null
로 설정됨). 이 생성자를 사용하면서View.DragShadowBuilder
를 확장하거나 메서드를 재정의하지 않으면 드래그 섀도우가 표시되지 않습니다. 시스템에서 오류를 표시하지 않습니다.
View.DragShadowBuilder
클래스에는 다음과 같은 두 가지 메서드가 있습니다.
-
onProvideShadowMetrics()
-
startDrag()
를 호출하는 즉시 시스템에서 이 메서드를 호출합니다. 이 메서드를 사용하여 시스템에 드래그 섀도우의 크기와 터치 포인트를 전송합니다. 이 메서드에는 두 가지 인수가 있습니다. -
onDrawShadow()
onProvideShadowMetrics()
가 호출된 직후 시스템에서onDrawShadow()
를 호출하여 드래그 섀도우를 가져옵니다. 이 메서드에서는onProvideShadowMetrics()
에 제공하는 매개변수를 통해 시스템에서 생성하는Canvas
객체를 단일 인수로 사용합니다. 제공된Canvas
객체에서 사용하여 드래그 섀도우를 그립니다.
성능을 개선하려면 드래그 섀도우의 크기를 작게 유지해야 합니다. 단일 항목의 경우 아이콘을 사용할 수 있습니다. 다중 선택 항목의 경우, 화면 전체에 걸쳐 전체 이미지를 표시하기보다는 스택 형태로 아이콘을 사용할 수 있습니다.
드래그 앤 드롭 작업 디자인
이 섹션에서는 드래그를 시작하는 방법, 드래그 중에 이벤트에 응답하는 방법, 드롭 이벤트에 응답하는 방법 및 드래그 앤 드롭 작업을 종료하는 방법을 단계별로 보여줍니다.
드래그 시작
사용자는 일반적으로 View 객체를 길게 누르는 드래그 동작을 사용하여 드래그를 시작합니다. 이에 응답하여 다음 작업을 완료해야 합니다.
-
필요하면 이동될 데이터의
ClipData
및ClipData.Item
을 만듭니다. ClipData 내ClipDescription
객체에 저장된 메타데이터를 ClipData 객체의 일부로 제공합니다. 데이터 이동을 나타내지 않는 드래그 앤 드롭 작업의 경우, 실제 객체 대신null
을 사용할 수 있습니다.예를 들어 이 코드 스니펫에서는 ImageView의 태그 또는 라벨을 포함하는 ClipData 객체를 생성하여 ImageView를 길게 누르는 동작에 응답하는 방법을 보여줍니다. 이 스니펫 다음에 있는 스니펫에서는
View.DragShadowBuilder
에서 메서드를 재정의하는 방법을 보여줍니다.Kotlin
const val IMAGEVIEW_TAG = "icon bitmap" ... val imageView = ImageView(this).apply { setImageBitmap(iconBitmap) tag = IMAGEVIEW_TAG imageView.setOnLongClickListener { v: View -> // Create a new ClipData. // This is done in two steps to provide clarity. The convenience method // ClipData.newPlainText() can create a plain text ClipData in one step. // Create a new ClipData.Item from the ImageView object's tag val item = ClipData.Item(v.tag as? CharSequence) // Create a new ClipData using the tag as a label, the plain text MIME type, and // the already-created item. This will create a new ClipDescription object within the // ClipData, and set its MIME type entry to "text/plain" val dragData = ClipData( v.tag as? CharSequence, arrayOf(ClipDescription.MIMETYPE_TEXT_PLAIN), item) // Instantiates the drag shadow builder. val myShadow = MyDragShadowBuilder(this) // Starts the drag v.startDrag( dragData, // the data to be dragged myShadow, // the drag shadow builder null, // no need to use local data 0 // flags (not currently used, set to 0) ) } }
자바
// Create a string for the ImageView label private static final String IMAGEVIEW_TAG = "icon bitmap" // Creates a new ImageView ImageView imageView = new ImageView(this); // Sets the bitmap for the ImageView from an icon bit map (defined elsewhere) imageView.setImageBitmap(iconBitmap); // Sets the tag imageView.setTag(IMAGEVIEW_TAG); ... // Sets a long click listener for the ImageView using an anonymous listener object that // implements the OnLongClickListener interface imageView.setOnLongClickListener(new View.OnLongClickListener() { // Defines the one method for the interface, which is called when the View is long-clicked public boolean onLongClick(View v) { // Create a new ClipData. // This is done in two steps to provide clarity. The convenience method // ClipData.newPlainText() can create a plain text ClipData in one step. // Create a new ClipData.Item from the ImageView object's tag ClipData.Item item = new ClipData.Item(v.getTag()); // Create a new ClipData using the tag as a label, the plain text MIME type, and // the already-created item. This will create a new ClipDescription object within the // ClipData, and set its MIME type entry to "text/plain" ClipData dragData = new ClipData( v.getTag(), new String[] { ClipDescription.MIMETYPE_TEXT_PLAIN }, item); // Instantiates the drag shadow builder. View.DragShadowBuilder myShadow = new MyDragShadowBuilder(imageView); // Starts the drag v.startDrag(dragData, // the data to be dragged myShadow, // the drag shadow builder null, // no need to use local data 0 // flags (not currently used, set to 0) ); } }
- 다음 코드 스니펫에서는
myDragShadowBuilder
를 정의하며, TextView를 작은 회색 사각형으로 드래그하는 드래그 섀도우를 생성합니다.Kotlin
private class MyDragShadowBuilder(v: View) : View.DragShadowBuilder(v) { private val shadow = ColorDrawable(Color.LTGRAY) // Defines a callback that sends the drag shadow dimensions and touch point back to the // system. override fun onProvideShadowMetrics(size: Point, touch: Point) { // Sets the width of the shadow to half the width of the original View val width: Int = view.width / 2 // Sets the height of the shadow to half the height of the original View val height: Int = view.height / 2 // The drag shadow is a ColorDrawable. This sets its dimensions to be the same as the // Canvas that the system will provide. As a result, the drag shadow will fill the // Canvas. shadow.setBounds(0, 0, width, height) // Sets the size parameter's width and height values. These get back to the system // through the size parameter. size.set(width, height) // Sets the touch point's position to be in the middle of the drag shadow touch.set(width / 2, height / 2) } // Defines a callback that draws the drag shadow in a Canvas that the system constructs // from the dimensions passed in onProvideShadowMetrics(). override fun onDrawShadow(canvas: Canvas) { // Draws the ColorDrawable in the Canvas passed in from the system. shadow.draw(canvas) } }
자바
private static class MyDragShadowBuilder extends View.DragShadowBuilder { // The drag shadow image, defined as a drawable thing private static Drawable shadow; // Defines the constructor for myDragShadowBuilder public MyDragShadowBuilder(View v) { // Stores the View parameter passed to myDragShadowBuilder. super(v); // Creates a draggable image that will fill the Canvas provided by the system. shadow = new ColorDrawable(Color.LTGRAY); } // Defines a callback that sends the drag shadow dimensions and touch point back to the // system. @Override public void onProvideShadowMetrics (Point size, Point touch) { // Defines local variables private int width, height; // Sets the width of the shadow to half the width of the original View width = getView().getWidth() / 2; // Sets the height of the shadow to half the height of the original View height = getView().getHeight() / 2; // The drag shadow is a ColorDrawable. This sets its dimensions to be the same as the // Canvas that the system will provide. As a result, the drag shadow will fill the // Canvas. shadow.setBounds(0, 0, width, height); // Sets the size parameter's width and height values. These get back to the system // through the size parameter. size.set(width, height); // Sets the touch point's position to be in the middle of the drag shadow touch.set(width / 2, height / 2); } // Defines a callback that draws the drag shadow in a Canvas that the system constructs // from the dimensions passed in onProvideShadowMetrics(). @Override public void onDrawShadow(Canvas canvas) { // Draws the ColorDrawable in the Canvas passed in from the system. shadow.draw(canvas); } }
참고:
View.DragShadowBuilder
를 확장할 필요가 없다는 점에 유의하세요. 생성자View.DragShadowBuilder(View)
를 통해서는 이 생성자에 전달되는 View 인수와 크기가 같은 기본 드래그 섀도우를 만들고, 드래그 섀도우에서 터치 포인트는 중앙에 있습니다.
드래그 시작에 응답
드래그 작업 중에 시스템에서 드래그 이벤트를 현재 레이아웃에 포함된 View 객체의 드래그 이벤트 리스너로 발송합니다. 리스너는 이에 응답하여 getAction()
을 호출함으로써 작업 유형을 가져와야 합니다.
드래그 시작 시에는 이 메서드에서 ACTION_DRAG_STARTED
를 반환합니다.
리스너에서는 작업 유형이 ACTION_DRAG_STARTED
인 이벤트에 응답하여 다음을 완료해야 합니다.
-
getClipDescription()
을 호출하여ClipDescription
을 가져옵니다.ClipDescription
에서 MIME 유형 메서드를 사용하여 리스너가 드래그되는 데이터를 수락할 수 있는지 확인합니다.드래그 앤 드롭 작업이 데이터 이동을 나타내지 않으면 필요하지 않을 수 있습니다.
-
리스너에서 드롭을 수락할 수 있으면
true
를 반환해야 합니다. 드래그 이벤트를 계속 리스너로 보내도록 시스템에 지시합니다. 드롭을 수락할 수 없으면false
를 반환해야 합니다. 그러면 시스템에서는ACTION_DRAG_ENDED
를 전송할 때까지 드래그 이벤트 전송을 중지합니다.
ACTION_DRAG_STARTED
이벤트에는 DragEvent
메서드, 즉 getClipData()
, getX()
, getY()
및 getResult()
가 유효하지 않습니다.
드래그 중에 이벤트 처리
드래그 중에 ACTION_DRAG_STARTED
드래그 이벤트에 응답하여 true
를 반환한 리스너는 계속 드래그 이벤트를 받습니다. 드래그 중에 리스너가 수신하는 드래그 이벤트 유형은 드래그 섀도우의 위치와 리스너의 View가 표시되는지 여부에 따라 달라집니다
드래그 중에 리스너는 주로 드래그 이벤트를 사용하여 View의 모양을 변경해야 하는지 결정합니다.
드래그 중에 getAction()
에서는 다음 세 가지 값 중 하나를 반환합니다.
ACTION_DRAG_ENTERED
: 터치 포인트(화면에서 사용자 손가락 아래에 있는 포인트)가 리스너 View의 경계 상자에 들어가면 리스너가 이 값을 수신합니다.-
ACTION_DRAG_LOCATION
: 리스너가ACTION_DRAG_ENTERED
이벤트를 수신하고 나서ACTION_DRAG_EXITED
이벤트를 수신하기 전까지, 터치 포인트가 움직일 때마다 새ACTION_DRAG_LOCATION
이벤트를 수신합니다.getX()
및getY()
메서드에서는 터치 포인트의 X 및 Y 좌표를 반환합니다. ACTION_DRAG_EXITED
: 드래그 섀도우가 리스너 View의 경계 상자 내에서 사라진 후, 이 이벤트는 이전에ACTION_DRAG_ENTERED
를 수신했던 리스너로 전송됩니다.
리스너는 이 작업 유형에 응답할 필요가 없습니다. 리스너에서 시스템에 값을 반환하더라도 값이 무시됩니다. 다음은 이러한 작업 유형 각각에 응답하는 데 관한 몇 가지 가이드라인입니다.
ACTION_DRAG_ENTERED
또는ACTION_DRAG_LOCATION
에 대한 응답으로 리스너에서 View의 모양을 변경하여 드롭을 곧 수신할 예정임을 나타낼 수 있습니다.-
작업 유형이
ACTION_DRAG_LOCATION
인 이벤트는 터치 포인트의 위치에 대응하는getX()
및getY()
의 유효한 데이터를 포함합니다. 리스너에서는 이 정보를 사용하여 View에서 터치 포인트에 해당하는 부분의 모양을 변경할 수 있습니다. 또한 이 정보를 사용하여 사용자가 드래그 섀도우를 드롭하는 정확한 위치도 확인할 수 있습니다. -
ACTION_DRAG_EXITED
에 응답하여 리스너에서는ACTION_DRAG_ENTERED
또는ACTION_DRAG_LOCATION
에 대한 응답으로 적용된 모양 변경 사항을 재설정해야 합니다. 이는 View가 더 이상 임박한 드롭 타겟이 아님을 사용자에게 나타냅니다.
드롭에 응답
사용자가 애플리케이션에서 특정 View에 드래그 섀도우를 놓고 해당 View가 이전에 드래그되는 콘텐츠를 수락할 수 있다고 보고한 경우, 시스템에서 작업 유형 ACTION_DROP
과 함께 이 View에 드래그 이벤트를 발송합니다. 리스너에서 다음을 완료해야 합니다.
-
getClipData()
를 호출하여startDrag()
호출을 통해 제공된ClipData
객체를 가져와 저장합니다. 드래그 앤 드롭 작업이 데이터 이동을 나타내지 않으면 필요하지 않을 수 있습니다. -
부울 값
true
를 반환하여 드롭이 성공적으로 처리되었음을 나타내거나 그렇지 않으면 부울 값false
를 반환합니다. 반환된 값은ACTION_DRAG_ENDED
이벤트용으로getResult()
에서 반환된 값이 됩니다.시스템에서
ACTION_DROP
이벤트를 보내지 않으면ACTION_DRAG_ENDED
이벤트의getResult()
값은false
입니다.
ACTION_DROP
이벤트에서 getX()
및 getY()
는 드롭이 이루어진 시점에 드롭을 수신한 View의 좌표계를 사용하여 드래그 지점의 X 및 Y 위치를 반환합니다.
시스템에서 리스너가 드래그 이벤트를 수신하지 않는 View에 드래그 섀도우를 놓도록 허용합니다. 애플리케이션 UI의 빈 영역이나 애플리케이션 외부의 영역에도 드래그 섀도우를 놓도록 허용합니다.
이 경우 모두, 시스템에서 ACTION_DRAG_ENDED
이벤트를 전송하더라도 작업 유형이 ACTION_DROP
인 이벤트를 전송하지 않습니다.
드래그 종료에 응답
사용자가 드래그 섀도우를 놓은 후 즉시, 시스템에서 작업 유형 ACTION_DRAG_ENDED
와 함께 애플리케이션에 포함된 모든 드래그 이벤트 리스너로 드래그 이벤트를 전송합니다. 이는 드래그 작업이 종료되었음을 나타냅니다.
각 리스너에서 다음을 완료해야 합니다.
- 리스너가 작업이 수행되는 동안 View 객체의 모양을 변경하면 View를 기본 모양으로 재설정해야 합니다. 이는 사용자에게 작업이 종료되었음을 시각적으로 나타냅니다.
-
리스너에서 선택적으로
getResult()
를 호출하여 작업에 관한 자세한 정보를 확인할 수 있습니다. 리스너에서 작업 유형이ACTION_DROP
인 이벤트에 대한 응답으로true
를 반환하면getResult()
는 부울 값true
를 반환합니다. 그 외에 다른 모든 경우에는getResult()
에서 부울 값false
를 반환합니다. 여기에는 시스템에서ACTION_DROP
이벤트를 전송하지 않은 모든 경우가 포함됩니다. -
리스너에서는 시스템에 부울 값
true
를 반환해야 합니다.
드래그 이벤트에 대한 응답: 예
모든 드래그 이벤트는 드래그 이벤트 메서드나 리스너에서 처음 수신합니다. 다음 코드 스니펫은 리스너의 드래그 이벤트에 대한 응답을 보여주는 간단한 예입니다.
Kotlin
// Creates a new drag event listener private val dragListen = View.OnDragListener { v, event -> // Handles each of the expected events when (event.action) { DragEvent.ACTION_DRAG_STARTED -> { // Determines if this View can accept the dragged data if (event.clipDescription.hasMimeType(ClipDescription.MIMETYPE_TEXT_PLAIN)) { // As an example of what your application might do, // applies a blue color tint to the View to indicate that it can accept // data. (v as? ImageView)?.setColorFilter(Color.BLUE) // Invalidate the view to force a redraw in the new tint v.invalidate() // returns true to indicate that the View can accept the dragged data. true } else { // Returns false. During the current drag and drop operation, this View will // not receive events again until ACTION_DRAG_ENDED is sent. false } } DragEvent.ACTION_DRAG_ENTERED -> { // Applies a green tint to the View. Return true; the return value is ignored. (v as? ImageView)?.setColorFilter(Color.GREEN) // Invalidate the view to force a redraw in the new tint v.invalidate() true } DragEvent.ACTION_DRAG_LOCATION -> // Ignore the event true DragEvent.ACTION_DRAG_EXITED -> { // Re-sets the color tint to blue. Returns true; the return value is ignored. (v as? ImageView)?.setColorFilter(Color.BLUE) // Invalidate the view to force a redraw in the new tint v.invalidate() true } DragEvent.ACTION_DROP -> { // Gets the item containing the dragged data val item: ClipData.Item = event.clipData.getItemAt(0) // Gets the text data from the item. val dragData = item.text // Displays a message containing the dragged data. Toast.makeText(this, "Dragged data is " + dragData, Toast.LENGTH_LONG).show() // Turns off any color tints (v as? ImageView)?.clearColorFilter() // Invalidates the view to force a redraw v.invalidate() // Returns true. DragEvent.getResult() will return true. true } DragEvent.ACTION_DRAG_ENDED -> { // Turns off any color tinting (v as? ImageView)?.clearColorFilter() // Invalidates the view to force a redraw v.invalidate() // Does a getResult(), and displays what happened. when(event.result) { true -> Toast.makeText(this, "The drop was handled.", Toast.LENGTH_LONG) else -> Toast.makeText(this, "The drop didn't work.", Toast.LENGTH_LONG) }.show() // returns true; the value is ignored. true } else -> { // An unknown action type was received. Log.e("DragDrop Example", "Unknown action type received by OnDragListener.") false } } } ... val imageView = ImageView(this) // Sets the drag event listener for the View imageView.setOnDragListener(dragListen)
자바
// Creates a new drag event listener dragListen = new myDragEventListener(); View imageView = new ImageView(this); // Sets the drag event listener for the View imageView.setOnDragListener(dragListen); ... protected class myDragEventListener implements View.OnDragListener { // This is the method that the system calls when it dispatches a drag event to the // listener. public boolean onDrag(View v, DragEvent event) { // Defines a variable to store the action type for the incoming event final int action = event.getAction(); // Handles each of the expected events switch(action) { case DragEvent.ACTION_DRAG_STARTED: // Determines if this View can accept the dragged data if (event.getClipDescription().hasMimeType(ClipDescription.MIMETYPE_TEXT_PLAIN)) { // As an example of what your application might do, // applies a blue color tint to the View to indicate that it can accept // data. v.setColorFilter(Color.BLUE); // Invalidate the view to force a redraw in the new tint v.invalidate(); // returns true to indicate that the View can accept the dragged data. return true; } // Returns false. During the current drag and drop operation, this View will // not receive events again until ACTION_DRAG_ENDED is sent. return false; case DragEvent.ACTION_DRAG_ENTERED: // Applies a green tint to the View. Return true; the return value is ignored. v.setColorFilter(Color.GREEN); // Invalidate the view to force a redraw in the new tint v.invalidate(); return true; case DragEvent.ACTION_DRAG_LOCATION: // Ignore the event return true; case DragEvent.ACTION_DRAG_EXITED: // Re-sets the color tint to blue. Returns true; the return value is ignored. v.setColorFilter(Color.BLUE); // Invalidate the view to force a redraw in the new tint v.invalidate(); return true; case DragEvent.ACTION_DROP: // Gets the item containing the dragged data ClipData.Item item = event.getClipData().getItemAt(0); // Gets the text data from the item. dragData = item.getText(); // Displays a message containing the dragged data. Toast.makeText(this, "Dragged data is " + dragData, Toast.LENGTH_LONG).show(); // Turns off any color tints v.clearColorFilter(); // Invalidates the view to force a redraw v.invalidate(); // Returns true. DragEvent.getResult() will return true. return true; case DragEvent.ACTION_DRAG_ENDED: // Turns off any color tinting v.clearColorFilter(); // Invalidates the view to force a redraw v.invalidate(); // Does a getResult(), and displays what happened. if (event.getResult()) { Toast.makeText(this, "The drop was handled.", Toast.LENGTH_LONG).show(); } else { Toast.makeText(this, "The drop didn't work.", Toast.LENGTH_LONG).show(); } // returns true; the value is ignored. return true; // An unknown action type was received. default: Log.e("DragDrop Example","Unknown action type received by OnDragListener."); break; } return false; } };
멀티 윈도우 모드에서 권한 드래그
Android 7.0(API 수준 24) 이상을 실행하는 기기에서는 멀티 윈도우 모드를 지원하므로 사용자가 드래그 앤 드롭 작업을 사용하여 앱 간에 데이터를 이동할 수 있습니다.
- 소스 앱: 원래 데이터가 포함된 앱입니다. 여기에서 드래그가 시작됩니다.
- 타겟 앱: 데이터를 수신하는 앱입니다. 여기에서 드래그가 끝납니다.
드래그 앤 드롭 작업을 시작할 때 소스 앱에서 DRAG_FLAG_GLOBAL
플래그를 설정하여 사용자가 데이터를 다른 앱으로 드래그할 수 있음을 나타내야 합니다.
데이터는 앱 경계를 넘어 이동하기 때문에 앱에서 콘텐츠 URI를 사용하여 데이터에 대한 액세스를 공유합니다.
- 소스 앱은 타겟 앱에서 보유해야 하는 데이터에 대한 읽기/쓰기 액세스 권한에 따라
DRAG_FLAG_GLOBAL_URI_READ
및DRAG_FLAG_GLOBAL_URI_WRITE
플래그 중 하나 또는 둘 다를 설정해야 합니다. - 타겟 앱은 사용자가 앱에 드래그하는 데이터를 처리하기 바로 전에
requestDragAndDropPermissions()
를 호출해야 합니다. 타겟 앱에서 더 이상 드래그 데이터에 액세스할 필요가 없으면 앱이requestDragAndDropPermissions()
에서 반환한 객체에서release()
를 호출할 수 있습니다. 그러지 않으면 해당되는 활동이 소멸될 때 권한이 해제됩니다.
다음 코드 스니펫에서는 드래그 앤 드롭 작업이 실행된 직후 드래그 데이터에 대한 읽기 전용 액세스 권한을 해제하는 방법을 보여줍니다. GitHub에서 사용 가능한 DragAndDropAcrossApps 샘플에 더 완전한 예가 제공됩니다.
SourceDragAndDropActivity
Kotlin
// Drag a file stored under an "images/" directory within internal storage. val internalImagesDir = File(context.filesDir, "images") val imageFile = File(internalImagesDir, file-name) val uri: Uri = FileProvider.getUriForFile( context, file-provider-content-authority, imageFile) // Container for where the image originally appears in the source app. val srcImageView = findViewById(R.id.my-image-id) val listener = DragStartHelper.OnDragStartListener = { view, _ -> val clipData = ClipData(clip-description, ClipData.Item(uri)) // Must include DRAG_FLAG_GLOBAL to allow for dragging data between apps. // This example provides read-only access to the data. val flags = View.DRAG_FLAG_GLOBAL or View.DRAG_FLAG_GLOBAL_URI_READ return@OnDragStartListener view.startDragAndDrop( clipData, drag-shadow-builder, null, flags) } // Detect and start the drag event. DragStartHelper(srcImageView, listener).apply { attach() }
자바
// Drag a file stored under an "images/" directory within internal storage. File internalImagesDir = new File(context.filesDir, "images"); File imageFile = new File(internalImagesDir, file-name); final Uri uri = FileProvider.getUriForFile( context, file-provider-content-authority, imageFile); // Container for where the image originally appears in the source app. ImageView srcImageView = findViewById(R.id.my-image-id); DragStartHelper.OnDragStartListener listener = new DragStartHelper.OnDragStartListener() { @Override public boolean onDragStart(View v, DragStartHelper helper) { ClipData clipData = new ClipData( clip-description, new ClipData.Item(uri)); // Must include DRAG_FLAG_GLOBAL to allow for dragging data // between apps. This example provides read-only access // to the data. int flags = View.DRAG_FLAG_GLOBAL | View.DRAG_FLAG_GLOBAL_URI_READ; return v.startDragAndDrop(clipData, drag-shadow-builder, null, flags); } }; // Detect and start the drag event. DragStartHelper helper = new DragStartHelper(srcImageView, listener); helper.attach();
TargetDragAndDropActivity
Kotlin
// Container for where the image is to be dropped in the target app. val targetImageView = findViewById<ImageView>(R.id.my-image-id) targetImageView.setOnDragListener { view, event -> when (event.action) { ACTION_DROP -> val imageItem: ClipData.Item = event.clipData.getItemAt(0) val uri = imageItem.uri // Request permission to access the image data being dragged into // the target activity's ImageView element. val dropPermissions = requestDragAndDropPermissions(event) (view as ImageView).setImageURI(uri) // Release the permission immediately afterwards because it's // no longer needed. dropPermissions.release() return@setOnDragListener true // Implement logic for other DragEvent cases here. } }
자바
// Container for where the image is to be dropped in the target app. ImageView targetImageView = findViewById(R.id.my-image-id); targetImageView.setOnDragListener( new View.OnDragListener() { @Override public boolean onDrag(View view, DragEvent dragEvent) { switch (dragEvent.getAction()) { case ACTION_DROP: ClipData.Item imageItem = dragEvent.getClipData().getItemAt(0); Uri uri = imageItem.getUri(); // Request permission to access the image data being // dragged into the target activity's ImageView element. DragAndDropPermissions dropPermissions = requestDragAndDropPermissions(dragEvent); ((ImageView)view).setImageURI(uri); // Release the permission immediately afterwards because // it's no longer needed. dropPermissions.release(); return true; // Implement logic for other DragEvent cases here. } } });