
It's a common misconception that using the basic layout structures leads to
the most efficient layouts. However, each widget and layout you add to your app
requires initialization, layout, and drawing. For example, using nested
instances of
LinearLayout
can lead to an excessively deep view hierarchy. Furthermore, nesting several
instances of LinearLayout that use the layout_weight
parameter can be especially expensive, as each child needs to be measured twice.
This is particularly important when the layout is inflated repeatedly, such as
when used in a
RecyclerView.
This document shows how to use Layout Inspector and lint to examine and optimize your layout.
Inspect your layout
The Android SDK tools includes the Layout Inspector tool, which lets you analyze your layout while your app is running. Using this tool helps you discover inefficiencies in the layout performance.
Layout Inspector lets you select running processes on a connected device or emulator, then display the layout tree. The traffic lights on each block represent its Measure, Layout, and Draw performance, helping you identify potential issues.
For example, figure 1 shows a layout that's used as an item in a
RecyclerView. This layout shows a small bitmap image on the left
and two stacked items of text on the right. It is especially important that
layouts like this that are inflated multiple times are optimized, as the
performance benefits are multiplied.

RecyclerView.
Layout Inspector shows a list of available devices and their running components. Choose your component from the Windows tab, and click Layout Inspector to view the layout hierarchy of the selected component. For example, figure 2 shows the layout for the list item illustrated by figure 1.
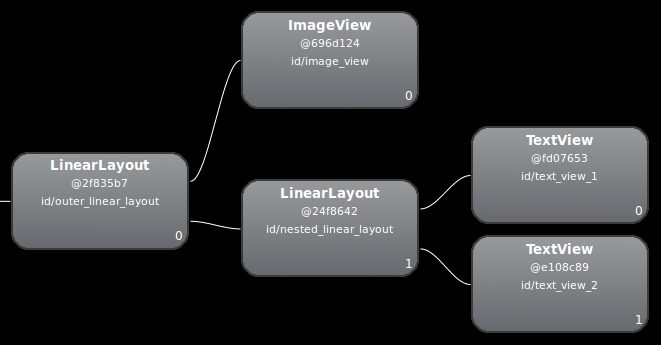
LinearLayout.
Revise your layout
Because the preceding layout performance slows down due to a nested
LinearLayout, you might improve performance by flattening the
layout—in other words, making the layout shallow and wide, rather than
narrow and deep. A
ConstraintLayout
as the root node allows for such layouts. When you convert this design to use
ConstraintLayout, the layout becomes a two-level hierarchy:
    <androidx.constraintlayout.widget.ConstraintLayout
      xmlns:android="http://schemas.android.com/apk/res/android"
      xmlns:app="http://schemas.android.com/apk/res-auto"
      xmlns:tools="http://schemas.android.com/tools"
      android:id="@+id/root"
      android:layout_width="match_parent"
      android:layout_height="52dp"
      android:background="#e4e6e4"
      android:padding="4dp">

      <ImageView
          android:id="@+id/image"
          android:layout_width="48dp"
          android:layout_height="48dp"
          android:background="#5c5c74"
          android:contentDescription="An example box"
          app:layout_constraintBottom_toBottomOf="parent"
          app:layout_constraintStart_toStartOf="parent"
          app:layout_constraintTop_toTopOf="parent" />

      <TextView
          android:id="@+id/title"
          android:layout_width="0dp"
          android:layout_height="0dp"
          android:layout_marginStart="4dp"
          android:background="#745c74"
          app:layout_constraintBottom_toTopOf="@+id/subtitle"
          app:layout_constraintEnd_toEndOf="parent"
          app:layout_constraintStart_toEndOf="@id/image"
          app:layout_constraintTop_toTopOf="parent" />

      <TextView
          android:id="@+id/subtitle"
          android:layout_width="0dp"
          android:layout_height="0dp"
          android:background="#7e8d6e"
          app:layout_constraintBottom_toBottomOf="parent"
          app:layout_constraintEnd_toEndOf="parent"
          app:layout_constraintStart_toStartOf="@id/title"
          app:layout_constraintTop_toBottomOf="@+id/title" />
  </androidx.constraintlayout.widget.ConstraintLayout>
Inspection of the new layout looks like this:
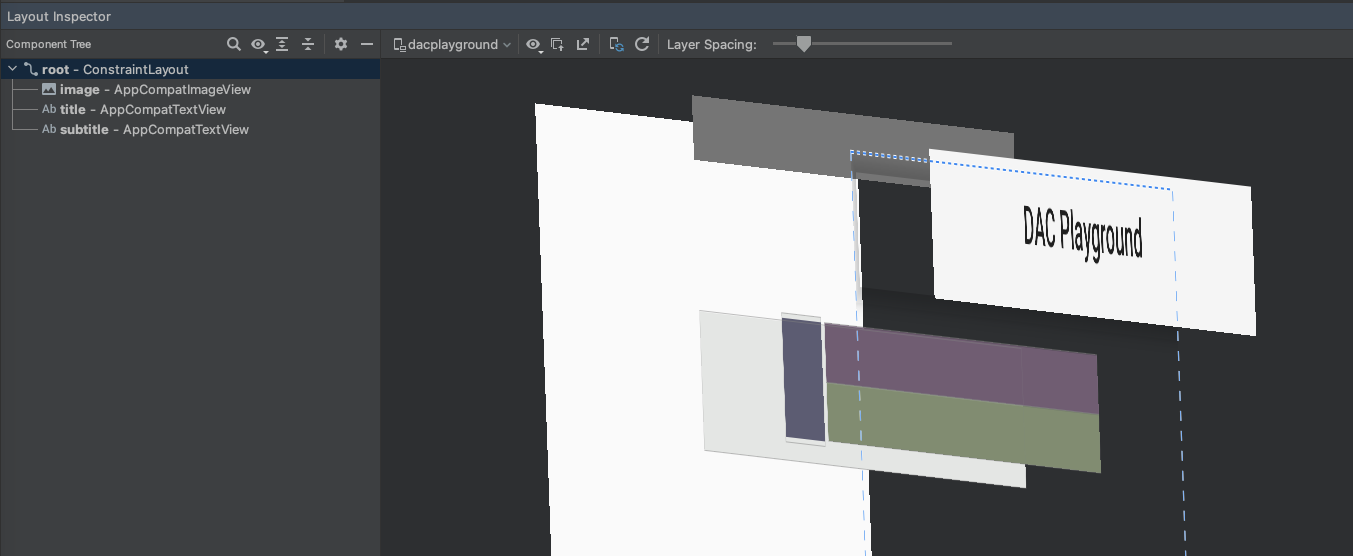
The benefits of this are multiplied, because this layout is used for every item in a list.
Most of the difference is due to the use of layout_weight in the
LinearLayout design, which can slow down measurement. This is one
example of how each layout has appropriate uses. Carefully consider whether
using layout weight is necessary.
In some complex layouts, the system might waste effort measuring the same UI element more than once. This phenomenon is called double taxation. For more information about double taxation and how to prevent it, see Performance and view hierarchies.
Use lint
It's good practice to run the lint tool on your layout files to search for possible view hierarchy optimizations. Lint replaces the layoutopt tool and has greater functionality. The following are examples of lint rules:
-
Use compound drawables. You can handle a
LinearLayoutthat contains anImageViewand aTextViewmore efficiently as a compound drawable. -
Merge root frame. If the root of a layout is a
FrameLayoutthat doesn't provide background or padding, you can replace it with a merge tag, which is slightly more efficient. - Remove useless leaves. You can remove a layout that has no children or no background—since it's invisible—for a flatter and more efficient layout hierarchy.
-
Remove useless parents. You can remove a layout with a child that has no
siblings, isn't a
ScrollViewor a root layout, and doesn't have a background. You can also move the child view directly into the parent for a flatter and more efficient layout hierarchy. -
Avoid deep layouts. Layouts with too much nesting are bad for
performance. Consider using flatter layouts, such as
ConstraintLayout, to improve performance. The default maximum depth for lint checks is 10.
Another benefit of the lint tool is its integration into Android Studio. Lint automatically runs whenever you compile your program. With Android Studio, you can also run lint inspections for a specific build variant or for all build variants.
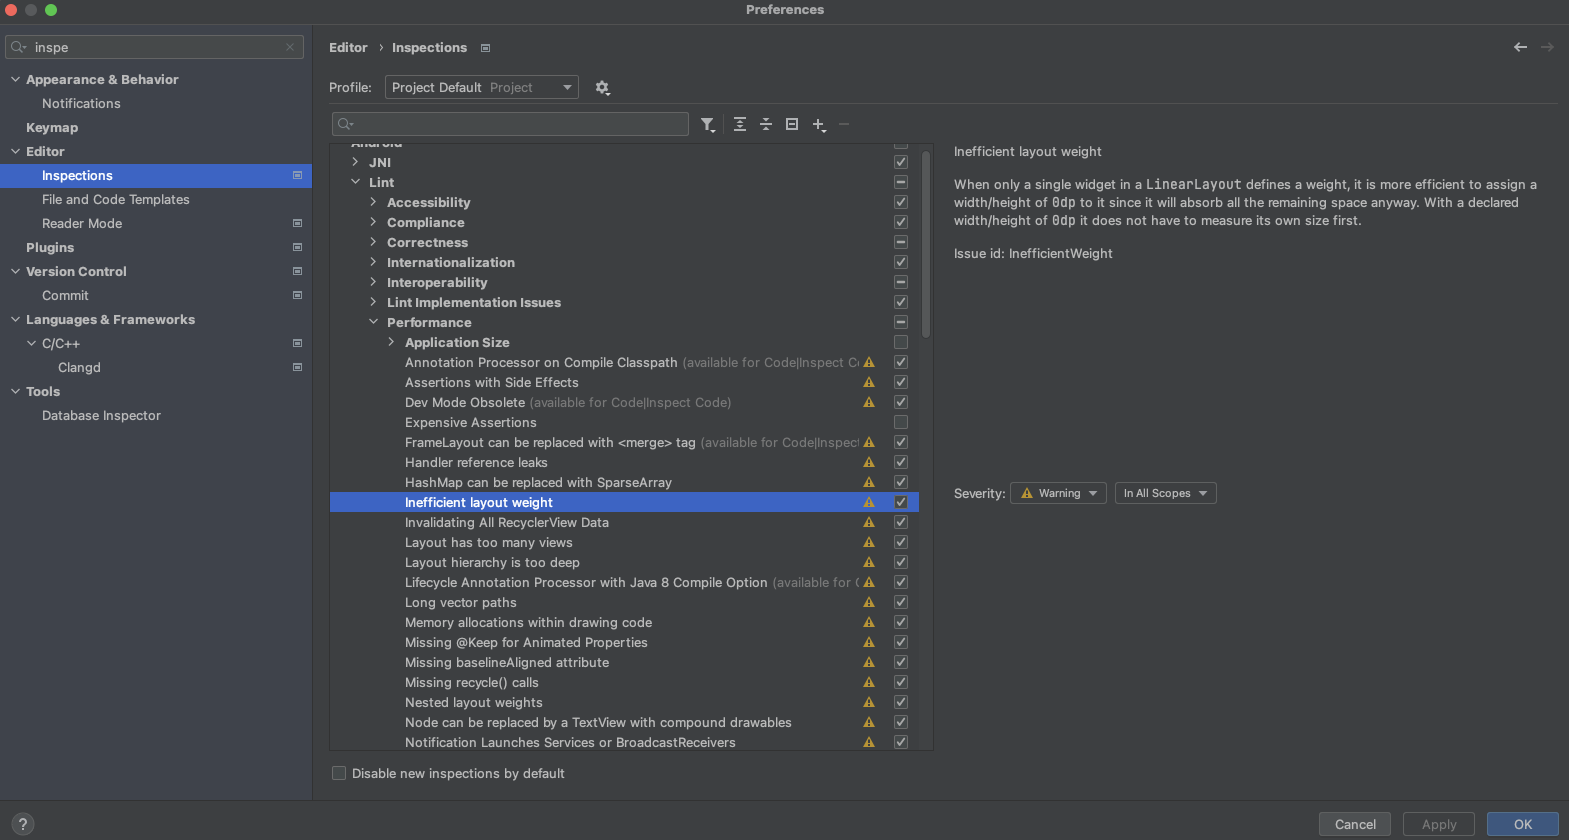
You can also manage inspection profiles and configure inspections within Android Studio with the File > Settings > Project Settings option. The Inspection Configuration page appears with the supported inspections:
Lint can automatically fix some issues, provide suggestions for others, and jump directly to the offending code for review.
For more information, see Layouts and Layout resource.