Developer workflow basics
Stay organized with collections
Save and categorize content based on your preferences.
The workflow to develop an app for Android is conceptually the same as
for other app platforms. However, to efficiently build a
well-designed app for Android, you need some specialized tools.
This page provides an overview of the process to build an Android app and
includes links to more information about Android Studio tools for each phase of development.
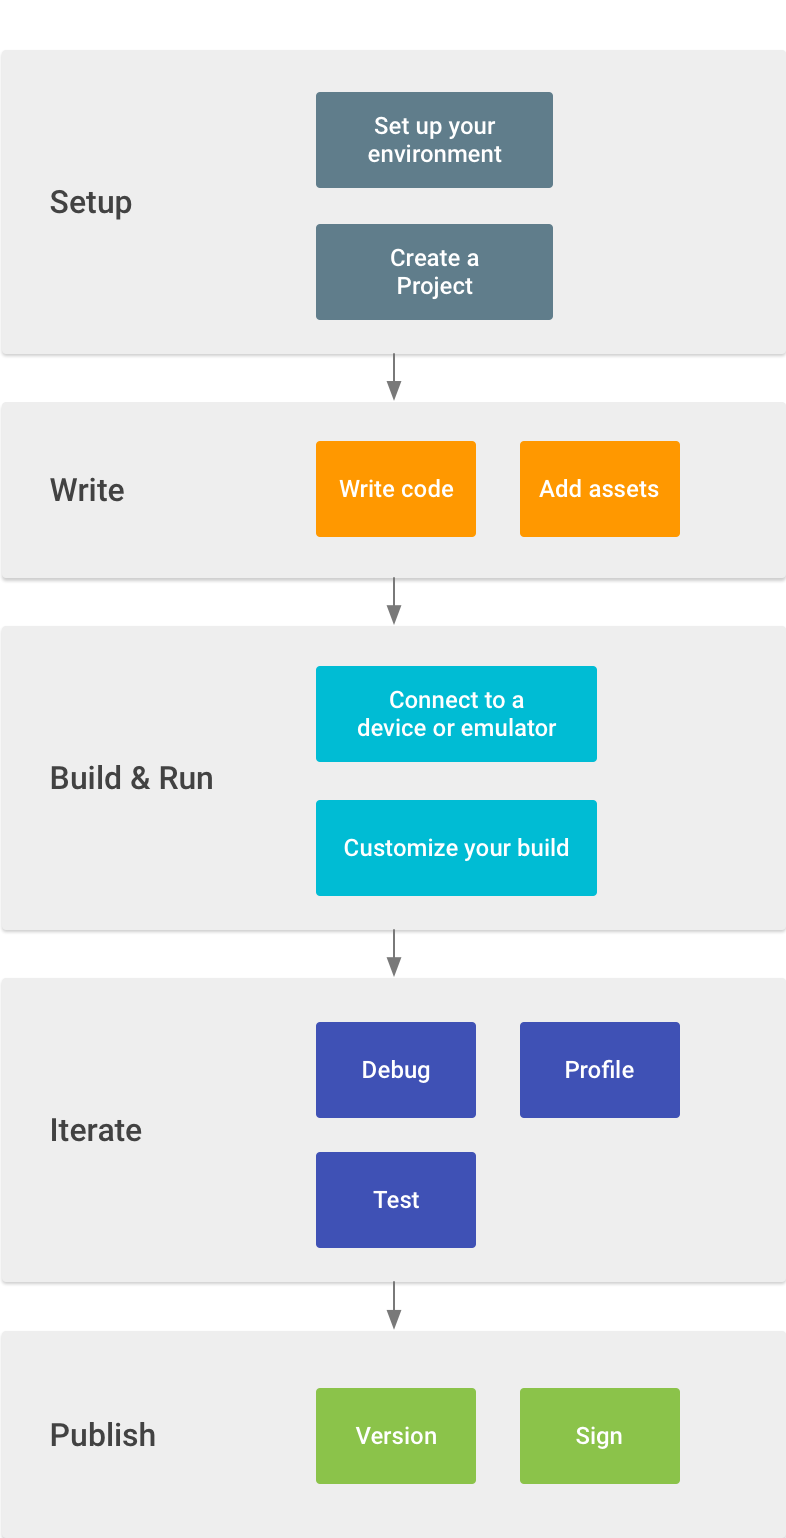
- Set up your workspace
This is the first step of the Android app development process. For more details, see
the Android Studio installation page and the guide to
creating a project.
Complete a walkthrough with Android Studio and learn some Android development
fundamentals with the
Build your first Android app guide.
- Write your app
Once you have set up your workspace, you can begin writing your app. Android Studio
includes a variety of tools and intelligence to help you work faster, write quality code,
design a UI, and create resources for different device types. For more information about the
tools and features available, see Write your app.
- Build and run
During the build and run phase, you build your project into a debuggable APK package that
you can install and run on the emulator or an Android-powered device. For more information
on how to run your code, see
Build and run your app.
You can also customize your build in this phase. For example, you can create build variants that
produce different versions of your app from the same project, and shrink your code and resources to
make your app smaller. For an introduction to custom build configurations,
see Configure your build.
- Debug, profile, and test
In this iterative phase, you continue developing your app while eliminating bugs and
optimizing app performance. For help to debug and optimize your app,
test your app in Android Studio.
For more information about debugging, read Debug your app and Write and view logs with Logcat.
To view and analyze various performance metrics such as memory usage, network traffic, CPU
impact, and more, see Profile your app performance.
- Publish
To prepare your app for release to users, you will need to build an
Android App Bundle,
sign it with a security key, and get ready to publish to the Google Play Store. For more
information, see the
Publish your app.
Content and code samples on this page are subject to the licenses described in the Content License. Java and OpenJDK are trademarks or registered trademarks of Oracle and/or its affiliates.
Last updated 2023-04-12 UTC.
[[["Easy to understand","easyToUnderstand","thumb-up"],["Solved my problem","solvedMyProblem","thumb-up"],["Other","otherUp","thumb-up"]],[["Missing the information I need","missingTheInformationINeed","thumb-down"],["Too complicated / too many steps","tooComplicatedTooManySteps","thumb-down"],["Out of date","outOfDate","thumb-down"],["Samples / code issue","samplesCodeIssue","thumb-down"],["Other","otherDown","thumb-down"]],["Last updated 2023-04-12 UTC."],[],[],null,["# Developer workflow basics\n\nThe workflow to develop an app for Android is conceptually the same as\nfor other app platforms. However, to efficiently build a\nwell-designed app for Android, you need some specialized tools.\n\nThis page provides an overview of the process to build an Android app and\nincludes links to more information about Android Studio tools for each phase of development. \n\n1. **Set up your workspace**\n\n This is the first step of the Android app development process. For more details, see\n the [Android Studio installation page](/studio) and the guide to\n [creating a project](/studio/projects/create-project).\n\n Complete a walkthrough with Android Studio and learn some Android development\n fundamentals with the\n [Build your first Android app](/training/basics/firstapp) guide.\n2. **Write your app**\n\n Once you have set up your workspace, you can begin writing your app. Android Studio\n includes a variety of tools and intelligence to help you work faster, write quality code,\n design a UI, and create resources for different device types. For more information about the\n tools and features available, see [Write your app](/studio/write).\n3. **Build and run**\n\n During the build and run phase, you build your project into a debuggable APK package that\n you can install and run on the emulator or an Android-powered device. For more information\n on how to run your code, see\n [Build and run your app](/studio/run).\n\n You can also customize your build in this phase. For example, you can [create build variants](/studio/build/build-variants) that\n produce different versions of your app from the same project, and [shrink your code and resources](/studio/build/shrink-code) to\n make your app smaller. For an introduction to custom build configurations,\n see [Configure your build](/studio/build).\n4. **Debug, profile, and test**\n\n In this iterative phase, you continue developing your app while eliminating bugs and\n optimizing app performance. For help to debug and optimize your app,\n [test your app in Android Studio](/studio/test/test-in-android-studio).\n\n For more information about debugging, read [Debug your app](/studio/debug) and [Write and view logs with Logcat](/studio/debug/am-logcat).\n\n To view and analyze various performance metrics such as memory usage, network traffic, CPU\n impact, and more, see [Profile your app performance](/studio/profile).\n5. **Publish**\n\n To prepare your app for release to users, you will need to build an\n [Android App Bundle](/guide/app-bundle),\n sign it with a security key, and get ready to publish to the Google Play Store. For more\n information, see the\n [Publish your app](/studio/publish)."]]