
Each running virtual device provides a console that lets you query and control the emulated device environment. For example, you can use the console to manage port redirection, network characteristics, and telephony events while your app runs on the emulator.
The following commands require that you already have an emulator running. For more information about running an emulator, see Run apps on the Android Emulator and Start the emulator from the command line.
Start and stop a console session
To access the console and enter commands from a terminal window, use telnet to connect to the console port and provide your authentication token. Each time the console displays OK, it's ready to accept commands. There isn't a typical prompt.
To connect to the console of a running virtual device:
Open a terminal window and enter the following command:
telnet localhost console-portThe emulator window title lists the console port number when running in a separate window but not when running in a tool window. For example, the window title for an emulator using console port 5554 could be Pixel8_API_34:5554. Also, the
adb devicescommand prints a list of running virtual devices and their console port numbers. For more information, see Query for devices.Note: The emulator listens for connections on ports 5554 to 5585 and accepts connections from localhost only.
After the console displays OK, enter the
auth auth_tokencommand.Before you can enter console commands, the emulator console requires authentication.
auth_tokenmust match the contents of the.emulator_console_auth_tokenfile in your home directory.If that file doesn't exist, the
telnet localhost console-portcommand creates the file, which contains a randomly generated authentication token. To disable authentication, delete the token from the.emulator_console_auth_tokenfile or create an empty file if it doesn't exist.After you're connected to the console, enter console commands.
Enter
help,help command, orhelp-verboseto see a list of console commands and learn about specific commands.To exit the console session, enter
quitorexit.
Here's an example session:
$ telnet localhost 5554
Trying ::1...
telnet: connect to address ::1: Connection refused
Trying 127.0.0.1...
Connected to localhost.
Escape character is '^]'.
Android Console: Authentication required
Android Console: type 'auth <auth_token>' to authenticate
Android Console: you can find your <auth_token> in
'/Users/me/.emulator_console_auth_token'
OK
auth 123456789ABCdefZ
Android Console: type 'help' for a list of commands
OK
help-verbose
Android console command help:
    help|h|?         Prints a list of commands
    help-verbose     Prints a list of commands with descriptions
    ping             Checks if the emulator is alive
    automation       Manages emulator automation
    event            Simulates hardware events
    geo              Geo-location commands
    gsm              GSM related commands
    cdma             CDMA related commands
    crash            Crashes the emulator instance
    crash-on-exit    Simulates crash on exit for the emulator instance
    kill             Terminates the emulator instance
    restart          Restarts the emulator instance
    network          Manages network settings  (ethernet and cellular only)
    power            Power related commands
    quit|exit        Quits control session
    redir            Manages port redirections
    sms              SMS related commands
    avd              Controls virtual device execution
    qemu             QEMU-specific commands
    sensor           Manages emulator sensors
    physics          Manages physical model
    finger           Manages emulator finger print
    debug            Controls the emulator debug output tags
    rotate           Rotates the screen clockwise by 90 degrees
    screenrecord     Records the emulator's display
    fold             Folds the device
    unfold           Unfolds the device
    multidisplay     Configures the multi-display
    nodraw           turn on/off NoDraw mode. (experimental)
    resize-display   resize the display resolution to the preset size
    virtualscene-image  customize virtualscene image for virtulscene camera
    proxy            manage network proxy server settings
    phonenumber      set phone number for the device

try 'help <command>' for command-specific help
OK
exit
Connection closed by foreign host.
Fire-and-forget commands
If you don't need the session to be open, use the adb emu shortcut, which
executes the command and immediately returns control to the invoking shell:
adb emu command commandParameter
Invocation with adb emu connects to the available emulator. If you have
multiple emulators running at the same time, you must pass in the serial of the
specific emulator you're targeting:
adb -s emulator-serial emu command commandParameter
Emulator command reference
The following lists describe the emulator console commands with their parameters and values:
General commands
avd {stop| start| status| name}Queries, controls, and manages the virtual device, as follows:- stop: Stops the execution of the device.
- start: Starts the execution of the device.
- status: Queries the virtual device status, which can be running or stopped.
- name: Queries the virtual device name.
avd snapshot {list| save name| load name| delete name}Saves and restores the device state in snapshots, as follows:- list: Lists all saved snapshots.
- save name: Saves the snapshot as name.
- load name: Loads the named snapshot.
- delete name: Deletes the named snapshot.
The following example saves a snapshot with the name
firstactivitysnapshot:avd snapshot save firstactivitysnapshotfold: Folds the device to display its smaller screen configuration, if the device is foldable and currently unfolded.
unfold: Unfolds the device to display its larger screen configuration, if the device is foldable and currently folded.
kill: Terminates the virtual device.
ping: Checks whether the virtual device is running.
rotate: Rotates the AVD counterclockwise in 45 degree increments.
Crash the emulator
crash: Crashes the emulator during app execution.
crash-on-exit: Crashes the emulator when the app exits.
Debug tags
debug tags ...: Enables or disables debug messages from specific parts of the emulator. The tags parameter must be a value from the list of debug tags that appears when you execute
emulator -help-debug-tags. For more information about the-help-debug-tagsoption, see the table of commonly used options. The following example enables the radio tag:debug radio
Port redirection
redir list: Lists the current port redirection.
redir add protocol:host-port:guest-portAdds a new port redirection, as follows:- protocol: Must be either tcp or udp.
- host-port: The port number to open on the host.
- guest-port: The port number to route data to on the emulator.
redir del protocol:host-portDeletes a port redirection.- protocol: Must be either tcp or udp.
- host-port: The port number to open on the host.
Geographic location
Sets the geographic location reported to the apps running inside an emulator by sending a GPS fix to the emulator.
You can issue one of the following geo commands as soon as a virtual device is
running. The emulator sets the location you enter by creating a mock location
provider. This provider responds to location listeners set by apps and supplies
the location to the LocationManager. Any app can query the location manager to
obtain the current GPS fix for the emulated device by calling
LocationManager.getLastKnownLocation("gps").
geo fix longitude latitude [altitude] [satellites] [velocity]: Sends a simple GPS fix to the emulator. Specify longitude and latitude in decimal degrees. Use a number from 1 to 12 to specify the number of satellites to use to determine the position, and specify altitude in meters and velocity in knots.
geo nmea sentence: Sends an NMEA 0183 sentence to the emulated device as if it were sent from an emulated GPS modem. Start sentence with '$GP'. Only '$GPGGA' and '$GPRCM' sentences are currently supported. The following example is a GPGGA (Global Positioning System Fix Data) sentence that gets the time, position, and fix data for a GPS receiver:
geo nmea $GPGGA,hhmmss.ss,llll.ll,a,yyyyy.yy,a,x,xx,x.x,x.x,M,x.x,M,x.x,xxxx
Fake hardware events
The emulator console's hardware event subsystem lets you simulate virtually any physical interaction with the device. This includes physical buttons, screen touch/gestures, rotary dials, joystick inputs, and hardware switches.
event types: Lists all fake event types. For events that have codes, the number of codes is listed in parentheses on the right. Example output:
event types
event <type> can be an integer or one of the following aliases:
    EV_SYN
    EV_KEY    (405 code aliases)
    EV_REL    (2 code aliases)
    EV_ABS    (27 code aliases)
    EV_MSC
    EV_SW     (4 code aliases)
    EV_LED
    EV_SND
    EV_REP
    EV_FF
    EV_PWR
    EV_FF_STATUS
    EV_MAX
OK
event send types [types ...]: Sends one or more fake event types.
event codes type: Lists the event codes for the specified fake event type.
event send type[:code]:[value] [...]: Sends one or more fake events with optional codes and code values.
EV_KEY — Key Code References
The EV_KEY event type is used to simulate button presses and releases. The
following tables divide the vast list of supported key codes into logical
categories. For each key code, dispatching a value of 1 simulates a press,
whereas a value of 0 simulates a release. A value of 2 represents key
repeat.
Subtable A: Android System Keys
| Code | Description |
|---|---|
KEY_HOME |
Home button trigger |
KEY_BACK |
Back button trigger |
KEY_MENU |
Menu (overflow) button |
KEY_POWER |
Power button (press/long press) |
KEY_VOLUMEUP |
Volume Up button trigger |
KEY_VOLUMEDOWN |
Volume Down button trigger |
KEY_CAMERA |
Physical Camera shutter button |
KEY_FOCUS |
Camera auto-focus shutter |
KEY_SEARCH |
Search button trigger |
KEY_SLEEP |
Sleep command trigger |
KEY_WAKEUP |
Wake up command trigger |
KEY_NOTIFICATION |
Open notification drawer |
KEY_MUTE |
Mute system audio output |
KEY_MICMUTE |
Mute microphone input |
KEY_BRIGHTNESSDOWN |
Decrease display brightness |
KEY_BRIGHTNESSUP |
Increase display brightness |
KEY_PHONE |
Open default dialer app |
KEY_SEND |
Send or initiate phone call |
KEY_HEADSETHOOK |
Headset hook (answer/hangup) |
KEY_SCREEN |
Screensaver active command |
KEY_CONFIG |
Configuration system menu |
KEY_SWITCHVIDEOMODE |
Switch system video mode |
KEY_KBDILLUMTOGGLE |
Toggle keyboard backlight |
Subtable B: Media & Playback Controls
| Code | Description |
|---|---|
KEY_PLAYPAUSE |
Toggle play and pause state |
KEY_PLAY |
Initiate media playback |
KEY_PAUSECD |
Pause CD playback |
KEY_STOPCD |
Stop CD playback |
KEY_NEXTSONG |
Skip to next track |
KEY_PREVIOUSSONG |
Skip to previous track |
KEY_REWIND |
Rewind active track |
KEY_FASTFORWARD |
Fast-forward active track |
KEY_RECORD |
Record trigger command |
KEY_SHUFFLE |
Toggle shuffle playback |
KEY_REPEAT |
Toggle repeat playback |
KEY_MEDIA |
Media key trigger |
Subtable C: Navigation & General Keyboards
| Code | Description |
|---|---|
KEY_UP |
D-pad Up direction |
KEY_DOWN |
D-pad Down direction |
KEY_LEFT |
D-pad Left direction |
KEY_RIGHT |
D-pad Right direction |
KEY_PAGEUP |
Page up navigation |
KEY_PAGEDOWN |
Page down navigation |
KEY_INSERT |
Insert key trigger |
KEY_DELETE |
Delete key trigger |
KEY_ENTER |
Enter key trigger |
KEY_ESC |
Escape key trigger |
KEY_TAB |
Tab key trigger |
KEY_SPACE |
Spacebar key trigger |
KEY_BACKSPACE |
Backspace key trigger |
KEY_CLEAR |
Clear input buffer |
KEY_CANCEL |
Cancel active action |
KEY_OK |
Confirm/OK selection |
KEY_SELECT |
Select item trigger |
KEY_GOTO |
Go to designated place |
KEY_HELP |
Access help context |
Subtable D: Alphanumerics & Keypad Symbols
- Standard Alphabet letters:
KEY_AthroughKEY_Z(26 codes). - Numeric keypad keys:
KEY_1throughKEY_0(10 codes).
| Code | Character Symbol |
|---|---|
KEY_COMMA |
, |
KEY_DOT |
. |
KEY_SLASH |
/ |
KEY_SEMICOLON |
; |
KEY_APOSTROPHE |
' |
KEY_GRAVE |
\` |
KEY_MINUS |
- |
KEY_EQUAL |
= |
KEY_LEFTBRACE |
[ |
KEY_RIGHTBRACE |
] |
KEY_BACKSLASH |
\ |
KEY_KPASTERISK |
* (Numeric keypad) |
KEY_KPPLUS |
+ (Numeric keypad) |
KEY_KPMINUS |
- (Numeric keypad) |
KEY_KPDOT |
. (Numeric keypad) |
KEY_KPSLASH |
/ (Numeric keypad) |
KEY_KPENTER |
Enter (Numeric keypad) |
KEY_KPEQUAL |
= (Numeric keypad) |
KEY_KPCOMMA |
, (Numeric keypad) |
KEY_KPJPCOMMA |
, (Japanese layout) |
KEY_KPLEFTPAREN |
( (Numeric keypad) |
KEY_KPRIGHTPAREN |
) (Numeric keypad) |
KEY_KPPLUSMINUS |
± (Numeric keypad) |
Subtable E: Modifier & Function Keys
- Standard Function keys:
KEY_F1throughKEY_F24(24 codes).
| Code | Description |
|---|---|
KEY_LEFTSHIFT |
Left Shift keyboard modifier |
KEY_RIGHTSHIFT |
Right Shift keyboard modifier |
KEY_LEFTCTRL |
Left Control keyboard modifier |
KEY_RIGHTCTRL |
Right Control keyboard modifier |
KEY_LEFTALT |
Left Alt keyboard modifier |
KEY_RIGHTALT |
Right Alt keyboard modifier |
KEY_LEFTMETA |
Left Meta/Command key |
KEY_RIGHTMETA |
Right Meta/Command key |
KEY_CAPSLOCK |
Caps Lock keyboard toggle |
KEY_NUMLOCK |
Num Lock keyboard toggle |
KEY_SCROLLLOCK |
Scroll Lock keyboard toggle |
KEY_COMPOSE |
Compose character helper |
KEY_FN |
Physical keyboard FN key |
KEY_FN_ESC |
Function key combinations |
KEY_FN_1 |
Special function shortcut 1 |
KEY_FN_2 |
Special function shortcut 2 |
KEY_FN_D |
Special function shortcut D |
KEY_FN_E |
Special function shortcut E |
KEY_FN_F |
Special function shortcut F |
KEY_FN_S |
Special function shortcut S |
KEY_FN_B |
Special function shortcut B |
Subtable F: Gamepads & Joysticks
| Code | Description |
|---|---|
BTN_A / BTN_B / BTN_C |
Controller face buttons A/B/C |
BTN_X / BTN_Y / BTN_Z |
Controller face buttons X/Y/Z |
BTN_START |
Gamepad Start menu button |
BTN_SELECT |
Gamepad Select button |
BTN_MODE |
Controller Mode switch |
BTN_TL / BTN_TR |
Left / Right shoulder bumpers |
BTN_TL2 / BTN_TR2 |
Left / Right analogue triggers |
BTN_THUMBL / BTN_THUMBR |
Left / Right stick clicks |
BTN_DPAD_UP |
Gamepad D-pad Up trigger |
BTN_DPAD_DOWN |
Gamepad D-pad Down trigger |
BTN_DPAD_LEFT |
Gamepad D-pad Left trigger |
BTN_DPAD_RIGHT |
Gamepad D-pad Right trigger |
BTN_THUMB |
Joystick primary thumb trigger |
BTN_TOP / BTN_TOP2 |
Joystick upper top buttons |
BTN_PINKIE |
Joystick pinky button triggers |
BTN_BASE to _BASE6 |
Joystick platform base buttons |
BTN_DEAD |
Inactive gamepad deadzone flag |
BTN_TRIGGER |
Physical joystick hand trigger |
BTN_JOYSTICK |
Generic joystick input code |
Subtable G: Mouse, Touch & Stylus Inputs
| Code | Description |
|---|---|
BTN_MOUSE |
Generic mouse pointer event |
BTN_LEFT |
Left mouse button click |
BTN_RIGHT |
Right mouse button click |
BTN_MIDDLE |
Middle scroll wheel click |
BTN_SIDE |
Navigation side key trigger |
BTN_EXTRA |
Extra mouse button trigger |
BTN_FORWARD |
Forward browser navigation click |
BTN_BACK |
Back browser navigation click |
BTN_TASK |
System task switcher key |
BTN_TOUCH |
Screen physical contact detected |
BTN_STYLUS |
Active stylus pen proximity |
BTN_STYLUS2 |
Secondary barrel switch on stylus |
BTN_TOOL_PEN |
Stylus pen tool identifier |
BTN_TOOL_RUBBER |
Stylus eraser tool identifier |
BTN_TOOL_BRUSH |
Painter brush tool identifier |
BTN_TOOL_PENCIL |
Drafting pencil tool identifier |
BTN_TOOL_AIRBRUSH |
Airbrush paint tool identifier |
BTN_TOOL_FINGER |
Touch screen finger contact |
BTN_TOOL_MOUSE |
External mouse tool identifier |
BTN_TOOL_LENS |
Optical magnifier lens tool |
BTN_TOOL_DOUBLETAP |
Gesture double-tap speed flag |
BTN_TOOL_TRIPLETAP |
Gesture triple-tap speed flag |
Subtable H: Application Shortcuts
| Code | Target Action |
|---|---|
KEY_WWW |
Launches default web browser |
KEY_MAIL |
Opens default email client |
KEY_BOOKMARKS |
Opens browser bookmarks list |
KEY_CALC |
Opens calculator utility |
KEY_FILE |
Opens local files explorer |
KEY_EDIT |
Document edit trigger |
KEY_NEW |
Document create new trigger |
KEY_OPEN |
Document open trigger |
KEY_SAVE |
File save task trigger |
KEY_CLOSE |
File close task trigger |
KEY_PRINT |
File print task trigger |
KEY_COPY |
Clipboard buffer copy action |
KEY_PASTE |
Clipboard buffer insert action |
KEY_CUT |
Clipboard buffer cut action |
KEY_UNDO |
Clipboard buffer undo action |
KEY_REDO |
Clipboard buffer redo action |
KEY_CANCEL |
Buffer cancel process trigger |
KEY_FIND |
Document search utility |
KEY_REFRESH |
Document refresh utility |
KEY_EXIT |
Document close utility |
KEY_DOCUMENTS |
Launches system documents portal |
KEY_HOMEPAGE |
Launches homepage browser |
KEY_FAVORITES |
Opens browser favorites portal |
KEY_CHAT |
Launches instant messenger |
KEY_EMAIL |
Alternate email launch trigger |
KEY_FINANCE |
Open stock/finance utility |
KEY_SPORT |
Open sports tracking utility |
KEY_SHOP |
Open digital shopping portal |
KEY_PLAYER |
Open primary media player |
KEY_MP3 |
Open primary MP3 player |
KEY_TEXT |
Open default text editor |
KEY_LIST |
Open checklist utility |
KEY_MEMO |
Open notepad / memo utility |
KEY_CALENDAR |
Opens calendar / agenda portal |
KEY_DIRECTORY |
Opens system address directory |
KEY_COMPUTER |
Opens specifications explorer |
KEY_TV / KEY_TV2 |
Launches television portal |
KEY_RADIO |
Launches radio utility |
KEY_CD / KEY_DVD |
Activates optical drive reader |
KEY_AUDIO / KEY_VIDEO |
Accesses media specifications |
KEY_TUNER |
Configures receivers/tuners |
KEY_SAT / KEY_SAT2 |
Configures satellite feeds |
KEY_TAPE |
Play tape media deck |
KEY_VCR |
Play VCR player feed |
KEY_VCR2 |
Play VCR 2 player feed |
KEY_AUX |
Auxiliary media port inputs |
KEY_SETUP |
Setup configuration menu |
KEY_PROG1 to _PROG4 |
User-defined program keys |
KEY_ZOOM |
Zoom viewport toggle |
KEY_MODE |
Viewport mode select |
KEY_KEYBOARD |
Show/hide virtual keyboard |
KEY_LANGUAGE |
Switch audio track language |
KEY_TITLE |
Open media title options |
KEY_SUBTITLE |
Toggle subtitles interface |
KEY_ANGLE |
Change video camera angles |
KEY_EPG |
Open electronic program guide |
KEY_PVR |
Open personal video recorder |
KEY_MHP |
Open multimedia home platform |
KEY_CHANNEL |
Open TV tuner channels |
KEY_CHANNELUP |
Tune TV channel upward |
KEY_CHANNELDOWN |
Tune TV channel downward |
KEY_RED |
Red interactive button |
KEY_GREEN |
Green interactive button |
KEY_YELLOW |
Yellow interactive button |
KEY_BLUE |
Blue interactive button |
KEY_FIRST |
Select first item option |
KEY_LAST |
Select last item option |
KEY_NEXT |
Select next track option |
KEY_PREVIOUS |
Select previous track option |
KEY_RESTART |
Restart media track loop |
KEY_SLOW |
Slow-motion play option |
KEY_AB |
A-B repeat sequence loop |
KEY_PLAYCD |
CD deck play command |
KEY_PAUSECD |
CD deck pause command |
KEY_STOPCD |
CD deck stop command |
KEY_DIGITS |
Digital keypad entry command |
KEY_TEEN |
Keypad teen values option |
KEY_TWEN |
Keypad twen values option |
KEY_DEL_EOL |
Delete to end of line buffer |
KEY_DEL_EOS |
Delete to end of screen buffer |
KEY_INS_LINE |
Insert new line buffer |
KEY_BRL_DOT1 to _DOT8 |
Braille display button inputs |
KEY_VOICECOMMAND |
Launches voice assistant app |
KEY_SELECTIVE_SCREEN |
Triggers regional screen snipping |
KEY_BATTERY |
Queries battery notifications |
KEY_STAR / KEY_SHARP |
Telephone keypad symbols |
KEY_PLUS |
Telephone keypad plus symbol |
KEY_INFO |
Show info panel overlay |
KEY_TIME |
Show current clock time |
KEY_VENDOR |
Queries vendor specifications |
KEY_ARCHIVE |
Opens local archive utility |
KEY_PROGRAM |
Configures program parameters |
KEY_POWER2 |
Triggers alternate backup power |
EV_ABS — Absolute Motion Events
The EV_ABS event type is crucial for simulating precise touches, drag-and-drop
gestures, multi-touch pinch actions, and joystick adjustments. The absolute
coordinates below map directly to the underlying physical screen resolution.
| Code | Coordinate Range | Description |
|---|---|---|
ABS_MT_TRACKING_ID |
-1 or ≥0 |
Tracking ID; -1 ends touch |
ABS_MT_POSITION_X |
0 to 1767 |
X coordinate (Pixel Fold) |
ABS_MT_POSITION_Y |
0 to 2207 |
Y coordinate (Pixel Fold) |
ABS_MT_TOUCH_MAJOR |
pixels | Touch area major axis width |
ABS_MT_TOUCH_MINOR |
pixels | Touch area minor axis width |
ABS_MT_WIDTH_MAJOR |
pixels | Tool major axis width |
ABS_MT_WIDTH_MINOR |
pixels | Tool minor axis width |
ABS_MT_ORIENTATION |
0 to 255 |
Contact orientation angle |
ABS_MT_PRESSURE |
0 to 255 |
Contact force magnitude |
ABS_MT_DISTANCE |
mm | Hover distance from screen |
ABS_MT_TOOL_TYPE |
0 to 2 |
0=finger, 1=pen, 2=pencil |
ABS_MT_BLOB_ID |
integer | Contact blob identifier |
ABS_MT_TOOL_X |
pixels | Tool X-position coordinate |
ABS_MT_TOOL_Y |
pixels | Tool Y-position coordinate |
ABS_MT_SLOT |
0 to N |
Active slot (Protocol B) |
ABS_X / _Y / _Z |
analogue | Joystick coordinate axes |
ABS_RX / _RY / _RZ |
analogue | Joystick rotational axes |
ABS_THROTTLE / _BRAKE |
analogue | Pedals and steering controls |
ABS_HAT0X / _HAT0Y |
-1 / 0 / 1 |
D-pad hat & POV switches |
ABS_PRESSURE |
0 to 255 |
Stylus / pointer force level |
ABS_DISTANCE |
mm | Hover distance (stylus pen) |
ABS_TILT_X / _TILT_Y |
degrees | Stylus inclination angles |
ABS_VOLUME |
analogue | Controller volume levels |
Android touch interaction is driven by Multi-touch (MT) Protocols. Modern emulators implement both Protocol A (stateless, sending contact packets separated by synchronization marks) and Protocol B (stateful, assigning contacts to dedicated tracking slots). Protocol B allows efficient tracking of multiple concurrent touches for gestures like pinch-to-zoom.
EV_REL & EV_SW — Motion & Hardware Switches
The EV_REL event category manages relative pointer or coordinate changes,
which is primarily used for emulating external mouse movements or scrolling
wheels. The EV_SW event category manages physical device switches, such as
whether a flip phone or tablet is folded, or if external audio hardware is
inserted.
| Code | Values | Description |
|---|---|---|
REL_X |
Delta | Horizontal cursor movement |
REL_Y |
Delta | Vertical cursor movement |
SW_LID |
0/1 |
Laptop lid status (0=Open, 1=Closed) |
SW_TABLET_MODE |
0/1 |
Tablet mode status (0=Off, 1=Active) |
SW_HEADPHONE_INSERT |
0/1 |
Headphone jack status (0=Out, 1=In) |
SW_MICROPHONE_INSERT |
0/1 |
Microphone jack status (0=Out, 1=In) |
Command Dispatch Syntax
To dispatch these codes, format the console command with types, codes, and
values separated by colons. You can queue multiple coordinate changes in a
single string. Crucially, always append a final synchronization mark
(EV_SYN:0:0) to indicate that the emulator framework should bundle and
process these inputs together.
Event Scripting & Gesture Examples
Because Telnet allows sending multi-part parameters, you can simulate realistic physical gesture sequences. Below are raw event script structures for automating gestures from your host console.
Simulating a Screen Tap
To perform a clean screen tap at a target coordinate, assign a tracking ID, specify the X and Y coordinates on the screen, simulate the contact touch, synchronize, and then release.
# Press down at coordinate (400, 800) and sync
event send EV_ABS:ABS_MT_TRACKING_ID:1
OK
event send EV_ABS:ABS_MT_POSITION_X:400
OK
event send EV_ABS:ABS_MT_POSITION_Y:800
OK
event send EV_KEY:BTN_TOUCH:1
OK
event send EV_SYN:0:0
OK
# Lift finger up and sync
event send EV_ABS:ABS_MT_TRACKING_ID:-1
OK
event send EV_KEY:BTN_TOUCH:0
OK
event send EV_SYN:0:0
OK
Simulating a Vertical Scroll (Swipe)
To execute a scroll swipe gesture, hold down contact at the starting coordinate, send intermediate movement coordinate frames, and release at the end.
# Finger touch down at start coordinate (500, 1600)
event send EV_ABS:ABS_MT_TRACKING_ID:2
OK
event send EV_ABS:ABS_MT_POSITION_X:500
OK
event send EV_ABS:ABS_MT_POSITION_Y:1600
OK
event send EV_KEY:BTN_TOUCH:1
OK
event send EV_SYN:0:0
OK
# Move coordinates upward dynamically
event send EV_ABS:ABS_MT_POSITION_Y:1200
OK
event send EV_SYN:0:0
OK
event send EV_ABS:ABS_MT_POSITION_Y:800
OK
event send EV_SYN:0:0
OK
event send EV_ABS:ABS_MT_POSITION_Y:400
OK
event send EV_SYN:0:0
OK
# Finger release at coordinate (500, 400)
event send EV_ABS:ABS_MT_TRACKING_ID:-1
OK
event send EV_KEY:BTN_TOUCH:0
OK
event send EV_SYN:0:0
OK
Simulating a Pinch-to-Zoom Gesture
To trigger a two-finger zoom, use active MT slots (0 and 1) to track and coordinate two concurrent touch coordinates moving away from each other.
# Finger 1 down at (500, 1000) using slot 0
event send EV_ABS:ABS_MT_SLOT:0
OK
event send EV_ABS:ABS_MT_TRACKING_ID:10
OK
event send EV_ABS:ABS_MT_POSITION_X:500
OK
event send EV_ABS:ABS_MT_POSITION_Y:1000
OK
event send EV_KEY:BTN_TOUCH:1
OK
event send EV_SYN:0:0
OK
# Finger 2 down at (600, 1000) using slot 1
event send EV_ABS:ABS_MT_SLOT:1
OK
event send EV_ABS:ABS_MT_TRACKING_ID:11
OK
event send EV_ABS:ABS_MT_POSITION_X:600
OK
event send EV_ABS:ABS_MT_POSITION_Y:1000
OK
event send EV_SYN:0:0
OK
# Fingers slide apart from each other
event send EV_ABS:ABS_MT_SLOT:0
OK
event send EV_ABS:ABS_MT_POSITION_X:300
OK
event send EV_SYN:0:0
OK
event send EV_ABS:ABS_MT_SLOT:1
OK
event send EV_ABS:ABS_MT_POSITION_X:800
OK
event send EV_SYN:0:0
OK
# Lift Finger 1 using slot 0
event send EV_ABS:ABS_MT_SLOT:0
OK
event send EV_ABS:ABS_MT_TRACKING_ID:-1
OK
event send EV_SYN:0:0
OK
# Lift Finger 2 using slot 1
event send EV_ABS:ABS_MT_SLOT:1
OK
event send EV_ABS:ABS_MT_TRACKING_ID:-1
OK
event send EV_KEY:BTN_TOUCH:0
OK
event send EV_SYN:0:0
OK
Simulating a Headphone Connection Switch
Simulate headphone jack insertions or removals to test audio routing switches. A
value of 1 represents jack insertion, and 0 is headphone removal.
# Simulate headphones plugged in
event send EV_SW:SW_HEADPHONE_INSERT:1 EV_SYN:0:0
OK
# Simulate headphones unplugged
event send EV_SW:SW_HEADPHONE_INSERT:0 EV_SYN:0:0
OK
Discovering Console Event Codes from a Real Device
To discover the exact event syntax sequence for any custom action or button
gesture, connect via adb shell and run the getevent diagnostic utility. As you
interact with the emulator GUI, the console prints the exact event codes, types,
and positions.
# Run getevent to monitor input events dynamically
adb shell getevent -lt
/dev/input/event12: EV_KEY       KEY_POWER            DOWN
/dev/input/event12: EV_SYN       SYN_REPORT           00000000
/dev/input/event12: EV_KEY       KEY_POWER            UP
/dev/input/event12: EV_SYN       SYN_REPORT           00000000
- event text message: Sends a string of characters that simulate keypresses. The message must be a UTF-8 string. Unicode posts are reverse-mapped according to the current device keyboard, and unsupported characters are discarded silently.
Power state controls
power display: Displays battery and charger state.
power ac {on| off}: Sets AC charging state to on or off.
power status {unknown| charging| discharging| not-charging| full}: Changes battery status as specified.
power present {true| false}: Sets battery presence state.
power health {unknown| good| overheat| dead| overvoltage| failure}: Sets b attery health state.
power capacity percent: Sets remaining battery capacity state as a percent from 0 to 100.
Network connection status (Ethernet and Cellular only)
network status: Checks the network status and current delay and speed characteristics.
network delay latencyChanges the emulated network latency.The emulator lets you simulate various network latency levels so that you can test your app in an environment more typical of actual running conditions. You can set a latency level or range at emulator startup, or you can use the console to change the latency while the app is running in the emulator.
The format of network latency is one of the following (numbers are milliseconds):
Network latency format:
gprs: GPRS, which uses a latency range of 150 minimum and 550 maximum.
edge: EDGE/EGPRS, which uses a latency range of 80 minimum and 400 maximum.
umts: UMTS/3G, which uses a latency range of 35 minimum and 200 maximum.
none: No latency.
num: Emulates the specified latency in milliseconds.
min:max: Emulates the specified latency range.
To set latency at emulator startup, use the
-netdelayemulator option with a supported latency value. Examples:emulator -netdelay gprs emulator -netdelay 40,100To make changes to network delay while the emulator is running, connect to the console and use the
network delaycommand:network delay gprs network delay 40 100network speed speedThe emulator lets you simulate various network transfer rates. You can set a transfer rate or range at emulator startup, or you can use the console to change the rate while the app is running in the emulator.The format of network speed is one of the following (numbers are kilobits/sec):
Network speed format:
gsm: GSM/CSD, which uses a speed of 14.4 up and 14.4 down.
hscsd: HSCSD, which uses a speed of 14.4 up and 43.2 down.
gprs: GPRS, which uses a speed of 40.0 up and 80.0 down.
edge: EDGE/EGPRS, which uses a speed of 118.4 up and 236.8 down.
umts: UMTS/3G, which uses a speed of 128.0 up and 1920 down.
hsdpa: HSDPA, which uses a speed of 348.0 up and 14,400.0 down.
lte: LTE, which uses a speed of 58,000 up and 173,000 down.
evdo: EVDO, which uses a speed of 75,000 up and 280,000 down.
full: Unlimited speed, but depends on the connection speed of your computer.
num: Sets an exact rate in kilobits/sec used for both upload and download.
up:down: Sets exact rates in kilobits/sec for upload and download separately.
To set the network speed at emulator startup, use the
-netspeedemulator option. Examples:emulator -netspeed gsm @Pixel_API_26 emulator -netspeed 14.4,80 @Pixel_API_26To make changes to network speed while the emulator is running, connect to the console and use the
network speedcommand:network speed 14.4 80network capture {start| stop} fileSends packets to a file. The following list describes the parameters and parameter values:Note: Starting with Android Emulator 36.5 and later, Wi-Fi connection traffic is handled by netsim by default. The network capture console command only captures legacy cellular/WAN traffic routed through the QEMU slirp stack. To capture Wi-Fi, Bluetooth, or advanced network packets in modern emulator versions, see Capture network traffic in the Advanced Emulator Networking guide.
start file: Starts capturing network packets. For security, file must be a bare filename (no path separators like
/, and no..). The packet capture file will be saved under your AVD's content directory in theconsole_out/folder (for example,~/.android/avd/avd_name.avd/console_out/file).stop file: Stops sending packets to the specified file.
Telephony emulation
The Android emulator includes its own GSM and CDMA emulated modems that let you simulate telephony functions in the emulator. For example, with GSM you can simulate inbound phone calls and establish and terminate data connections. With CDMA, you provide a subscription source and the preferred roaming list. The Android system handles simulated calls exactly as it would actual calls. The emulator doesn't support call audio.
gsm {call| accept| cancel| busy} phonenumberThe gsm parameters are the following:- call: Simulates an inbound phone call from phonenumber.
- accept: Accepts an inbound call from phonenumber and changes the call state to active. You can change a call state to active only when its current state is waiting or held.
- cancel: Terminates an inbound phone call from or outbound phone call to phonenumber.
- busy: Closes an outbound call to phonenumber and changes the call state to busy. You can change a call state to busy only when its current state is waiting.
gsm {data| voice} stateThe data state command changes the state of the GPRS data connection, and the voice state command changes the state of the GPRS voice connection, as follows:- unregistered: No network available.
- home: On local network, non-roaming.
- roaming: On roaming network.
- searching: Searching networks.
- denied: Emergency calls only.
- off: Same as unregistered.
- on: Same as home.
gsm hold: Changes the state of a call to hold. You can change a call state to hold only when its current state is active or waiting.
gsm list: Lists all inbound and outbound calls and their states.
gsm status: Reports the current GSM voice/data state. Values are those described for the voice and data commands.
gsm signal {rssi| ber}Changes the reported signal strength (rssi) and bit error rate (ber) on the next 15 seconds of update. The following list describes the parameters and their values:- rssi: range is 0 through 31 and 99 for unknown.
- ber: range is 0 through 7 and 99 for unknown.
gsm signal-profile num: Sets the signal strength profile. num is a number from 0 through 4.
cdma ssource sourceSets the current CDMA subscription source, where source is a network-based allowlist that contains the CDMA carrier's subscribers and their values, as follows:- nv: Reads subscription from non-volatile RAM.
- ruim: Reads subscription from Removable User Identity Module (RUIM).
cdma prl_version version: Dumps the current preferred roaming list (PRL) version. The version number is for the PRL database that contains information used during the system selection and acquisition process.
Manage sensors on the emulator
These commands relate to which sensors are available in the AVD. Besides using the sensor command, you can see and adjust the settings in the emulator in the Virtual sensors screen in the Accelerometer and Additional sensors tabs.
sensor status: Lists all sensors and their status.
sensor get sensor-name: Gets the settings for sensor-name. The following example gets the value for the acceleration sensor:
sensor get acceleration
acceleration = 2.23517e-07:9.77631:0.812348
The acceleration values separated by colons(:) refer to the x, y, and z coordinates for the virtual sensors.
sensor set sensor-name value-x:value-y:value-z: Sets the values for sensor-name. The following example sets the acceleration sensor to the x, y, and z values separated by colons.
sensor set acceleration 2.23517e-07:9.77631:0.812348
SMS emulation
sms send sender-phone-number textmessageGenerates an emulated incoming SMS. The following list describes the parameters and their values:- sender-phone-number: Contains an arbitrary numeric string.
- textmessage: The sms message.
The following example sends the message "hi there" to the 4085555555 phone number:
sms send 4085555555 hi there
The console forwards the SMS message to the Android framework, which passes it to an app on the emulator that handles SMS, such as the Messages app. If you pass 10 numbers, the app formats it as a phone number. Longer or shorter numeric strings display the way you sent them.
Fingerprint simulation
finger touch fingerprint-id: Simulates a finger touching the sensor.
finger remove: Simulates finger removal.
For instructions about how to use these commands, see the following section about fingerprint simulation and validation.
Screen Record
The screen record command enables capturing high-quality video files of the emulator's physical display directly from the host system. This is highly useful for continuous integration pipelines and automated bug reporting.
screenrecord {start| stop} fileStarts or stops the display recording process.- start file: Starts video recording. The output file must end with
the mandatory
.webmextension. The captured video is saved directly under your AVD's console output directory:~/.android/avd/avd_name.avd/console_out/file. - stop file: Stops the active display recording process.
- start file: Starts video recording. The output file must end with
the mandatory
Automation & Macro
The automation subsystem allows developers to record macro state transitions on the running virtual device and play them back to execute automated testing flows.
automation {record| stop-record| play| stop-play}Manages automated macro recordings.- record: Starts recording device state changes and inputs.
- stop-record: Stops the current macro recording session.
- play: Begins playing back a recorded macro sequence.
- stop-play: Halts the active macro playback sequence.
Physics (6DoF)
The physics commands manage logging ground truth spatial poses for six-degrees- of-freedom (6DoF) physical movement models, which are used to simulate advanced motion tracking.
physics {record-gt| stop}Manages physical pose model recordings.- record-gt: Begins recording ground-truth 6DoF movement data.
- stop: Halts the current ground-truth recording process.
Advanced Device Controls
This section aggregates highly specialized console command endpoints for advanced emulation configurations, including network proxies, multi-display configurations, rendering overrides, and hypervisor direct debugging.
multidisplay {add| del}Adds or deletes secondary virtual monitors to test multi-screen configurations. Note: Secondary monitors are not supported on fold profiles like the Pixel Fold or the Resizable emulator.proxy {set| clear}Configures network proxy forwarding programmatically from the console.- set host port: Configures target proxy settings.
- clear: Resets proxy configurations back to default. Note: Proxy set operations fail in headless execution environments.
virtualscene-image {wall| table} image_pathCustomizes the background walls or horizontal tables displayed on the virtual scene camera feed with a custom user image file.resize-display scaleDynamically adjusts screen resolution between preset scales. Note: Resolution adjustments are unsupported in headless configurations.nodraw {on| off}Disables physical GUI rendering on the host screen to reduce system memory and GPU load during high-volume background headless automation runs.grpc portConfigures advanced programmatic device control over custom gRPC port endpoints.qemu monitorProvides direct interactive terminal access to the underlying hypervisor's console. This command can only be entered over active Telnet console sessions.icebox track pidEnables automated system snapshots when the specified app process experiences an unhandled exception or crash.phonenumber numberSets the virtual local phone number of the target device.
gRPC programmatic interface
Modern emulator versions support a powerful gRPC programmatic interface alongside the legacy Telnet console. While the Telnet console is great for quick interactive sessions or simple scripting, the gRPC interface is designed for high-performance, secure, and robust automated control in continuous integration (CI) and headless environments. By offering direct service endpoints, gRPC eliminates the need to parse text streams, manage terminal session handshakes, or expose unencrypted localhost ports.
To help choose between the legacy Telnet console and the modern gRPC programmatic interface, review the following comparison of performance, security, and feature capabilities:
| Feature | Telnet Console | gRPC Interface |
|---|---|---|
| Best For | Manual debugging, interactive sessions. | Headless CI/CD, heavy automated test rigs. |
| Speed | Slower; text overhead, connection latency. | Optimized; multiplexed HTTP/2, fast proto. |
| Security | Unencrypted; local ports (5554–5585). | Can be TLS secured, works over networks. |
| Streams | Unsupported; request-response only. | Streams for logcat, guest audio capture. |
| Media | Writes output files to host/guest disk. | Direct over-the-wire binary buffers. |
| Guest OS | Restricted to fixed emulator commands. | Runs native guest bash shell commands. |
Launching and calling gRPC
To use the gRPC endpoints, launch the Android Emulator from the command line and
include the -grpc flag, specifying the target loopback port.
# Start the emulator with the gRPC service enabled on port 8556
emulator -grpc localhost:8556 @Pixel_Fold
Once the emulator is running with the gRPC service enabled, you can make
programmatic RPC calls. For command-line testing, use the grpcurl utility to
communicate with the emulator's services. All requests are formatted in JSON and
dispatched over plaintext.
# Query the status of the virtual device using grpcurl
grpcurl -plaintext -d '{}' localhost:8556 \
  android.emulation.control.EmulatorController/getStatus

# Simulate an incoming phone call
grpcurl -plaintext -d '{"operation": "InitCall", "number": "1234567890"}' localhost:8556 \
  android.emulation.control.EmulatorController/sendPhone

# Simulate typing text into the guest OS
grpcurl -plaintext -d '{"text": "Hello"}' localhost:8556 \
  android.emulation.control.EmulatorController/sendKey
Telnet console to gRPC service mapping
The following reference table maps legacy Telnet console commands to their corresponding gRPC services and methods, indicating how to automate common virtual device interactions programmatically:
| Category | Legacy Telnet Command | gRPC Service / Method |
|---|---|---|
| Status | ping |
EmulatorController/getStatus |
| Status | avd name |
incubating.AvdService/getAvdInfo |
| Status | kill |
EmulatorController/setVmState |
| Status | restart |
EmulatorController/setVmState |
| Power | power display |
EmulatorController/getBattery |
| Power | power capacity |
EmulatorController/setBattery |
| Geo Loc | geo fix |
EmulatorController/setGps |
| Sensors | sensor set |
incubating.SensorService/setSensor |
| Biometrics | finger touch |
EmulatorController/sendFingerprint |
| Posture | posture |
EmulatorController/setPosture |
| Posture | physics / fold |
EmulatorController/setPhysicalModel |
| SMS | sms send |
EmulatorController/sendSms |
| GSM Call | gsm call |
EmulatorController/sendPhone |
| GSM Call | phonenumber |
EmulatorController/setPhoneNumber |
| Redirect | redir add |
Waterfall/ForwardPort |
| Input | event send EV_KEY |
EmulatorController/sendKey |
| Input | event send EV_ABS |
EmulatorController/sendTouch |
| Media | screenrecord |
incubating.ScreenRecording |
| Rendering | nodraw |
EmulatorController/setDisplayMode |
| Snapshots | avd snapshot list |
SnapshotService/ListSnapshots |
| Snapshots | avd snapshot load/save |
SnapshotService/LoadSnapshot |
Programmatic commands unique to gRPC
The gRPC interface provides several cutting-edge capabilities that are physically impossible to execute over legacy Telnet console connections. These include direct logcat streaming, bi-directional audio capture or injection, host GUI modifications, and direct shell access.
| gRPC Service / Method | Parameter | Capability |
|---|---|---|
streamLogcat |
{"maxLines": 100} |
Streams guest system logcat outputs |
streamAudio |
{} |
Streams speaker audio over the wire |
injectAudio |
{"audio": "..."} |
Injects microphone audio streams |
UiController |
{"theme": "DARK"} |
Modifies host window window themes |
Waterfall/Exec |
{"cmd": "ls"} |
Runs native guest OS shell commands |
Fingerprint simulation and validation
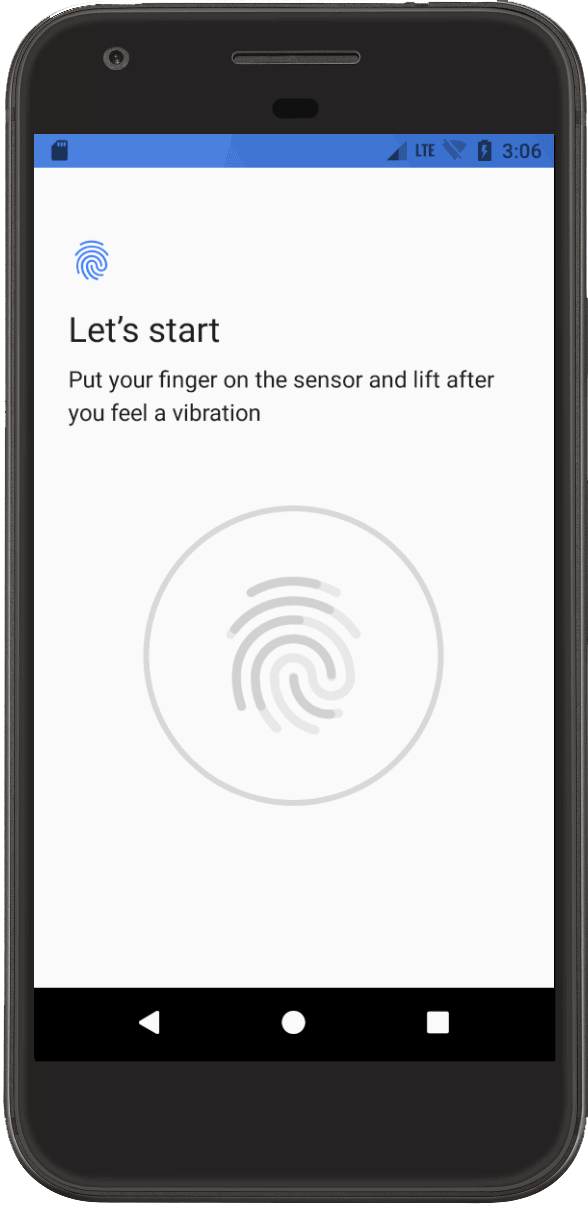
Use the finger command to simulate and validate fingerprint authentication for your app. You need SDK Tools 24.3 or higher and Android 6.0 (API level 23) or higher.
To simulate and validate fingerprint authentication, follow these steps:
If you don't yet have a fingerprint ID, enroll a new fingerprint in the emulator by selecting Settings > Security > Fingerprint and following the enrollment instructions.
Set up your app to accept fingerprint authentication. After you perform this setup, your device displays the fingerprint authentication screen.
While your app displays the fingerprint authentication screen, go to the console and enter the
finger touchcommand and the fingerprint ID you created. This simulates a finger touch.Then, enter the
finger removecommand to simulate finger removal. Your app should respond as if a user touched and then removed their finger from the fingerprint sensor.