
Jetpack WebGPU를 사용하려면 프로젝트가 다음 최소 요구사항을 충족해야 합니다.
- 최소 API 수준: Android API 24 (Nougat) 이상이 필요합니다.
- 하드웨어: Vulkan 1.1 이상을 지원하는 기기가 백엔드에 적합합니다.
- 호환성 모드 및 OpenGL ES 지원: 표준화된
featureLevel옵션을compatibility로 설정하고GPUAdapter를 요청하면 호환성 모드로 WebGPU를 사용할 수 있습니다.
// Example of requesting an adapter with "compatibility" mode enabled:
val adapter = instance.requestAdapter(
  GPURequestAdapterOptions(featureLevel = FeatureLevel.Compatibility))
설치 및 설정
기본 요건
Android 스튜디오: 공식 웹사이트에서 최신 버전의 Android 스튜디오를 다운로드하고 Android 스튜디오 설치 가이드에 제공된 안내를 따릅니다.
새 프로젝트 만들기
Android 스튜디오가 설치되면 다음 단계에 따라 WebGPU 프로젝트를 설정합니다.
- 새 프로젝트 시작: Android 스튜디오를 열고 새 프로젝트를 클릭합니다.
템플릿 선택: Android 스튜디오에서 Empty Activity 템플릿을 선택하고 Next를 클릭합니다.
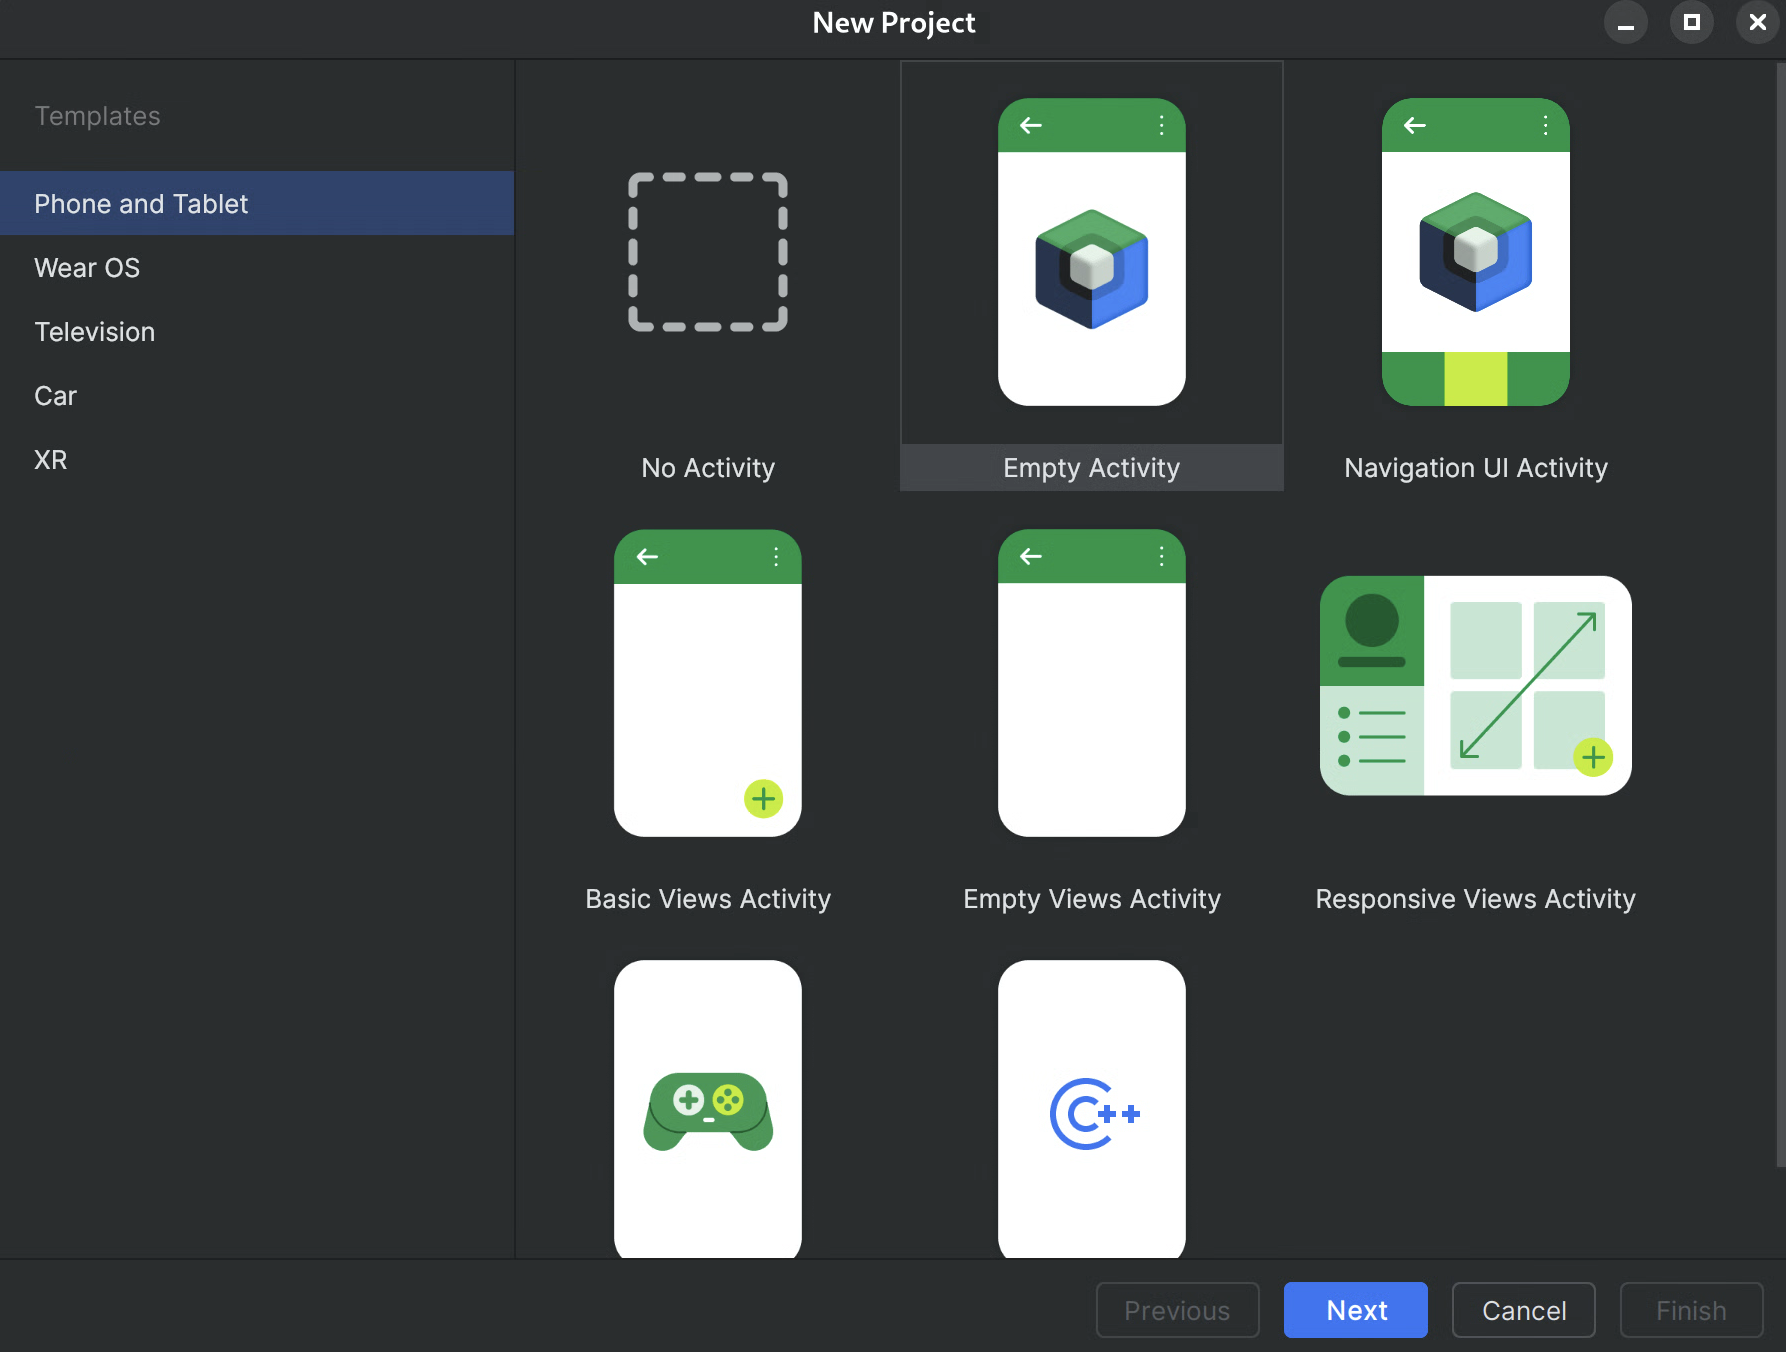
그림 1. Android 스튜디오에서 새 프로젝트 만들기 프로젝트 구성:
- 이름: 프로젝트 이름을 지정합니다 (예: 'JetpackWebGPUSample')을 실행합니다.
- 패키지 이름: 패키지 이름이 선택한 네임스페이스 (예: com.example.webgpuapp)와 일치하는지 확인합니다.
- 언어: Kotlin을 선택합니다.
- 최소 SDK: 이 라이브러리에 권장되는 API 24: Android 7.0 (Nougat) 이상을 선택합니다.
- 빌드 구성 언어: 최신 종속 항목 관리에는 Kotlin DSL (build.gradle.kts)을 사용하는 것이 좋습니다.
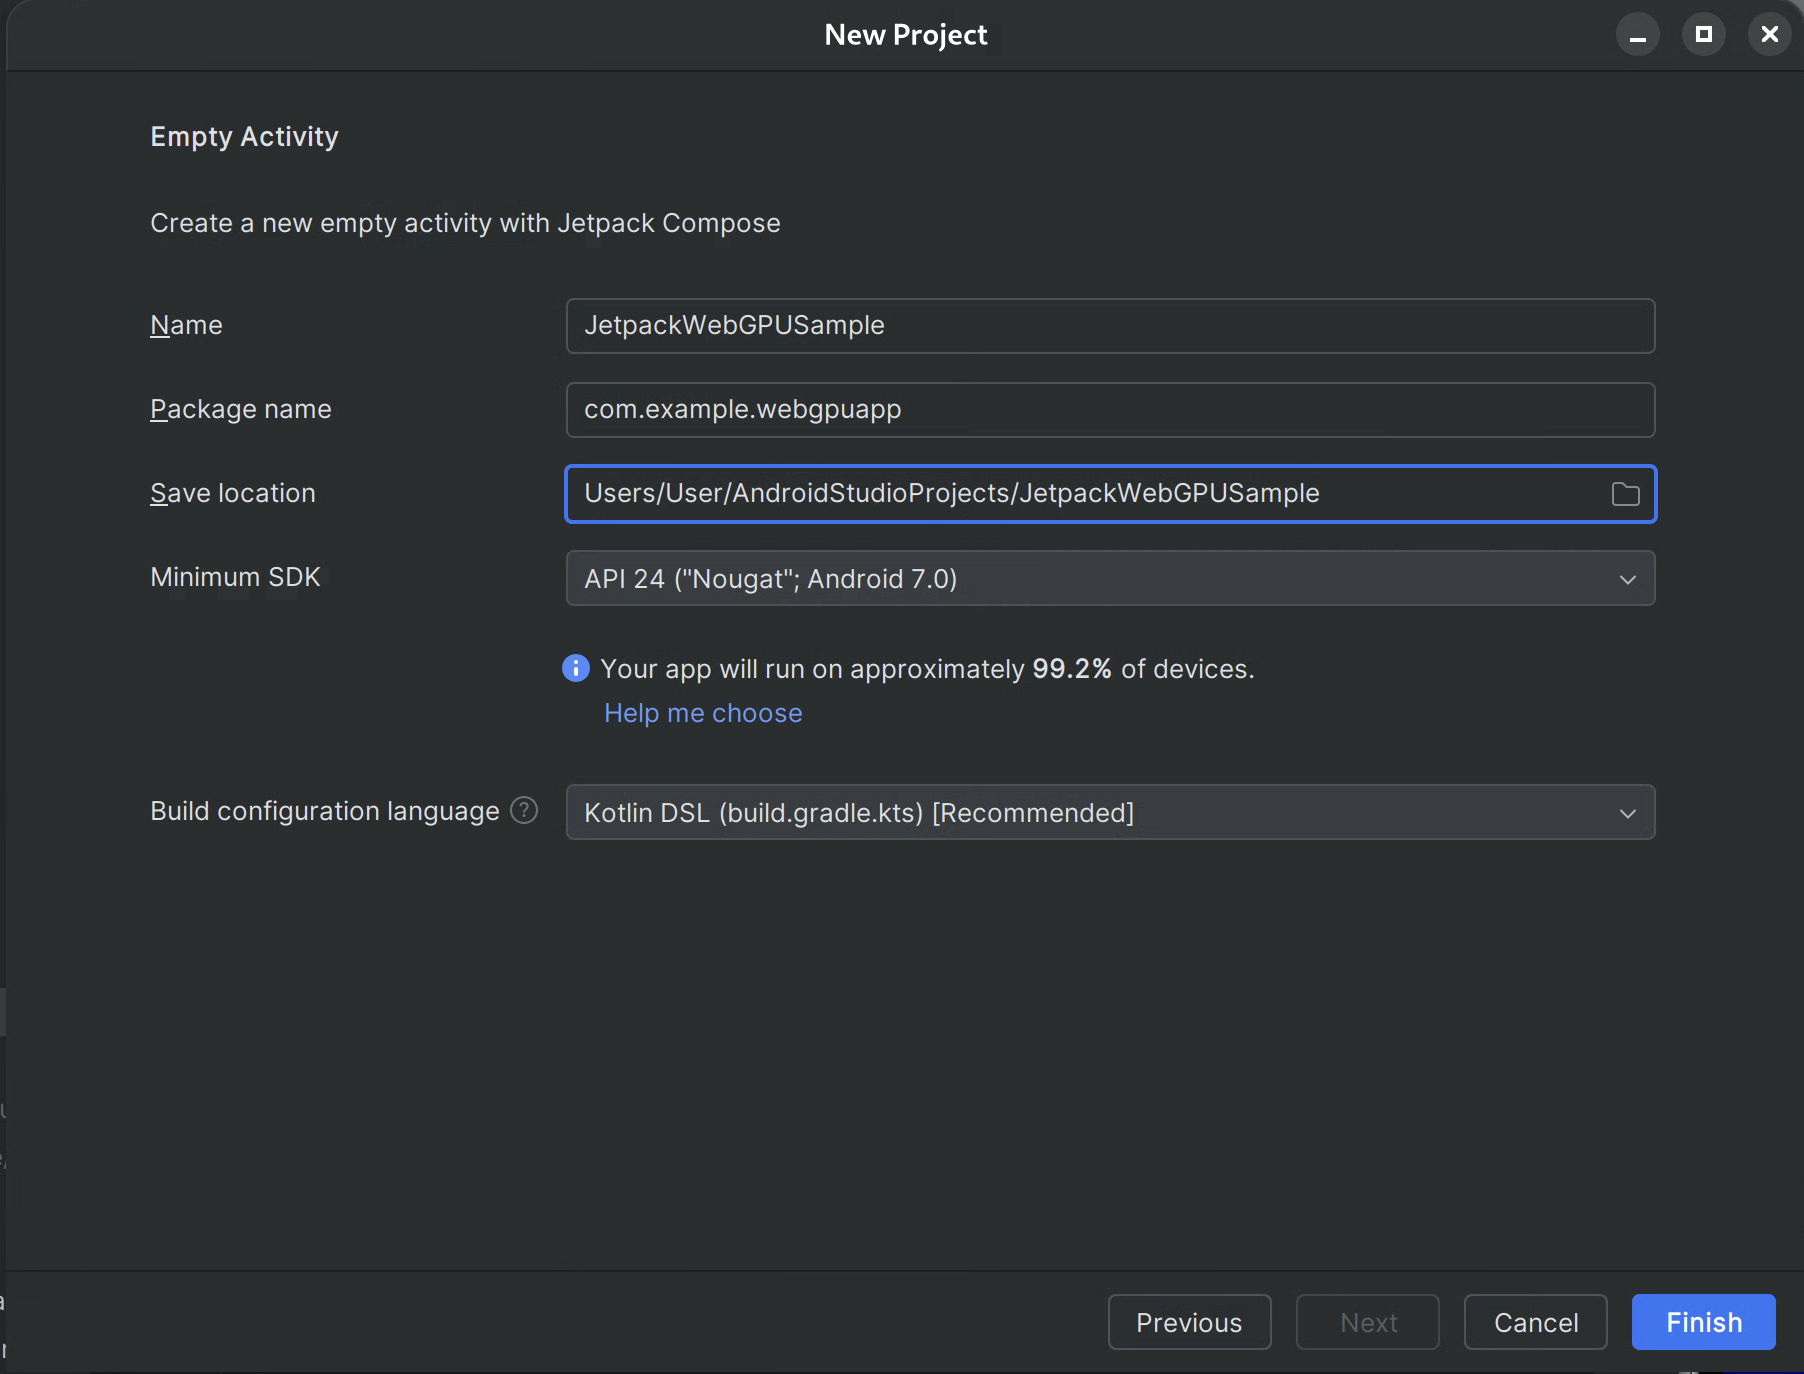
그림 2.Empty Activity로 시작하기 완료: 완료를 클릭하고 Android 스튜디오가 프로젝트 파일을 동기화할 때까지 기다립니다.
WebGPU Jetpack 라이브러리 추가
- 앱에서 Jetpack 라이브러리 사용에 설명된 대로
google저장소를settings.gradle에 추가합니다. - 앱 또는 모듈의 build.gradle 파일에 필요한 아티팩트의 종속성을 추가합니다.
- 참고: 최신 라이브러리 버전은 webgpu | Jetpack | Android 개발자를 참고하세요.
androidx.webgpu 라이브러리에는 WebGPU NDK .so 라이브러리 파일과 관리 코드 인터페이스가 포함되어 있습니다.
build.gradle을 업데이트하고 Android 스튜디오의 'Sync Project' 버튼을 사용하여 프로젝트를 Gradle 파일과 동기화하면 라이브러리 버전을 업데이트할 수 있습니다.
상위 수준 아키텍처
Android 애플리케이션 내의 WebGPU 렌더링은 UI의 응답성을 유지하기 위해 전용 렌더링 스레드에서 실행됩니다.
- UI 레이어: UI는 Jetpack Compose로 빌드됩니다. WebGPU 그리기 표면은
AndroidExternalSurface를 사용하여 Compose 계층 구조에 통합됩니다. - 렌더링 로직: 특수 클래스 (예: WebGpuRenderer)는 모든 WebGPU 객체를 관리하고 렌더링 루프를 조정합니다.
- 셰이더 레이어: res 또는 문자열 상수에 저장된 WGSL 셰이더 코드입니다.

단계별: 샘플 앱
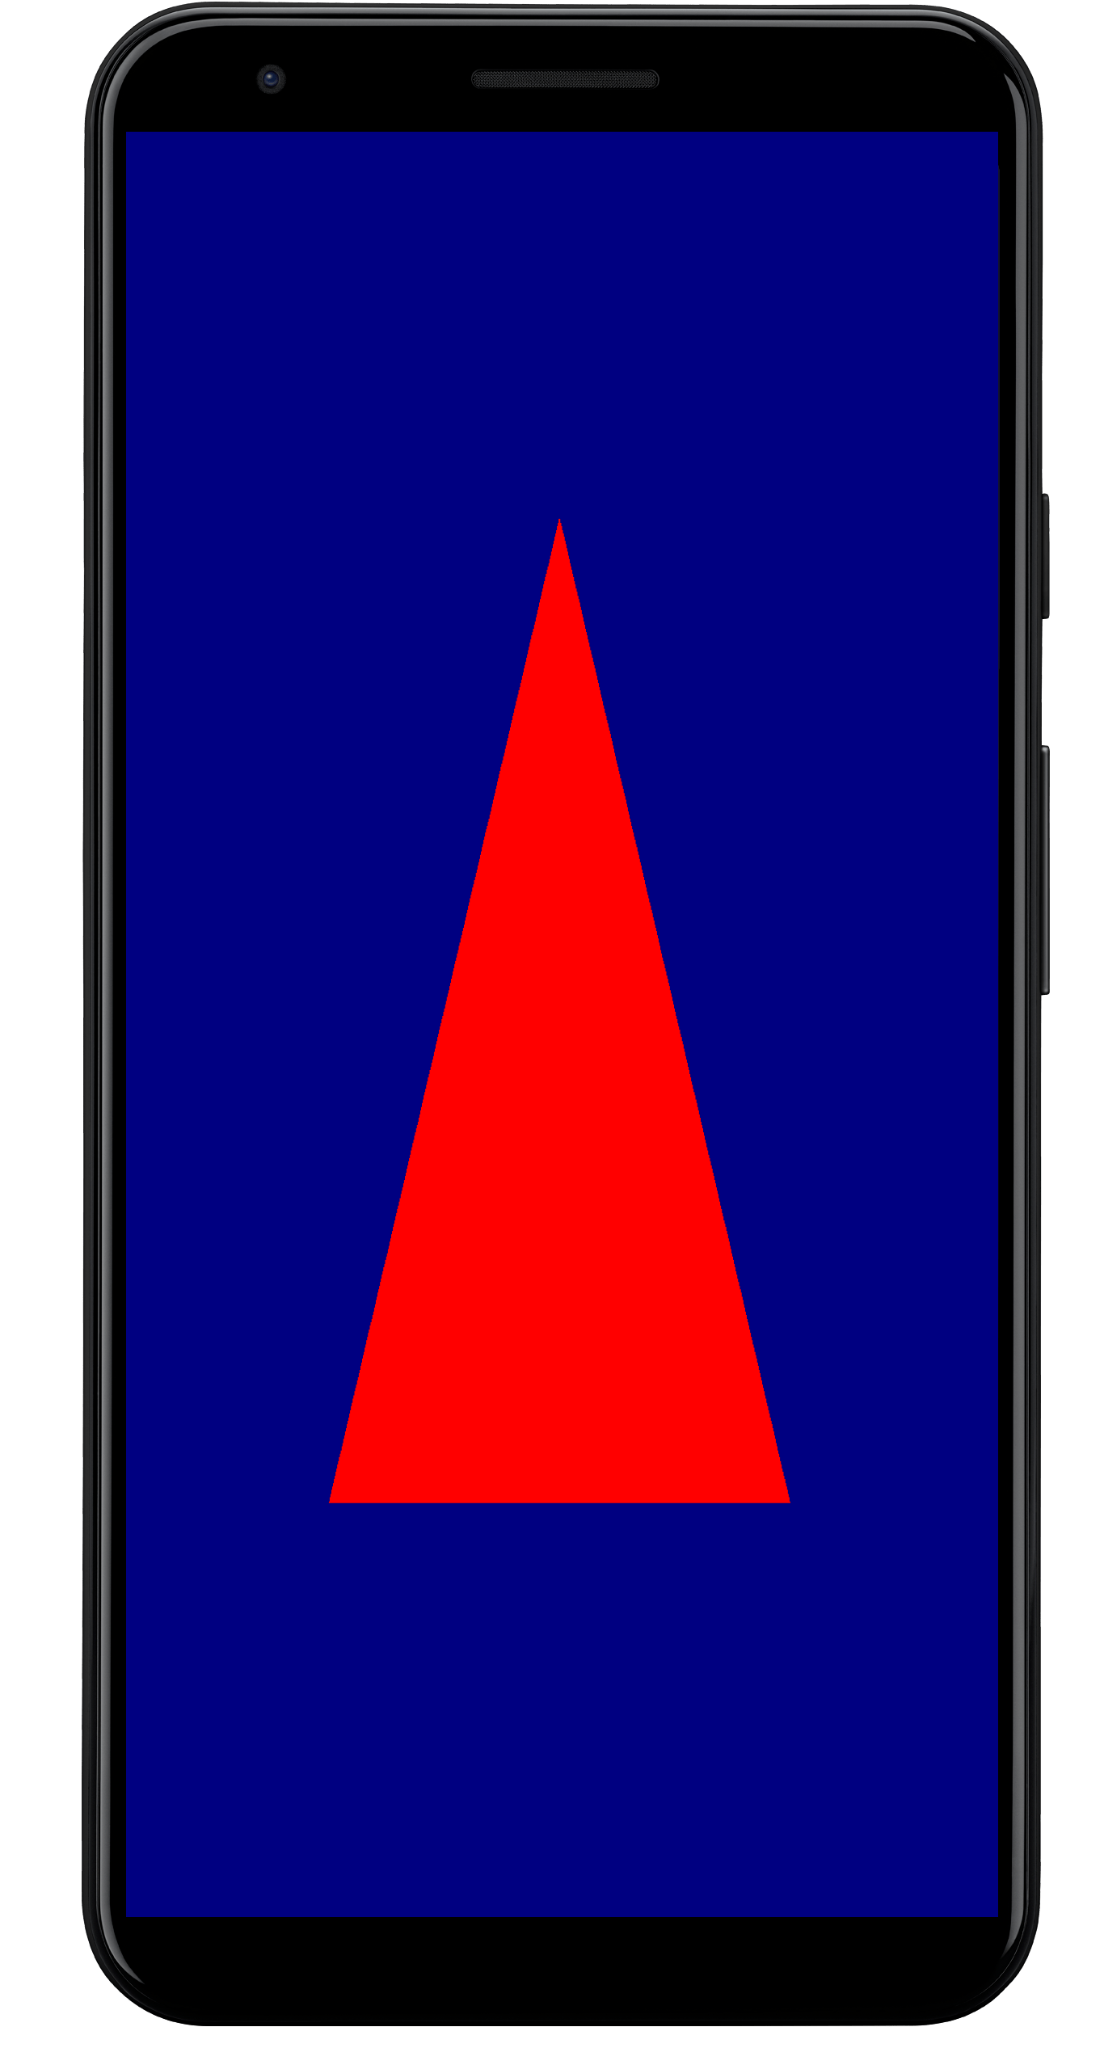
이 섹션에서는 화면에 색상이 지정된 삼각형을 렌더링하는 데 필요한 필수 단계를 안내하여 핵심 WebGPU 워크플로를 보여줍니다.
기본 활동
class MainActivity : ComponentActivity() {
    override fun onCreate(savedInstanceState: Bundle?) {
        super.onCreate(savedInstanceState)
        setContent {
            WebGpuSurface()
        }
    }
}
외부 표면 컴포저블
WebgpuSurface.kt라는 새 파일을 만듭니다. 이 컴포저블은 AndroidExternalSurface를 래핑하여 Compose와 렌더러 간의 브리지를 제공합니다.
@Composable
fun WebGpuSurface(modifier: Modifier = Modifier) {
    // Create and remember a WebGpuRenderer instance.
    val renderer = remember { WebGpuRenderer() }
    AndroidExternalSurface(
        modifier = modifier.fillMaxSize(),
    ) {
        // This block is called when the surface is created or resized.
        onSurface { surface, width, height ->
            // Run the rendering logic on a background thread.
            withContext(Dispatchers.Default) {
                try {
                    // Initialize the renderer with the surface
                    renderer.init(surface, width, height)
                    // Render a frame.
                    renderer.render()
                } finally {
                    // Clean up resources when the surface is destroyed.
                    renderer.cleanup()
                }
            }
        }
    }
}
렌더러 설정
WebGpuRenderer.kt에서 WebGpuRenderer 클래스를 만듭니다. 이 클래스는 GPU와의 통신을 위한 무거운 작업을 처리합니다.
먼저 클래스 구조와 변수를 정의합니다.
class WebGpuRenderer() {
    private lateinit var webGpu: WebGpu
    private lateinit var renderPipeline: GPURenderPipeline
}
초기화: 다음으로 init 함수를 구현하여 WebGPU 인스턴스를 만들고 서피스를 구성합니다. 이 함수는 앞에서 만든 외부 표면 컴포저블 내의 AndroidExternalSurface 범위에서 호출됩니다.
참고: init 함수는 createWebGpu (설정을 간소화하는 도우미 메서드이며 androidx.webgpu.helper의 일부)를 사용하여 설정을 간소화합니다. 이 유틸리티는 WebGPU 인스턴스를 만들고, 어댑터를 선택하고, 기기를 요청합니다.
// Inside WebGpuRenderer class
suspend fun init(surface: Surface, width: Int, height: Int) {
    // 1. Create Instance & Device
    webGpu = createWebGpu(surface)
    val device = webGpu.device

    // 2. Setup Pipeline (compile shaders)
    initPipeline(device)

    // 3. Configure the Surface
    webGpu.webgpuSurface.configure(
      GPUSurfaceConfiguration(
        device,
        width,
        height,
        TextureFormat.RGBA8Unorm,
      )
    )
  }
androidx.webgpu 라이브러리에는 빌드 시스템에서 자동으로 연결하고 관리하는 JNI 및 .so 파일이 포함됩니다. 도우미 메서드 createWebGpu는 번들로 제공된 libwebgpu_c_bundled.so 로드를 처리합니다.
파이프라인 설정
이제 기기가 있으므로 GPU에 삼각형을 그리는 방법을 알려야 합니다. 이를 위해 셰이더 코드 (WGSL로 작성)가 포함된 '파이프라인'을 만듭니다.
이 비공개 도우미 함수를 WebGpuRenderer 클래스에 추가하여 셰이더를 컴파일하고 렌더링 파이프라인을 만듭니다.
// Inside WebGpuRenderer class
private fun initPipeline(device: GPUDevice) {
    val shaderCode = """
        @vertex fn vs_main(@builtin(vertex_index) vertexIndex : u32) ->
        @builtin(position) vec4f {
            const pos = array(vec2f(0.0, 0.5), vec2f(-0.5, -0.5), vec2f(0.5, -0.5));
            return vec4f(pos[vertexIndex], 0, 1);
        }
        @fragment fn fs_main() -> @location(0) vec4f {
            return vec4f(1, 0, 0, 1);
        }
    """

    // Create Shader Module
    val shaderModule = device.createShaderModule(
      GPUShaderModuleDescriptor(shaderSourceWGSL = GPUShaderSourceWGSL(shaderCode))
    )

    // Create Render Pipeline
    renderPipeline = device.createRenderPipeline(
      GPURenderPipelineDescriptor(
        vertex = GPUVertexState(
          shaderModule,
        ), fragment = GPUFragmentState(
          shaderModule, targets = arrayOf(GPUColorTargetState(TextureFormat.RGBA8Unorm))
        ), primitive = GPUPrimitiveState(PrimitiveTopology.TriangleList)
      )
    )
  }
프레임 그리기
파이프라인이 준비되었으므로 이제 렌더링 함수를 구현할 수 있습니다. 이 함수는 화면에서 사용 가능한 다음 텍스처를 획득하고, 그리기 명령어를 기록하고, GPU에 제출합니다.
WebGpuRenderer 클래스에 다음 메서드를 추가합니다.
// Inside WebGpuRenderer class
fun render() {
    if (!::webGpu.isInitialized) {
      return
    }

    val gpu = webGpu

    // 1. Get the next available texture from the screen
    val surfaceTexture = gpu.webgpuSurface.getCurrentTexture()

    // 2. Create a command encoder
    val commandEncoder = gpu.device.createCommandEncoder()

    // 3. Begin a render pass (clearing the screen to blue)
    val renderPass = commandEncoder.beginRenderPass(
      GPURenderPassDescriptor(
        colorAttachments = arrayOf(
          GPURenderPassColorAttachment(
            GPUColor(0.0, 0.0, 0.5, 1.0),
            surfaceTexture.texture.createView(),
            loadOp = LoadOp.Clear,
            storeOp = StoreOp.Store,
          )
        )
      )
    )

    // 4. Draw
    renderPass.setPipeline(renderPipeline)
    renderPass.draw(3) // Draw 3 vertices
    renderPass.end()

    // 5. Submit and Present
    gpu.device.queue.submit(arrayOf(commandEncoder.finish()))
    gpu.webgpuSurface.present()
  }
리소스 정리
서페이스가 소멸될 때 WebGpuSurface에 의해 호출되는 정리 함수를 구현합니다.
// Inside WebGpuRenderer class
fun cleanup() {
    if (::webGpu.isInitialized) {
      webGpu.close()
    }
  }
렌더링된 출력
샘플 앱 구조
샘플 앱에서 사용된 구조와 같이 렌더링 구현을 UI 로직에서 분리하는 것이 좋습니다.
app/src/main/
├── java/com/example/app/
│   ├── MainActivity.kt       // Entry point
│   ├── WebGpuSurface.kt      // Composable Surface
│   └── WebGpuRenderer.kt     // Pure WebGPU logic
- MainActivity.kt: 애플리케이션 진입점입니다. 콘텐츠를
WebGpuSurface컴포저블로 설정합니다. - WebGpuSurface.kt:
[AndroidExternalSurface](/reference/kotlin/androidx/compose/foundation/package-summary#AndroidExternalSurface(androidx.compose.ui.Modifier,kotlin.Boolean,androidx.compose.ui.unit.IntSize,androidx.compose.foundation.AndroidExternalSurfaceZOrder,kotlin.Boolean,kotlin.Function1))를 사용하여 UI 구성요소를 정의합니다.Surface수명 주기 범위를 관리하여, 서페이스가 준비되면 렌더러를 초기화하고 소멸되면 정리합니다. - WebGpuRenderer.kt: 모든 WebGPU 관련 로직 (기기 생성, 파이프라인 설정)을 캡슐화합니다. UI에서 분리되어 있으며 그리기하는 데 필요한
[Surface](/reference/android/view/Surface.html)와 측정기준만 수신합니다.
수명 주기 및 리소스 관리
수명 주기 관리는 Jetpack Compose 내에서 [AndroidExternalSurface](/reference/kotlin/androidx/compose/foundation/package-summary#AndroidExternalSurface(androidx.compose.ui.Modifier,kotlin.Boolean,androidx.compose.ui.unit.IntSize,androidx.compose.foundation.AndroidExternalSurfaceZOrder,kotlin.Boolean,kotlin.Function1))가 제공하는 Kotlin 코루틴 범위에 의해 처리됩니다.
- 표면 생성:
onSurface람다 블록 시작 시Device및Surface구성을 초기화합니다. 이 코드는Surface를 사용할 수 있게 되면 즉시 실행됩니다. - 표면 소멸: 사용자가 이동하거나 시스템에서
Surface가 소멸되면 람다 블록이 취소됩니다.finally블록이 실행되어renderer.cleanup()를 호출하여 메모리 누수를 방지합니다. - 크기 조절: 서피스 크기가 변경되면
AndroidExternalSurface가 구성에 따라 블록을 다시 시작하거나 업데이트를 직접 처리하므로 렌더러는 항상 유효한 버퍼에 씁니다.
디버깅 및 유효성 검사
WebGPU에는 입력 구조를 검증하고 런타임 오류를 포착하도록 설계된 메커니즘이 있습니다.
- Logcat: 검증 오류가 Android Logcat에 출력됩니다.
- 오류 범위:
[device.pushErrorScope()](/reference/kotlin/androidx/webgpu/GPUDevice#pushErrorScope(kotlin.Int))및 `device.popErrorScope()` 블록 내에 GPU 명령어를 캡슐화하여 특정 오류를 포착할 수 있습니다.
device.pushErrorScope(ErrorFilter.Validation)
// ... potentially incorrect code ...
device.popErrorScope { status, type, message ->
    if (status == PopErrorScopeStatus.Success && type != ErrorType.NoError) {
        Log.e("WebGPU", "Validation Error: $message")
    }
}
성능 팁
WebGPU에서 프로그래밍할 때는 성능 병목 현상을 방지하기 위해 다음 사항을 고려하세요.
- 프레임별 객체 생성 방지: 애플리케이션 설정 중에 파이프라인(
GPURenderPipeline)을 인스턴스화하고 그룹 레이아웃과 셰이더 모듈을 한 번 바인딩하여 재사용을 극대화합니다. - 버퍼 사용량 최적화: 각 프레임마다 새 버퍼를 만드는 대신
GPUQueue.writeBuffer를 통해 기존GPUBuffers의 콘텐츠를 업데이트합니다. - 상태 변경 최소화: 동일한 파이프라인을 공유하는 그리기 호출을 그룹화하고 그룹을 바인딩하여 드라이버 오버헤드를 최소화하고 렌더링 효율성을 개선합니다.