捲動

捲動修飾符

在元素的內容邊界超過尺寸上限時,使用 verticalScrollhorizontalScroll 修飾符可以讓使用者以最簡單的方式捲動元素。只要使用 verticalScrollhorizontalScroll 修飾符,就不必平移或偏移內容。

@Composable
private fun ScrollBoxes() {
    Column(
        modifier = Modifier
            .background(Color.LightGray)
            .size(100.dp)
            .verticalScroll(rememberScrollState())
    ) {
        repeat(10) {
            Text("Item $it", modifier = Modifier.padding(2.dp))
        }
    }
}
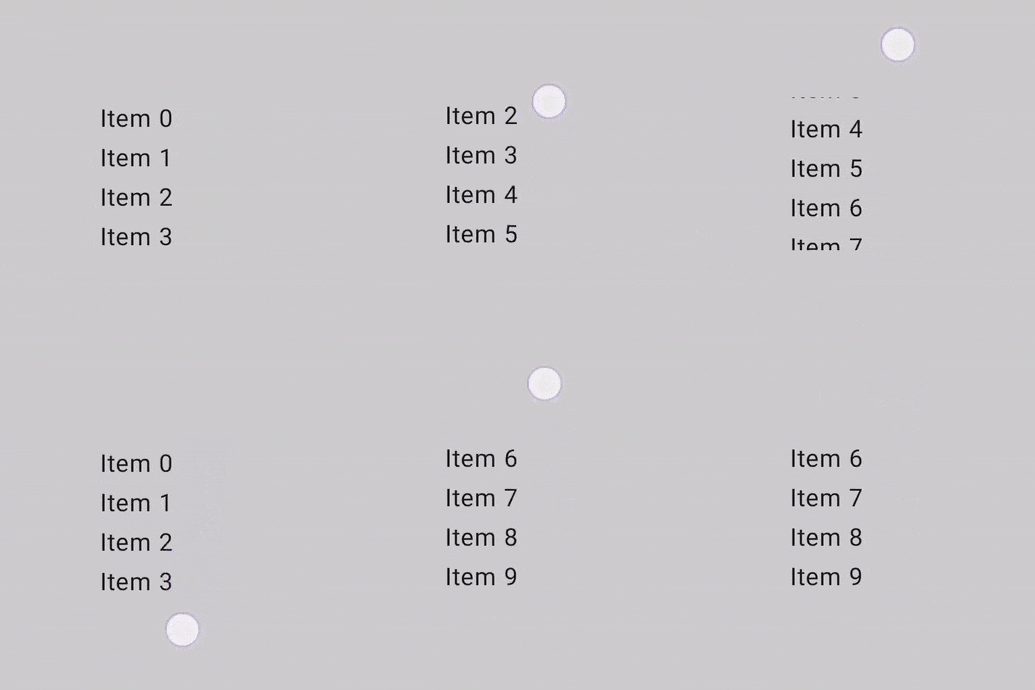
回應捲動手勢的簡易垂直清單

ScrollState 可讓您變更捲動位置或取得其目前狀態。如要使用預設參數建立,請使用 rememberScrollState()

@Composable
private fun ScrollBoxesSmooth() {
    // Smoothly scroll 100px on first composition
    val state = rememberScrollState()
    LaunchedEffect(Unit) { state.animateScrollTo(100) }

    Column(
        modifier = Modifier
            .background(Color.LightGray)
            .size(100.dp)
            .padding(horizontal = 8.dp)
            .verticalScroll(state)
    ) {
        repeat(10) {
            Text("Item $it", modifier = Modifier.padding(2.dp))
        }
    }
}

scrollable 修飾符

scrollable 修飾符與捲動修飾符不同,scrollable 會偵測捲動手勢並擷取差異,但不會自動偏移內容。而是透過 ScrollableState 委派給使用者,這是讓修飾符正常運作的必要步驟。

建構 ScrollableState 時,您必須提供 consumeScrollDelta 函式,以便在每個捲動步驟 (透過手勢輸入、流暢捲動或快速滑過) 時叫用該函式,並以像素為單位顯示差異。此函式必須傳回耗用的捲動距離,確保在具有 scrollable 修飾符的巢狀元素的情況下,事件正確傳播。

下列程式碼片段會偵測手勢並顯示位移數值,但不會使任何元素位移:

@Composable
private fun ScrollableSample() {
    // actual composable state
    var offset by remember { mutableStateOf(0f) }
    Box(
        Modifier
            .size(150.dp)
            .scrollable(
                orientation = Orientation.Vertical,
                // Scrollable state: describes how to consume
                // scrolling delta and update offset
                state = rememberScrollableState { delta ->
                    offset += delta
                    delta
                }
            )
            .background(Color.LightGray),
        contentAlignment = Alignment.Center
    ) {
        Text(offset.toString())
    }
}
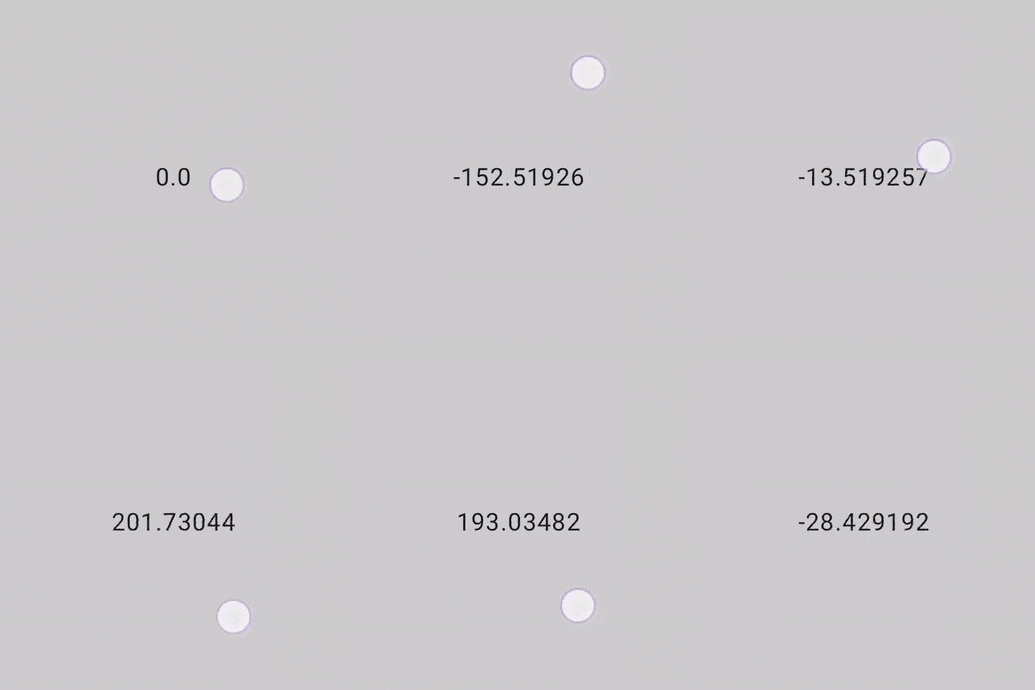
UI 元素會偵測按下手指並顯示手指位置的數值

巢狀捲動

建立巢狀捲動的系統,可對單一捲動手勢做出反應,並傳遞其捲動差異 (變更),藉此讓彼此之間的多個捲動元件搭配運作。

巢狀捲動系統可讓您在可捲動和階層連結的元件之間進行協調 (通常是共用同一個父項),這個系統會連結捲動容器,並允許與移動和共用的捲動差異互動。

Compose 提供多種處理可組合項之間巢狀捲動的方式。巢狀捲動的典型範例是位於另一個清單內的清單,而較複雜的情況則是收合工具列

自動巢狀捲動

簡易的巢狀捲動功能無需使用者執行任何動作。觸發捲動動作的手勢會自動從子項套用到父項,因此,當子項無法再捲動畫面時,就會由父項元素處理該手勢。

自動巢狀捲動功能是由部分 Compose 元件和修飾符直接支援,包括:verticalScrollhorizontalScrollscrollableLazy API 和 TextField。這表示當使用者捲動巢狀元件的內部子項時,先前的修飾符會將捲動差異傳播至支援巢狀捲動的父項。

以下範例顯示套用 verticalScroll 修飾符的元素,位於同樣套用 verticalScroll 修飾符的容器中。

@Composable
private fun AutomaticNestedScroll() {
    val gradient = Brush.verticalGradient(0f to Color.Gray, 1000f to Color.White)
    Box(
        modifier = Modifier
            .background(Color.LightGray)
            .verticalScroll(rememberScrollState())
            .padding(32.dp)
    ) {
        Column {
            repeat(6) {
                Box(
                    modifier = Modifier
                        .height(128.dp)
                        .verticalScroll(rememberScrollState())
                ) {
                    Text(
                        "Scroll here",
                        modifier = Modifier
                            .border(12.dp, Color.DarkGray)
                            .background(brush = gradient)
                            .padding(24.dp)
                            .height(150.dp)
                    )
                }
            }
        }
    }
}

兩個巢狀垂直捲動 UI 元素,回應內部元素內部和外部的手勢

使用 nestedScroll 修飾符

如果您需要在多個元素之間建立進階協調捲動功能,nestedScroll 修飾符可以定義巢狀捲動階層,讓您享有更多彈性。如上一節所述,部分元件已內建巢狀捲動支援。不過,對於無法自動捲動的可組合項 (例如 BoxColumn),這類元件的捲動差異不會傳播至巢狀捲動系統中,因此差異也不會送達 NestedScrollConnection 或父項元件。如要解決這個問題,您可以使用 nestedScroll 將這類支援權限授予其他元件,包括自訂元件。

巢狀捲動週期

巢狀捲動週期是捲動差異流,透過巢狀捲動系統中的所有元件 (或節點) 向上或向下分派,例如使用可捲動的元件和修飾符 (即 nestedScroll),

巢狀捲動週期的各個階段

當可捲動的元件偵測到觸發事件 (例如手勢) 時,在觸發實際捲動動作之前,系統會將產生的差異傳送至巢狀捲動系統,並經歷三個階段:片頭捲動、節點使用和捲動後。

巢狀捲動週期的各個階段

在第一個片頭捲動階段,接收觸發事件差異的元件會透過階層樹狀結構,將這些事件向上分派至最頂層的父項。接著,差異化事件會向下顯示,這表示差異將從最根層級的父項向下傳播到啟動巢狀捲動週期的子項。

片頭捲動階段 - 向上調度

這讓巢狀捲動父項 (使用 nestedScroll 或可捲動修飾符的可組合項) 有機會在節點本身可使用差異之前,使用差異遷移功能。

片頭捲動階段 - 向下滾動

在節點使用階段,節點本身將使用其父項未使用的任何差異。這時就會完成捲動動作並顯示在畫面上。

節點使用階段

在這個階段,子項可以選擇使用全部或部分剩餘的捲動畫面。所有剩餘的內容將被退回,以完成捲動後階段。

最後,在捲動後階段中,節點本身未使用的任何內容都會再次傳到其祖係以便使用。

捲動後階段 - 向上調度

捲動後捲動階段的運作方式與片頭捲動階段類似,其中任何父項都可以選擇使用。

捲動後階段 - 放開

與捲動類似,拖曳手勢完成時,使用者的意圖可能會轉譯為可捲動 (使用動畫捲動) 可捲動容器時的速率。快速滑過也是巢狀捲動週期的一部分,而拖曳事件產生的速度也經過類似的階段:預先滑過、節點消耗和快速滑過。請注意,快速滑過動畫僅與觸控手勢相關聯,不會透過其他事件 (例如 a11y 或硬體捲動) 觸發。

參與巢狀捲動週期

參與週期代表攔截、使用及回報階層上的差異用量。Compose 提供一組工具會影響巢狀捲動系統的運作方式,以及如何直接與該系統互動,例如需要先使用捲動差異執行操作,之後才會開始捲動可捲動的元件。

如果巢狀捲動週期是對一連串的節點執行動作,則 nestedScroll 修飾符是一種攔截及插入這些變更的方式,可以對鏈結中傳播的資料 (捲動差異) 產生影響。這個修飾符可放在階層中的任何位置,並與樹狀結構的巢狀捲動修飾符執行個體通訊,即可透過此管道共用資訊。此修飾符的構成元素為 NestedScrollConnectionNestedScrollDispatcher

NestedScrollConnection 可讓您回應巢狀捲動週期的各個階段,並影響巢狀捲動系統。由四種回呼方法組成,每個方法都代表其中一種使用階段:前/捲動後和前後對照:

val nestedScrollConnection = object : NestedScrollConnection {
    override fun onPreScroll(available: Offset, source: NestedScrollSource): Offset {
        println("Received onPreScroll callback.")
        return Offset.Zero
    }

    override fun onPostScroll(
        consumed: Offset,
        available: Offset,
        source: NestedScrollSource
    ): Offset {
        println("Received onPostScroll callback.")
        return Offset.Zero
    }
}

每個回呼也會提供要傳播的 Delta 資訊:該特定階段的 available 差異,以及先前階段使用的 consumed 差異值。如果您想停止在階層向上傳播差異,可以使用巢狀捲動連線執行以下動作:

val disabledNestedScrollConnection = remember {
    object : NestedScrollConnection {
        override fun onPostScroll(
            consumed: Offset,
            available: Offset,
            source: NestedScrollSource
        ): Offset {
            return if (source == NestedScrollSource.SideEffect) {
                available
            } else {
                Offset.Zero
            }
        }
    }
}

所有回呼都會提供 NestedScrollSource 類型的相關資訊。

NestedScrollDispatcher 會初始化巢狀捲動週期。使用調度器並呼叫其方法會觸發循環。可捲動的容器內建調度器,可在將手勢操作期間擷取到系統之間的差異。因此,自訂巢狀捲動在大多數情況下,會用到 NestedScrollConnection 而非調度工具,以回應現有的差異,而非傳送新的差異。如要進一步瞭解使用方式,請參閱 NestedScrollDispatcherSample

巢狀捲動互通性

當您嘗試在可捲動的可組合項中為可捲動的 View 元素建立巢狀結構,或以其他方式建立巢狀結構時,可能會發生問題。最值得注意的是,當捲動子項並達到開始或結束邊界,並預期父項會捲動畫面時,就會發生最值得注意的項目。不過,這個預期行為可能沒有發生,或是無法正常運作。

這可能是由於捲動式可組合元件內建的預期情況所導致的。捲動式可組合元件具有「預設建立巢狀捲動」的規則,因此任何可以捲動的容器都必須加入巢狀捲動鏈結,包括透過 NestedScrollConnection 方式作為父項,以及透過 NestedScrollDispatcher 方式作為子項。當子項抵達邊界時,就會對父項驅動巢狀捲動。舉例來說,這項規則可以讓您同時正常使用 Compose Pager 和 Compose LazyRow。不過,如果使用 ViewPager2RecyclerView 達成互通性捲動,則由於這些元件並未實作 NestedScrollingParent3,因此子項無法將捲動延續到父項。

如果想啟用可在捲動式 View 與捲動式可組合元件之間同時使用的巢狀捲動互通性 API,讓兩個方向皆使用巢狀結構,那麼在以下情況中,您可以使用巢狀捲動互通性 API 緩解這類問題。

內含子項 ComposeView 的合作執行父項 View

合作執行父項 View 已實作 NestedScrollingParent3,因此能夠從合作的巢狀子項可組合元件接收捲動差異。在這種情況下,ComposeView 會做為子項,需要 (間接) 實作 NestedScrollingChild3。合作作業父項的範例為 androidx.coordinatorlayout.widget.CoordinatorLayout

如需在捲動式 View 父項容器和巢狀捲動式子項可組合元件之間建立巢狀捲動互通性,可使用 rememberNestedScrollInteropConnection()

rememberNestedScrollInteropConnection() 可允許並記憶在實作 NestedScrollingParent3View 父項和 Compose 子項之間啟用巢狀捲動互通性的 NestedScrollConnection。此內容應和 nestedScroll 修飾符一同使用。由於 Compose 端預設為啟用巢狀捲動,因此您可以使用這個連線在 View 端啟用巢狀捲動功能,並在 Views 和可組合項之間加入必要的黏合邏輯。

常見的用途是使用 CoordinatorLayoutCollapsingToolbarLayout 和子項可組合函式,如以下範例所示:

<androidx.coordinatorlayout.widget.CoordinatorLayout
    xmlns:android="http://schemas.android.com/apk/res/android"
    xmlns:app="http://schemas.android.com/apk/res-auto"
    android:layout_width="match_parent"
    android:layout_height="match_parent">

    <com.google.android.material.appbar.AppBarLayout
        android:id="@+id/app_bar"
        android:layout_width="match_parent"
        android:layout_height="100dp"
        android:fitsSystemWindows="true">

        <com.google.android.material.appbar.CollapsingToolbarLayout
            android:id="@+id/collapsing_toolbar_layout"
            android:layout_width="match_parent"
            android:layout_height="match_parent"
            android:fitsSystemWindows="true"
            app:layout_scrollFlags="scroll|exitUntilCollapsed">

            <!--...-->

        </com.google.android.material.appbar.CollapsingToolbarLayout>

    </com.google.android.material.appbar.AppBarLayout>

    <androidx.compose.ui.platform.ComposeView
        android:id="@+id/compose_view"
        app:layout_behavior="@string/appbar_scrolling_view_behavior"
        android:layout_width="match_parent"
        android:layout_height="match_parent"/>

</androidx.coordinatorlayout.widget.CoordinatorLayout>

您必須在 Activity 或 Fragment 中設定子項可組合函式,以及必要的 NestedScrollConnection

open class MainActivity : ComponentActivity() {
    @OptIn(ExperimentalComposeUiApi::class)
    override fun onCreate(savedInstanceState: Bundle?) {
        super.onCreate(savedInstanceState)
        setContentView(R.layout.activity_main)
        findViewById<ComposeView>(R.id.compose_view).apply {
            setContent {
                val nestedScrollInterop = rememberNestedScrollInteropConnection()
                // Add the nested scroll connection to your top level @Composable element
                // using the nestedScroll modifier.
                LazyColumn(modifier = Modifier.nestedScroll(nestedScrollInterop)) {
                    items(20) { item ->
                        Box(
                            modifier = Modifier
                                .padding(16.dp)
                                .height(56.dp)
                                .fillMaxWidth()
                                .background(Color.Gray),
                            contentAlignment = Alignment.Center
                        ) {
                            Text(item.toString())
                        }
                    }
                }
            }
        }
    }
}

包含子項 AndroidView 的父項可組合函式

在這個案例中,當您有父項內含子項 AndroidView 時,可藉此在 Compose 端實作巢狀捲動互通性 API。AndroidView 是 Compose 捲動父項的子項,因此會實作 NestedScrollDispatcher;同時,由於它也是 View 捲動子項的父項,因此會實作 NestedScrollingParent3。這樣一來,Compose 父項就能從巢狀捲動子項 View 接收巢狀捲動差異。

以下範例說明如何在這個情境中達成巢狀捲動互通性,並使用 Compose 收合工具列:

@Composable
private fun NestedScrollInteropComposeParentWithAndroidChildExample() {
    val toolbarHeightPx = with(LocalDensity.current) { ToolbarHeight.roundToPx().toFloat() }
    val toolbarOffsetHeightPx = remember { mutableStateOf(0f) }

    // Sets up the nested scroll connection between the Box composable parent
    // and the child AndroidView containing the RecyclerView
    val nestedScrollConnection = remember {
        object : NestedScrollConnection {
            override fun onPreScroll(available: Offset, source: NestedScrollSource): Offset {
                // Updates the toolbar offset based on the scroll to enable
                // collapsible behaviour
                val delta = available.y
                val newOffset = toolbarOffsetHeightPx.value + delta
                toolbarOffsetHeightPx.value = newOffset.coerceIn(-toolbarHeightPx, 0f)
                return Offset.Zero
            }
        }
    }

    Box(
        Modifier
            .fillMaxSize()
            .nestedScroll(nestedScrollConnection)
    ) {
        TopAppBar(
            modifier = Modifier
                .height(ToolbarHeight)
                .offset { IntOffset(x = 0, y = toolbarOffsetHeightPx.value.roundToInt()) }
        )

        AndroidView(
            { context ->
                LayoutInflater.from(context)
                    .inflate(R.layout.view_in_compose_nested_scroll_interop, null).apply {
                        with(findViewById<RecyclerView>(R.id.main_list)) {
                            layoutManager = LinearLayoutManager(context, VERTICAL, false)
                            adapter = NestedScrollInteropAdapter()
                        }
                    }.also {
                        // Nested scrolling interop is enabled when
                        // nested scroll is enabled for the root View
                        ViewCompat.setNestedScrollingEnabled(it, true)
                    }
            },
            // ...
        )
    }
}

private class NestedScrollInteropAdapter :
    Adapter<NestedScrollInteropAdapter.NestedScrollInteropViewHolder>() {
    val items = (1..10).map { it.toString() }

    override fun onCreateViewHolder(
        parent: ViewGroup,
        viewType: Int
    ): NestedScrollInteropViewHolder {
        return NestedScrollInteropViewHolder(
            LayoutInflater.from(parent.context)
                .inflate(R.layout.list_item, parent, false)
        )
    }

    override fun onBindViewHolder(holder: NestedScrollInteropViewHolder, position: Int) {
        // ...
    }

    class NestedScrollInteropViewHolder(view: View) : ViewHolder(view) {
        fun bind(item: String) {
            // ...
        }
    }
    // ...
}

本範例可以說明如何透過 scrollable 修飾符使用 API:

@Composable
fun ViewInComposeNestedScrollInteropExample() {
    Box(
        Modifier
            .fillMaxSize()
            .scrollable(rememberScrollableState {
                // View component deltas should be reflected in Compose
                // components that participate in nested scrolling
                it
            }, Orientation.Vertical)
    ) {
        AndroidView(
            { context ->
                LayoutInflater.from(context)
                    .inflate(android.R.layout.list_item, null)
                    .apply {
                        // Nested scrolling interop is enabled when
                        // nested scroll is enabled for the root View
                        ViewCompat.setNestedScrollingEnabled(this, true)
                    }
            }
        )
    }
}

最後,這個範例可以說明如何透過 BottomSheetDialogFragment 使用巢狀捲動互通性 API,藉此成功達成拖曳和關閉行為:

class BottomSheetFragment : BottomSheetDialogFragment() {

    override fun onCreateView(
        inflater: LayoutInflater,
        container: ViewGroup?,
        savedInstanceState: Bundle?
    ): View {
        val rootView: View = inflater.inflate(R.layout.fragment_bottom_sheet, container, false)

        rootView.findViewById<ComposeView>(R.id.compose_view).apply {
            setContent {
                val nestedScrollInterop = rememberNestedScrollInteropConnection()
                LazyColumn(
                    Modifier
                        .nestedScroll(nestedScrollInterop)
                        .fillMaxSize()
                ) {
                    item {
                        Text(text = "Bottom sheet title")
                    }
                    items(10) {
                        Text(
                            text = "List item number $it",
                            modifier = Modifier.fillMaxWidth()
                        )
                    }
                }
            }
            return rootView
        }
    }
}

請注意,rememberNestedScrollInteropConnection() 會在您附加的元素中安裝 NestedScrollConnectionNestedScrollConnection 負責從 Compose 層級傳送差異到 View 層級。這樣做可讓元素加入巢狀捲動,但不會自動捲動元素。如果是無法自動捲動的可組合項 (例如 BoxColumn),則這類元件的捲動差異不會傳播至巢狀捲動系統中,差異也不會觸及 rememberNestedScrollInteropConnection() 提供的 NestedScrollConnection,因此這些差異不會進入父項 View 元件。如要解決這個問題,請務必也將捲動修飾符設定為這些巢狀可組合元件的類型。詳情請參閱上一節的巢狀捲動

含有子項 ComposeView 的非合作執行父項 View

非合作執行的 View 並未在 View 端實作必要的 NestedScrolling 介面。請注意,這代表具有 Views 的巢狀捲動互通性無法供您馬上使用。非合作執行的 ViewsRecyclerViewViewPager2