
คุณปรับแต่งรูปภาพได้โดยใช้พร็อพเพอร์ตี้ใน Image Composable
(contentScale, colorFilter) นอกจากนี้ คุณยังใช้ตัวแก้ไขที่มีอยู่
เพื่อใช้เอฟเฟกต์ต่างๆ กับ Image ได้ด้วย ตัวปรับแต่งใช้ได้กับ Composable ใดก็ได้ ไม่ใช่แค่ Composable Image เท่านั้น ในขณะที่ contentScale และ colorFilter เป็นพารามิเตอร์ที่ชัดเจนใน Composable Image
ขนาดเนื้อหา
ระบุcontentScaleตัวเลือกเพื่อครอบตัดหรือเปลี่ยนวิธีปรับขนาดรูปภาพภายใน
ขอบเขตของรูปภาพ โดยค่าเริ่มต้น หากคุณไม่ได้ระบุcontentScaleตัวเลือก
ContentScale.Fit ระบบจะใช้
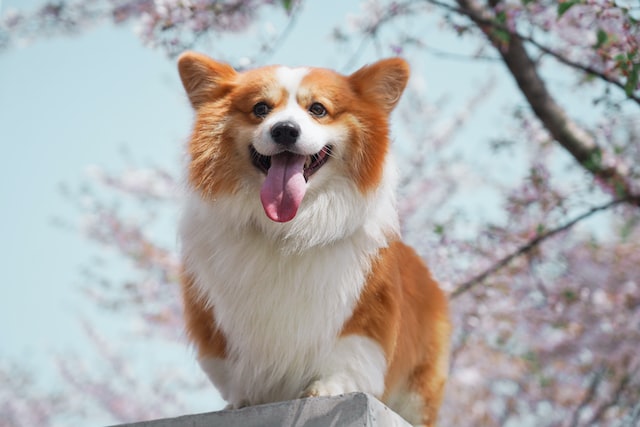
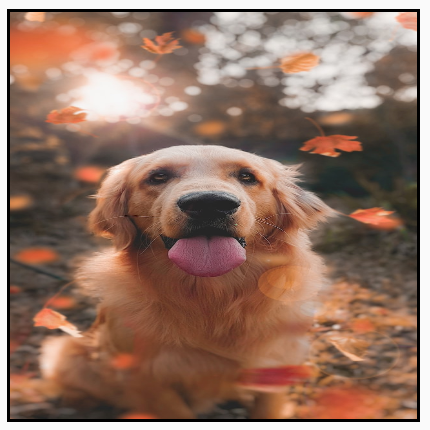
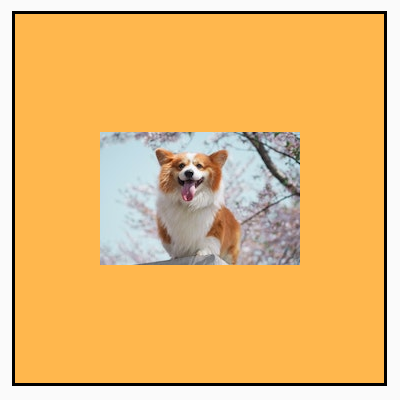
ในตัวอย่างต่อไปนี้ Image Composable จะจำกัดขนาดไว้ที่ 150dp
พร้อมเส้นขอบ และตั้งค่าพื้นหลังเป็นสีเหลืองใน Image Composable เพื่อ
แสดงตัวเลือก ContentScale ต่างๆ ในตารางต่อไปนี้
val imageModifier = Modifier .size(150.dp) .border(BorderStroke(1.dp, Color.Black)) .background(Color.Yellow) Image( painter = painterResource(id = R.drawable.dog), contentDescription = stringResource(id = R.string.dog_content_description), contentScale = ContentScale.Fit, modifier = imageModifier )
การตั้งค่าContentScaleที่แตกต่างกันจะส่งผลให้ได้เอาต์พุตที่แตกต่างกัน ตารางต่อไปนี้จะช่วยให้คุณเลือกContentScaleโหมดที่ถูกต้องได้
| รูปภาพต้นฉบับ |

|
|
ContentScale |
ผลลัพธ์ - รูปภาพแนวตั้ง: | ผลลัพธ์ - รูปภาพแนวนอน: |
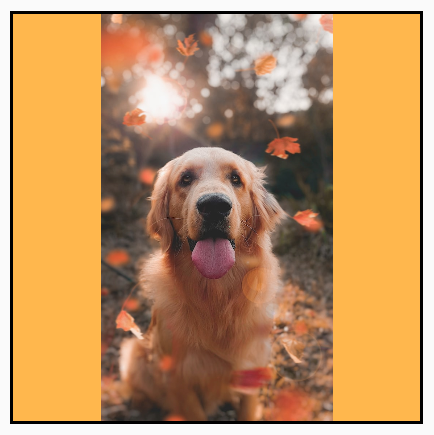
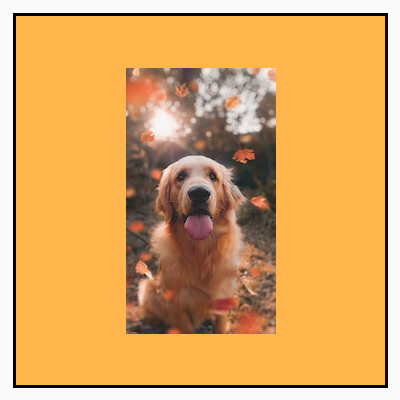
ContentScale.Fit: ปรับขนาดรูปภาพอย่างสม่ำเสมอโดยรักษาสัดส่วนภาพไว้ (ค่าเริ่มต้น) หากเนื้อหามีขนาดเล็กกว่าขนาดที่ระบุ ระบบจะขยายรูปภาพให้พอดีกับขอบเขต |

|

|
ContentScale.Crop: ครอบตัดรูปภาพตรงกลางให้พอดีกับพื้นที่ที่มี |

|
|
ContentScale.FillHeight: ปรับขนาดแหล่งที่มาโดยรักษาสัดส่วนการแสดงผลเพื่อให้ขอบเขตตรงกับความสูงของปลายทาง |
|

|
ContentScale.FillWidth: ปรับขนาดแหล่งที่มาโดยรักษาสัดส่วนการแสดงผลเพื่อให้ขอบเขตตรงกับความกว้างของปลายทาง |

|
|
ContentScale.FillBounds: ปรับขนาดเนื้อหาในแนวตั้งและแนวนอนไม่สม่ำเสมอเพื่อให้เต็มขอบเขตปลายทาง (หมายเหตุ: การดำเนินการนี้จะบิดเบือนรูปภาพหากคุณวางรูปภาพในคอนเทนเนอร์ที่ไม่ตรงกับสัดส่วนที่แน่นอนของรูปภาพ) |
|
|
ContentScale.Inside: ปรับขนาดแหล่งที่มาเพื่อรักษาอัตราส่วนภายในขอบเขตปลายทาง หากแหล่งที่มามีขนาดเล็กกว่าหรือเท่ากับปลายทางในทั้ง 2 มิติ แหล่งที่มาจะทำงานคล้ายกับ None เนื้อหาจะอยู่ภายในขอบเขตเสมอ หากเนื้อหามีขนาดเล็กกว่าขอบเขต ระบบจะไม่ปรับขนาด |
รูปภาพต้นฉบับใหญ่กว่าขอบเขต
 รูปภาพต้นฉบับเล็กกว่าขอบเขต
|
รูปภาพต้นฉบับใหญ่กว่าขอบเขต
 รูปภาพต้นฉบับเล็กกว่าขอบเขต
|
ContentScale.None: ไม่ปรับขนาดแหล่งที่มา หากเนื้อหามีขนาดเล็กกว่าขอบเขตปลายทาง ระบบจะไม่ปรับขนาดให้พอดีกับพื้นที่ |
รูปภาพต้นฉบับใหญ่กว่าขอบเขต
 รูปภาพต้นฉบับเล็กกว่าขอบเขต
|
รูปภาพต้นฉบับใหญ่กว่าขอบเขต
 รูปภาพต้นฉบับเล็กกว่าขอบเขต
|
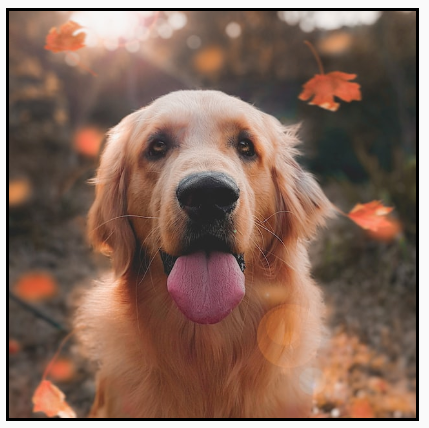
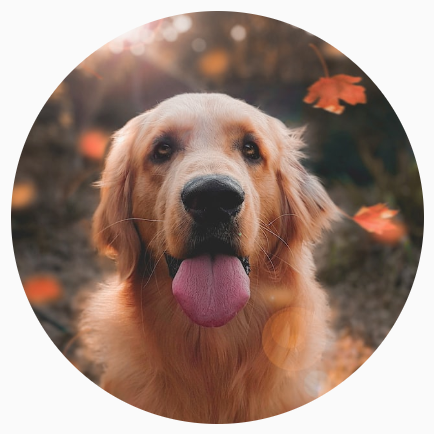
ครอบ Image ที่ประกอบได้กับรูปร่าง
หากต้องการปรับรูปภาพให้พอดีกับรูปร่าง ให้ใช้ตัวแก้ไข clip ในตัว
หากต้องการครอบตัดรูปภาพเป็นวงกลม ให้ใช้Modifier.clip(CircleShape)
Image( painter = painterResource(id = R.drawable.dog), contentDescription = stringResource(id = R.string.dog_content_description), contentScale = ContentScale.Crop, modifier = Modifier .size(200.dp) .clip(CircleShape) )
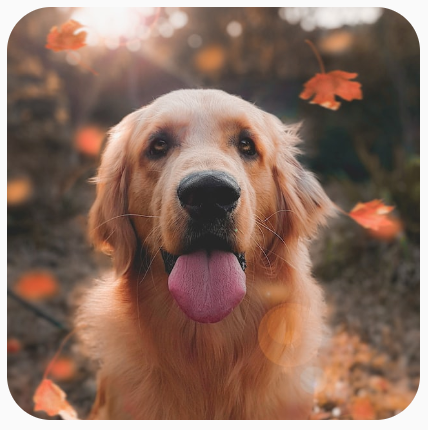
CircleShapeสำหรับรูปร่างมุมโค้ง ให้ใช้ Modifier.clip(RoundedCornerShape(16.dp)) โดยมี
ขนาดของมุมที่ต้องการให้โค้งดังนี้
Image( painter = painterResource(id = R.drawable.dog), contentDescription = stringResource(id = R.string.dog_content_description), contentScale = ContentScale.Crop, modifier = Modifier .size(200.dp) .clip(RoundedCornerShape(16.dp)) )
RoundedCornerShapeนอกจากนี้ คุณยังสร้างรูปร่างการครอบตัดของคุณเองได้โดยการขยาย Shape และระบุ
Path สำหรับรูปร่างที่จะครอบตัดรอบๆ
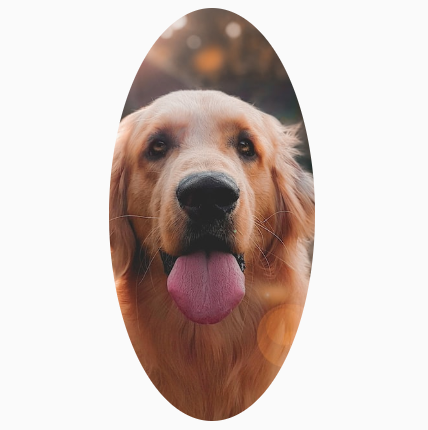
class SquashedOval : Shape { override fun createOutline( size: Size, layoutDirection: LayoutDirection, density: Density ): Outline { val path = Path().apply { // We create an Oval that starts at ¼ of the width, and ends at ¾ of the width of the container. addOval( Rect( left = size.width / 4f, top = 0f, right = size.width * 3 / 4f, bottom = size.height ) ) } return Outline.Generic(path = path) } } Image( painter = painterResource(id = R.drawable.dog), contentDescription = stringResource(id = R.string.dog_content_description), contentScale = ContentScale.Crop, modifier = Modifier .size(200.dp) .clip(SquashedOval()) )
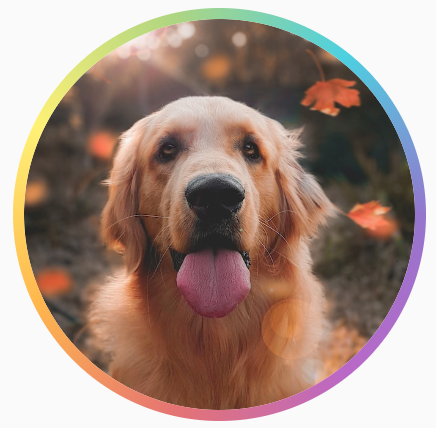
เพิ่มเส้นขอบให้กับ Image Composable
การดำเนินการทั่วไปคือการรวม Modifier.border() กับ Modifier.clip()
เพื่อสร้างเส้นขอบรอบรูปภาพ
val borderWidth = 4.dp Image( painter = painterResource(id = R.drawable.dog), contentDescription = stringResource(id = R.string.dog_content_description), contentScale = ContentScale.Crop, modifier = Modifier .size(150.dp) .border( BorderStroke(borderWidth, Color.Yellow), CircleShape ) .padding(borderWidth) .clip(CircleShape) )
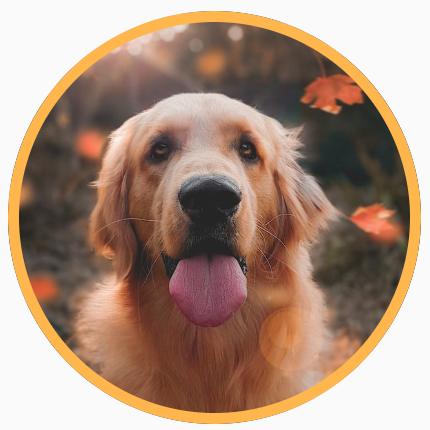
หากต้องการสร้างเส้นขอบแบบไล่ระดับสี คุณสามารถใช้ API ของ Brush เพื่อ
วาดเส้นขอบแบบไล่ระดับสีรุ้งรอบรูปภาพได้
val rainbowColorsBrush = remember { Brush.sweepGradient( listOf( Color(0xFF9575CD), Color(0xFFBA68C8), Color(0xFFE57373), Color(0xFFFFB74D), Color(0xFFFFF176), Color(0xFFAED581), Color(0xFF4DD0E1), Color(0xFF9575CD) ) ) } val borderWidth = 4.dp Image( painter = painterResource(id = R.drawable.dog), contentDescription = stringResource(id = R.string.dog_content_description), contentScale = ContentScale.Crop, modifier = Modifier .size(150.dp) .border( BorderStroke(borderWidth, rainbowColorsBrush), CircleShape ) .padding(borderWidth) .clip(CircleShape) )
ตั้งค่าสัดส่วนภาพที่กำหนดเอง
หากต้องการเปลี่ยนรูปภาพเป็นสัดส่วนภาพที่กำหนดเอง ให้ใช้
Modifier.aspectRatio(16f/9f) เพื่อระบุสัดส่วนที่กำหนดเองสำหรับรูปภาพ (หรือ
Composable ใดก็ได้)
Image( painter = painterResource(id = R.drawable.dog), contentDescription = stringResource(id = R.string.dog_content_description), modifier = Modifier.aspectRatio(16f / 9f) )
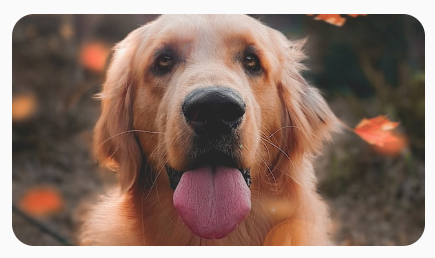
Modifier.aspectRatio(16f/9f) ใน Imageฟิลเตอร์สี: เปลี่ยนสีพิกเซลของรูปภาพ
Composable Image มีพารามิเตอร์ colorFilter ที่เปลี่ยนเอาต์พุต
ของแต่ละพิกเซลในรูปภาพได้
แต้มสีรูปภาพ
การใช้ ColorFilter.tint(color, blendMode) จะใช้โหมดผสมผสานกับสีที่ระบุใน Image ที่ใช้ร่วมกันได้ ColorFilter.tint(color, blendMode)
ใช้ BlendMode.SrcIn เพื่อปรับสีเนื้อหา ซึ่งหมายความว่าสีที่ระบุจะ
แสดงในตำแหน่งที่รูปภาพแสดงบนหน้าจอ ซึ่งมีประโยชน์สำหรับไอคอนและ
เวกเตอร์ที่ต้องใช้ธีมต่างกัน
Image( painter = painterResource(id = R.drawable.baseline_directions_bus_24), contentDescription = stringResource(id = R.string.bus_content_description), colorFilter = ColorFilter.tint(Color.Yellow) )

ColorFilter.tint ใช้กับ BlendMode.SrcInBlendModeอื่นๆ จะส่งผลให้เกิดเอฟเฟกต์ที่แตกต่างกัน ตัวอย่างเช่น การตั้งค่า
BlendMode.Darken ที่มี Color.Green ในรูปภาพจะทำให้เกิดผลลัพธ์ต่อไปนี้
Image( painter = painterResource(id = R.drawable.dog), contentDescription = stringResource(id = R.string.dog_content_description), colorFilter = ColorFilter.tint(Color.Green, blendMode = BlendMode.Darken) )
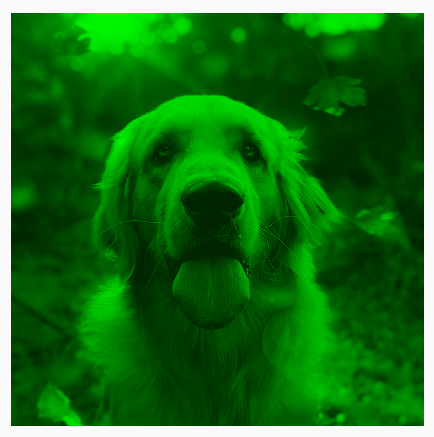
Color.Green tint ด้วย BlendMode.Darkenดูข้อมูลเพิ่มเติมเกี่ยวกับโหมดการผสมต่างๆ ที่มีได้ในBlendModeเอกสารอ้างอิง
ใช้ฟิลเตอร์ Image กับเมทริกซ์สี
เปลี่ยนรูปแบบรูปภาพโดยใช้ตัวเลือกเมทริกซ์สี ColorFilter เช่น หากต้องการใช้ฟิลเตอร์ขาวดำกับรูปภาพ คุณสามารถใช้
ColorMatrix และตั้งค่าความอิ่มตัวเป็น 0f
Image( painter = painterResource(id = R.drawable.dog), contentDescription = stringResource(id = R.string.dog_content_description), colorFilter = ColorFilter.colorMatrix(ColorMatrix().apply { setToSaturation(0f) }) )

ปรับคอนทราสต์หรือความสว่างของ Image Composable
หากต้องการเปลี่ยนคอนทราสต์และความสว่างของรูปภาพ คุณสามารถใช้
ColorMatrix เพื่อเปลี่ยนค่าได้โดยทำดังนี้
val contrast = 2f // 0f..10f (1 should be default) val brightness = -180f // -255f..255f (0 should be default) val colorMatrix = floatArrayOf( contrast, 0f, 0f, 0f, brightness, 0f, contrast, 0f, 0f, brightness, 0f, 0f, contrast, 0f, brightness, 0f, 0f, 0f, 1f, 0f ) Image( painter = painterResource(id = R.drawable.dog), contentDescription = stringResource(id = R.string.dog_content_description), colorFilter = ColorFilter.colorMatrix(ColorMatrix(colorMatrix)) )
ColorMatrixสลับสีของ Image ที่ใช้ร่วมกันได้
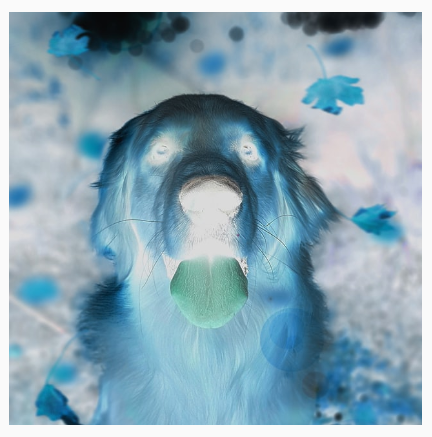
หากต้องการกลับสีของรูปภาพ ให้ตั้งค่า ColorMatrix เพื่อกลับสี
val colorMatrix = floatArrayOf( -1f, 0f, 0f, 0f, 255f, 0f, -1f, 0f, 0f, 255f, 0f, 0f, -1f, 0f, 255f, 0f, 0f, 0f, 1f, 0f ) Image( painter = painterResource(id = R.drawable.dog), contentDescription = stringResource(id = R.string.dog_content_description), colorFilter = ColorFilter.colorMatrix(ColorMatrix(colorMatrix)) )
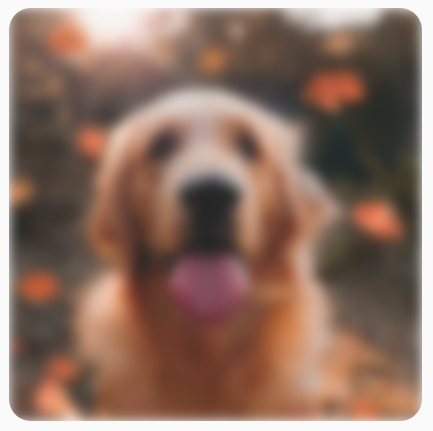
เบลอ Image ที่ประกอบกันได้
หากต้องการเบลอรูปภาพ ให้ใช้ Modifier.blur() โดยระบุ radiusX และ radiusY
ซึ่งจะกำหนดรัศมีการเบลอในทิศทางแนวนอนและแนวตั้ง
ตามลำดับ
Image( painter = painterResource(id = R.drawable.dog), contentDescription = stringResource(id = R.string.dog_content_description), contentScale = ContentScale.Crop, modifier = Modifier .size(150.dp) .blur( radiusX = 10.dp, radiusY = 10.dp, edgeTreatment = BlurredEdgeTreatment(RoundedCornerShape(8.dp)) ) )
BlurEffect ใช้กับรูปภาพเมื่อเบลอ Images เราขอแนะนำให้ใช้ BlurredEdgeTreatment(Shape)
แทน BlurredEdgeTreatment.Unbounded เนื่องจากใช้สำหรับเบลอ
การแสดงผลที่กำหนดเองซึ่งคาดว่าจะแสดงผลนอกขอบเขตของ
เนื้อหาต้นฉบับ สำหรับรูปภาพ มีแนวโน้มว่ารูปภาพจะไม่แสดงนอก
ขอบเขตของเนื้อหา ในขณะที่การเบลอสี่เหลี่ยมผืนผ้าโค้งอาจต้องใช้
ความแตกต่างนี้
ตัวอย่างเช่น หากเราตั้งค่า BlurredEdgeTreatment เป็น Unbounded ในรูปภาพก่อนหน้า ขอบของรูปภาพจะเบลอแทนที่จะคมชัด
Image( painter = painterResource(id = R.drawable.dog), contentDescription = stringResource(id = R.string.dog_content_description), contentScale = ContentScale.Crop, modifier = Modifier .size(150.dp) .blur( radiusX = 10.dp, radiusY = 10.dp, edgeTreatment = BlurredEdgeTreatment.Unbounded ) .clip(RoundedCornerShape(8.dp)) )
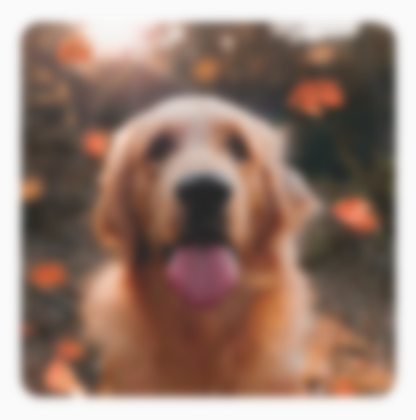
BlurEdgeTreatment.Unboundedแนะนำสำหรับคุณ
- หมายเหตุ: ข้อความลิงก์จะแสดงเมื่อ JavaScript ปิดอยู่
- ตัวปรับแต่งกราฟิก
- กำลังโหลดรูปภาพ
- ไอคอน Material