
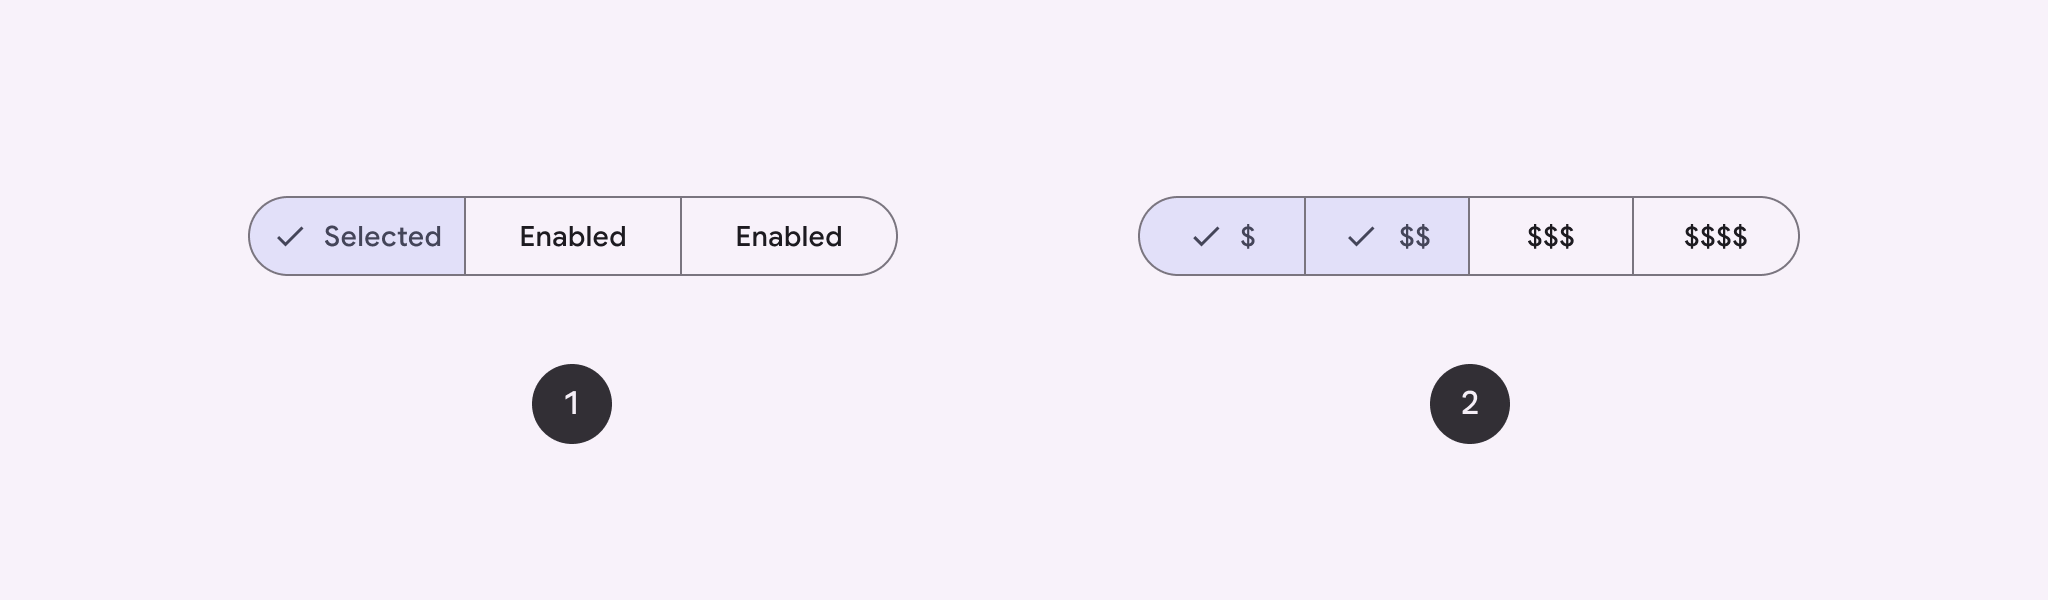
セグメント ボタンを使用すると、ユーザーは一連のオプションを並べて表示し、その中から選択できます。セグメント ボタンには次の 2 種類があります。
- 単一選択ボタン: ユーザーが 1 つのオプションを選択できるようにします。
- 複数選択ボタン: ユーザーが 2 ~ 5 個のアイテムを選択できます。複雑な選択肢や 5 つを超えるアイテムの場合は、チップを使用します。
API サーフェス
SingleChoiceSegmentedButtonRow レイアウトと MultiChoiceSegmentedButtonRow レイアウトを使用して、セグメント化されたボタンを作成します。これらのレイアウトは、SegmentedButton を正しい位置に配置して正しいサイズに設定し、次のキーパラメータを共有します。
space: ボタン間の重複を調整します。content: 通常はSegmentedButtonのシーケンスである、セグメント化されたボタン行のコンテンツが含まれます。
単一選択セグメント ボタンを作成する
次の例は、単一選択のセグメント化されたボタンを作成する方法を示しています。
@Composable fun SingleChoiceSegmentedButton(modifier: Modifier = Modifier) { var selectedIndex by remember { mutableIntStateOf(0) } val options = listOf("Day", "Month", "Week") SingleChoiceSegmentedButtonRow { options.forEachIndexed { index, label -> SegmentedButton( shape = SegmentedButtonDefaults.itemShape( index = index, count = options.size ), onClick = { selectedIndex = index }, selected = index == selectedIndex, label = { Text(label) } ) } } }
コードに関する主なポイント
rememberとmutableIntStateOfを使用してselectedIndex変数を初期化し、選択されたボタンのインデックスを追跡します。- ボタンラベルを表す
optionsのリストを定義します。 SingleChoiceSegmentedButtonRowを使用すると、ボタンを 1 つだけ選択できます。forEachIndexedループ内で、各オプションのSegmentedButtonを作成します。shapeは、SegmentedButtonDefaults.itemShapeを使用して、インデックスとオプションの合計数に基づいてボタンの形状を定義します。onClickは、クリックされたボタンのインデックスでselectedIndexを更新します。selectedは、selectedIndexに基づいてボタンの選択状態を設定します。labelはTextコンポーザブルを使用してボタンラベルを表示します。
結果
![[日]、[月]、[週] のオプションを含むセグメント化されたボタン コンポーネントが表示されます。現在、[日] オプションが選択されています。](https://developer.android.com/static/develop/ui/compose/images/components/SingleChoiceSegmentedButton.png?authuser=7&hl=ja)
複数選択のセグメント化されたボタンを作成する
この例では、ユーザーが複数のオプションを選択できるアイコン付きの多肢選択式セグメント ボタンを作成する方法を示します。
@Composable fun MultiChoiceSegmentedButton(modifier: Modifier = Modifier) { val selectedOptions = remember { mutableStateListOf(false, false, false) } val options = listOf("Walk", "Ride", "Drive") MultiChoiceSegmentedButtonRow { options.forEachIndexed { index, label -> SegmentedButton( shape = SegmentedButtonDefaults.itemShape( index = index, count = options.size ), checked = selectedOptions[index], onCheckedChange = { selectedOptions[index] = !selectedOptions[index] }, icon = { SegmentedButtonDefaults.Icon(selectedOptions[index]) }, label = { when (label) { "Walk" -> Icon( imageVector = Icons.AutoMirrored.Filled.DirectionsWalk, contentDescription = "Directions Walk" ) "Ride" -> Icon( imageVector = Icons.Default.DirectionsBus, contentDescription = "Directions Bus" ) "Drive" -> Icon( imageVector = Icons.Default.DirectionsCar, contentDescription = "Directions Car" ) } } ) } } }
コードに関する主なポイント
- このコードでは、
rememberとmutableStateListOfを使用してselectedOptions変数を初期化します。これにより、各ボタンの選択状態が追跡されます。 - このコードでは、
MultiChoiceSegmentedButtonRowを使用してボタンを格納しています。 forEachIndexedループ内で、コードは各オプションのSegmentedButtonを作成します。shapeは、インデックスとオプションの合計数に基づいてボタンの形状を定義します。checkedは、selectedOptionsの対応する値に基づいてボタンのチェック状態を設定します。onCheckedChangeは、ボタンがクリックされたときにselectedOptions内の対応するアイテムの選択状態を切り替えます。iconは、SegmentedButtonDefaults.Iconとボタンのチェック状態に基づいてアイコンを表示します。labelは、適切な画像ベクトルとコンテンツの説明を含むIconコンポーザブルを使用して、ラベルに対応するアイコンを表示します。
結果
![[徒歩]、[自転車]、[車] のオプションがあるセグメント化されたボタン コンポーネントが表示されています。現在、[徒歩] と [乗車] のオプションが選択されています。](https://developer.android.com/static/develop/ui/compose/images/components/Multi-Choice-Segmented-Button.png?authuser=7&hl=ja)
参考情報
- Material 3: セグメント ボタン