
A notification is a message that Android displays outside your app's UI to provide the user with reminders, communication from other people, or other timely information from your app. Users can tap the notification to open your app or take an action directly from the notification.
This page provides an overview of where notifications appear and the available features. To start building notifications, read Create a notification.
For more information about notification design and interaction patterns, see the Notifications design guide.
Appearances on a device
Notifications automatically appear to users in different locations and formats. A notification appears as an icon in the status bar, a more detailed entry in the notification drawer, and a badge on the app's icon. Notifications also appear on paired wearables.
Status bar and notification drawer
When you issue a notification, it first appears as an icon in the status bar.
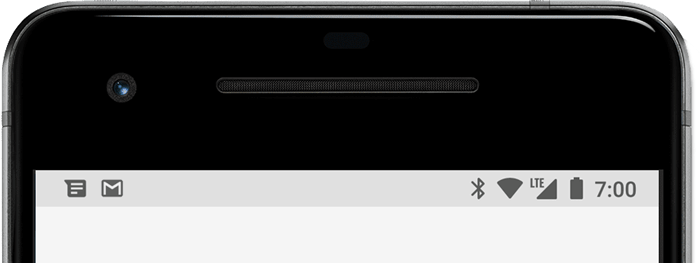
Figure 1. Notification icons appear on the left side of the status bar.
Users can swipe down on the status bar to open the notification drawer, where they can view more details and take actions with the notification.
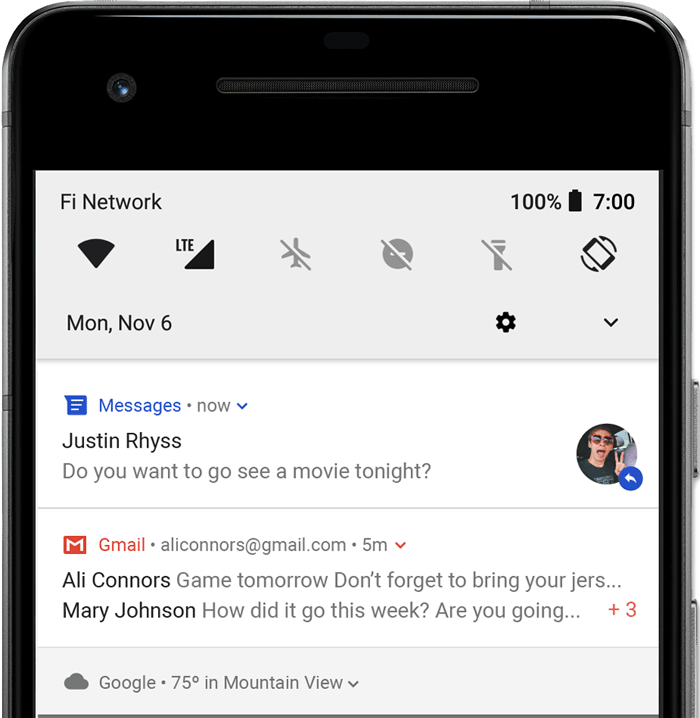
Figure 2. Notifications in the notification drawer.
Users can drag down on a notification in the drawer to reveal the expanded view, which shows additional content and action buttons, if provided. Starting in Android 13, this expanded view includes a button that lets users stop an app that has ongoing foreground services.
A notification remains visible in the notification drawer until it's dismissed by the app or user.
Heads-up notification
Beginning with Android 5.0, notifications can briefly appear in a floating window called a heads-up notification. This behavior is normally for important notifications that the user needs to know about immediately, and it only appears if the device is unlocked.
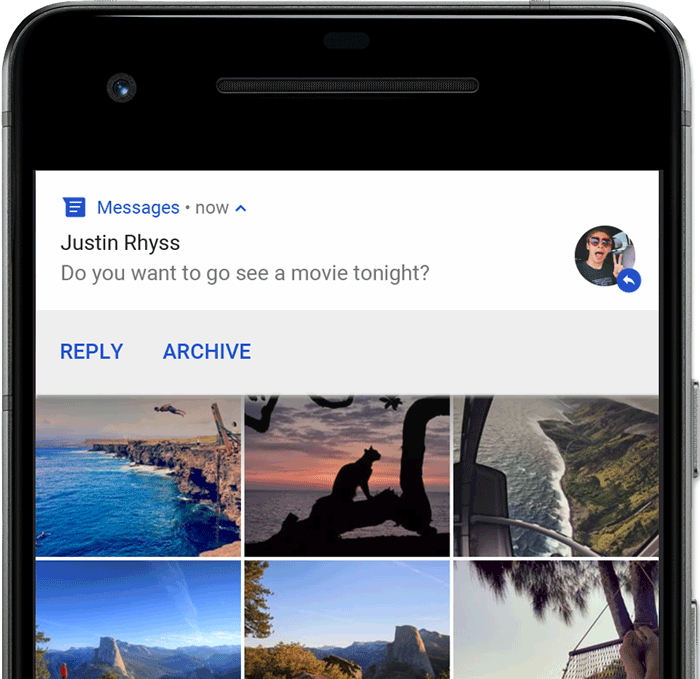
Figure 3. A heads-up notification appears in front of the foreground app.
The heads-up notification appears when your app issues the notification. It disappears after a moment, but it remains visible in the notification drawer as usual.
Conditions that might trigger heads-up notifications include the following:
The user's activity is in fullscreen mode, such as when the app uses
fullScreenIntent.The notification has high priority and uses ringtones or vibrations on devices running Android 7.1 (API level 25) and lower.
The notification channel has high importance on devices running Android 8.0 (API level 26) and higher.
Lock screen
Beginning with Android 5.0, notifications can appear on the lock screen.
You can programmatically set whether notifications posted by your app show on a secure lock screen and, if so, the level of detail visible.
Users can use the system settings to choose the level of detail visible in lock screen notifications or to disable all lock screen notifications. Starting with Android 8.0, users can disable or enable lock screen notifications for each notification channel.
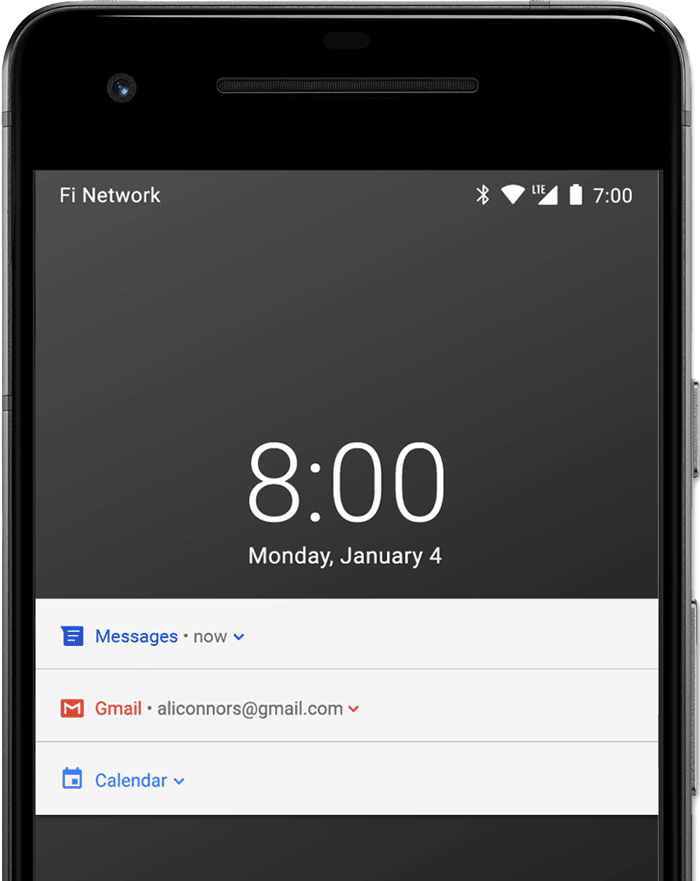
Figure 4. Notifications on the lock screen with sensitive content hidden.
To learn more, see Set lock screen visibility.
App icon badge
In supported launchers on devices running Android 8.0 (API level 26) and higher, app icons indicate new notifications with a colored badge known as a notification dot on the corresponding app launcher icon.
Users can touch & hold an app icon to see the notifications for that app. Users can dismiss or act on notifications from that menu, similar to the notification drawer.
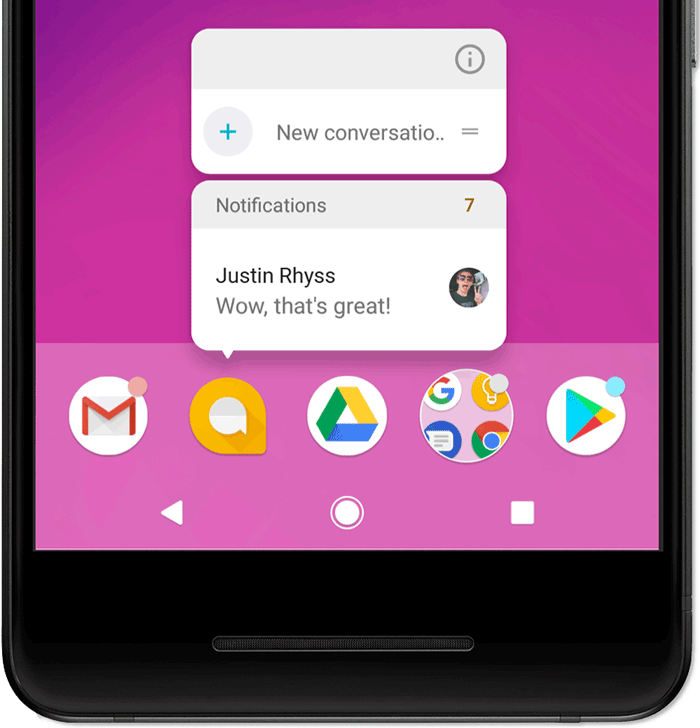
Figure 5. Notification badges and the touch & hold menu.
To learn more about how badges work, read Modify a notification badge.
Wear OS devices
If the user has a paired Wear OS device, all your notifications appear there automatically, including expandable detail and action buttons.
You can enhance the experience by customizing the appearance of your notifications on wearables and by providing different actions, including suggested replies and voice input replies. For more information, see how to add wearable-specific features to your notification.
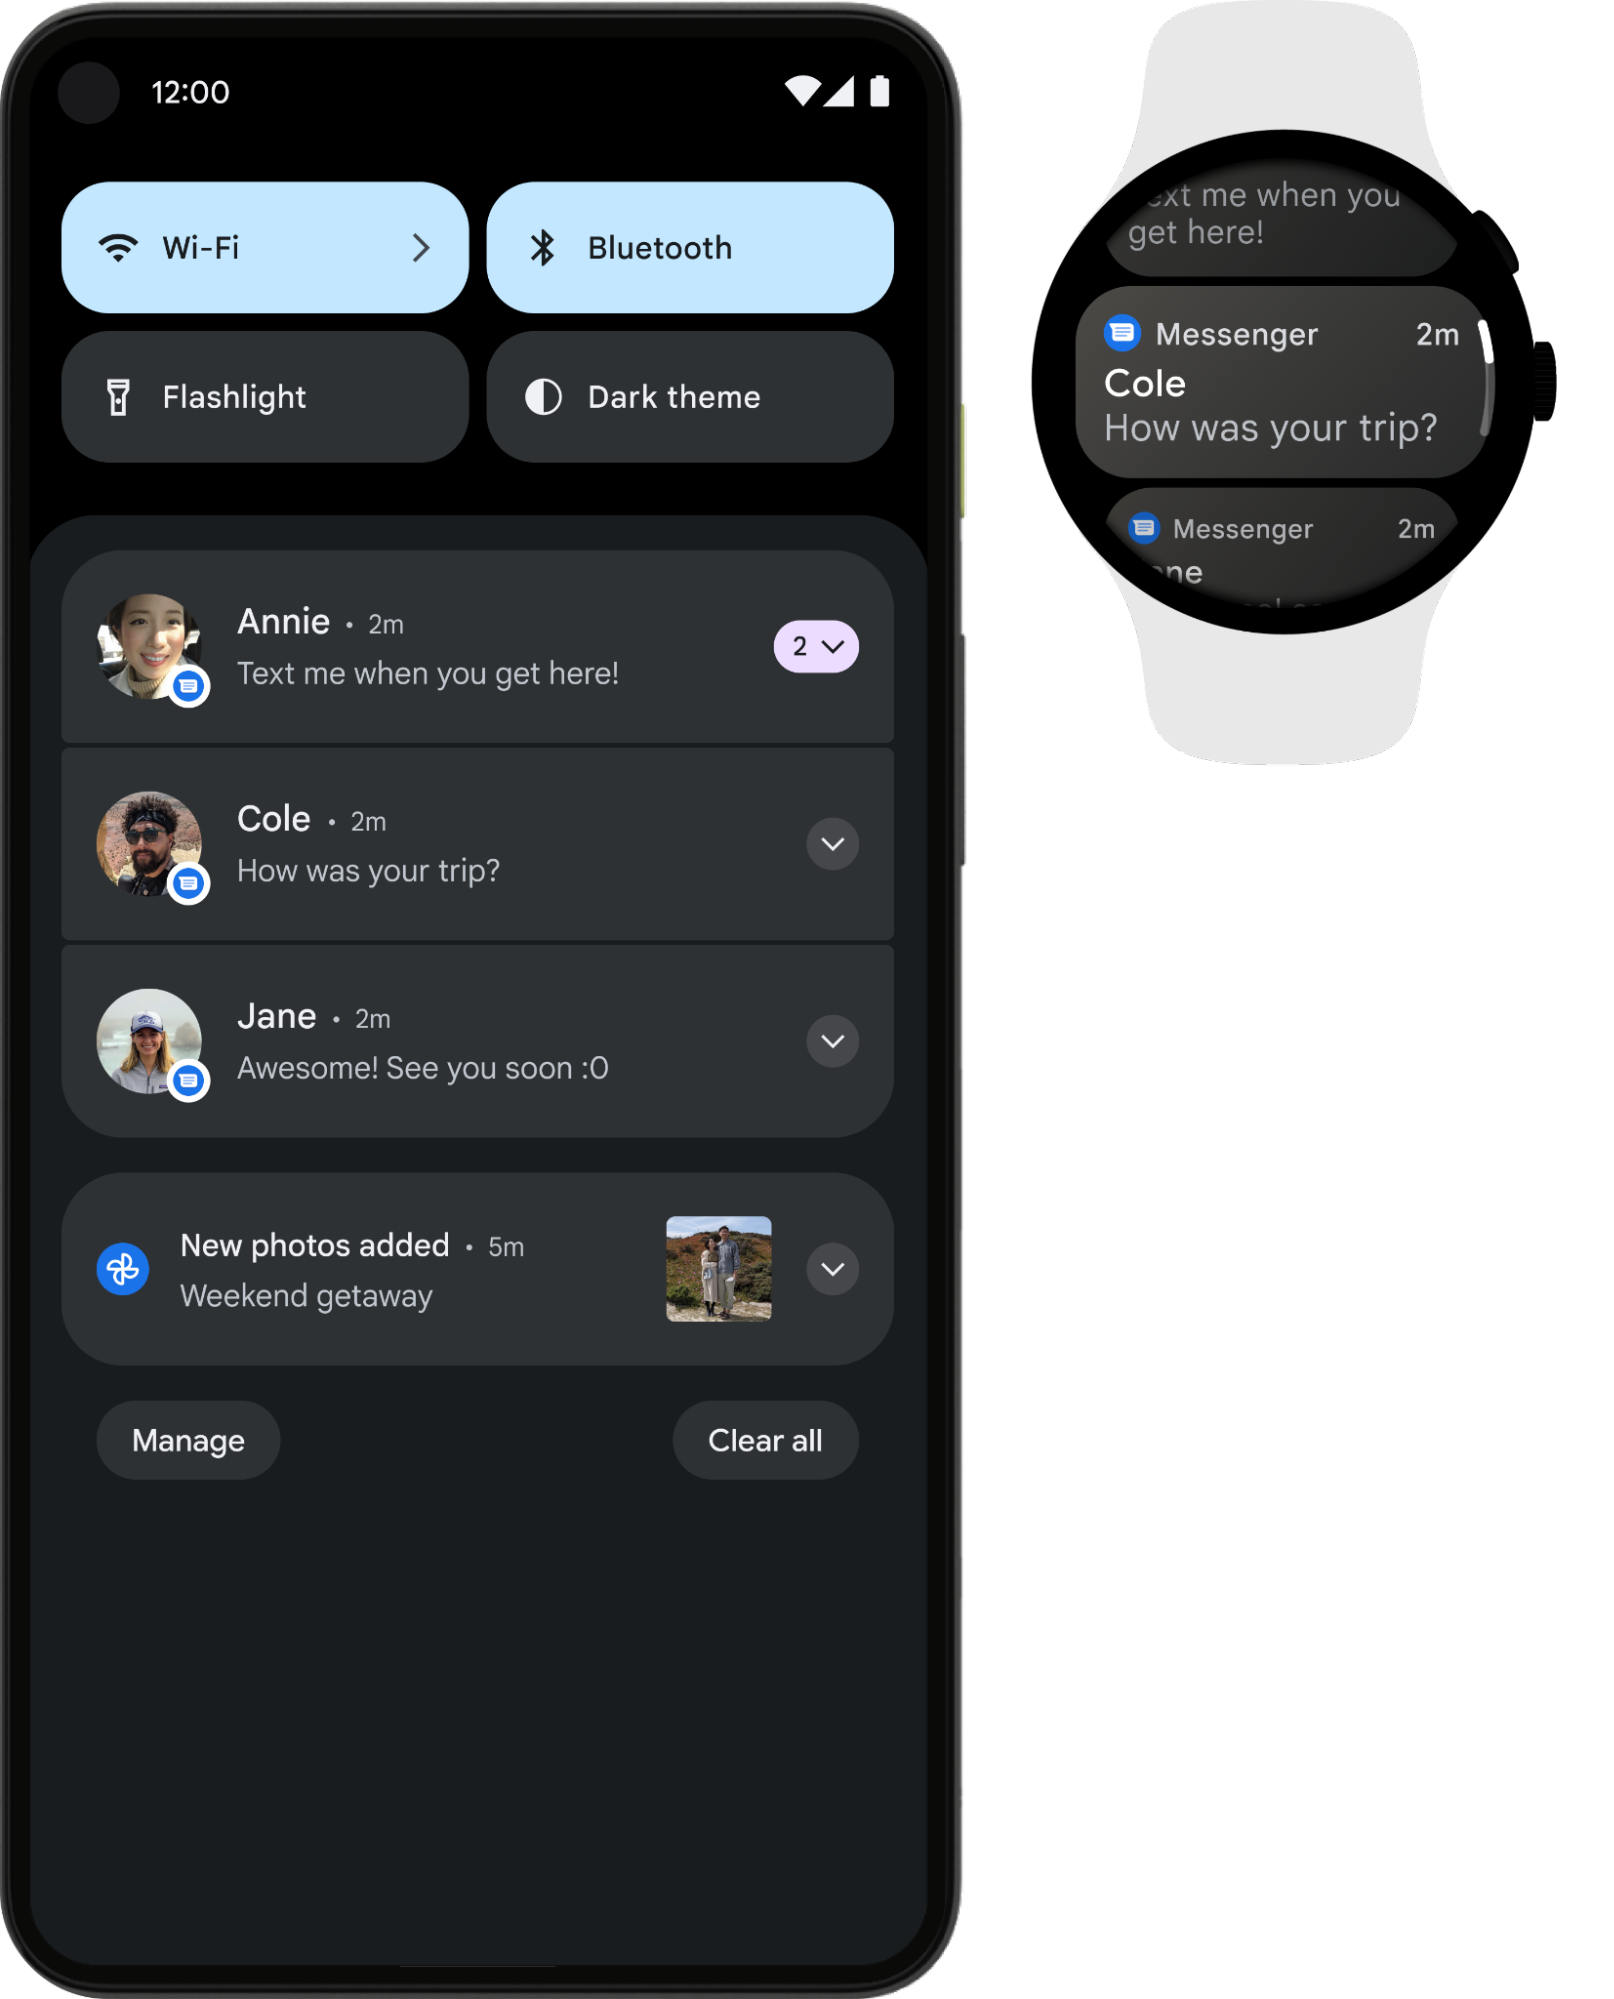
Figure 6. Notifications automatically appear on a paired Wear OS device.
Notification anatomy
The design of a notification is determined by system templates, and your app defines the contents for each portion of the template. Some details of the notification appear only in the expanded view.
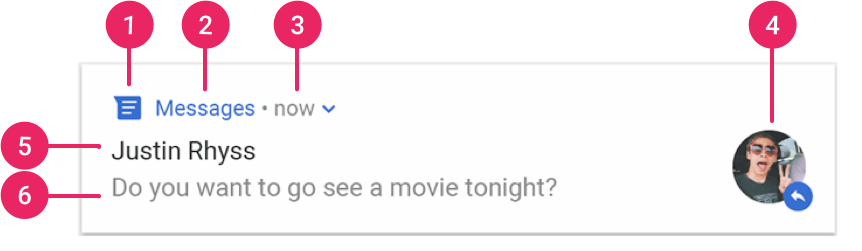
Figure 7. A notification with basic details.
The most common parts of a notification are indicated in figure 7, as follows:
- Small icon: required; set using
setSmallIcon(). - App name: provided by the system.
- Time stamp: provided by the system, but you can override it using
setWhen()or hide it usingsetShowWhen(false). - Large icon: optional; usually used only for contact photos.
Don't use it for your app icon. Set using
setLargeIcon(). - Title: optional; set using
setContentTitle(). - Text: optional; set using
setContentText().
We strongly recommend using system templates for proper design compatibility on all devices. If necessary, you can create a custom notification layout.
For more information about how to create a notification with these features and more, read Create a notification.
Notification actions
Although it's not required, it's a good practice for every notification to open an appropriate app activity when it's tapped. In addition to this default notification action, you can add action buttons that complete an app-related task from the notification—often without opening an activity—as shown in figure 8.
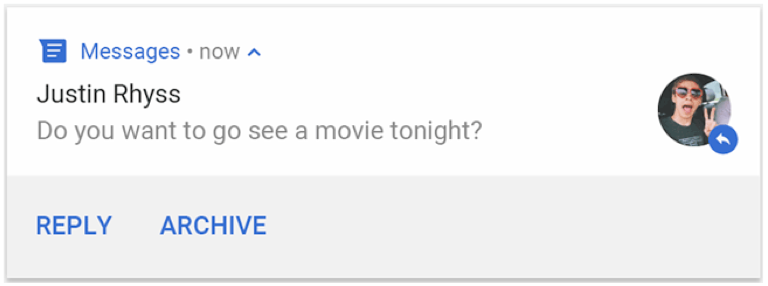
Figure 8. A notification with action buttons.
Starting in Android 7.0 (API level 24), you can add an action to reply to messages or enter other text directly from the notification.
Starting in Android 10 (API level 29), the platform can automatically generate action buttons with suggested intent-based actions.
Adding action buttons is explained further in Create a notification.
Require an unlocked device
Users might see notification actions on the device's lock screen. If a notification action causes an app to launch an activity or send a direct reply, users must unlock the device before the app can invoke that notification action.
On Android 12 (API level 31) and higher, you can configure a notification action such that the device must be unlocked for your app to invoke that action, no matter what workflow the action launches. This option adds an extra layer of security to notifications on locked devices.
To require a device to be unlocked before your app invokes a given notification
action, pass true into
setAuthenticationRequired()
when creating your notification action, as shown in the following code snippet:
Kotlin
val moreSecureNotification = Notification.Action.Builder(...)

    // This notification always requests authentication when invoked
    // from a lock screen.
    .setAuthenticationRequired(true)
    .build()
Java
Notification moreSecureNotification = new Notification.Action.Builder(...)

    // This notification always requests authentication when invoked
    // from a lock screen.
    .setAuthenticationRequired(true)
    .build();
Expandable notification
By default, the notification's text content is truncated to fit on one line. If you want your notification to be longer, you can enable a larger text area that's expandable by applying an additional template, as shown in figure 9.
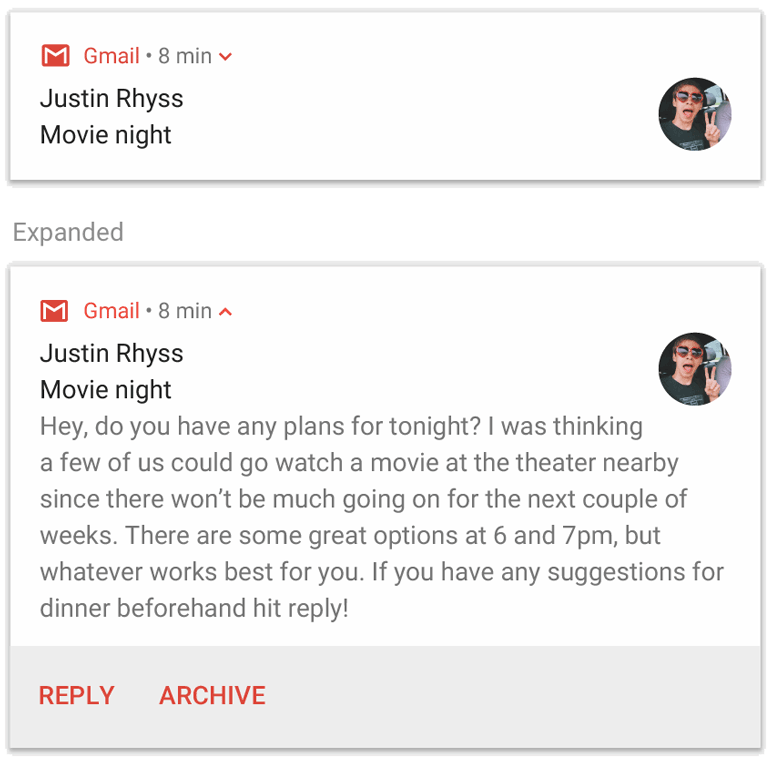
Figure 9. An expandable notification for large text.
You can also create an expandable notification with an image, in inbox style, with a chat conversation, or with media playback controls. For more information, read Create an expandable notification.
Notification updates and groups
To avoid flooding your users with multiple or redundant notifications when you have additional updates, update an existing notification rather than issuing a new one or use the inbox-style notification to show conversation updates.
However, if it's necessary to deliver multiple notifications, consider grouping the separate notifications into a group, available on Android 7.0 and higher.
A notification group lets you collapse multiple notifications into one post in the notification drawer with a summary. The user can progressively expand the notification group and each notification within it for more details, as shown in figure 10.
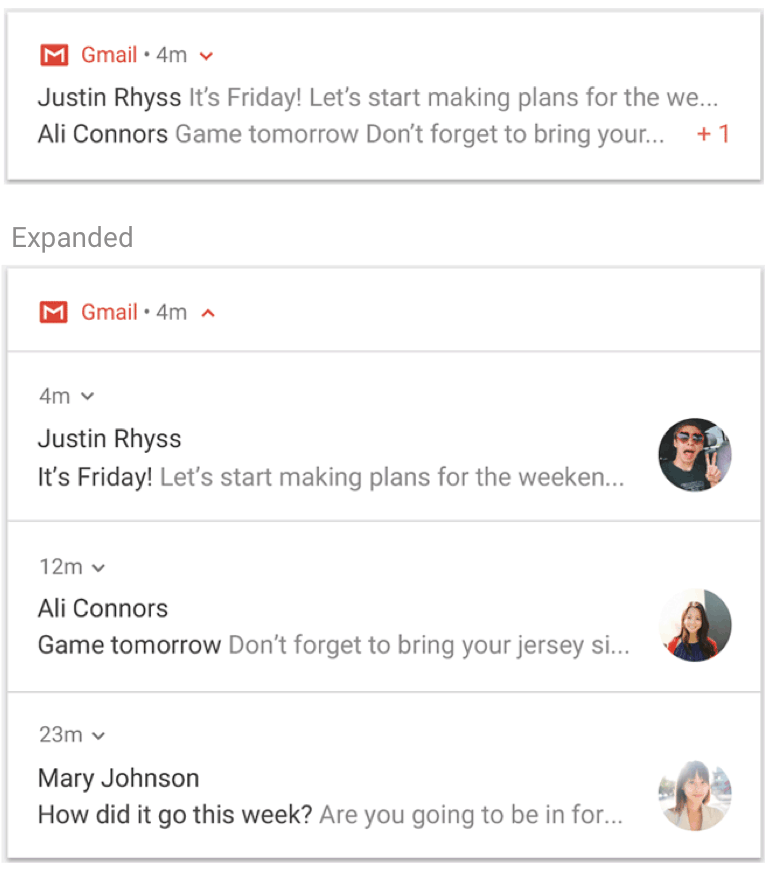
Figure 10. A collapsed and expanded notification group.
To learn how to add notifications to a group, see Create a group of notifications.
Notification channels
Starting in Android 8.0 (API level 26), all notifications must be assigned to a channel or they don't appear. This lets users disable specific notification channels for your app instead of disabling all your notifications. Users can control the visual and auditory options for each channel from the Android system settings, as shown in figure 11. Users can also touch & hold a notification to change behaviors for the associated channel.
On devices running Android 7.1 (API level 25) and lower, users can manage notifications on a per-app basis only. Each app effectively has only one channel on Android 7.1 and lower.
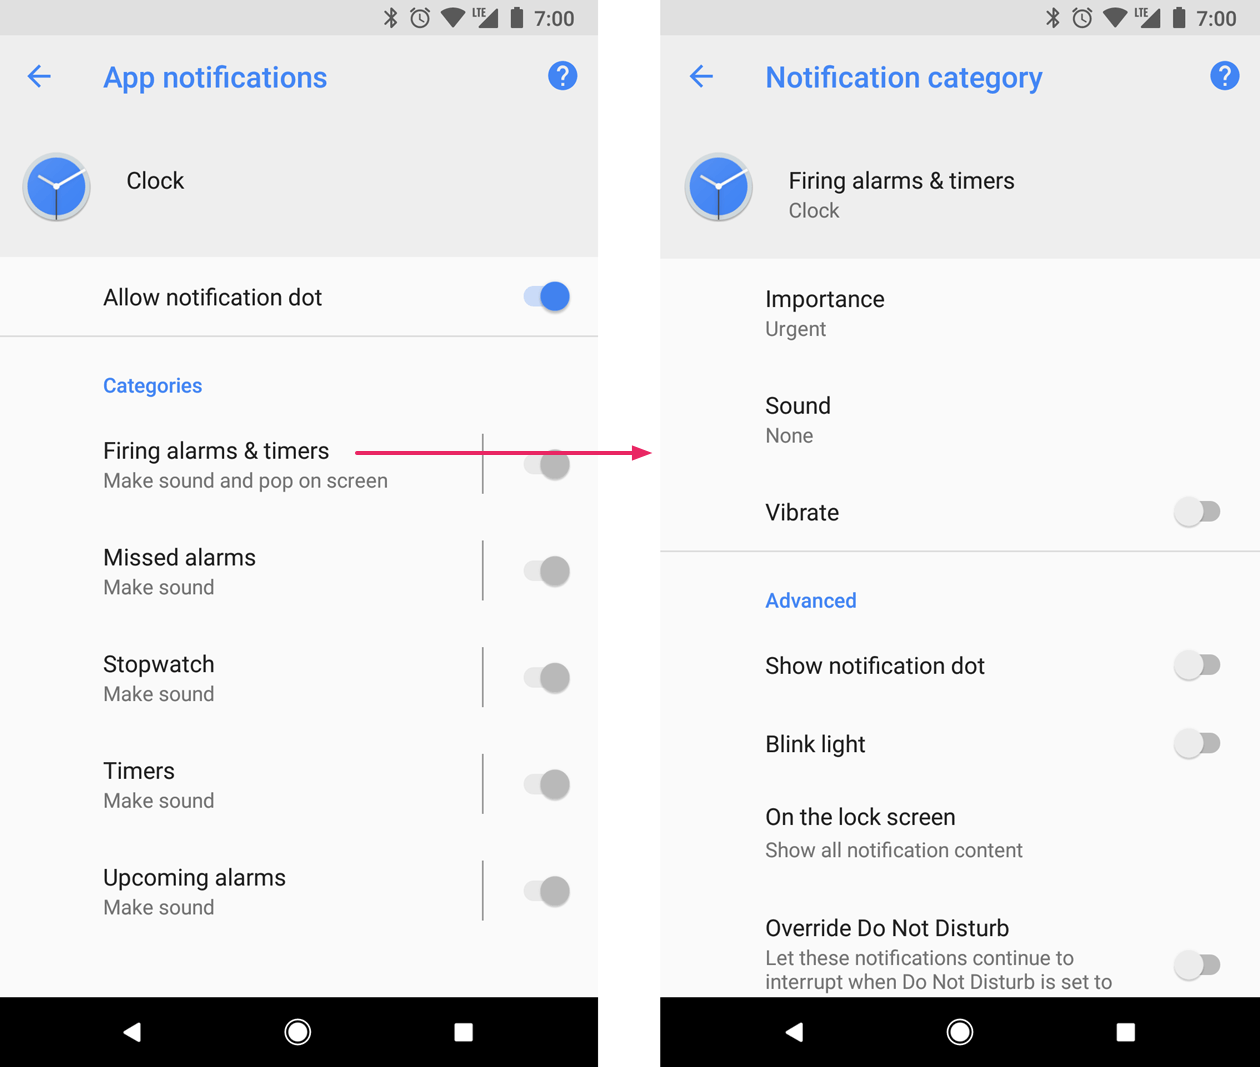
Figure 11. Notification settings for the Clock app and one of its channels.
An app can have separate channels for each type of notification the app issues. An app can also create notification channels in response to choices made by users. For example, you can set up separate notification channels for each conversation group created by a user in a messaging app.
The channel is also where you specify the importance level for your notifications on Android 8.0 and higher, so all notifications posted to the same notification channel have the same behavior. This is described in the following section.
For more information, see Create and manage notification channels.
Notification importance
Android uses the importance of a notification to determine how much the notification interrupts the user visually and audibly. The higher the importance of a notification, the more interruptive the notification is.
On Android
7.1 (API level 25) and lower, the importance of a notification is determined by
the notification's
priority.
On Android 8.0 (API level 26) and higher, the importance of a notification is
determined by the
importance
of the channel the notification is posted to. Users can change the importance of
a notification channel in the system settings, as shown in figure 12.
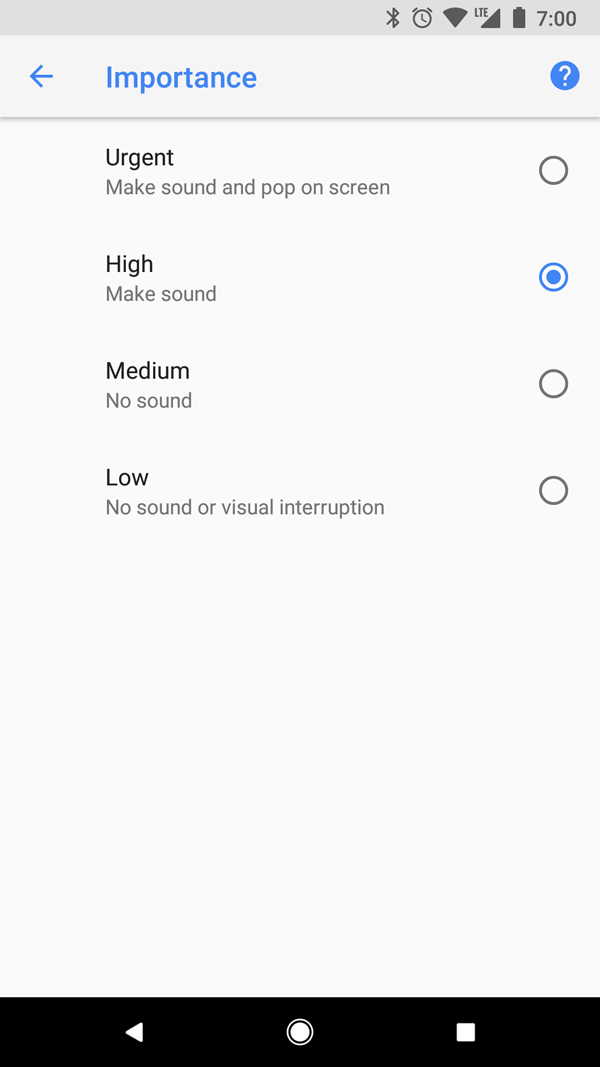
Figure 12. Users can change the importance of each channel on Android 8.0 and higher.
The possible importance levels and the associated notification behaviors are the following:
Urgent: makes a sound and appears as a heads-up notification.
High: makes a sound.
Medium: makes no sound.
Low: makes no sound and doesn't appear in the status bar.
All notifications, regardless of importance, appear in non-interruptive system UI locations, such as in the notification drawer and as a badge on the launcher icon. However, you can modify the appearance of the notification badge.
For more information, read about how to set the importance.
Do Not Disturb mode
Starting in Android 5.0 (API level 21), users can enable Do Not Disturb mode, which silences sound and vibration for all notifications. Notifications still appear in the system UI as normal, unless the user specifies otherwise.
There are three levels available in Do Not Disturb mode:
- Total silence: blocks all sounds and vibrations, including from alarms, music, videos, and games.
- Alarms only: blocks all sounds and vibrations, except from alarms.
- Priority only: users can configure which system-wide categories can interrupt them, such as only alarms, reminders, events, calls, or messages. For messages and calls, users can filter based on sender or caller, as shown in figure 13.
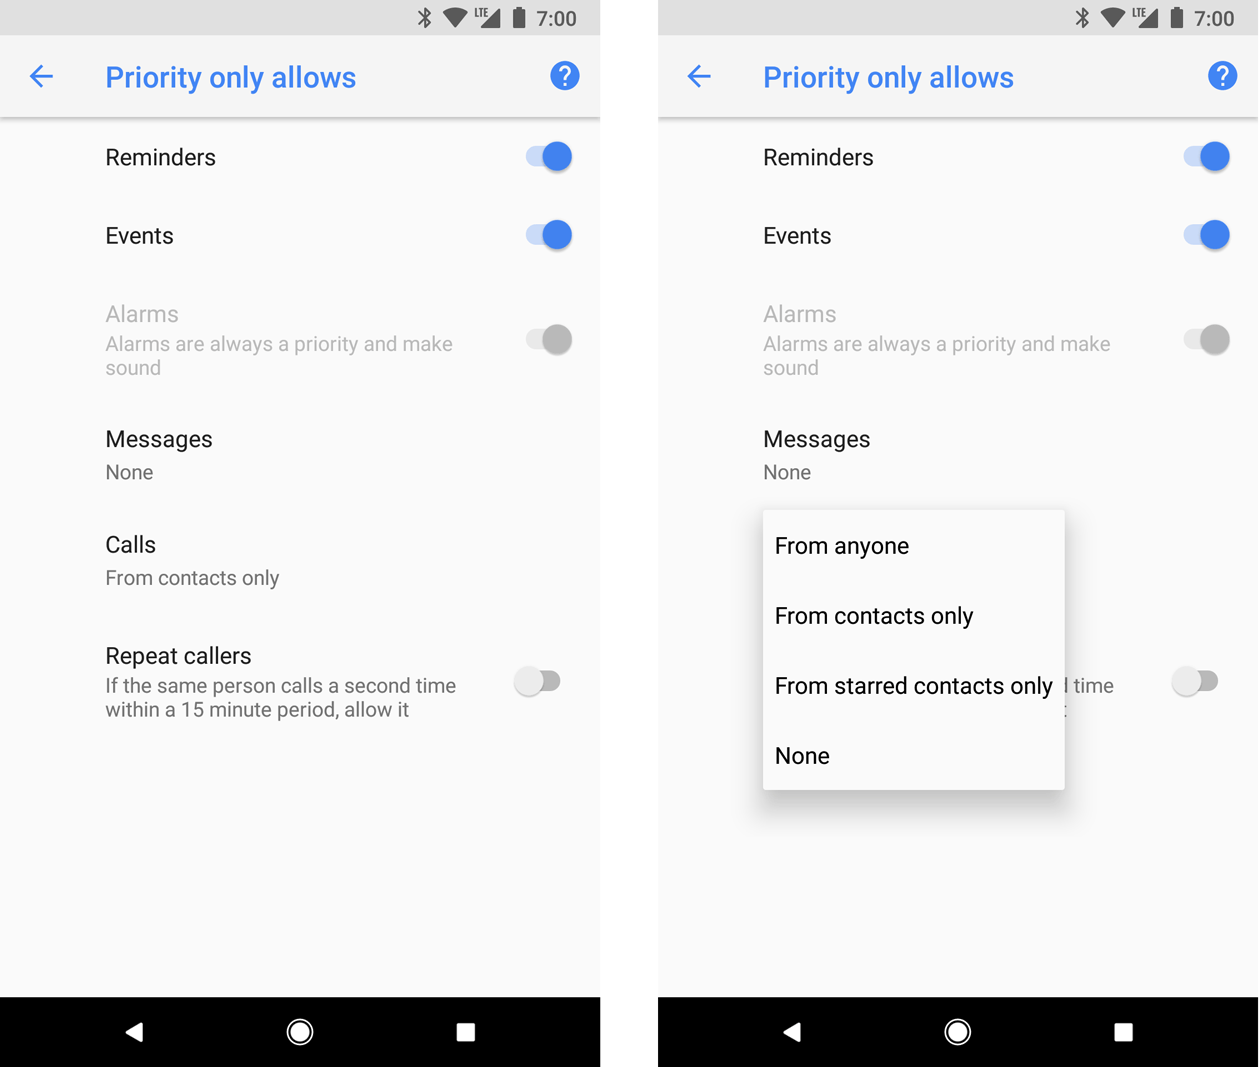
Figure 13. Users can can allow notifications through based on system-wide categories (left) and sender or caller (right).
On Android 8.0 (API level 26) and higher, users can additionally allow notifications through for app-specific categories—also known as channels—by overriding Do Not Disturb on a channel-by-channel basis. For example, a payment app might have channels for notifications related to withdrawals and deposits. The user can allow withdrawal notifications, deposit notifications, or both when in priority mode.
On devices running Android 7.1 (API level 25) and lower, users can allow notifications through on an app-by-app basis, rather than on a channel-by-channel basis.
To configure your notifications for these user settings, you must set a system-wide category.
Notifications for foreground services
A notification is required when your app is running a foreground
service—a Service running in the
background that's long-living and noticeable to the user, such as a media
player. This notification can't be dismissed like other notifications. To remove
the notification, the service must be stopped or removed from the foreground
state.
For more information, read Foreground services. If you are building a media player, also read Playing media in the background.
Notification behaviors
Android 16.0, API level 36
Notifications are now auto-grouped on the app's behalf.
The following notifications are auto-grouped:
- Notifications without a summary
- Notifications without child notifications
- Notifications with single or a low number of child notifications
Android 15.0, API level 35
Cooldown
Android 15 introduces a notification cooldown feature that aims to improve the experience of notifications that arrive in quick succession. This feature reduces the appearance, sound volume and vibration intensity for repetitive notifications for up to two minutes.
Critical notifications that require audio and haptics to get attention are not subject to cooldown. The user can turn off notification cooldown in Settings.
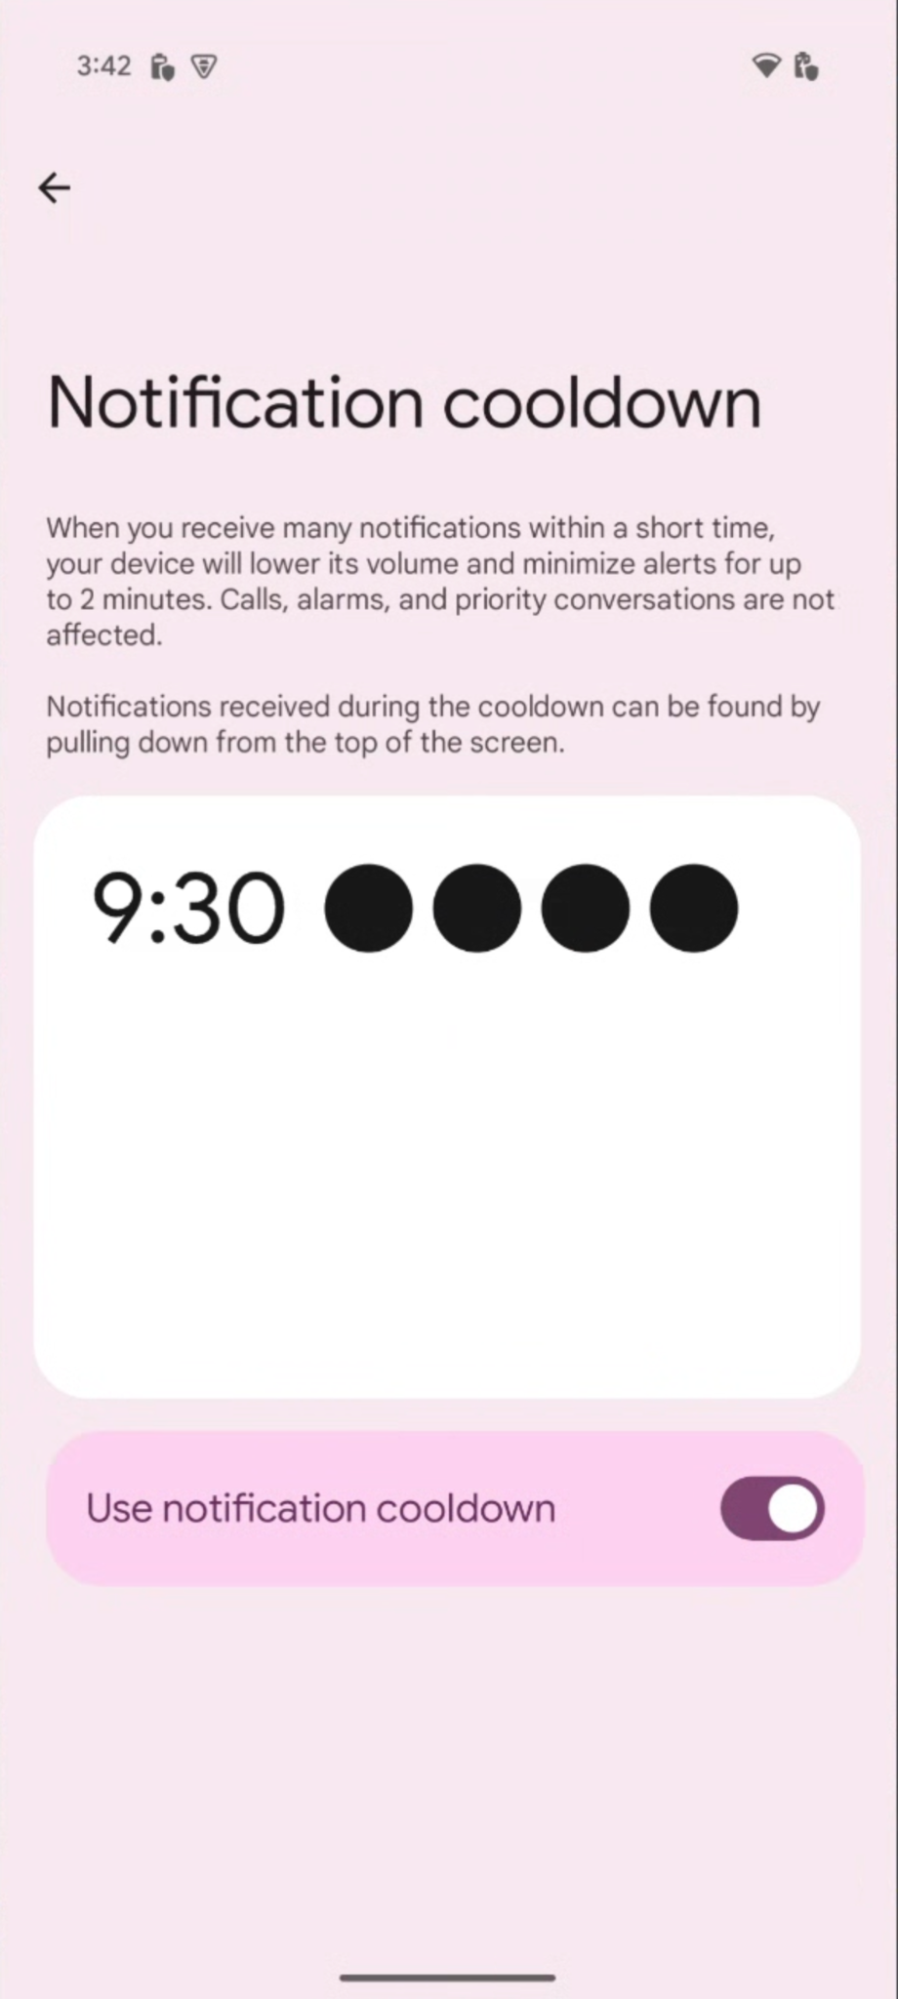
Figure 9. The notification cooldown settings.
The following is an example of how to locate the notification cooldown settings:
Kotlin
val intent = Intent(Settings.ACTION_MANAGE_ADAPTIVE_NOTIFICATIONS)
val pendingIntent =
            PendingIntent.getActivity(context, 0, intent, PendingIntent.FLAG_IMMUTABLE)
Java
Intent intent = new Intent(Settings.ACTION_MANAGE_ADAPTIVE_NOTIFICATIONS)
PendingIntent pendingIntent =
            PendingIntent.getActivity(context, 0, intent, PendingIntent.FLAG_IMMUTABLE)