
برای کامپایل و اشکالزدایی کد نیتیو برای برنامه خود، به اجزای زیر نیاز دارید:
- کیت توسعه بومی اندروید (NDK): مجموعهای از ابزارها که به شما امکان میدهد از کد C و C++ در اندروید استفاده کنید.
- CMake: یک ابزار ساخت خارجی که در کنار Gradle برای ساخت کتابخانه بومی شما کار میکند. اگر فقط قصد استفاده از ndk-build را دارید، به این کامپوننت نیازی ندارید.
- LLDB: دیباگر اندروید استودیو که برای دیباگ کردن کد native استفاده میشود. به طور پیشفرض، LLDB در کنار اندروید استودیو نصب خواهد شد.
این صفحه نحوه نصب خودکار این اجزا یا با استفاده از اندروید استودیو یا ابزار sdkmanager برای دانلود و نصب دستی آنها را شرح میدهد.
نصب خودکار NDK و CMake
افزونه اندروید Gradle نسخه ۴.۲.۰+ میتواند به طور خودکار NDK و CMake مورد نیاز را در اولین باری که پروژه خود را میسازید، در صورتی که مجوزهای آنها از قبل پذیرفته شده باشد، نصب کند. اگر قبلاً شرایط مجوز را خوانده و با آنها موافقت کردهاید، میتوانید مجوزها را در اسکریپتها با دستور زیر از قبل بپذیرید:
yes | ${sdk}/cmdline-tools/latest/bin/sdkmanager --licenses
NDK و CMake را نصب کنید
هنگام نصب NDK، اندروید استودیو آخرین NDK موجود را انتخاب میکند. برای اکثر پروژهها، نصب این نسخه پیشفرض NDK کافی است. با این حال، اگر پروژه شما به یک یا چند نسخه خاص از NDK نیاز دارد، میتوانید نسخههای خاص را دانلود و پیکربندی کنید . انجام این کار به شما کمک میکند تا از ساختهای قابل تکرار در پروژههایی که هر کدام به نسخه خاصی از NDK وابسته هستند، اطمینان حاصل کنید. اندروید استودیو تمام نسخههای NDK را در دایرکتوری android-sdk /ndk/ نصب میکند.
برای نصب CMake و NDK پیشفرض در اندروید استودیو، مراحل زیر را انجام دهید:
با باز کردن یک پروژه، روی ابزارها > مدیر SDK کلیک کنید.
روی برگه ابزارهای SDK کلیک کنید.
کادرهای انتخاب NDK (کنار هم) و CMake را علامت بزنید.
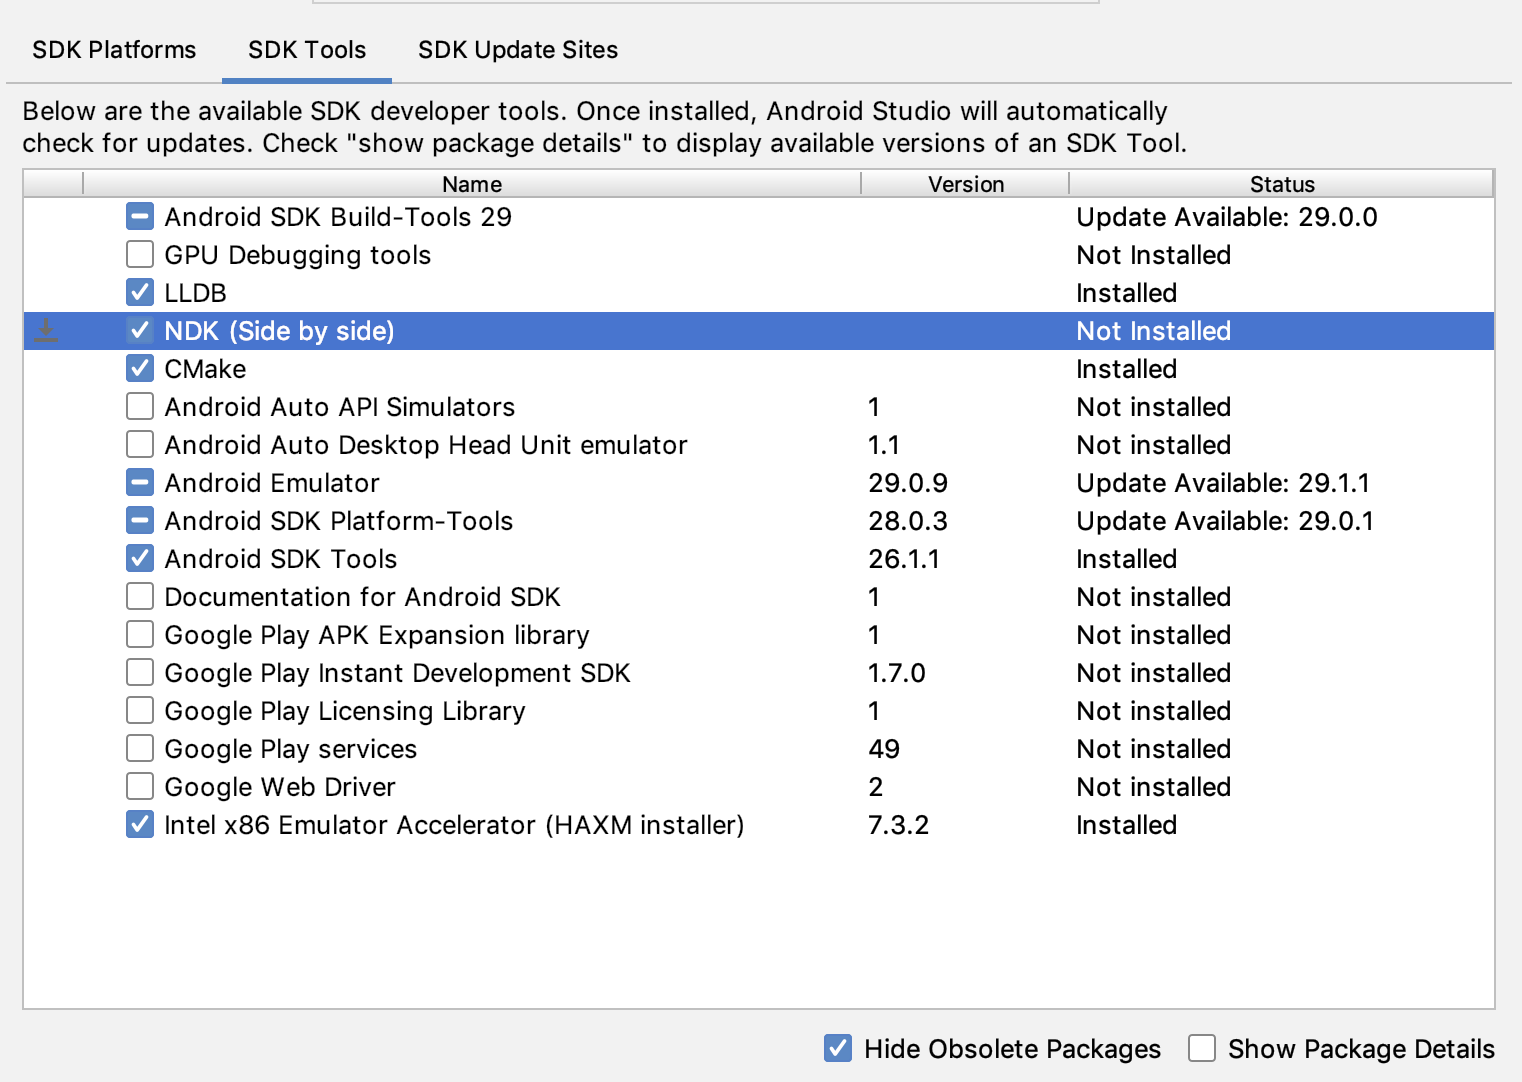 شکل ۱. پنجره SDK Tools که گزینه NDK (کنار هم) را نشان میدهد
روی تأیید کلیک کنید.
یک کادر محاورهای به شما میگوید که بسته NDK چقدر فضا روی دیسک اشغال کرده است.
روی تأیید کلیک کنید.
وقتی نصب تمام شد، روی Finish کلیک کنید.
پروژه شما به طور خودکار فایل ساخت را همگامسازی کرده و ساخت را انجام میدهد. هرگونه خطایی که رخ میدهد را برطرف کنید.
پیکربندی یک نسخه خاص از CMake
SDK Manager شامل نسخه فورک شده CMake نسخه ۳.۶.۰ و نسخه ۳.۱۰.۲ است. پروژههایی که نسخه خاصی از CMake را تنظیم نمیکنند، با CMake نسخه ۳.۱۰.۲ ساخته میشوند. برای تنظیم نسخه CMake، موارد زیر را به فایل build.gradle ماژول خود اضافه کنید:
گرووی
android {
    ...
    externalNativeBuild {
        cmake {
            ...
            version "cmake-version"
        }
    }
}
کاتلین
android {
    ...
    externalNativeBuild {
        cmake {
            ...
            version = "cmake-version"
        }
    }
}
اگر میخواهید از نسخهای از CMake استفاده کنید که در SDK Manager وجود ندارد، مراحل زیر را دنبال کنید:
- CMake را از وبسایت رسمی CMake دانلود و نصب کنید.
- نسخه CMake مورد نظر خود را برای استفاده توسط Gradle در فایل
build.gradleماژول خود مشخص کنید. یا مسیر نصب CMake را به متغیر محیطی
PATHخود اضافه کنید یا آن را در فایلlocal.propertiesپروژه خود، همانطور که نشان داده شده است، قرار دهید. اگر Gradle نتواند نسخه CMake را که در فایلbuild.gradleخود مشخص کردهاید، پیدا کند، با خطای ساخت مواجه خواهید شد.# If you set this property, Gradle no longer uses PATH to find CMake. cmake.dir = "path-to-cmake"</pre>اگر سیستم ساخت نینجا را از قبل روی سیستم عامل خود نصب نکردهاید، به وبسایت رسمی نینجا بروید و آخرین نسخه نینجا را که برای سیستم عامل شما موجود است، دانلود و نصب کنید. حتماً مسیر نصب نینجا را نیز به متغیر محیطی
PATHخود اضافه کنید.
نصب نسخه خاصی از NDK
برای نصب نسخه خاصی از NDK، موارد زیر را انجام دهید:
با باز کردن یک پروژه، روی ابزارها > مدیر SDK کلیک کنید.
روی برگه ابزارهای SDK کلیک کنید.
کادر انتخاب «نمایش جزئیات بسته» را علامت بزنید.
کادر انتخاب NDK (Side by side) و کادرهای انتخاب زیر آن را که مربوط به نسخههای NDK مورد نظر برای نصب هستند، انتخاب کنید. اندروید استودیو تمام نسخههای NDK را در دایرکتوری
android-sdk /ndk/نصب میکند.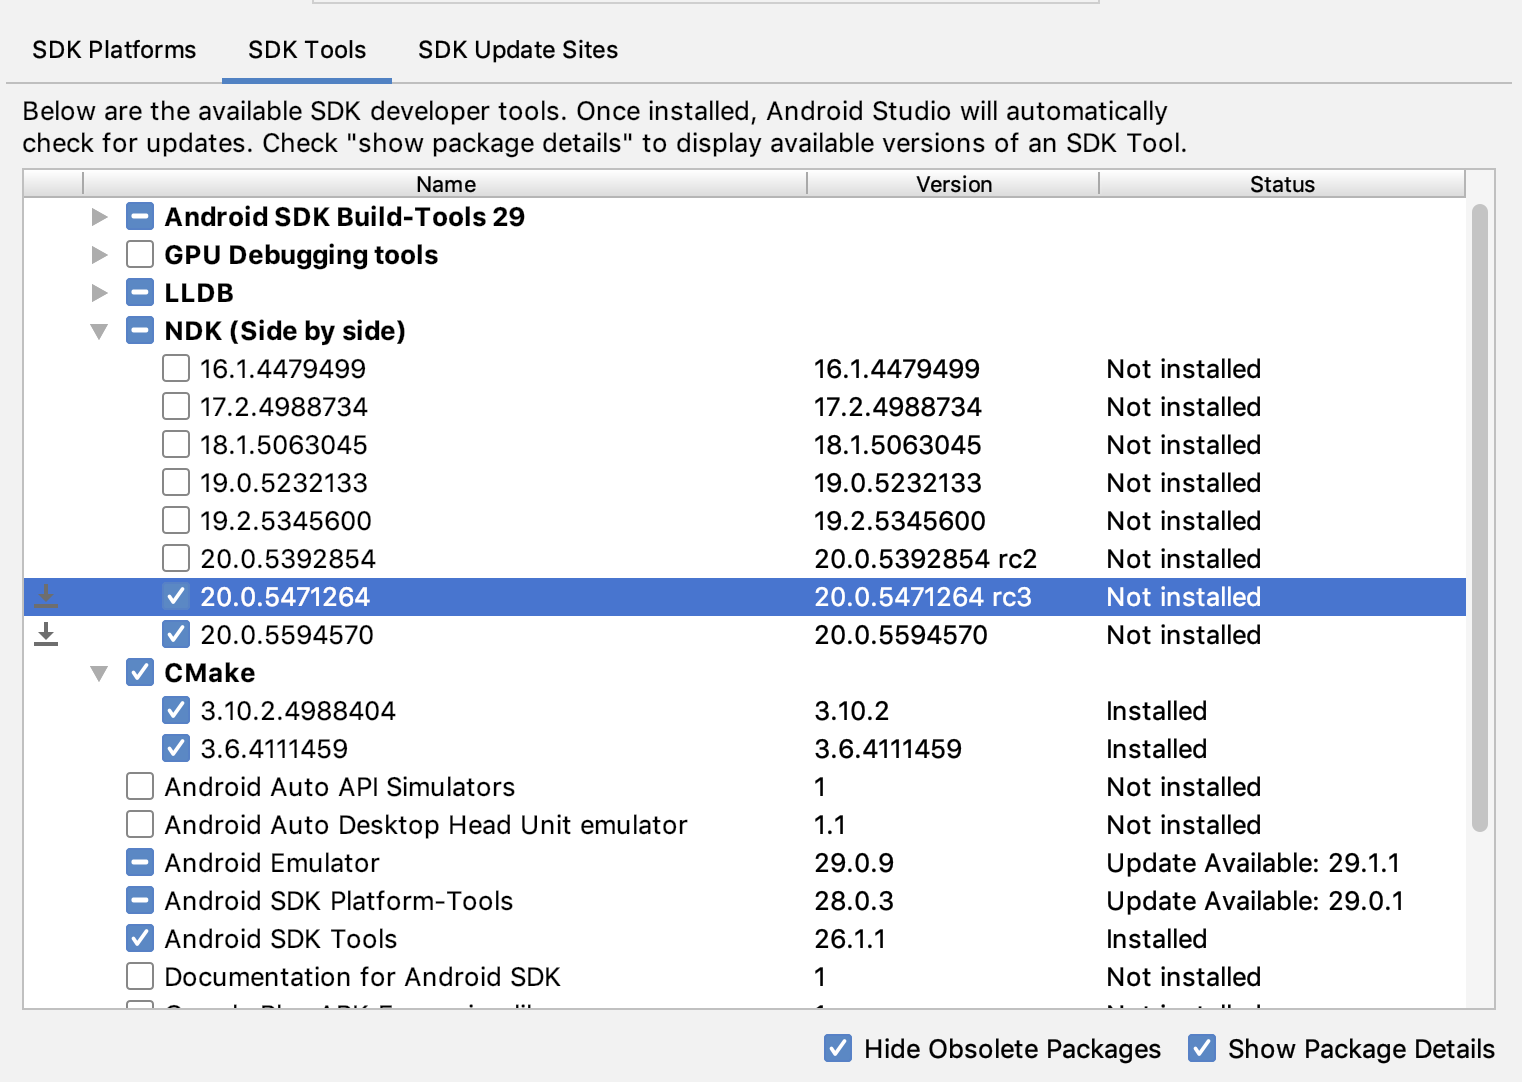 شکل ۲. پنجره ابزارهای SDK که گزینههای NDK (کنار هم) را نشان میدهد
روی تأیید کلیک کنید.
یک کادر محاورهای به شما میگوید که بسته(های) NDK چقدر فضا مصرف میکنند.
روی تأیید کلیک کنید.
وقتی نصب تمام شد، روی Finish کلیک کنید.
پروژه شما به طور خودکار فایل ساخت را همگامسازی کرده و ساخت را انجام میدهد. هرگونه خطایی که رخ میدهد را برطرف کنید.
هر ماژول را با نسخه NDK مورد نظر خود پیکربندی کنید . هنگام استفاده از اندروید استودیو ۳.۶ یا بالاتر، اگر نسخه را مشخص نکنید، افزونه Android Gradle نسخهای را انتخاب میکند که با آن سازگار است.
نسخههای خاصی از NDK را در پروژه خود پیکربندی کنید
اگر یکی از موارد زیر درست باشد، ممکن است لازم باشد نسخه NDK را در پروژه خود پیکربندی کنید:
- پروژه شما به ارث رسیده است و شما باید از نسخههای خاصی از NDK و افزونه Android Gradle (AGP) استفاده کنید. برای اطلاعات بیشتر، به پیکربندی NDK برای افزونه Android Gradle مراجعه کنید.
شما چندین نسخه از NDK را نصب کردهاید و میخواهید از یکی از آنها استفاده کنید. در این حالت، نسخه را با استفاده از ویژگی
android.ndkVersionدر فایلbuild.gradleماژول، همانطور که در نمونه کد زیر نشان داده شده است، مشخص کنید.گرووی
android {
    ndkVersion "major.minor.build" // e.g.,  ndkVersion "21.3.6528147"
}
کاتلین
android {
    ndkVersion = "major.minor.build" // e.g.,  ndkVersion "21.3.6528147"
}
نسخه پیشفرض NDK برای هر نسخه AGP
قبل از انتشار، هر نسخه AGP با آخرین نسخه پایدار NDK در آن زمان به طور کامل آزمایش میشود. اگر نسخه NDK را در فایل build.gradle مشخص نکرده باشید، از این نسخه NDK برای ساخت پروژههای شما استفاده میشود. نسخه پیشفرض NDK برای نسخههای مختلف AGP در یادداشتهای انتشار AGP و یادداشتهای انتشار قبلی AGP مستند شده است.