
Aby skompilować i debugować kod natywny aplikacji, potrzebujesz tych komponentów:
- Android Native Development Kit (NDK): zestaw narzędzi, który umożliwia używanie kodu C i C++ w Androidzie.
- CMake: zewnętrzne narzędzie do kompilacji, które współpracuje z Gradle, aby kompilować bibliotekę natywną. Jeśli planujesz używać tylko ndk-build, nie potrzebujesz tego komponentu.
- LLDB: debuger używany przez Android Studio do debugowania kodu natywnego. Domyślnie LLDB zostanie zainstalowany razem z Android Studio.
Na tej stronie opisujemy, jak automatycznie zainstalować te komponenty lub jak pobrać i zainstalować je ręcznie za pomocą Android Studio lub narzędzia sdkmanager.
Automatyczna instalacja NDK i CMake
Wtyczka Androida do obsługi Gradle w wersji 4.2.0 lub nowszej może automatycznie zainstalować wymagane NDK i CMake przy pierwszej kompilacji projektu, jeśli licencje zostały wcześniej zaakceptowane. Jeśli warunki licencji zostały już przeczytane i zaakceptowane, możesz zaakceptować licencje z wyprzedzeniem w skryptach za pomocą tego polecenia:
yes | ${sdk}/cmdline-tools/latest/bin/sdkmanager --licenses
Instalowanie NDK i CMake
Podczas instalacji NDK Android Studio wybiera najnowszą dostępną wersję NDK. W przypadku większości projektów wystarczy zainstalować domyślną wersję NDK.
Jeśli jednak Twój projekt wymaga co najmniej 1 konkretnej wersji NDK, możesz
pobrać i skonfigurować konkretne wersje. Dzięki temu możesz mieć pewność, że kompilacje będą powtarzalne w projektach, z których każdy zależy od konkretnej wersji NDK. Android Studio instaluje wszystkie wersje NDK w katalogu
android-sdk/ndk/.
Aby zainstalować CMake i domyślny NDK w Android Studio:
Gdy projekt jest otwarty, kliknij Narzędzia > Menedżer SDK.
Kliknij kartę Narzędzia SDK.
Zaznacz pola wyboru NDK (Side by side) i CMake.
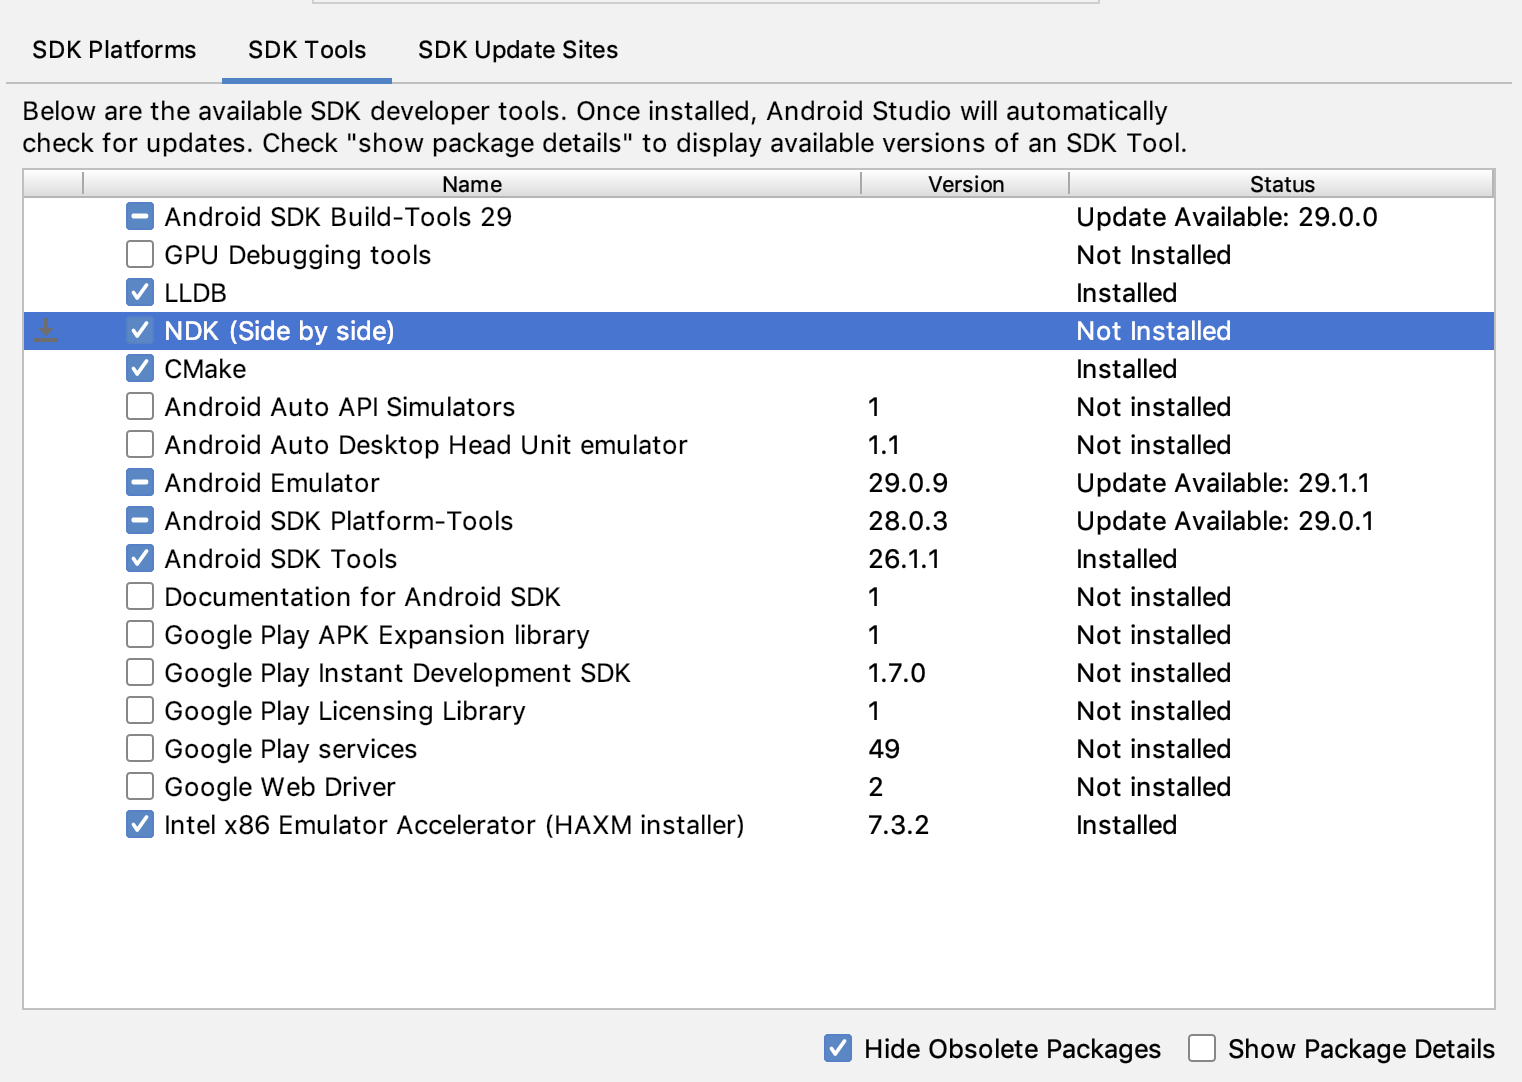 Rysunek 1. Okno Narzędzia SDK z zaznaczoną opcją NDK (Side by side)
Kliknij OK.
W oknie dialogowym zobaczysz, ile miejsca na dysku zajmuje pakiet NDK.
Kliknij OK.
Po zakończeniu instalacji kliknij Finish (Zakończ).
Twój projekt automatycznie synchronizuje plik kompilacji i przeprowadza kompilację. Rozwiąż wszelkie błędy.
Konfigurowanie konkretnej wersji CMake
Menedżer SDK zawiera rozwidloną wersję CMake 3.6.0 i wersję 3.10.2. Projekty, w których nie ustawiono konkretnej wersji CMake, są kompilowane za pomocą CMake 3.10.2. Aby ustawić wersję CMake, dodaj do pliku build.gradle modułu te informacje:
Dynamiczny
android {
    ...
    externalNativeBuild {
        cmake {
            ...
            version "cmake-version"
        }
    }
}
Kotlin
android {
    ...
    externalNativeBuild {
        cmake {
            ...
            version = "cmake-version"
        }
    }
}
Jeśli chcesz używać wersji CMake, która nie jest uwzględniona w Menedżerze SDK, wykonaj te czynności:
- Pobierz i zainstaluj CMake z oficjalnej witryny CMake.
- Określ wersję CMake, której Gradle ma używać w pliku
build.gradlemodułu. Dodaj ścieżkę do instalacji CMake do zmiennej środowiskowej
PATHlub uwzględnij ją w plikulocal.propertiesprojektu, jak pokazano poniżej. Jeśli Gradle nie może znaleźć wersji CMake określonej w plikubuild.gradle, pojawi się błąd kompilacji.# If you set this property, Gradle no longer uses PATH to find CMake. cmake.dir = "path-to-cmake"</pre>Jeśli na stacji roboczej nie masz jeszcze zainstalowanego systemu kompilacji Ninja, wejdź na oficjalną stronę Ninja, pobierz i zainstaluj najnowszą wersję Ninja dostępną dla Twojego systemu operacyjnego. Pamiętaj, aby dodać ścieżkę do instalacji Ninja do zmiennej środowiskowej
PATH.
Instalowanie konkretnej wersji NDK
Aby zainstalować konkretną wersję NDK:
Gdy projekt jest otwarty, kliknij Narzędzia > Menedżer SDK.
Kliknij kartę Narzędzia SDK.
Zaznacz pole wyboru Pokaż szczegóły pakietu.
Zaznacz pole wyboru NDK (Side by side) oraz pola wyboru poniżej, które odpowiadają wersjom NDK, które chcesz zainstalować. Android Studio instaluje wszystkie wersje NDK w katalogu
android-sdk/ndk/.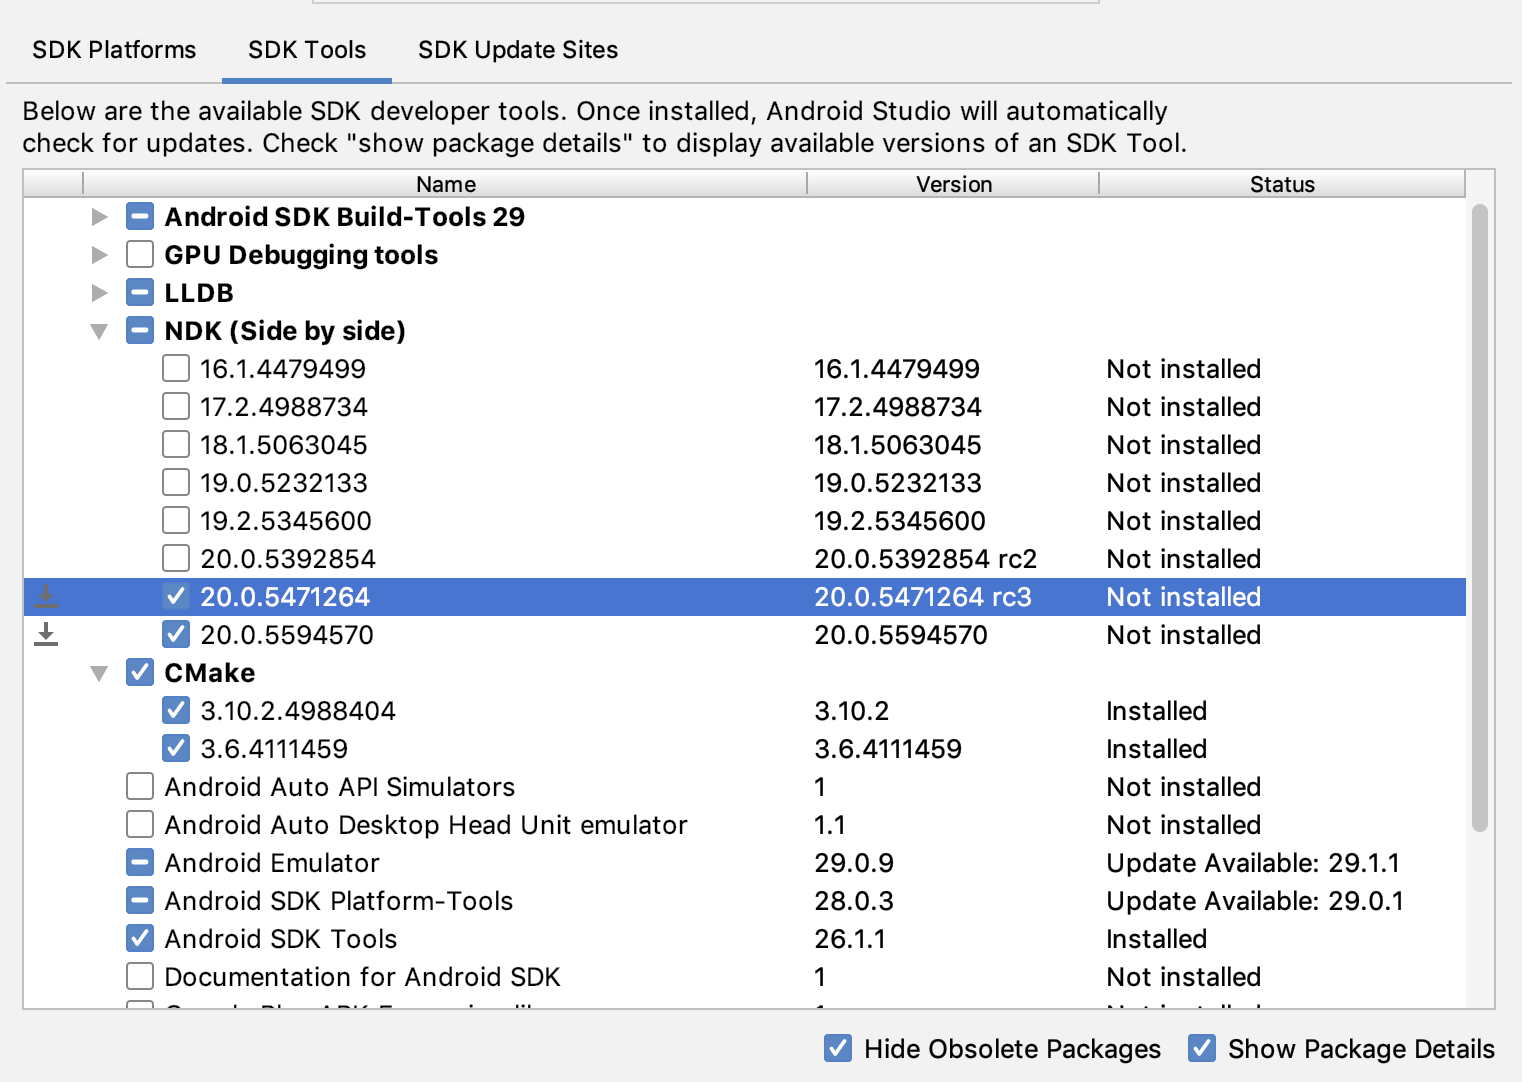 Rysunek 2. Okno Narzędzia SDK z zaznaczonymi opcjami NDK (Side by side)
Kliknij OK.
W oknie dialogowym zobaczysz, ile miejsca zajmuje pakiet lub pakiety NDK.
Kliknij OK.
Po zakończeniu instalacji kliknij Finish (Zakończ).
Twój projekt automatycznie synchronizuje plik kompilacji i przeprowadza kompilację. Rozwiąż wszelkie błędy.
Skonfiguruj każdy moduł z wersją NDK której ma używać. Jeśli używasz Android Studio w wersji 3.6 lub nowszej i nie określisz wersji, wtyczka Androida do obsługi Gradle wybierze wersję, która jest z nią zgodna.
Konfigurowanie konkretnych wersji NDK w projekcie
Może być konieczne skonfigurowanie wersji NDK w projekcie, jeśli spełniony jest jeden z tych warunków:
- Twój projekt jest dziedziczony i musisz używać konkretnych wersji NDK oraz wtyczki Androida do obsługi Gradle (AGP). Więcej informacji znajdziesz w artykule Konfigurowanie NDK dla wtyczki Androida do obsługi Gradle.
Masz zainstalowanych kilka wersji NDK i chcesz używać konkretnej wersji. W takim przypadku określ wersję za pomocą właściwości
android.ndkVersionw plikubuild.gradlemodułu, jak pokazano w tym przykładzie kodu.Dynamiczny
android {
    ndkVersion "major.minor.build" // e.g.,  ndkVersion "21.3.6528147"
}
Kotlin
android {
    ndkVersion = "major.minor.build" // e.g.,  ndkVersion "21.3.6528147"
}
Domyślna wersja NDK w zależności od wersji AGP
Przed wydaniem każda wersja AGP jest dokładnie testowana z najnowszą stabilną wersją NDK w danym momencie. Ta wersja NDK jest używana do kompilowania projektów, jeśli nie określisz wersji NDK w pliku build.gradle. Domyślne wersje NDK
dla różnych wersji AGP są opisane w
informacjach o wersji AGP i
informacjach o poprzednich wersjach AGP.