更新 IDE 和 SDK 工具
透過集合功能整理內容
你可以依據偏好儲存及分類內容。
安裝 Android Studio 後,即可透過自動更新服務和 Android SDK Manager 更新 Android Studio IDE 和 Android SDK 工具。
如果您使用 JetBrains Toolbox 安裝 Android Studio,Toolbox 會負責處理 Android Studio 的更新。Toolbox 可讓您同時安裝 Android Studio 的初期測試版本、RC 版和穩定版。如有需要,還可讓您復原至先前的各個版本。當有可用的更新時,Toolbox 中會顯示更新項目 (如圖 1 所示)。
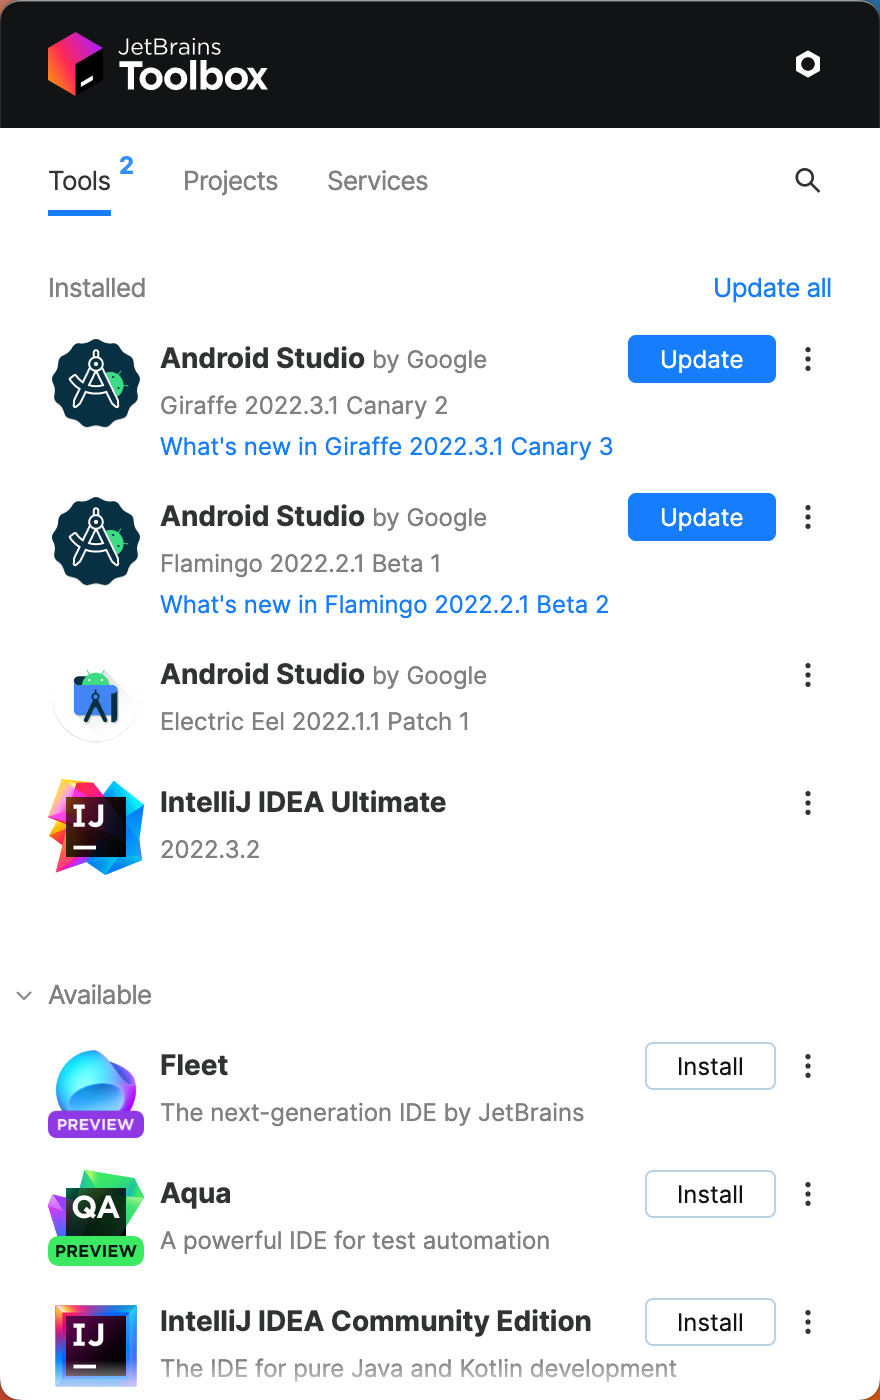
圖 1.Jetbrains Toolbox 顯示有可用更新。
更新 IDE 並變更版本
如果您手動安裝 Android Studio,當 IDE 有可用的更新時,Android Studio 會使用小泡泡對話方塊通知您。如要手動檢查更新,請依序點選「File」>「Settings」>「Appearance & Behavior」>「System Settings」>「Updates」 (在 macOS 中為「Android Studio」>「Check for Updates」)。請見圖 2。
您可以透過下列發布版本取得 Android Studio 更新:
如果您要試用其中一個預先發布版 (Canary 版或 RC 版),同時在正式專案中使用穩定版,可以並行安裝這兩個版本。
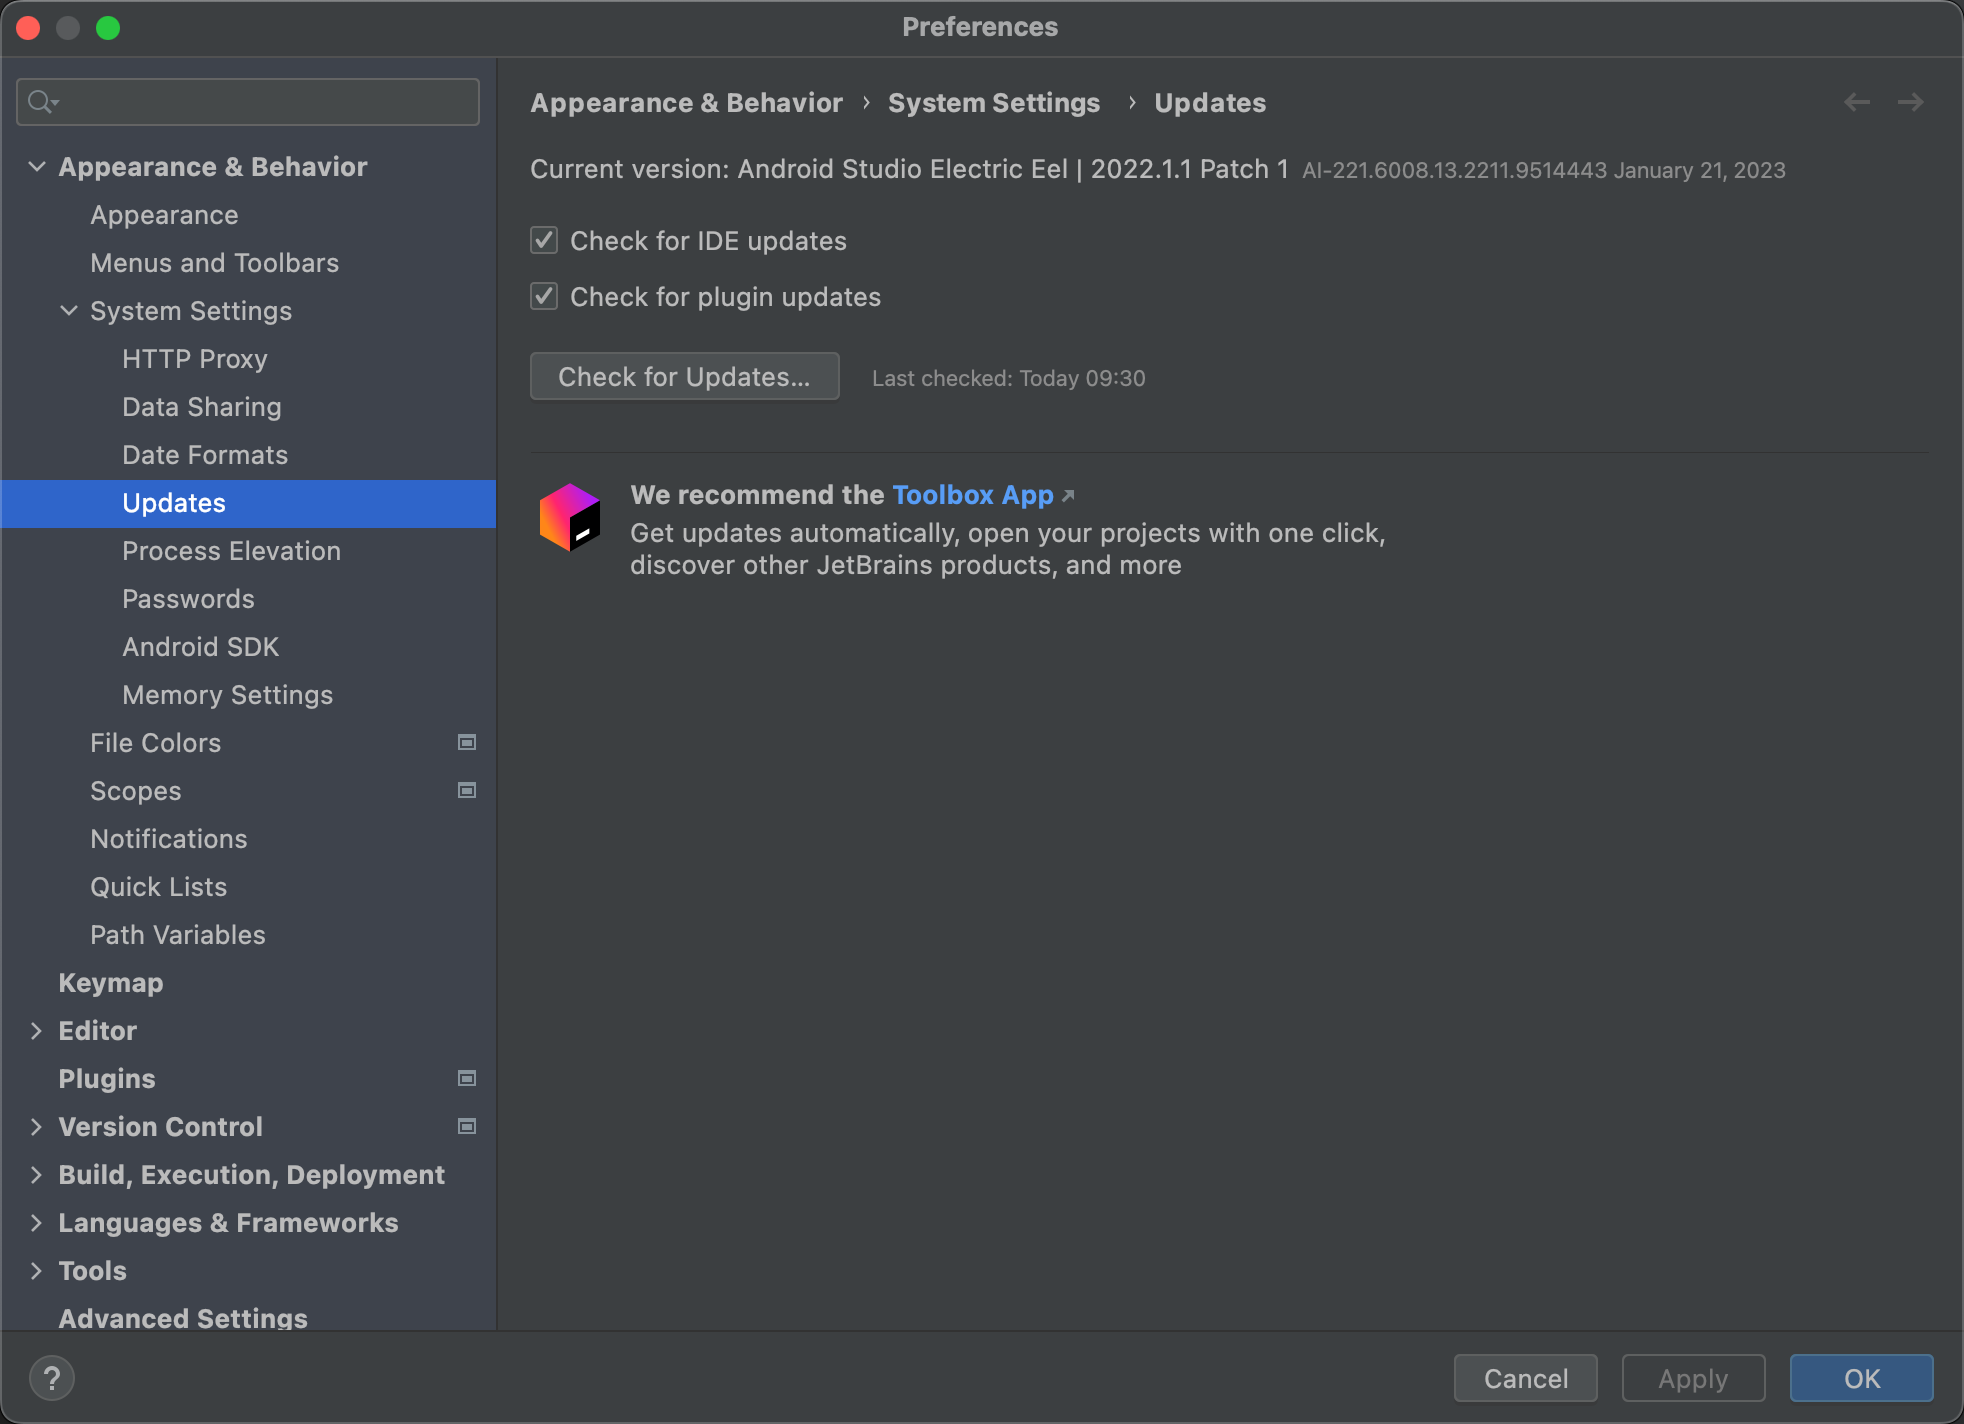
圖 2. Android Studio 更新偏好設定。
刪除未使用的 Android Studio 目錄
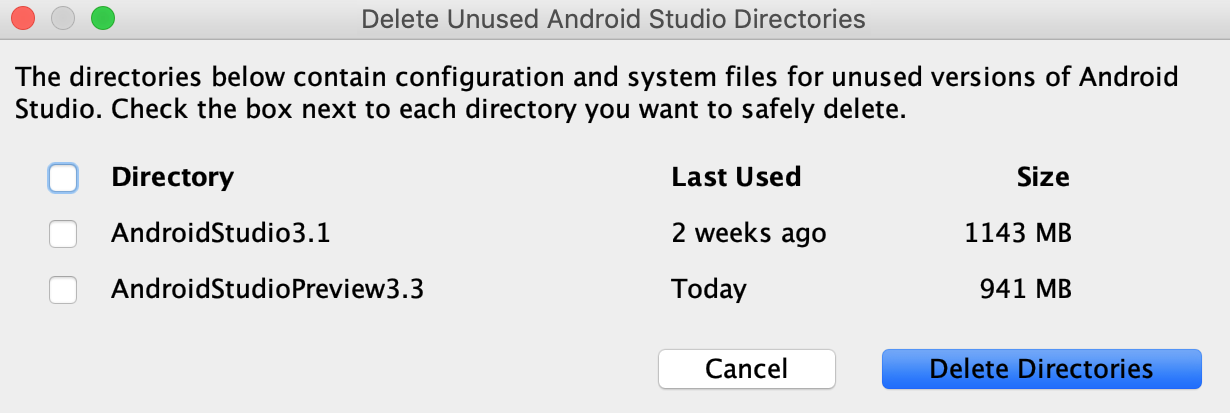
首次執行 Android Studio 的主要版本時,系統會針對找不到對應安裝項目的 Android Studio 版本,尋找包含其快取、設定、索引和記錄的目錄。「Delete Unused Android Studio Directories」對話方塊會顯示這些未使用目錄的位置、大小和上次修改時間,並提供刪除目錄的選項。
透過 SDK Manager 更新工具
Android SDK Manager 可協助您下載開發應用程式所需的 SDK 工具、平台和其他元件。下載完成後,您可以在標示為「Android SDK Location」的目錄中找到各個套件 (如圖 3 所示)。
如要透過 Android Studio 開啟 SDK Manager,請依序按一下「Tools」>「SDK Manager」,或點選工具列中的「SDK Manager」圖示
。如果您不是使用 Android Studio,則可使用 sdkmanager
指令列工具下載相關工具。
如果已安裝的套件有可用更新,套件旁邊的核取方塊會顯示破折號
。
- 如要更新項目或安裝新項目,請勾選核取方塊。
- 如要解除安裝套件,只要按一下即可取消選取核取方塊。
在左欄中,待更新項目會以下載圖示
表示,待移除項目則以紅色十字表示︰
。
如要更新所選套件,請按一下「Apply」或「OK」,然後同意所有授權協議。
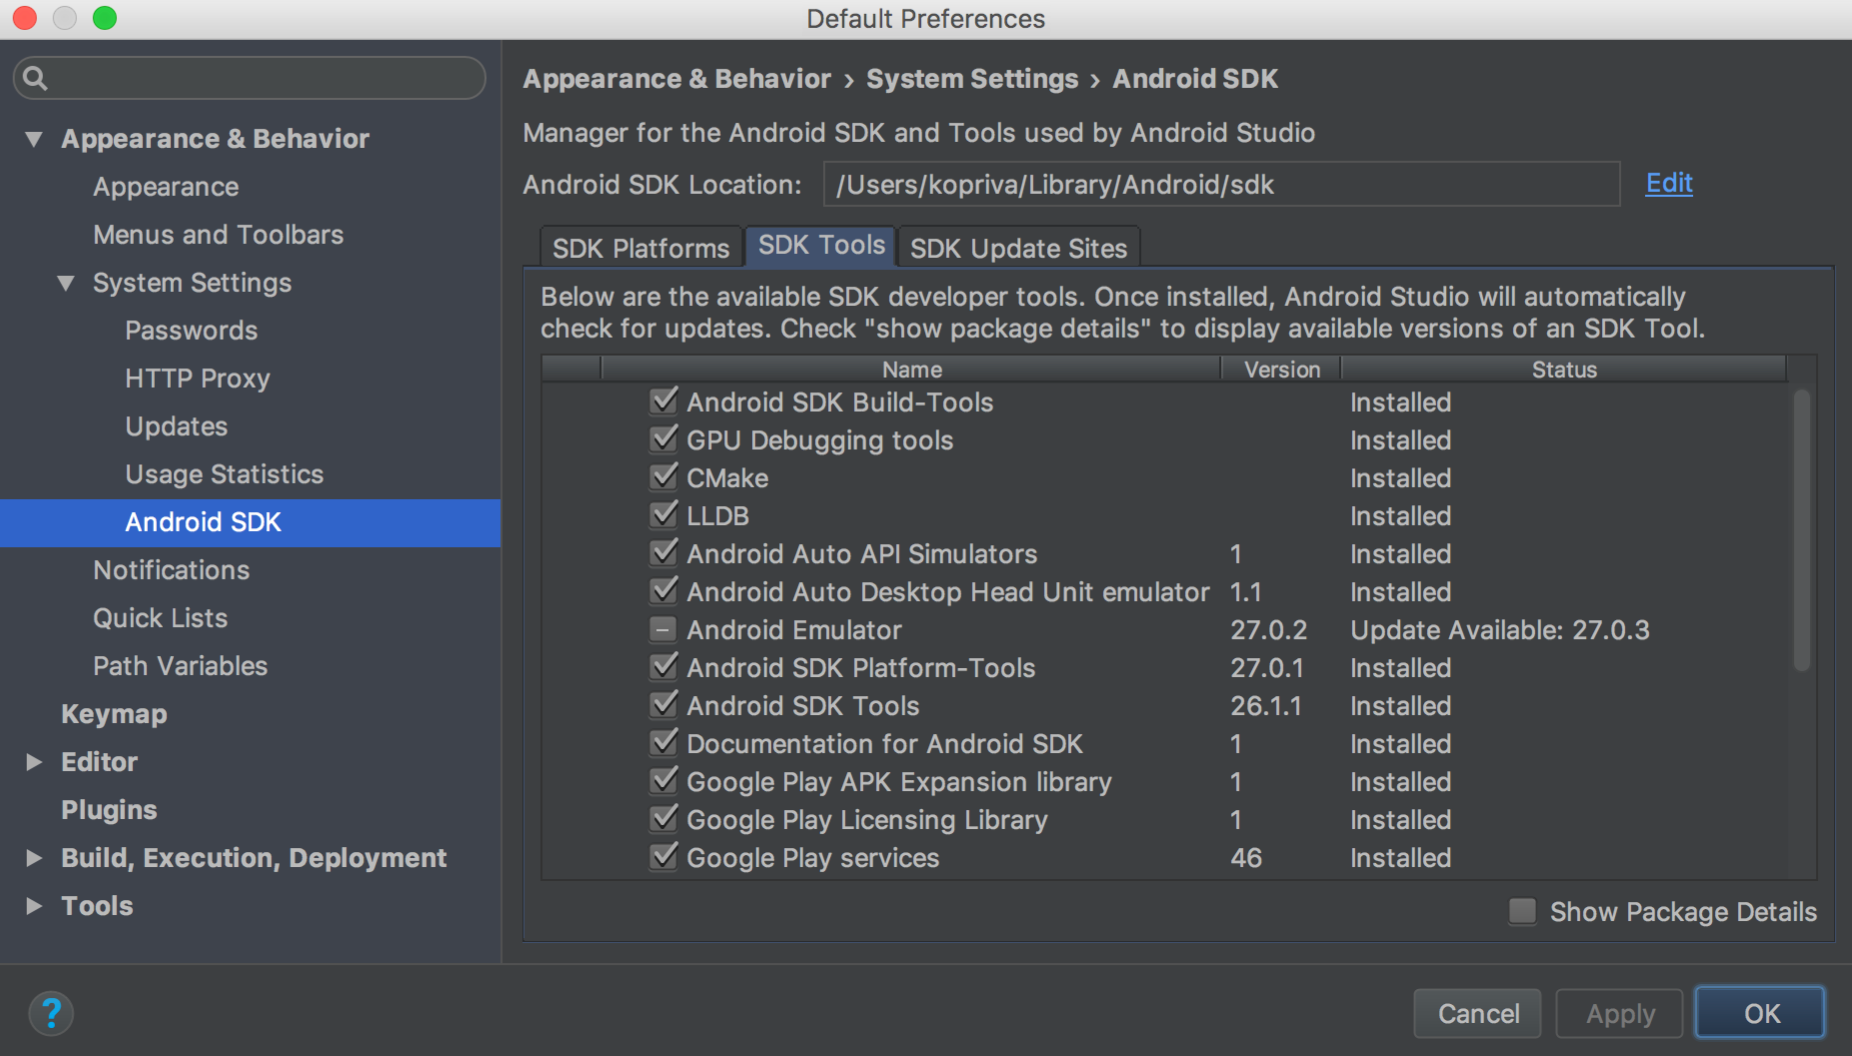
圖 3. Android SDK Manager。
必要套件
您可以在「SDK Tools」分頁找到下列工具:
- Android SDK 建構工具
- 包含用於建構 Android 應用程式的工具。詳情請參閱 SDK 建構工具版本資訊。
- Android SDK 平台工具
- 包含 Android 平台所需的各種工具,包括
adb
工具。
- Android SDK 指令列工具
- 包含 ProGuard 等必要工具。詳情請參閱 SDK Tools 版本資訊。
- Android SDK Platform
在「SDK Platforms」分頁標籤中,您必須安裝至少一個 Android 平台版本,才能編譯應用程式。使用最新的平台版本做為建構目標,以便在最新裝置上提供最佳使用者體驗。如要下載版本,請勾選該版本名稱旁的核取方塊。
應用程式仍可在舊版本上執行;不過,在搭載最新版 Android 的裝置上執行時,您必須針對最新版本進行建構,才能使用新功能。
- Google USB 驅動程式
- Windows 必要條件。包含多項工具,以協助您使用 Google 裝置執行
adb
偵錯。如要安裝,請前往取得 Google USB 驅動程式。
推薦套件
建議使用下列工具進行開發:
- Android Emulator
- 以 QEMU 為基礎的裝置模擬工具,可讓您在實際的 Android 執行階段環境中對應用程式進行偵錯及測試。詳情請參閱模擬器版本資訊。
注意事項:先前由「Support Repository」套件 (例如 Android 支援資料庫、限制版面配置、Google Play 服務和 Firebase) 提供的多數 API 程式庫,現已由 Google 的 Maven 存放區提供。使用 Android Studio 3.0 以上版本建立的專案會在建構設定中自動納入這個存放區。如果您使用的是舊有專案,則必須在 build.gradle
或 build.gradle.kts
檔案中手動新增 Google 的 Maven 存放區。
- Intel 或 ARM 系統映像檔
- 必須提供系統映像檔才能執行 Android Emulator。每個平台版本都會包含支援的系統映像檔。日後在 AVD Manager 中建立 Android 虛擬裝置 (AVD) 時,也可以下載系統映像檔。請根據開發電腦的處理器選擇 Intel 或 ARM。
- Google Play 服務
- 包含一組程式庫、Javadocs 和範例,以協助您建構應用程式。如要使用 Google Play 服務中的 API,您必須使用 Google API 系統映像檔或 Google Play 系統映像檔。
上述清單僅列舉部分項目,您可以新增其他網站,透過第三方下載其他套件。
在某些情況下,SDK 套件可能需要其他工具的特定最低修訂版本。如果是這類情況,SDK Manager 會發出警示通知,並將依附元件加入您的下載清單。
編輯或新增 SDK 工具網站
在「SDK Update Sites」分頁中,您可以新增並管理其他代管自家工具的網站,然後從這些網站下載套件。Android Studio 會檢查您新增的 SDK 網站,確認是否有 Android 工具和第三方工具更新。
舉例來說,行動電信業者或裝置製造商可能會提供自家 Android 裝置支援的其他 API 程式庫。如要使用這類程式庫進行開發,可以安裝其 Android SDK 套件,只要在「SDK Update Sites」中將 SDK 工具網址新增至「SDK Manager」即可。
如果電信業者或裝置製造商在自家網站上提供 SDK 外掛程式存放區檔案,請按照下列步驟將該網站新增至 Android SDK Manager:
- 按一下「SDK Update Sites」分頁標籤。
- 按一下視窗頂端的「Add」
。
- 輸入第三方網站的名稱和網址,然後按一下「OK」。
- 確認您已勾選「Enabled」資料欄中對應的核取方塊。
- 按一下「Apply」或「OK」。
該網站提供的所有 SDK 套件會視情況在「SDK Platforms」或「SDK Tools」分頁標籤中顯示。
透過 Gradle 自動下載缺少的套件
在您透過指令列或 Android Studio 執行建構作業時,只要 SDK Manager 中已經接受對應的 SDK 授權協議,Gradle 就會自動下載專案依附的任何缺少的 SDK 套件。
使用 SDK Manager 接受授權協議時,Android Studio 會在 SDK 主目錄內建立授權目錄。Gradle 需要這個授權目錄才能自動下載缺少的套件。
如果您已在某個工作站上接受授權協議,但想要在其他工作站上建構專案,則可複製已接受的授權目錄,藉此匯出授權。
如要將授權複製到其他機器上,請按照下列步驟操作:
- 在已安裝 Android Studio 的電腦上,依序點選「Tools」>「SDK Manager」。記下視窗頂端的「Android SDK Location」路徑。
前往該目錄,並找出其中的 licenses/
目錄。
如果沒有看到 licenses/
目錄,請返回 Android Studio,更新您的 SDK 工具,並接受授權協議。當您返回 Android SDK 主目錄後,系統應該會顯示該目錄。
- 複製整個
licenses/
目錄,並在您想要用來建立專案的電腦上將目錄貼到 Android SDK 主目錄中。
Gradle 現在可以自動下載專案依附的缺少的套件。
請注意,如果您是透過 Android Studio 執行建構,這項功能會自動停用,這是因為 SDK Manager 會負責下載 IDE 缺少的套件。如要手動停用這項功能,請在專案的 gradle.properties
檔案中設定 android.builder.sdkDownload=false
。
使用指令列更新工具
在沒有圖形 UI 的系統上 (例如持續整合伺服器),您無法在 Android Studio 中使用 SDK Manager。請改用 sdkmanager
指令列工具,來安裝及更新 SDK 工具和平台。
使用 sdkmanager
安裝 SDK 工具和平台後,您可能必須接受任何缺少的授權。此外還可以使用 sdkmanager
來完成此操作:
$ sdkmanager --licenses
這個指令會掃描所有已安裝的 SDK 工具和平台,並顯示任何尚未接受的授權。系統會提示您接受每項授權。
這個頁面中的內容和程式碼範例均受《內容授權》中的授權所規範。Java 與 OpenJDK 是 Oracle 和/或其關係企業的商標或註冊商標。
上次更新時間:2025-08-17 (世界標準時間)。
[[["容易理解","easyToUnderstand","thumb-up"],["確實解決了我的問題","solvedMyProblem","thumb-up"],["其他","otherUp","thumb-up"]],[["缺少我需要的資訊","missingTheInformationINeed","thumb-down"],["過於複雜/步驟過多","tooComplicatedTooManySteps","thumb-down"],["過時","outOfDate","thumb-down"],["翻譯問題","translationIssue","thumb-down"],["示例/程式碼問題","samplesCodeIssue","thumb-down"],["其他","otherDown","thumb-down"]],["上次更新時間:2025-08-17 (世界標準時間)。"],[],[],null,["# Update the IDE and SDK tools\n\nOnce you install Android Studio, you can keep the Android Studio IDE\nand Android SDK tools up to date with automatic updates\nand the Android SDK Manager.\n\nUpdate your IDE using JetBrains Toolbox\n---------------------------------------\n\nIf you installed Android Studio using\n[JetBrains Toolbox](https://www.jetbrains.com/toolbox-app/), then\nToolbox is responsible for handling updates to Android Studio. Toolbox lets you install canary,\nRC, and stable versions of Android Studio in parallel. It also lets you roll back to earlier\nversions of each, if required. When an update is available it displays in Toolbox, as\nshown in figure 1.\n\n**Figure 1.** Jetbrains Toolbox showing available updates.\n\nUpdate your IDE and change channels\n-----------------------------------\n\nIf you installed Android Studio manually, Android Studio notifies you with a small bubble\ndialog when an update is available for the IDE. To manually check for updates,\nclick **File** \\\u003e**Settings** \\\u003e**Appearance \\& Behavior** \\\u003e\n**System Settings** \\\u003e **Updates**\n(on macOS, **Android Studio** \\\u003e **Check for Updates**). See figure 2.\n\nUpdates for Android Studio are available from the following\nrelease channels:\n\n- **Canary channel:** these bleeding-edge releases are updated roughly weekly and are available for download on the [Preview release](/studio/preview) page.\n\n In addition to receiving canary versions of Android Studio, you also receive preview\n versions of other SDK tools, including the Android Emulator.\n\n Although these builds are subject to more\n bugs, they do get tested and are available so you can try new\n features and provide feedback.\n\n\n **Note:** This channel is not recommended for\n production development.\n- **RC channel:** these are release candidates based on stable canary builds and are available for download on the [Preview release](/studio/preview) page. They are released to get feedback before being integrated into the stable channel.\n- **Stable channel:** the official, stable release of [Android Studio](/studio).\n\nIf you'd like to try one of the preview channels (canary or RC)\nwhile still using the stable build for your production projects, you\ncan [install them side by side](/studio/preview/install-preview).\n\n**Figure 2.** The Android Studio Updates\npreferences.\n\n### Delete unused Android Studio directories\n\nWhen you run a major version of Android Studio for the first time, it looks for directories\ncontaining caches, settings, indices, and logs for versions of Android Studio for which a\ncorresponding installation can't be found. The **Delete Unused Android Studio\nDirectories** dialog then displays locations, sizes, and last-modified times of these unused\ndirectories and provides an option to delete them.\n\nUpdate your tools with the SDK Manager\n--------------------------------------\n\nThe Android SDK Manager helps you download the SDK tools, platforms, and\nother components you need to develop your apps. Once downloaded, you can find\neach package in the directory indicated as the **Android SDK Location**,\nas shown in figure 3.\n\nTo open the SDK Manager from Android Studio, click **Tools \\\u003e\nSDK Manager** or click **SDK Manager**\n\nin the toolbar. If you're not using Android Studio, you can download tools\nusing the [`sdkmanager`](/studio/command-line/sdkmanager) command-line tool.\n\nWhen an update is available for a package you already have, a dash\nappears in the checkbox next to the package.\n\n- To update an item or install a new one, select the checkbox.\n- To uninstall a package, click to clear the checkbox.\n\nPending updates are indicated in the left column with a download icon\n. Pending removals are\nindicated with a red X: .\n\nTo update the selected packages,\nclick **Apply** or **OK** and agree to any\nlicense agreements.\n| **Note:** To install SDK packages from another release channel without changing your IDE's release channel, see the [`sdkmanager` documentation](/tools/sdkmanager#usage).\n\n**Figure 3.** The Android SDK Manager.\n\n### Required packages\n\nYou can find the following tools in the **SDK Tools** tab:\n\n**Android SDK Build Tools**\n: Includes tools to build Android apps.\n For more information, see the\n [SDK Build Tools release notes](/studio/releases/build-tools).\n\n**Android SDK Platform Tools**\n: Includes various tools required by the\n Android platform, including the [`adb`](/studio/command-line/adb) tool.\n\n**Android SDK Command-Line Tools**\n: Includes essential tools such as ProGuard. For more information, see\n the [SDK Tools release notes](/studio/releases/sdk-tools).\n\n**Android SDK Platform**\n\n: In the **SDK Platforms** tab, you must install at least one version of the Android\n platform so you can compile your app. Use the latest platform version as your build target to\n provide the best user experience on the latest devices. To download a version, select the checkbox next\n to the version name.\n\n You can still run your app on older versions; however, you must build against the latest\n version to use new features when running on devices with the latest version of\n Android.\n\n**Google USB Driver**\n: Required for Windows. Includes tools to help you perform\n [`adb`](/studio/command-line/adb) debugging with Google devices. To install, visit\n [Get the Google USB Driver](/studio/run/win-usb)."]]