Compose में, Painter ऑब्जेक्ट का इस्तेमाल ऐसी चीज़ को दिखाने के लिए किया जाता है जिसे बनाया जा सकता है. यह Android में तय किए गए Drawable एपीआई की जगह इस्तेमाल किया जाता है. साथ ही, यह उस कंपोज़ेबल के मेज़रमेंट और लेआउट पर असर डालता है जो इसका इस्तेमाल कर रहा है. A
BitmapPainter, स्क्रीन पर Bitmap बना सकने वाले ImageBitmap को लेता है.
ज़्यादातर इस्तेमाल के मामलों में, ऊपर दिए गए painterResource() का इस्तेमाल करने पर, ऐसेट के लिए सही पेंटर मिलता है. जैसे, BitmapPainter या VectorPainter. इन दोनों के बीच के अंतर के बारे में ज़्यादा जानने के लिए, ImageBitmap बनाम ImageVector सेक्शन पढ़ें.
Painter, DrawModifier से अलग होता है. DrawModifier, इसे दिए गए बाउंड्री के अंदर ही ड्रॉ करता है. साथ ही, इसका कंपोज़ेबल के मेज़रमेंट या लेआउट पर कोई असर नहीं पड़ता.
कस्टम पेंटर बनाने के लिए, Painter क्लास को बढ़ाएं और onDraw तरीके को लागू करें. इससे DrawScope को कस्टम ग्राफ़िक बनाने का ऐक्सेस मिलता है. intrinsicSize को बदला भी जा सकता है. इसका इस्तेमाल, उस कंपोज़ेबल को प्रभावित करने के लिए किया जाएगा जिसमें यह शामिल है:
class OverlayImagePainter constructor( private val image: ImageBitmap, private val imageOverlay: ImageBitmap, private val srcOffset: IntOffset = IntOffset.Zero, private val srcSize: IntSize = IntSize(image.width, image.height), private val overlaySize: IntSize = IntSize(imageOverlay.width, imageOverlay.height) ) : Painter() { private val size: IntSize = validateSize(srcOffset, srcSize) override fun DrawScope.onDraw() { // draw the first image without any blend mode drawImage( image, srcOffset, srcSize, dstSize = IntSize( this@onDraw.size.width.roundToInt(), this@onDraw.size.height.roundToInt() ) ) // draw the second image with an Overlay blend mode to blend the two together drawImage( imageOverlay, srcOffset, overlaySize, dstSize = IntSize( this@onDraw.size.width.roundToInt(), this@onDraw.size.height.roundToInt() ), blendMode = BlendMode.Overlay ) } /** * Return the dimension of the underlying [ImageBitmap] as it's intrinsic width and height */ override val intrinsicSize: Size get() = size.toSize() private fun validateSize(srcOffset: IntOffset, srcSize: IntSize): IntSize { require( srcOffset.x >= 0 && srcOffset.y >= 0 && srcSize.width >= 0 && srcSize.height >= 0 && srcSize.width <= image.width && srcSize.height <= image.height ) return srcSize } }
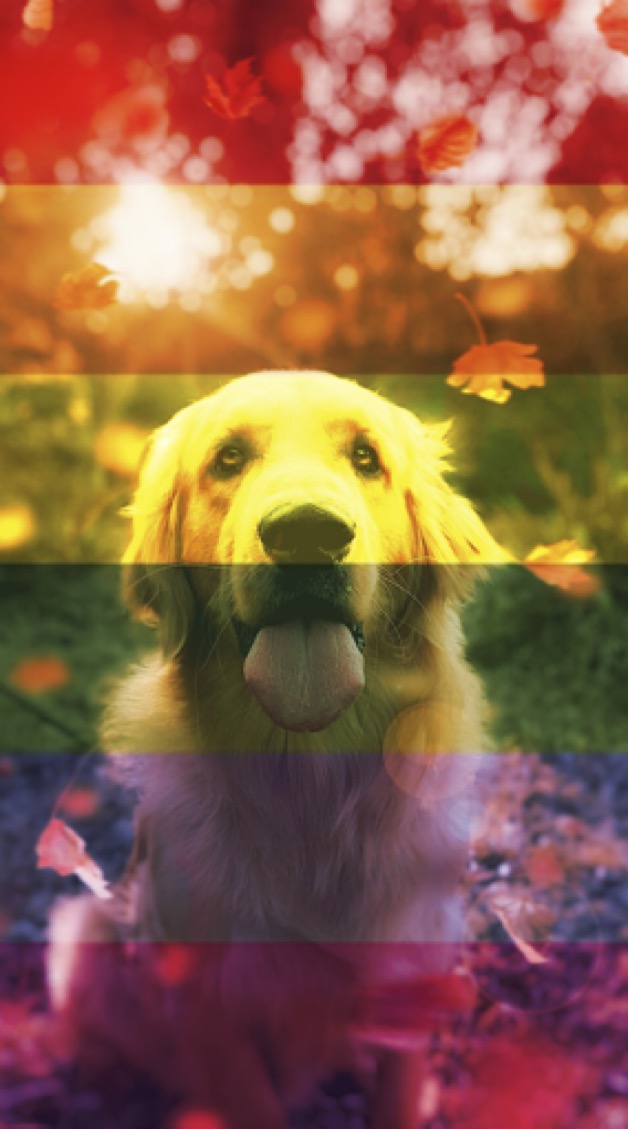
अब हमारे पास कस्टम Painter है. इसलिए, हम अपनी सोर्स इमेज के ऊपर किसी भी इमेज को इस तरह से ओवरले कर सकते हैं:
val rainbowImage = ImageBitmap.imageResource(id = R.drawable.rainbow) val dogImage = ImageBitmap.imageResource(id = R.drawable.dog) val customPainter = remember { OverlayImagePainter(dogImage, rainbowImage) } Image( painter = customPainter, contentDescription = stringResource(id = R.string.dog_content_description), contentScale = ContentScale.Crop, modifier = Modifier.wrapContentSize() )
कस्टम पेंटर का इस्तेमाल करके, दोनों इमेज को एक साथ जोड़ने पर मिलने वाला आउटपुट यहां देखा जा सकता है:

कस्टम पेंटर का इस्तेमाल Modifier.paint(customPainter) के साथ भी किया जा सकता है, ताकि कंपोज़ेबल पर कॉन्टेंट को इस तरह से बनाया जा सके:
val rainbowImage = ImageBitmap.imageResource(id = R.drawable.rainbow) val dogImage = ImageBitmap.imageResource(id = R.drawable.dog) val customPainter = remember { OverlayImagePainter(dogImage, rainbowImage) } Box( modifier = Modifier.background(color = Color.Gray) .padding(30.dp) .background(color = Color.Yellow) .paint(customPainter) ) { /** intentionally empty **/ }
आपके लिए सुझाव
- ध्यान दें: JavaScript बंद होने पर लिंक का टेक्स्ट दिखता है
- ImageBitmap बनाम ImageVector {:#bitmap-vs-vector}
- लिखते समय ग्राफ़िक
- इमेज लोड हो रही हैं {:#loading-images}
