1. Welcome
Introduction
Sometimes you want your app to show information to users even when the app isn't running in the foreground. For example, you might want to let users know that new content is available, or that their favorite sports team just scored a goal in a game. The Android notification framework provides a way for your app to notify users even when the app is not in the foreground.
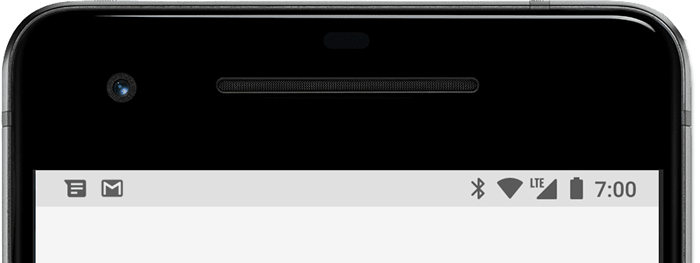
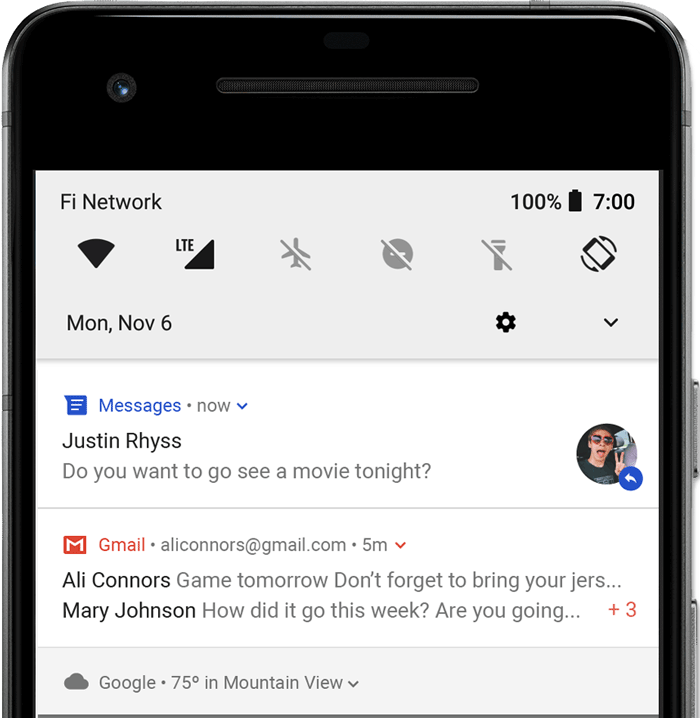
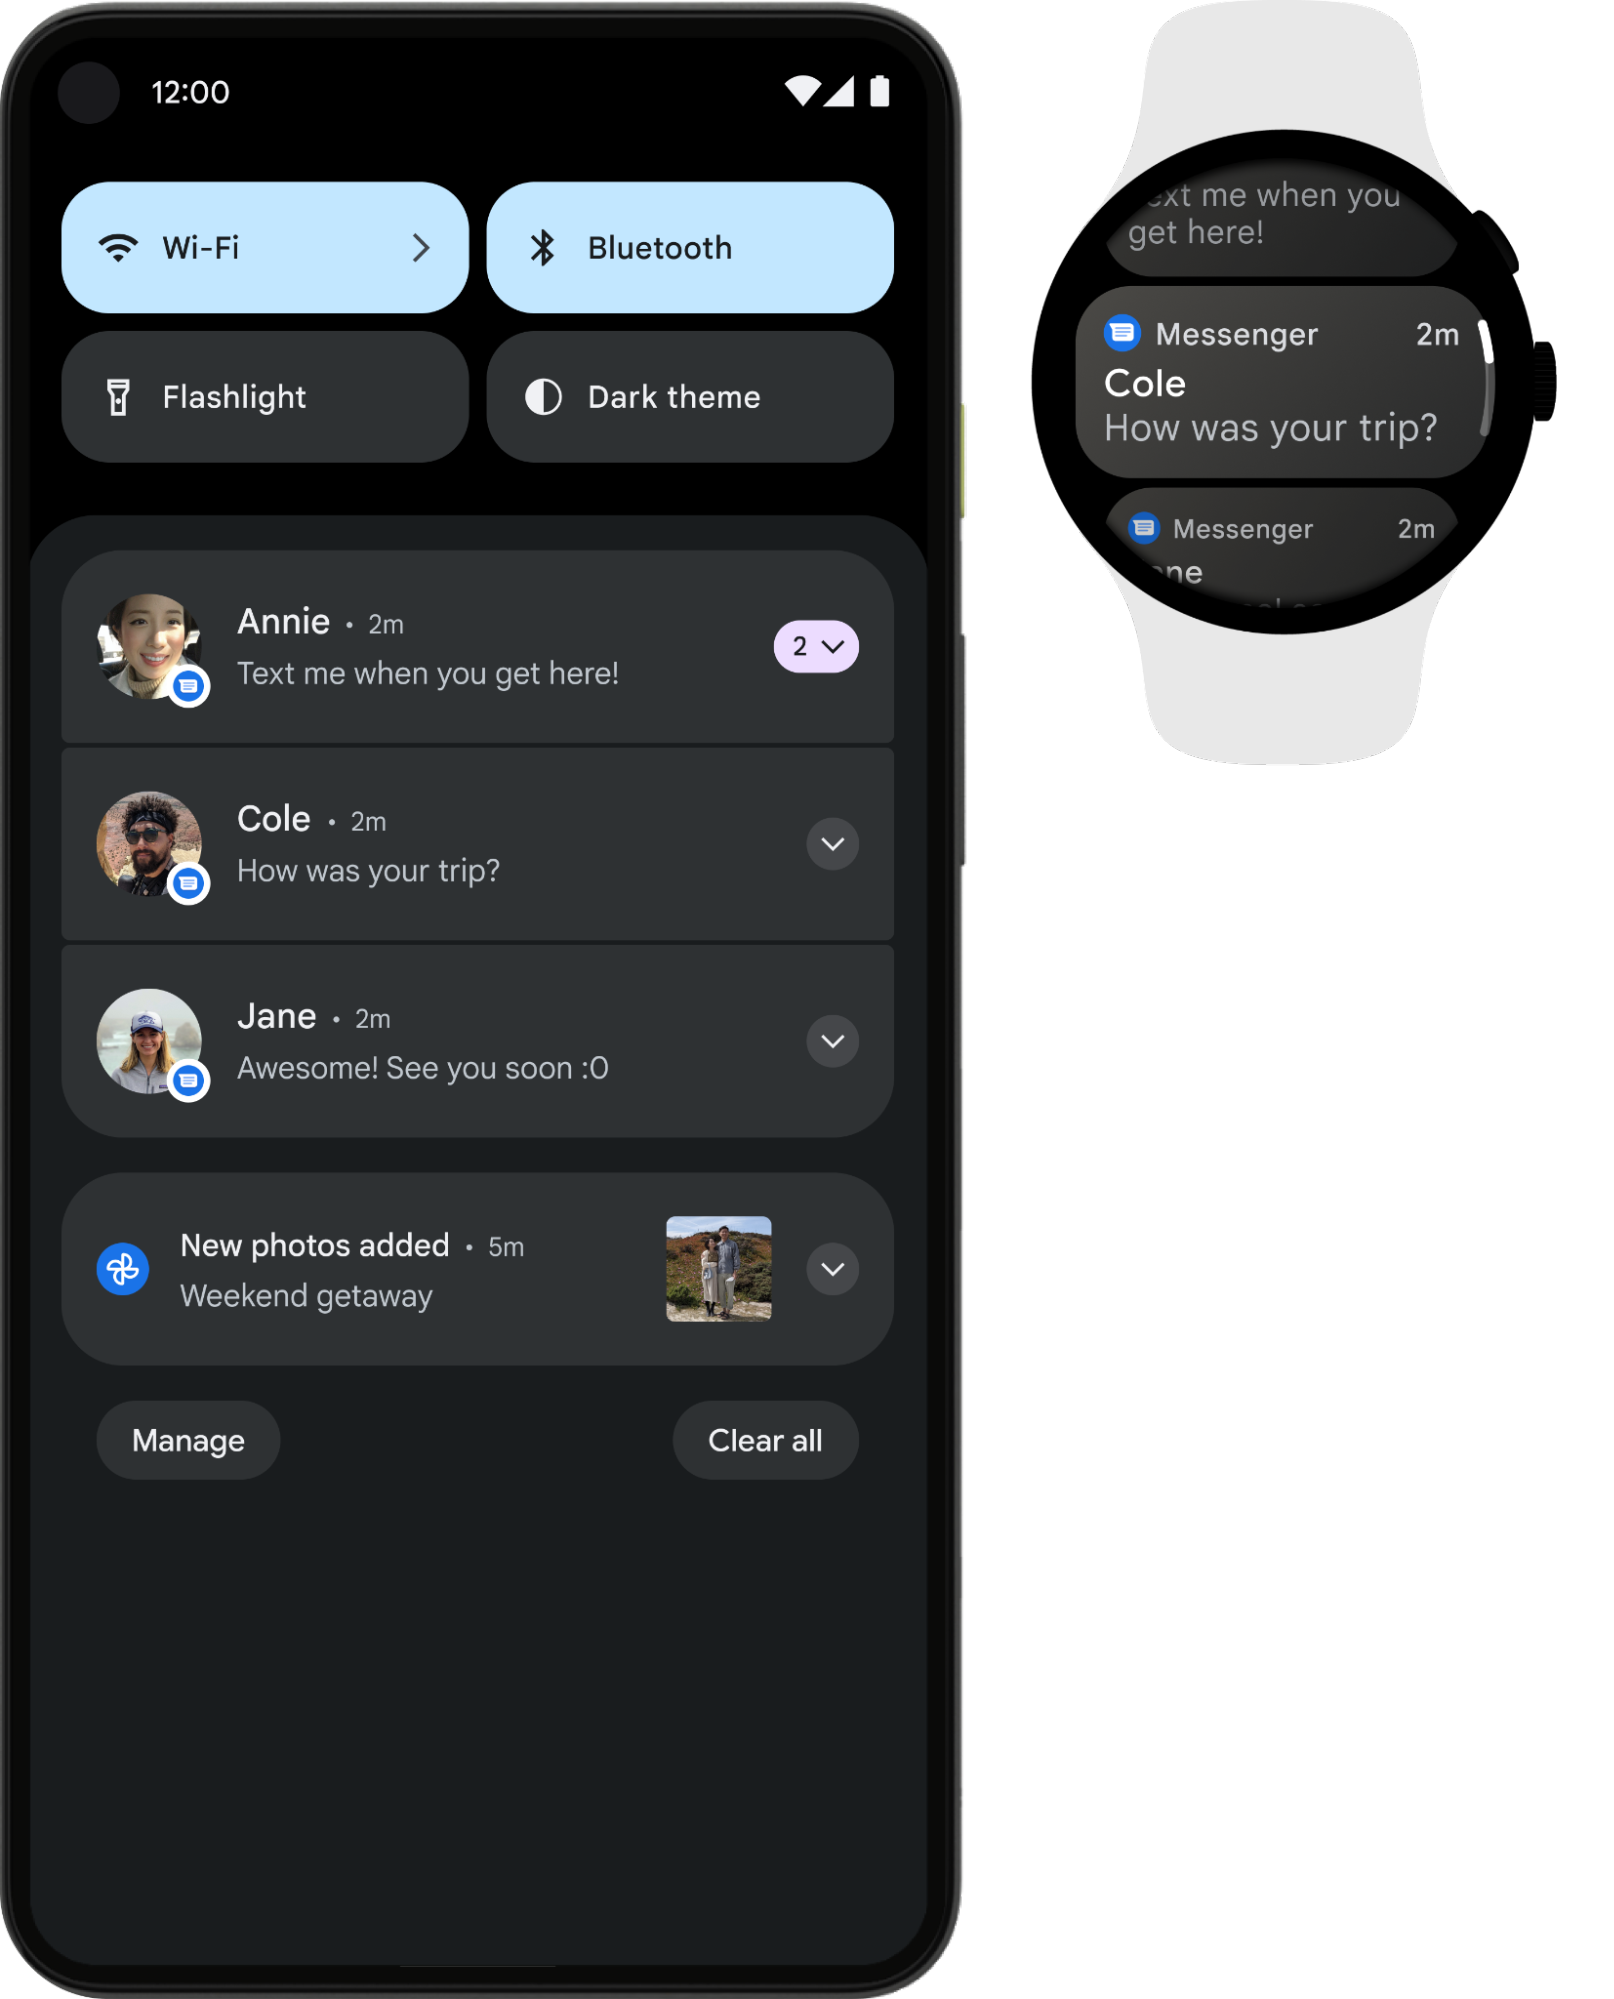
A notification is a message that your app displays to the user outside of your app's normal UI. Notifications appear as icons in the device's notification area, which is in the status bar. To see the details of a notification, the user opens the notification drawer, for example by swiping down on the status bar. The notification area and the notification drawer are system-controlled areas that the user can view at any time.
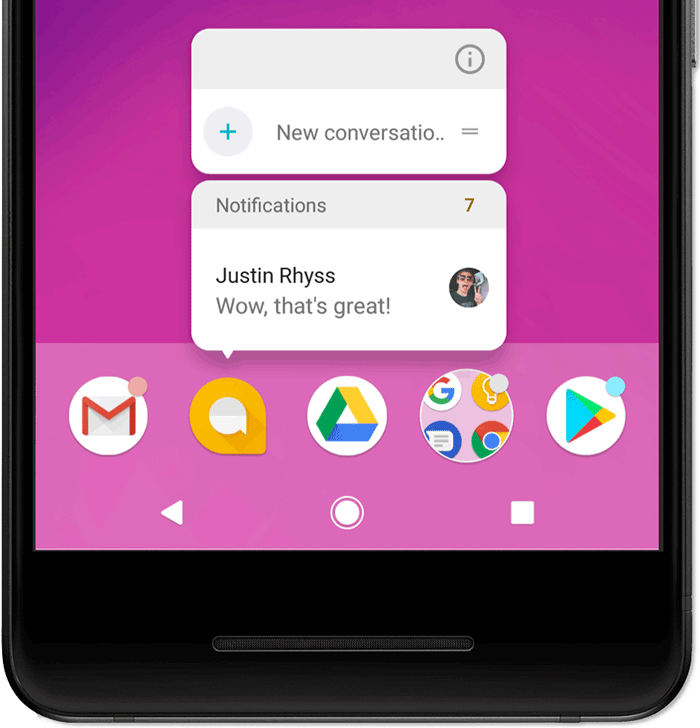
On devices running Android 8.0 and higher, when your app has a new notification to show to the user, your app icon automatically shows a badge. (Badges are also called notification dots). When the user long-presses the app icon, the notification appears above the app icon, as shown in the screenshot below.
In this practical you create an app that triggers a notification when the user taps a button in your app. The user can update the notification or cancel it.
What you should already know
You should be able to:
- Implement the
onClick()
method for buttons. - Create implicit intents.
- Send custom broadcasts.
- Use broadcast receivers.
What you'll learn
- How to create a notification using the notification builder.
- How to use pending intents to respond to notification actions.
- How to update or cancel existing notifications.
What you'll do
- Create an app that sends a notification when the user taps a button in the app.
- Update the notification from a button in your app, and from an action button that's inside the notification.
2. App overview
Notify Me! is an app that lets the user trigger, update, and cancel a notification using the three buttons shown in the screenshots below. While you create the app, you'll experiment with notification styles, actions, and priorities.
3. Task 1: Create a basic notification
1.1 Create the project
- In Android Studio, create a new project called "Notify Me!" Accept the default options, and use the Empty Activity template.
- In your
activity_main.xml
layout file, replace the defaultTextView
with a button that has the following attributes:
<Button
android:id="@+id/notify"
android:layout_width="wrap_content"
android:layout_height="wrap_content"
android:text="Notify Me!"
app:layout_constraintBottom_toBottomOf="parent"
app:layout_constraintLeft_toLeftOf="parent"
app:layout_constraintRight_toRightOf="parent"
app:layout_constraintTop_toTopOf="parent" />
Do the following steps in the MainActivity.java
file:
- Create a member variable for the Notify Me! button:
private Button button_notify;
- Create a method stub for the
sendNotification()
method:
public void sendNotification() {}
- In the
onCreate()
method, initialize the Notify Me! button and create anonClickListener
for it. CallsendNotification()
from theonClick
method:
button_notify = findViewById(R.id.notify);
button_notify.setOnClickListener(new View.OnClickListener() {
@Override
public void onClick(View view) {
sendNotification();
}
});
1.2 Create a notification channel
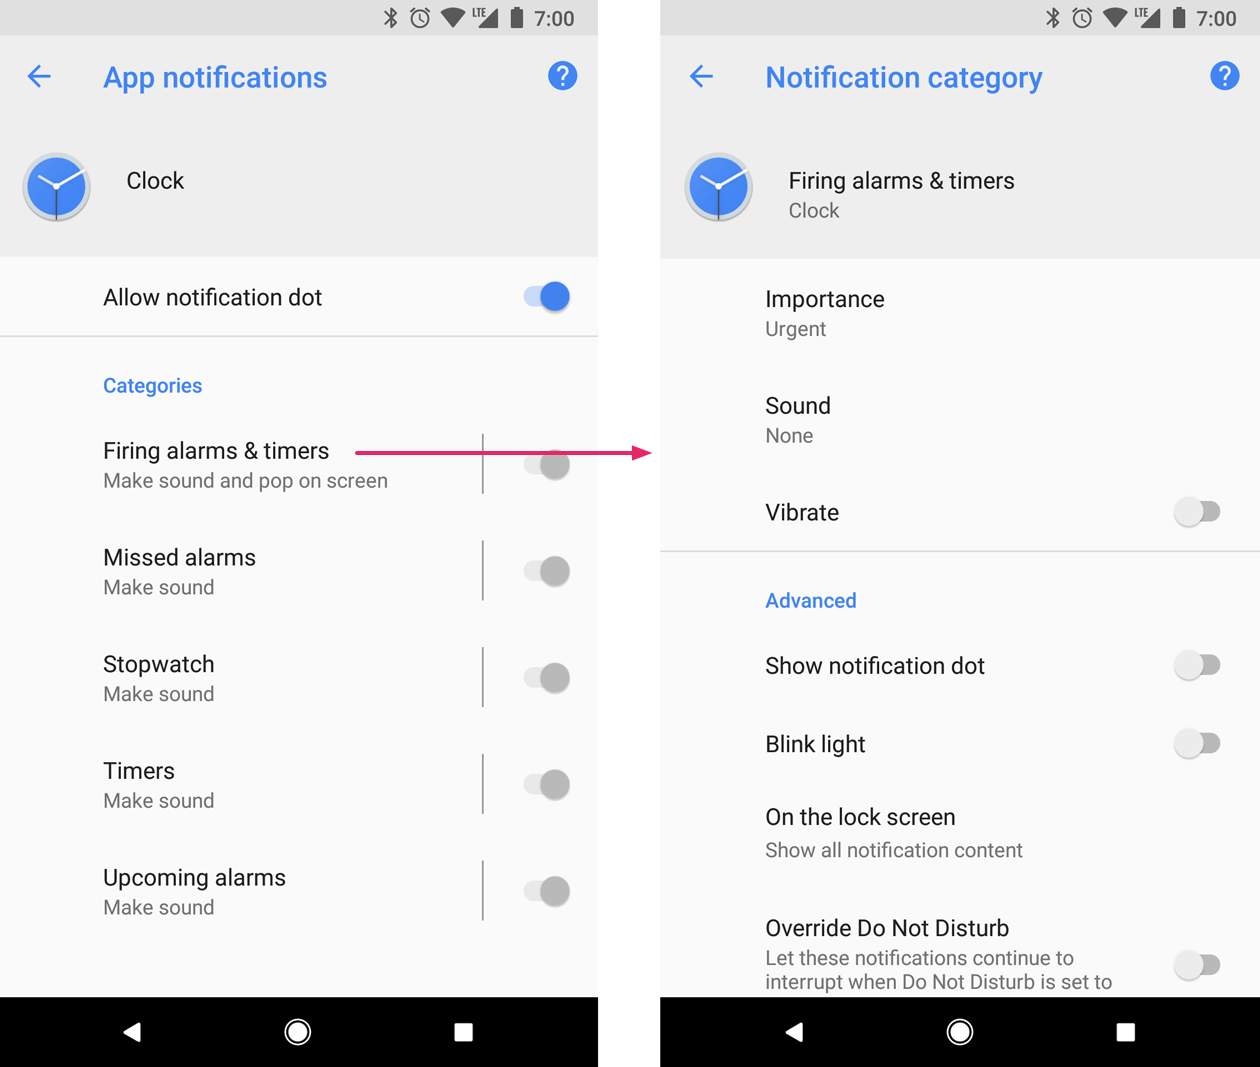
In the Settings app on an Android-powered device, users can adjust the notifications they receive. Starting with Android 8.0 (API level 26), your code can assign each of your app's notifications to a user-customizable notification channel:
- Each notification channel represents a type of notification.
- In your code, you can group several notifications in each notification channel.
- For each notification channel, your app sets behavior for the channel, and the behavior is applied to all the notifications in the channel. For example, your app might set the notifications in a channel to play a sound, blink a light, or vibrate.
- Whatever behavior your app sets for a notification channel, the user can change that behavior, and the user can turn off your app's notifications altogether.
On Android-powered devices running Android 8.0 (API level 26) or higher, notification channels that you create in your app appear as Categories under App notifications in the device Settings app.
For example, in the screenshot below of a device running Android 8.0, the Notify Me! app has one notification channel, Mascot Notification.
When your app targets Android 8.0 (API level 26), to display notifications to your users you must implement at least one notification channel. To display notifications on lower-end devices, you're not required to implement notification channels. However, it's good practice to always do the following:
- Target the latest available SDK.
- Check the device's SDK version in your code. If the SDK version is 26 or higher, build notification channels.
If your targetSdkVersion
is set to 25 or lower, when your app runs on Android 8.0 (API level 26) or higher, it behaves the same as it would on devices running Android 7.1 (API level 25) or lower.
Create a notification channel:
- In
MainActivity
, create a constant for the notification channel ID. Every notification channel must be associated with an ID that is unique within your package. You use this channel ID later, to post your notifications.
private static final String PRIMARY_CHANNEL_ID = "primary_notification_channel";
- The Android system uses the
NotificationManager
class to deliver notifications to the user. InMainActivity.java
, create a member variable to store theNotificationManager
object.
private NotificationManager mNotifyManager;
- In
MainActivity.java
, create acreateNotificationChannel()
method and instantiate theNotificationManager
inside the method.
public void createNotificationChannel()
{
mNotifyManager = (NotificationManager)
getSystemService(NOTIFICATION_SERVICE);
}
- Create a notification channel in the
createNotificationChannel()
method. Because notification channels are only available in API 26 and higher, add a condition to check for the device's API version.
public void createNotificationChannel() {
mNotifyManager = (NotificationManager)
getSystemService(NOTIFICATION_SERVICE);
if (android.os.Build.VERSION.SDK_INT >=
android.os.Build.VERSION_CODES.O) {
// Create a NotificationChannel
}
}
- Inside the
if
statement, construct aNotificationChannel
object and usePRIMARY_CHANNEL_ID
as the channelid
. - Set the channel
name
. Thename
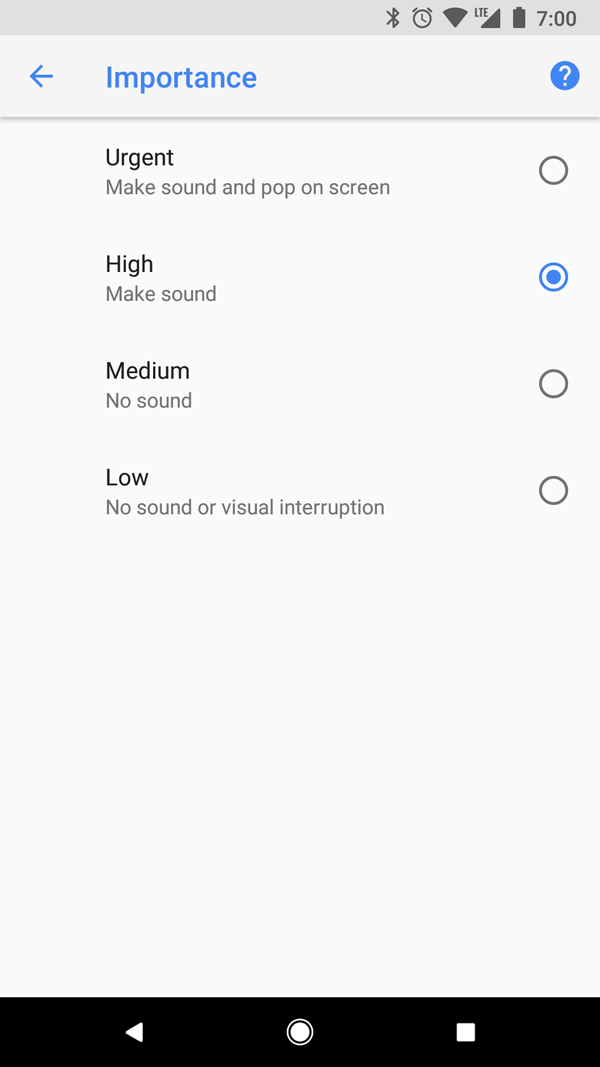
is displayed under notification Categories in the device's user-visible Settings app. - Set the importance to
IMPORTANCE_HIGH
. (For the complete list of notification importance constants, see theNotificationManager
documentation.)
// Create a NotificationChannel
NotificationChannel notificationChannel = new NotificationChannel(PRIMARY_CHANNEL_ID,
"Mascot Notification", NotificationManager
.IMPORTANCE_HIGH);
- In
createNotificationChannel()
, inside theif
statement, configure thenotificationChannel
object's initial settings. For example, you can set the notification light color, enable vibration, and set a description that's displayed in the device's Settings app. You can also configure a notification alert sound.
notificationChannel.enableLights(true);
notificationChannel.setLightColor(Color.RED);
notificationChannel.enableVibration(true);
notificationChannel.setDescription("Notification from Mascot");
mNotifyManager.createNotificationChannel(notificationChannel);
1.3 Build your first notification
Notifications are created using the NotificationCompat.Builder
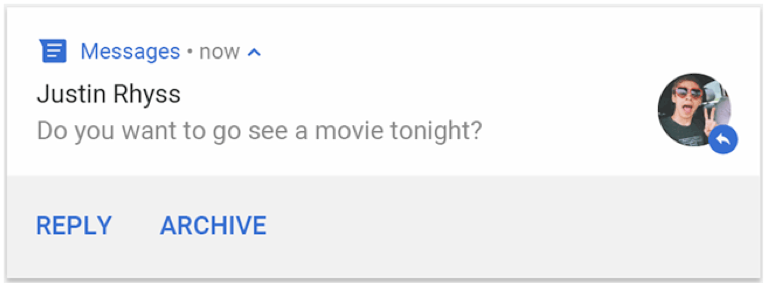
class, which allows you to set the content and behavior of the notification. A notification can contain the following elements:
- Icon (required), which you set in your code using the
setSmallIcon()
method. - Title (optional), which you set using
setContentTitle()
. - Detail text (optional), which you set using
setContentText()
.
To create the required notification icon:
- In Android Studio, go to File > New > Image Asset.
- From the Icon Type drop-down list, select Notification Icons.
- Click the icon next to the Clip Art item to select a Material Design icon for your notification. For this app, use the Android icon.
- Rename the resource
ic_android
and click Next and Finish. This creates drawable files with different resolutions for different API levels.
To build your notification and display it:
- You need to associate the notification with a notification ID so that your code can update or cancel the notification in the future. In
MainActivity.java
, create a constant for the notification ID:
private static final int NOTIFICATION_ID = 0;
- In
MainActivity.java
, at the end of theonCreate()
method, callcreateNotificationChannel()
. If you miss this step, your app crashes! - In
MainActivity.java
, create a helper method calledgetNotificationBuilder()
. You usegetNotificationBuilder()
later, in theNotificationCompat.Builder
object. Android Studio will show an error about the missing return statement, but you'll fix that soon.
private NotificationCompat.Builder getNotificationBuilder(){}
- Inside the
getNotificationBuilder()
method, create and instantiate the notification builder. For the notification channel ID, usePRIMARY_CHANNEL_ID
. If a popup error is displayed, make sure that theNotificationCompat
class is imported from the v4 Support Library.
NotificationCompat.Builder notifyBuilder = new NotificationCompat.Builder(this, PRIMARY_CHANNEL_ID);
- Inside the
getNotificationBuilder()
method, add the title, text, and icon to the builder, as shown below. At the end, return theBuilder
object.
NotificationCompat.Builder notifyBuilder = new NotificationCompat.Builder(this, PRIMARY_CHANNELID)
.setContentTitle("You've been notified!")
.setContentText("This is your notification text.")
.setSmallIcon(R.drawable.ic_android);
return notifyBuilder;
Now you can finish the sendNotification()
method that sends the notification:
- In
MainActivity.java,
inside thesendNotification()
method, usegetNotificationBuilder()
to get theBuilder
object. - Call
notify()
on theNotificationManager
:
NotificationCompat.Builder notifyBuilder = getNotificationBuilder();
mNotifyManager.notify(NOTIFICATION_ID, notifyBuilder.build());
- Run your app. The Notify Me! button issues a notification, and the icon appears in the status bar. However, the notification is missing an essential feature: nothing happens when you tap it. You add that functionality in the next task.
1.4 Add a content intent and dismiss the notification
Content intents for notifications are similar to the intents you've used throughout this course. Content intents can be explicit intents to launch an activity, implicit intents to perform an action, or broadcast intents to notify the system of a system event or custom event.
The major difference with an Intent
that's used for a notification is that the Intent
must be wrapped in a PendingIntent
. The PendingIntent
allows the Android notification system to perform the assigned action on behalf of your code.
In this step you update your app so that when the user taps the notification, your app sends a content intent that launches the MainActivity
. (If the app is open and active, tapping the notification will not have any effect.)
- In
MainActivity.java
, in the beginning of thegetNotificationBuilder()
, create an explicit intent method to launch theMainActivity
:
Intent notificationIntent = new Intent(this, MainActivity.class);
- Inside
getNotificationBuilder()
, after thenotificationIntent
declaration, use thegetActivity()
method to get aPendingIntent
. Pass in the notification ID constant for therequestCode
and use theFLAG_UPDATE_CURRENT
flag.
By using a PendingIntent
to communicate with another app, you are telling that app to execute some predefined code at some point in the future. It's like the other app can perform an action on behalf of your app.
PendingIntent notificationPendingIntent = PendingIntent.getActivity(this,
NOTIFICATION_ID, notificationIntent, PendingIntent.FLAG_UPDATE_CURRENT);
- Use the
setContentIntent()
method from theNotificationCompat.Builder
class to set the content intent. InsidegetNotificationBuilder()
, callsetContentIntent()
in the code that's building the notification. Also set auto-cancel totrue
:
.setContentIntent(notificationPendingIntent)
.setAutoCancel(true)
Setting auto-cancel to true
closes the notification when user taps on it.
- Run the app. Tap the Notify Me! button to send the notification. Tap the home button. Now view the notification and tap it. Notice the app opens back at the
MainActivity
. - If you are running the app on a device or emulator with API 26 or higher, press the Home button and open the app launcher. Notice the badge (the notification dot) on the app icon.
In the screenshot above:
- Notification in the status bar
- Notification dot on the app icon (only in API 26 or higher)
When the user touches and holds the app icon, a popup shows notifications along with the icon.
If you're running on a device or emulator with API 26 or higher, here's how to view the notification channel that you created:
- Open the device's Settings app.
- In the search bar, enter your app name, "Notify Me!"
- Open Notify Me! > App Notifications > Mascot Notifications. Use this setting to customize the notification channel. The notification channel's description is displayed at the bottom of the screen.
1.5 Add priority and defaults to your notification for backward compatibility
When the user taps the Notify Me! button in your app, the notification is issued, but the only visual that the user sees is the icon in the notification bar. To catch the user's attention, set notification default options.
Priority is an integer value from PRIORITY_MIN
(-2) to PRIORITY_MAX
(2). Notifications with a higher priority are sorted above lower priority ones in the notification drawer. HIGH
or MAX
priority notifications are delivered as "heads up" notifications, which drop down on top of the user's active screen. It's not a good practice to set all your notifications to MAX
priority, so use MAX
sparingly.
- Inside the
getNotificationBuilder()
method, set the priority of the notification toHIGH
by adding the following line to the notification builder object:
.setPriority(NotificationCompat.PRIORITY_HIGH)
- Set the sound, vibration, and LED-color pattern for your notification (if the user's device has an LED indicator) to the default values.
Inside getNotificationBuilder()
, add the following line to your notifyBuilder
object:
.setDefaults(NotificationCompat.DEFAULT_ALL)
- To see the changes, quit the app and run it again from Android Studio. If you are unable to see your changes, uninstall the app and install it again.
4. Task 2: Update or cancel the notification
After your app issues a notification, it's useful for your app to be able to update or cancel the notification if the information changes or becomes irrelevant.
In this task, you learn how to update and cancel a notification.
2.1 Add an update button and a cancel button
- In your
activity_maim.xml
layout file, create two copies of the Notify Me! button. In the design editor, constrain the new buttons to each other and to their parent, so that they don't overlap each other. - Change the
android:text
attribute in the new buttons to "Update Me!" and "Cancel Me!" - Change the
android:id
attributes for the buttons toupdate
andcancel
.
<Button
android:id="@+id/notify"
android:layout_width="wrap_content"
android:layout_height="wrap_content"
android:text="Notify Me!"
app:layout_constraintBottom_toTopOf="@+id/update"
app:layout_constraintEnd_toEndOf="parent"
app:layout_constraintStart_toStartOf="parent"
app:layout_constraintTop_toTopOf="parent" />
<Button
android:id="@+id/update"
android:layout_width="wrap_content"
android:layout_height="wrap_content"
android:text="Update Me!"
app:layout_constraintBottom_toTopOf="@+id/cancel"
app:layout_constraintEnd_toEndOf="parent"
app:layout_constraintStart_toStartOf="parent"
app:layout_constraintTop_toBottomOf="@+id/notify" />
<Button
android:id="@+id/cancel"
android:layout_width="wrap_content"
android:layout_height="wrap_content"
android:text="Cancel Me!"
app:layout_constraintBottom_toBottomOf="parent"
app:layout_constraintEnd_toEndOf="parent"
app:layout_constraintStart_toStartOf="parent"
app:layout_constraintTop_toBottomOf="@+id/update" />
- Extract all the text strings to
strings.xml
.
Do the following steps in the MainActivity.java
file:
- Add a member variable for each of the new buttons.
private Button button_cancel;
private Button button_update;
- At the end of
onCreate()
method, initialize the button variables and set theironClick
listeners. If Android Studio throws an error, rebuild your project
button_update = findViewById(R.id.update);
button_update.setOnClickListener(new View.OnClickListener() {
@Override
public void onClick(View view) {
//Update the notification
}
});
button_cancel = findViewById(R.id.cancel);
button_cancel.setOnClickListener(new View.OnClickListener() {
@Override
public void onClick(View view) {
//Cancel the notification
}
});
- Create methods for updating and canceling the notification. The methods take no parameters and return
void
:
public void updateNotification() {}
public void cancelNotification() {}
- In the
onCreate()
method, callupdateNotification()
in the update button'sonClick
method. In the cancel button'sonClick
method, callcancelNotification()
.
2.2 Implement the cancel and update notification methods
To cancel a notification, call cancel()
on the NotificationManager
, passing in the notification ID.
- In
MainActivity.java
, inside thecancelNotification()
method, add the following line:
mNotifyManager.cancel(NOTIFICATION_ID);
- Run the app.
- Tap the Notify Me! button to send the notification. Notice that the notification icon appears in the status bar.
- Tap the Cancel Me! button. The notification should be canceled.
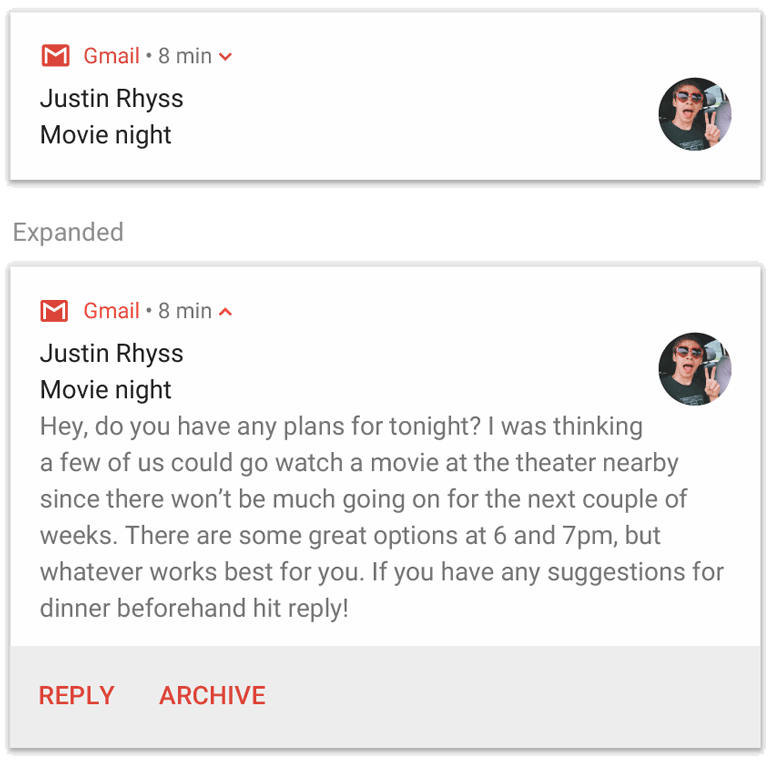
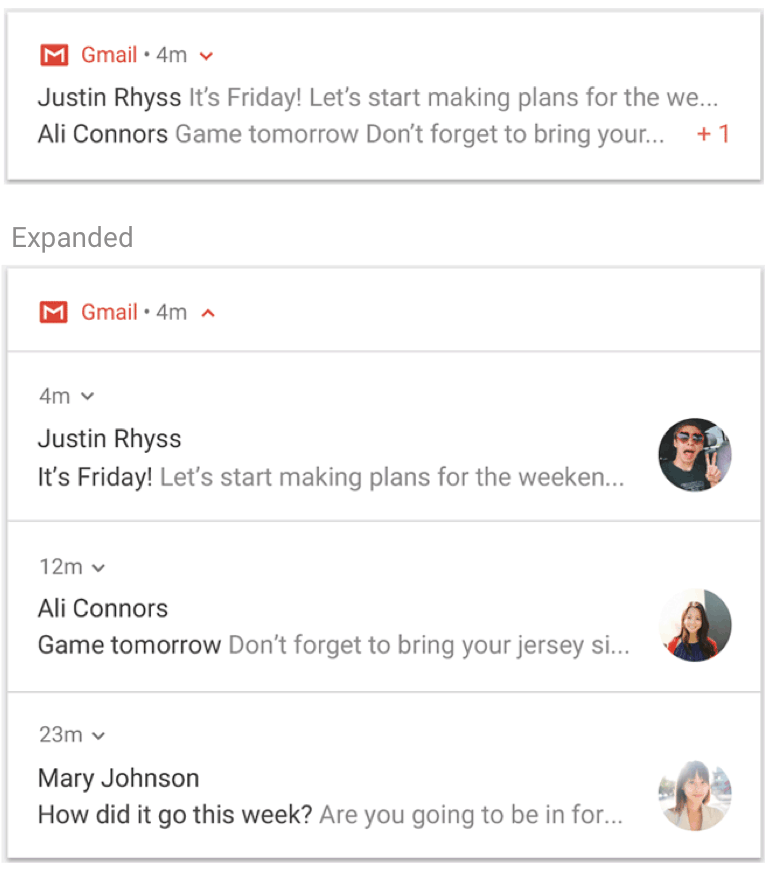
Updating a notification is more complex than canceling a notification. Android notifications come with styles that can condense information. For example, the Gmail app uses InboxStyle
notifications if the user has more than one unread message, which condenses the information into a single notification.
In this example, you update your notification to use BigPictureStyle
, which allows you to include an image in the notification.
- Download this image to use in your notification and rename it to
mascot_1
. If you use your own image, make sure that its aspect ratio is 2:1 and its width is 450 dp or less. - Put the
mascot_1
image in theres/drawable
folder. - In
MainActivity.java
, inside theupdateNotification()
method, convert your drawable into a bitmap.
Bitmap androidImage = BitmapFactory
.decodeResource(getResources(),R.drawable.mascot_1);
- Inside
updateNotification()
, use thegetNotificationBuilder()
method to get theNotificationCompat.Builder
object.
NotificationCompat.Builder notifyBuilder = getNotificationBuilder();
- Inside
updateNotification()
, after thenotifyBuilder
declaration, change the style of your notification and set the image and the title:
notifyBuilder.setStyle(new NotificationCompat.BigPictureStyle()
.bigPicture(androidImage)
.setBigContentTitle("Notification Updated!"));
- Inside
updateNotification()
, after setting the notification style, build the notification and callnotify()
on theNotificationManager
. Pass in the same notification ID as before.
mNotifyManager.notify(NOTIFICATION_ID, notifyBuilder.build());
- Run your app. Tap the update button and check the notification again—the notification now has the image and the updated title! To shrink back to the regular notification style, pinch the extended notification.
2.3 Toggle the button state
In this app, the user can get confused because the state of the notification is not tracked inside the activity. For example, the user might tap Cancel Me! when no notification is showing.
You can fix this by enabling and disabling the buttons depending on the state of the notification:
- When the app is first run, the Notify Me! button should be the only button enabled, because there is no notification yet to update or cancel.
- After a notification is sent, the cancel and update buttons should be enabled, and the notification button should be disabled, because the notification has been delivered.
- After the notification is updated, the update and notify buttons should be disabled, leaving only the cancel button enabled.
- If the notification is canceled, the buttons should return to their initial states, with only the notify button enabled.
To toggle the button state for all the buttons, do the following steps in MainActivity.java
:
- Add a utility method called
setNotificationButtonState()
to toggle the button states:
void setNotificationButtonState(Boolean isNotifyEnabled,
Boolean isUpdateEnabled,
Boolean isCancelEnabled) {
button_notify.setEnabled(isNotifyEnabled);
button_update.setEnabled(isUpdateEnabled);
button_cancel.setEnabled(isCancelEnabled);
}
- At the end of each of the relevant methods, add a call to
setNotificationButtonState()
to enable and disable the buttons as appropriate.
onCreate()
:
setNotificationButtonState(true, false, false);
sendNotification()
:
setNotificationButtonState(false, true, true);
updateNotification()
:
setNotificationButtonState(false, false, true);
cancelNotification()
:
setNotificationButtonState(true, false, false);
5. Task 3: Add a notification action button
Sometimes, a notification requires interaction from the user. For example, the user might snooze an alarm or reply to a text message. When these types of notifications occur, the user might tap the notification to respond to the event. Android then loads the relevant activity in your app.
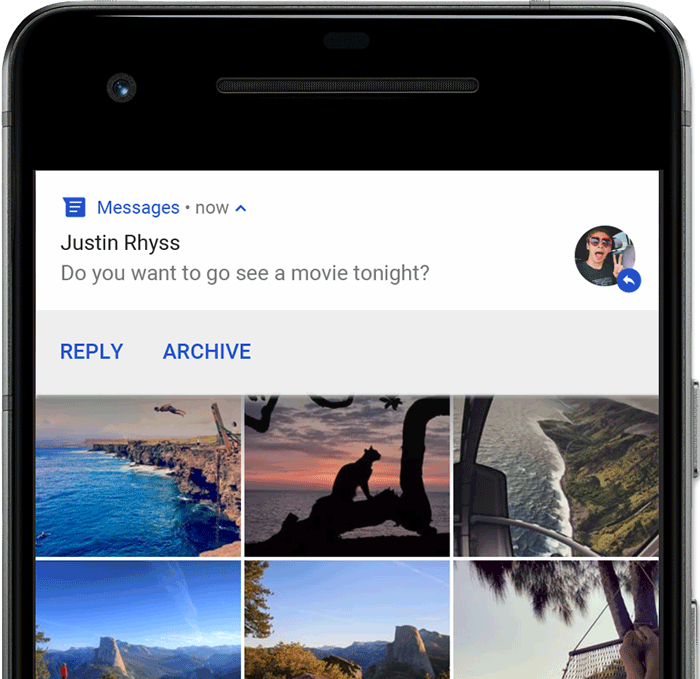
To avoid opening your app, the notification framework lets you embed a notification action button directly in the notification itself.
An action button needs the following components:
- An icon, to be placed in the notification.
- A label string, to be placed next to the icon.
- A
PendingIntent
, to be sent when the user taps the notification action.
In this task, you add an action button to your notification. The action button lets the user update the notification from within the notification, without opening the app. This Update Notification action works whether your app is running in the foreground or the background.
3.1 Implement a broadcast receiver that calls updateNotification()
In this step you implement a broadcast receiver that calls the updateNotification()
method when the user taps an Update Notification action button inside the notification.
- In
MainActivity.java
, add a subclass ofBroadcastReceiver
as an inner class. Override theonReceive()
method. Don't forget to include an empty constructor:
public class NotificationReceiver extends BroadcastReceiver {
public NotificationReceiver() {
}
@Override
public void onReceive(Context context, Intent intent) {
// Update the notification
}
}
- In the
onReceive()
method of theNotificationReceiver
, callupdateNotification()
. - In
MainActivity.java
, create a unique constant member variable to represent the update notification action for your broadcast. Make sure to prefix the variable value with your app's package name to ensure its uniqueness:
private static final String ACTION_UPDATE_NOTIFICATION =
"com.example.android.notifyme.ACTION_UPDATE_NOTIFICATION";
- In
MainActivity.java
, create a member variable for your receiver and initialize it using the default constructor.
private NotificationReceiver mReceiver = new NotificationReceiver();
- To receive the
ACTION_UPDATE_NOTIFICATION
intent, register your broadcast receiver in theonCreate()
method:
registerReceiver(mReceiver,new IntentFilter(ACTION_UPDATE_NOTIFICATION));
- To unregister your receiver, override the
onDestroy()
method of yourActivity
:
@Override
protected void onDestroy() {
unregisterReceiver(mReceiver);
super.onDestroy();
}
3.2 Create an icon for the update action
To create an icon for the update-action button:
- In Android Studio, select File > New > Image Asset.
- In the Icon Type drop-down list, select Action Bar and Tab Icons.
- Click the Clip Art icon.
- Select the update icon
and click OK.
- In the Name field, name the icon
ic_update
. - Click Next, then Finish.
Starting from Android 7.0, icons are not displayed in notifications. Instead, more room is provided for the labels themselves. However, notification action icons are still required, and they continue to be used on older versions of Android and on devices such as Android Wear.
3.3 Add the update action to the notification
In MainActivity.java
, inside the sendNotification()
method, implement the following steps:
- At the beginning of the method, create an
Intent
using the custom update actionACTION_UPDATE_NOTIFICATION
. - Use
getBroadcast()
to get aPendingIntent
. To make sure that this pending intent is sent and used only once, setFLAG_ONE_SHOT
.
Intent updateIntent = new Intent(ACTION_UPDATE_NOTIFICATION);
PendingIntent updatePendingIntent = PendingIntent.getBroadcast
(this, NOTIFICATION_ID, updateIntent, PendingIntent.FLAG_ONE_SHOT);
- Use the
addAction()
method to add an action to theNotificationCompat.Builder
object, after thenotifyBuilder
definition. Pass in the icon, the label text, and thePendingIntent
.
notifyBuilder.addAction(R.drawable.ic_update, "Update Notification", updatePendingIntent);
- Run your app. Tap the Notify Me! button, then press the Home button. Open the notification and tap on Update Notification button. The notification is updated.
The user can now update the notification without opening the app!
6. Solution code
Android Studio project: NotifyMe
7. Coding challenge
Enabling and disabling buttons is a common way to ensure that the user does not perform any actions that aren't supported in the current state of the app. For example, you might disable a Sync button when no network is available.
In the NotifyMe app, there is one use case in which the state of your buttons does not match the state of the app: when a user dismisses a notification by swiping it away or clearing the whole notification drawer. In this case, your app has no way of knowing that the notification was canceled and that the button state must be changed.
Create another pending intent to let the app know that the user has dismissed the notification, and toggle the button states accordingly.
Hint: Check out the NotificationCompat.Builder
class for a method that delivers an Intent
if the user dismisses the notification.
8. Summary
A notification is a message that you can display to the user outside of your app's normal UI:
- Notifications provide a way for your app to interact with the user even when the app is not running.
- When Android issues a notification, the notification appears first as an icon in the notification area of the device.
- To specify the UI and actions for a notification, use
NotificationCompat.Builder
. - To create a notification, use
NotificationCompat.Builder.build()
. - To issue a notification, use
NotificationManager.notify()
to pass the notification object to the Android runtime system. - To make it possible to update or cancel a notification, associate a notification ID with the notification.
- Notifications can have several components, including a small icon (
setSmallIcon()
, required); a title (setContentTitle()
); and detailed text (setContentText()
). - Notifications can also include pending intents, expanded styles, priorities, etc. For more details, see
NotificationCompat.Builder
.
9. Related concept
The related concept documentation is in 8.1: Notifications.
10. Learn more
Guides:
- Notifications Overview
- Material Design spec for notifications
- Create and Manage Notification Channels
Reference:
11. Homework
This section lists possible homework assignments for students who are working through this codelab as part of a course led by an instructor. It's up to the instructor to do the following:
- Assign homework if required.
- Communicate to students how to submit homework assignments.
- Grade the homework assignments.
Instructors can use these suggestions as little or as much as they want, and should feel free to assign any other homework they feel is appropriate.
If you're working through this codelab on your own, feel free to use these homework assignments to test your knowledge.
Build and run an app
Open the solution code for the NotifyMe app. Change the updated notification in the app to use the InboxStyle
expanded layout instead of BigPictureStyle
. Use fake string data for each line, and for the summary text.
Answer these questions
Question 1
Select all that are true for notification channels:
- You use notification channels to display notifications to the user in the device status bar.
- You use notification channels to group multiple notifications so that the user can control the notifications' behavior.
- Notification channels are available in older devices, those running Android 7.0 Nougat (API 24) and lower.
- Notification channels are not yet available in the Android Support Library package.
Question 2
Which API do you use to show a notification in the notification drawer and in the device's status bar?
Notification.notify()
NotificationManager.notify()
NotificationCompact.notify()
NotificationCompat.Builder.notify()
Question 3
Which component is not needed when you add a notification action?
- Icon that represents the action
- Title that describes the action
- Click listener for the action button click event.
PendingIntent
that's sent when the user taps the action button.
Question 4
Which API do you use to add an action button to a notification?
NotificationCompat.addActionButton()
NotificationCompat.Builder.addAction()
Notification.Builder.addActionButton()
NotificationManager.addAction()
Question 5
Suppose that you create an app that downloads a work of art on the user's device every day. Once the day's image is available, the app shows a notification to the user, and the user can download the image or skip the download. What PendingIntent
method would you use to start a service to download the image?
Activity.startService()
PendingIntent.getBroadcast()
PendingIntent.getActivity()
PendingIntent.getService()
Submit your app for grading
Guidance for graders
Check that the app has the following features:
- When the user taps the Update Notification button, the notification becomes an
InboxStyle
notification with several rows of text representing line items. - The screen has a summary and title-text line, which changes its position depending on the API level.
- The app uses the
NotificationCompat.InboxStyle
class for backward compatibility.
12. Next codelab
To find the next practical codelab in the Android Developer Fundamentals (V2) course, see Codelabs for Android Developer Fundamentals (V2).
For an overview of the course, including links to the concept chapters, apps, and slides, see Android Developer Fundamentals (Version 2).