ユーザー インターフェース コンポーネントは、ユーザー操作に応答する方法でデバイス ユーザーにフィードバックを返します。コンポーネントはそれぞれの方法で操作に応答するため、操作の効果がユーザーにわかりやすくなっています。たとえば、ユーザーがデバイスのタッチスクリーン上でボタンをタップすると、(ハイライト色が加わるなど)なんらかの方法でボタンが変化します。このように変化することで、ユーザーはボタンをタップしたことを把握できます。ユーザーがその操作を望まない場合は、指を離さずにボタンの外に指をドラッグすれば、ボタンはアクティブになりません。
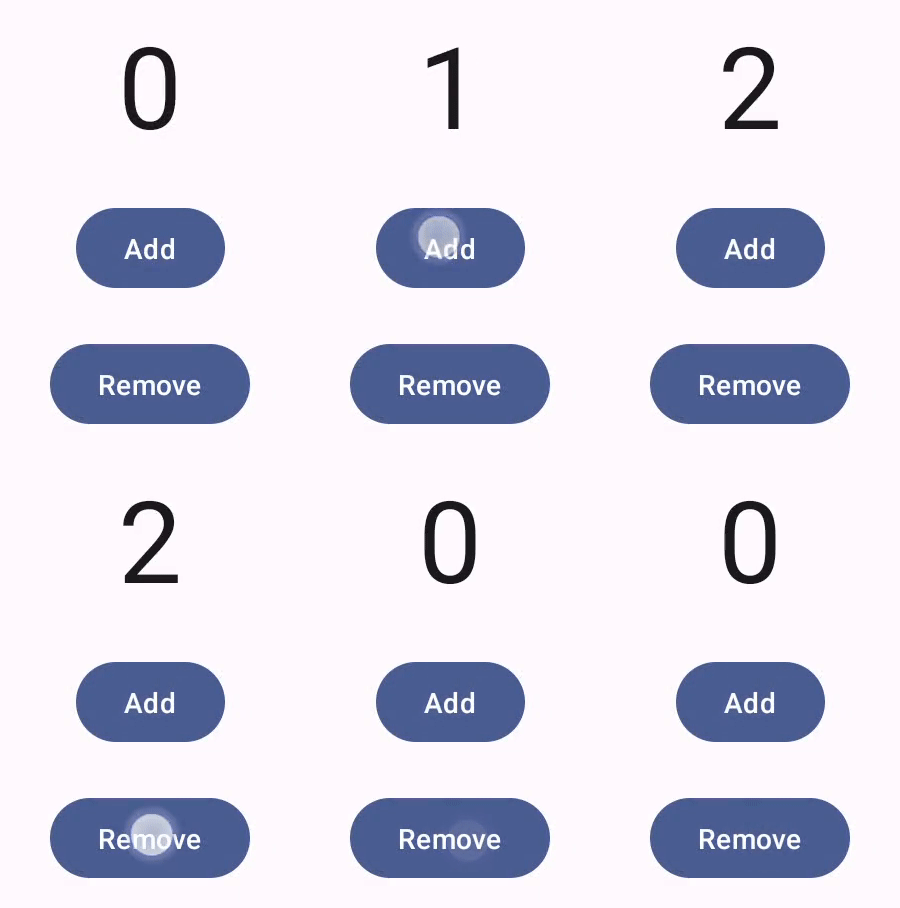
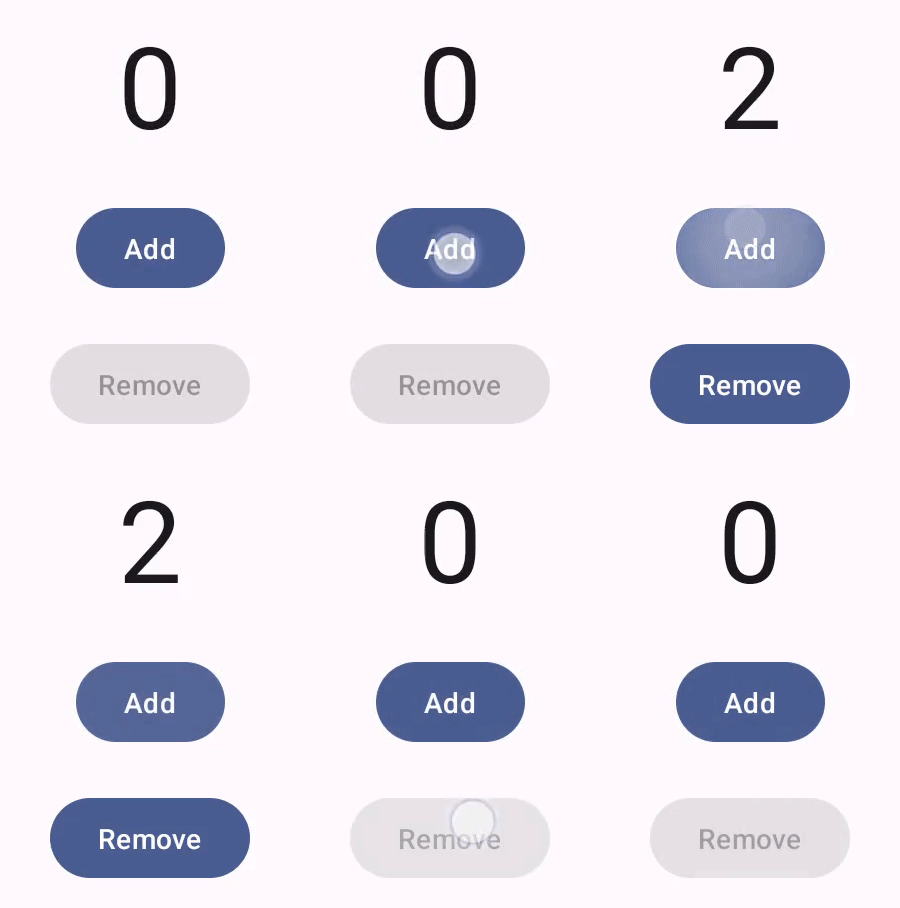
Compose のジェスチャーのドキュメントでは、ポインタの移動やクリックなど、Compose コンポーネントによる下位レベルのポインタ イベントの処理について説明しています。Compose では、そうした下位レベルのイベントが上位レベルの操作に抽象化されるようになっています。たとえば、一連のポインタ イベントがボタンのタップとリリースとして処理される場合があります。このような上位レベルの抽象化を理解することで、ユーザーに対する UI の応答をカスタマイズできるようになります。たとえば、ユーザーが操作したときにコンポーネントの外観がどのように変化するかをカスタマイズしたり、それらのユーザー アクションのログを保持したりすることができます。このドキュメントには、標準の UI 要素の変更や、独自の UI の設計に必要な情報が記載されています。
操作
通常、Compose コンポーネントがユーザー操作をどのように解釈しているかを知る必要はありません。たとえば、Button は Modifier.clickable によって、ユーザーがボタンをクリックしたかどうかを判別します。アプリに一般的なボタンを追加する場合、ボタンの onClick コードを定義すると、Modifier.clickable が必要に応じてそのコードを実行します。つまり、ユーザーが画面をタップしたか、キーボードでボタンを選択したかを知る必要はありません。ユーザーがクリックしたことを Modifier.clickable が判別し、onClick コードを実行して応答します。
ただし、ユーザーの操作に対する UI コンポーネントの応答をカスタマイズするには、内部で何が起きているのかを把握しなければなりません。このセクションでは、その方法について説明します。
ユーザーが UI コンポーネントを操作すると、システムはいくつかの Interaction イベントを生成することで、ユーザーの操作を表します。たとえば、ユーザーがボタンをタップすると PressInteraction.Press が生成されます。ユーザーがボタン内で指を離すと PressInteraction.Release が生成され、クリックが完了したことをボタンが認識します。一方、ユーザーが指をボタンの外にドラッグしてから指を離すと、PressInteraction.Cancel が生成され、ボタンのタップが完了せずにキャンセルされたことを示します。
こうした操作は固定的なものではありません。つまり、このような下位レベルの操作イベントは、ユーザー アクションの意味や順序を解釈するものではありません。また、特定のユーザー アクションが他のアクションに優先するかどうかも解釈しません。
これらの操作は通常、開始と終了がペアになっています。2 番目の操作には、最初の操作に対する参照が含まれています。たとえば、ユーザーがボタンをタップして指を離した場合、タップによって PressInteraction.Press 操作が生成され、指を離すことで PressInteraction.Release が生成されます。Release には、最初の PressInteraction.Press を識別する press プロパティがあります。
特定のコンポーネントに対する操作は InteractionSource によって確認できます。InteractionSource は Kotlin Flow 上に構築されており、他のフローの場合と同じように操作を収集できます。この設計上の決定について詳しくは、Illuminating Interactions のブログ投稿をご覧ください。
操作の状態
操作を自分で追跡することで、コンポーネントの組み込み機能を拡張することもできます。たとえば、ボタンがタップされたときに色を変えたいとします。操作を追跡する最も簡単な方法は、適切な操作状態を監視することです。InteractionSource には、操作のさまざまなステータスを状態として示す、各種のメソッドが用意されています。たとえば、特定のボタンがタップされたかどうかを確認する場合は InteractionSource.collectIsPressedAsState() メソッドを呼び出します。
val interactionSource = remember { MutableInteractionSource() } val isPressed by interactionSource.collectIsPressedAsState() Button( onClick = { /* do something */ }, interactionSource = interactionSource ) { Text(if (isPressed) "Pressed!" else "Not pressed") }
Compose には、collectIsPressedAsState() 以外にも、collectIsFocusedAsState()、collectIsDraggedAsState()、collectIsHoveredAsState() が用意されています。これらのメソッドは、実際には下位レベルの InteractionSource API 上にビルドされるコンビニエンス メソッドです。必要に応じて、それら下位レベルの関数を直接使用することもあります。
たとえば、あるボタンがタップされ、さらにドラッグされているかを判別する必要があるとします。collectIsPressedAsState() と collectIsDraggedAsState() の両方を使用すると、Compose で多数の処理が重複することになります。その場合、すべての操作が正しい順序で実行される保証はありません。そのような状況では、InteractionSource を直接使用することをおすすめします。InteractionSource を使用してインタラクションを自分でトラッキングする方法について詳しくは、InteractionSource を使用するをご覧ください。
次のセクションでは、InteractionSource と MutableInteractionSource を使用してインタラクションをそれぞれ使用および出力する方法について説明します。
Interaction を使用して出力する
InteractionSource は Interactions の読み取り専用ストリームを表します。Interaction を InteractionSource に出力することはできません。Interaction を出力するには、InteractionSource から拡張された MutableInteractionSource を使用する必要があります。
修飾子とコンポーネントは、Interactions を使用、出力、または使用と出力の両方を行うことができます。以降のセクションでは、修飾子とコンポーネントの両方からインタラクションを消費および出力する方法について説明します。
修飾子の使用例
フォーカス状態の境界線を描画する修飾子の場合、Interactions のみを監視すればよいので、InteractionSource を受け取ることができます。
fun Modifier.focusBorder(interactionSource: InteractionSource): Modifier { // ... }
この修飾子が コンシューマーであることは、関数シグネチャから明らかです。Interaction を使用することはできますが、出力することはできません。
修飾子の生成の例
Modifier.hoverable などのホバーイベントを処理する修飾子の場合、Interactions を出力し、代わりに MutableInteractionSource をパラメータとして受け取る必要があります。
fun Modifier.hover(interactionSource: MutableInteractionSource, enabled: Boolean): Modifier { // ... }
この修飾子はプロデューサーです。提供された MutableInteractionSource を使用して、ホバー時またはホバー解除時に HoverInteractions を出力できます。
使用と生成を行うコンポーネントを構築する
マテリアル Button などの高レベルのコンポーネントは、プロデューサーとコンシューマーの両方として機能します。入力イベントとフォーカス イベントを処理し、これらのイベントに応じて外観を変更します(リップルを表示したり、標高をアニメーション表示したりするなど)。その結果、MutableInteractionSource をパラメータとして直接公開し、独自の記憶されたインスタンスを提供できるようにします。
@Composable fun Button( onClick: () -> Unit, modifier: Modifier = Modifier, enabled: Boolean = true, // exposes MutableInteractionSource as a parameter interactionSource: MutableInteractionSource? = null, elevation: ButtonElevation? = ButtonDefaults.elevatedButtonElevation(), shape: Shape = MaterialTheme.shapes.small, border: BorderStroke? = null, colors: ButtonColors = ButtonDefaults.buttonColors(), contentPadding: PaddingValues = ButtonDefaults.ContentPadding, content: @Composable RowScope.() -> Unit ) { /* content() */ }
これにより、MutableInteractionSource をコンポーネントからホイスティングし、コンポーネントによって生成されたすべての Interaction をモニタリングできます。これを使用して、そのコンポーネントや UI の他のコンポーネントの外観を制御できます。
独自のインタラクティブな高レベル コンポーネントを構築する場合は、MutableInteractionSource をこのようにパラメータとして公開することをおすすめします。状態のホイスティングのベスト プラクティスに従うだけでなく、他の種類の状態(有効状態など)と同じように、コンポーネントの視覚状態を簡単に読み取って制御できるようになります。
Compose はレイヤード アーキテクチャ アプローチを採用しているため、ハイレベルのマテリアル コンポーネントは、リップルやその他の視覚効果を制御するために必要な Interaction を生成する基盤となるビルディング ブロックの上に構築されています。Foundation ライブラリには、Modifier.hoverable、Modifier.focusable、Modifier.draggable などの高レベルのインタラクション修飾子が用意されています。
ホバー イベントに応答するコンポーネントを構築するには、Modifier.hoverable を使用して MutableInteractionSource をパラメータとして渡します。コンポーネントにカーソルを合わせると、HoverInteraction が出力されます。これを使用して、コンポーネントの表示方法を変更できます。
// This InteractionSource will emit hover interactions val interactionSource = remember { MutableInteractionSource() } Box( Modifier .size(100.dp) .hoverable(interactionSource = interactionSource), contentAlignment = Alignment.Center ) { Text("Hello!") }
このコンポーネントもフォーカス可能にするには、Modifier.focusable を追加して、同じ MutableInteractionSource をパラメータとして渡します。これで、HoverInteraction.Enter/Exit と FocusInteraction.Focus/Unfocus の両方が同じ MutableInteractionSource を介して出力されるようになり、両方のタイプのインタラクションの外観を同じ場所でカスタマイズできます。
// This InteractionSource will emit hover and focus interactions val interactionSource = remember { MutableInteractionSource() } Box( Modifier .size(100.dp) .hoverable(interactionSource = interactionSource) .focusable(interactionSource = interactionSource), contentAlignment = Alignment.Center ) { Text("Hello!") }
Modifier.clickable は hoverable や focusable よりも抽象度が高いものです。コンポーネントがクリック可能である場合、暗黙的にホバー可能であり、クリック可能なコンポーネントはフォーカス可能である必要があります。Modifier.clickable を使用すると、下位レベルの API を組み合わせることなく、ホバー、フォーカス、押下操作を処理するコンポーネントを作成できます。コンポーネントもクリック可能にする場合は、hoverable と focusable を clickable に置き換えます。
// This InteractionSource will emit hover, focus, and press interactions val interactionSource = remember { MutableInteractionSource() } Box( Modifier .size(100.dp) .clickable( onClick = {}, interactionSource = interactionSource, // Also show a ripple effect indication = ripple() ), contentAlignment = Alignment.Center ) { Text("Hello!") }
InteractionSource と連携する
コンポーネントの操作に関する下位レベルの情報が必要な場合は、そのコンポーネントの InteractionSource に対して標準のフロー API を使用できます。たとえば、InteractionSource に対するタップとドラッグ操作のリストを保持するとします。このコードでは、新たなタップがリストに追加されるまでの処理が行われます。
val interactionSource = remember { MutableInteractionSource() } val interactions = remember { mutableStateListOf<Interaction>() } LaunchedEffect(interactionSource) { interactionSource.interactions.collect { interaction -> when (interaction) { is PressInteraction.Press -> { interactions.add(interaction) } is DragInteraction.Start -> { interactions.add(interaction) } } } }
その場合は、新しい操作を追加するだけでなく、終了した操作(たとえばユーザーがコンポーネントから指を離すなど)を削除する必要があります。ただし、終了操作は関連する開始操作に対する参照を常に伴うため、終了した操作の削除は簡単です。終了した操作を削除するコードを次に示します。
val interactionSource = remember { MutableInteractionSource() } val interactions = remember { mutableStateListOf<Interaction>() } LaunchedEffect(interactionSource) { interactionSource.interactions.collect { interaction -> when (interaction) { is PressInteraction.Press -> { interactions.add(interaction) } is PressInteraction.Release -> { interactions.remove(interaction.press) } is PressInteraction.Cancel -> { interactions.remove(interaction.press) } is DragInteraction.Start -> { interactions.add(interaction) } is DragInteraction.Stop -> { interactions.remove(interaction.start) } is DragInteraction.Cancel -> { interactions.remove(interaction.start) } } } }
コンポーネントがタップされているかドラッグされているかは、interactions が空かどうかを見るだけで確認できます。
val isPressedOrDragged = interactions.isNotEmpty()
直近の操作が何であったかは、リストの最後の項目で確認できます。たとえば、Compose のリップル実装では、直近の操作に対して使用する適切な状態オーバーレイを次の方法で判別します。
val lastInteraction = when (interactions.lastOrNull()) { is DragInteraction.Start -> "Dragged" is PressInteraction.Press -> "Pressed" else -> "No state" }
すべての Interaction は同じ構造に従うため、さまざまなタイプのユーザー インタラクションを扱う場合でも、コードに大きな違いはありません。全体的なパターンは同じです。
このセクションの前の例では、State を使用してインタラクションの Flow を表しています。これにより、状態値を読み取ると自動的に再コンポーズが発生するため、更新された値を簡単に確認できます。ただし、コンポジションはフレームごとにバッチ処理されます。つまり、状態が変更され、同じフレーム内で元に戻った場合、状態を監視しているコンポーネントは変更を認識しません。
これは、インタラクションが同じフレーム内で定期的に開始および終了する可能性があるため、インタラクションにとって重要です。たとえば、Button を使用して前の例を適用すると、次のようになります。
val interactionSource = remember { MutableInteractionSource() } val isPressed by interactionSource.collectIsPressedAsState() Button(onClick = { /* do something */ }, interactionSource = interactionSource) { Text(if (isPressed) "Pressed!" else "Not pressed") }
同じフレーム内でプレスが開始して終了した場合、テキストは「Pressed!」と表示されません。ほとんどの場合、これは問題になりません。このような短い時間で視覚効果を表示すると、ちらつきが発生し、ユーザーにはほとんど気づかれません。リップル効果や同様のアニメーションを表示する場合など、ボタンが押されなくなったらすぐに停止するのではなく、少なくとも一定時間効果を表示したい場合があります。これを行うには、状態に書き込むのではなく、collect ラムダ内からアニメーションを直接開始および停止します。このパターンの例は、アニメーション ボーダーで高度な Indication を作成するセクションにあります。
例: カスタムのインタラクション処理を行うコンポーネントをビルドする
コンポーネントを作成し、入力に対するカスタム応答を指定する方法については、以下の変更されたボタンの例をご覧ください。この例に示すボタンは、タップに対して、外観が変わることで応答しています。
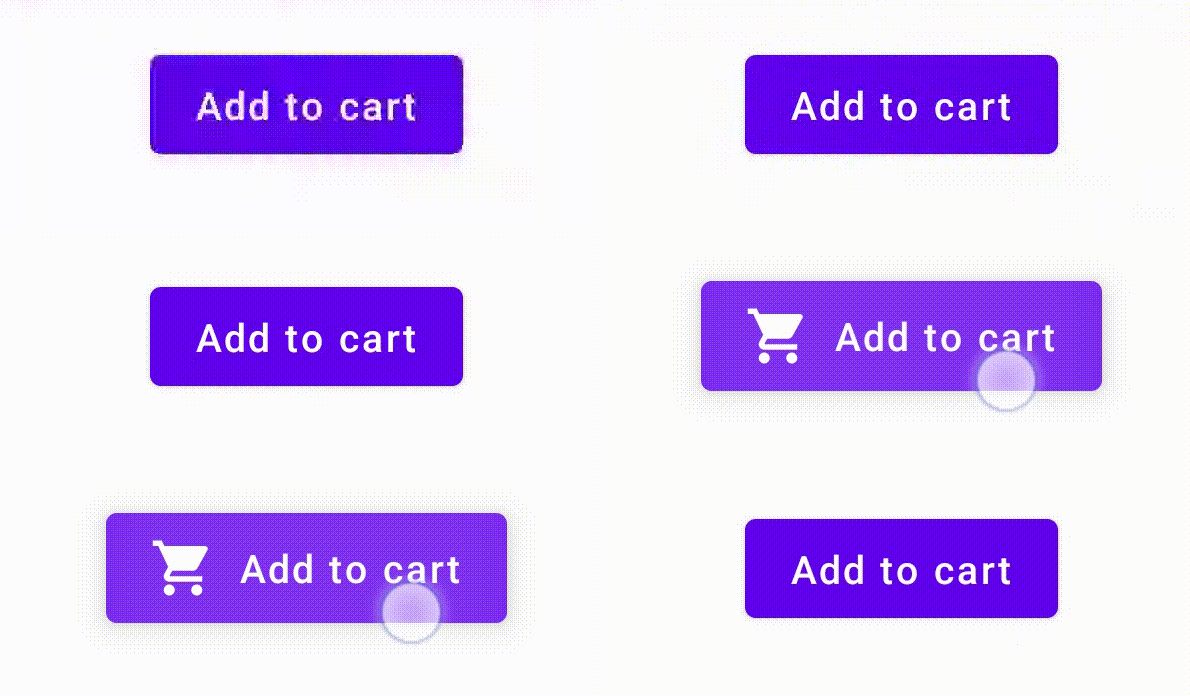
ここでは、Button に基づくカスタム コンポーザブルを作成し、icon パラメータを追加してアイコン(この場合はショッピング カート)を描画します。collectIsPressedAsState() を呼び出して、ユーザーがボタンにカーソルを合わせているかどうかを追跡します。そしてカーソルが合わさった場合にアイコンが表示されるようにします。コードは次のようになります。
@Composable fun PressIconButton( onClick: () -> Unit, icon: @Composable () -> Unit, text: @Composable () -> Unit, modifier: Modifier = Modifier, interactionSource: MutableInteractionSource? = null ) { val isPressed = interactionSource?.collectIsPressedAsState()?.value ?: false Button( onClick = onClick, modifier = modifier, interactionSource = interactionSource ) { AnimatedVisibility(visible = isPressed) { if (isPressed) { Row { icon() Spacer(Modifier.size(ButtonDefaults.IconSpacing)) } } } text() } }
新しいコンポーザブルは次のように使用します。
PressIconButton( onClick = {}, icon = { Icon(Icons.Filled.ShoppingCart, contentDescription = null) }, text = { Text("Add to cart") } )
この新しい PressIconButton は既存の Material Button 上にビルドされているため、ユーザーの操作に通常の方法で反応します。ユーザーがボタンをタップすると、通常の Material Button と同様に不透明度が少し変わります。
Indication を使用して再利用可能なカスタム効果を作成して適用する
前のセクションでは、押されたときにアイコンを表示するなど、さまざまな Interaction に応じてコンポーネントの一部を変更する方法について説明しました。このアプローチは、コンポーネントに提供するパラメータの値を変更したり、コンポーネント内に表示されるコンテンツを変更したりする場合にも使用できますが、これはコンポーネントごとにのみ適用されます。多くの場合、アプリケーションやデザイン システムには、ステートフルなビジュアル エフェクトの汎用システムがあります。これは、すべてのコンポーネントに一貫した方法で適用されるエフェクトです。
このようなデザイン システムを構築する場合、次の理由により、1 つのコンポーネントをカスタマイズして、そのカスタマイズを他のコンポーネントで再利用することは困難です。
- デザイン システムのすべてのコンポーネントに同じボイラープレートが必要
- この効果を新しく作成したコンポーネントやカスタムのクリック可能なコンポーネントに適用することを忘れがちです。
- カスタム効果を他の効果と組み合わせるのが難しい場合がある
このような問題を回避し、システム全体でカスタム コンポーネントを簡単にスケーリングするには、Indication を使用します。Indication は、アプリケーションまたはデザイン システムのコンポーネント全体に適用できる再利用可能な視覚効果を表します。Indication は次の 2 つの部分に分かれています。
IndicationNodeFactory: コンポーネントの視覚効果をレンダリングするModifier.Nodeインスタンスを作成するファクトリ。コンポーネント間で変更されないシンプルな実装の場合、これはシングルトン(オブジェクト)にすることができ、アプリケーション全体で再利用できます。これらのインスタンスはステートフルまたはステートレスにできます。コンポーネントごとに作成されるため、他の
Modifier.Nodeと同様に、CompositionLocalから値を取得して、特定のコンポーネント内での表示や動作を変更できます。Modifier.indication: コンポーネントのIndicationを描画する修飾子。Modifier.clickableなどの高レベルのインタラクション修飾子は、直接インジケータ パラメータを受け取るため、Interactionを出力するだけでなく、出力したInteractionの視覚効果を描画することもできます。したがって、単純なケースでは、Modifier.indicationを必要とせずにModifier.clickableを使用できます。
効果を Indication に置き換える
このセクションでは、特定のボタンに適用された手動のスケーリング効果を、複数のコンポーネントで再利用できる同等のインジケータに置き換える方法について説明します。
次のコードは、押すと縮小するボタンを作成します。
val interactionSource = remember { MutableInteractionSource() } val isPressed by interactionSource.collectIsPressedAsState() val scale by animateFloatAsState(targetValue = if (isPressed) 0.9f else 1f, label = "scale") Button( modifier = Modifier.scale(scale), onClick = { }, interactionSource = interactionSource ) { Text(if (isPressed) "Pressed!" else "Not pressed") }
上記のスニペットのスケール効果を Indication に変換する手順は次のとおりです。
スケール効果の適用を担当する
Modifier.Nodeを作成します。アタッチされると、ノードは前の例と同様にインタラクション ソースを監視します。ここでの唯一の違いは、受信したインタラクションを状態に変換するのではなく、アニメーションを直接起動することです。ノードは
DrawModifierNodeを実装してContentDrawScope#draw()をオーバーライドし、Compose の他のグラフィック API と同じ描画コマンドを使用してスケール効果をレンダリングする必要があります。ContentDrawScopeレシーバから利用可能なdrawContent()を呼び出すと、Indicationが適用される実際のコンポーネントが描画されます。そのため、この関数をスケール変換内で呼び出すだけで済みます。Indicationの実装では、必ずどこかでdrawContent()を呼び出すようにしてください。そうしないと、Indicationを適用するコンポーネントが描画されません。private class ScaleNode(private val interactionSource: InteractionSource) : Modifier.Node(), DrawModifierNode { var currentPressPosition: Offset = Offset.Zero val animatedScalePercent = Animatable(1f) private suspend fun animateToPressed(pressPosition: Offset) { currentPressPosition = pressPosition animatedScalePercent.animateTo(0.9f, spring()) } private suspend fun animateToResting() { animatedScalePercent.animateTo(1f, spring()) } override fun onAttach() { coroutineScope.launch { interactionSource.interactions.collectLatest { interaction -> when (interaction) { is PressInteraction.Press -> animateToPressed(interaction.pressPosition) is PressInteraction.Release -> animateToResting() is PressInteraction.Cancel -> animateToResting() } } } } override fun ContentDrawScope.draw() { scale( scale = animatedScalePercent.value, pivot = currentPressPosition ) { this@draw.drawContent() } } }
IndicationNodeFactoryを作成します。その唯一の役割は、提供されたインタラクション ソースの新しいノード インスタンスを作成することです。インジケーターを構成するパラメータがないため、ファクトリーはオブジェクトにできます。object ScaleIndication : IndicationNodeFactory { override fun create(interactionSource: InteractionSource): DelegatableNode { return ScaleNode(interactionSource) } override fun equals(other: Any?): Boolean = other === ScaleIndication override fun hashCode() = 100 }
Modifier.clickableは内部でModifier.indicationを使用するため、ScaleIndicationでクリック可能なコンポーネントを作成するには、Indicationをclickableのパラメータとして指定するだけです。Box( modifier = Modifier .size(100.dp) .clickable( onClick = {}, indication = ScaleIndication, interactionSource = null ) .background(Color.Blue), contentAlignment = Alignment.Center ) { Text("Hello!", color = Color.White) }
また、カスタム
Indicationを使用して、再利用可能なハイレベルのコンポーネントを簡単に構築することもできます。ボタンは次のようになります。@Composable fun ScaleButton( onClick: () -> Unit, modifier: Modifier = Modifier, enabled: Boolean = true, interactionSource: MutableInteractionSource? = null, shape: Shape = CircleShape, content: @Composable RowScope.() -> Unit ) { Row( modifier = modifier .defaultMinSize(minWidth = 76.dp, minHeight = 48.dp) .clickable( enabled = enabled, indication = ScaleIndication, interactionSource = interactionSource, onClick = onClick ) .border(width = 2.dp, color = Color.Blue, shape = shape) .padding(horizontal = 16.dp, vertical = 8.dp), horizontalArrangement = Arrangement.Center, verticalAlignment = Alignment.CenterVertically, content = content ) }
ボタンは次のように使用できます。
ScaleButton(onClick = {}) { Icon(Icons.Filled.ShoppingCart, "") Spacer(Modifier.padding(10.dp)) Text(text = "Add to cart!") }
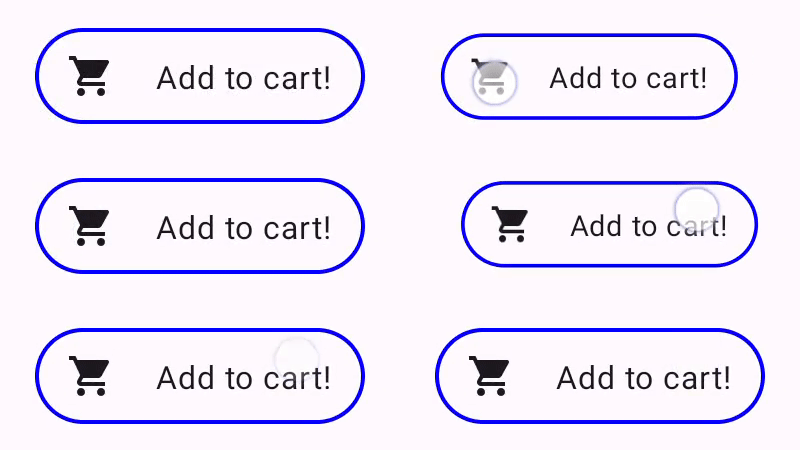
Indication で作成されたボタン。アニメーション ボーダー付きの高度な Indication を作成する
Indication は、コンポーネントのスケーリングなどの変換効果に限定されません。IndicationNodeFactory は Modifier.Node を返すため、他の描画 API と同様に、コンテンツの上または下に任意のエフェクトを描画できます。たとえば、コンポーネントが押されたときに、コンポーネントの周りにアニメーションの枠線を描画し、コンポーネントの上にオーバーレイを描画できます。
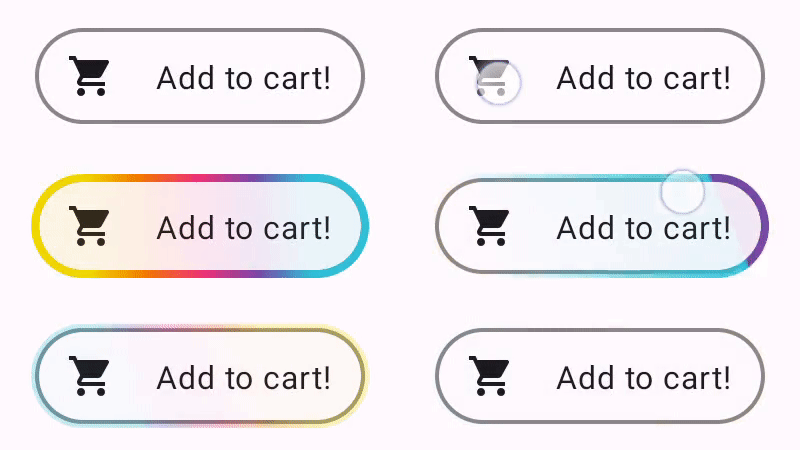
Indication で描画されたアニメーションの枠線効果。ここでの Indication の実装は前の例と非常によく似ています。いくつかのパラメータを含むノードを作成するだけです。アニメーション付きの枠線は、Indication が使用されるコンポーネントの形状と枠線に依存するため、Indication の実装では、形状と枠線の幅をパラメータとして指定する必要があります。
data class NeonIndication(private val shape: Shape, private val borderWidth: Dp) : IndicationNodeFactory { override fun create(interactionSource: InteractionSource): DelegatableNode { return NeonNode( shape, // Double the border size for a stronger press effect borderWidth * 2, interactionSource ) } }
描画コードが複雑になっても、Modifier.Node の実装は概念的には同じです。以前と同様に、アタッチ時に InteractionSource を監視し、アニメーションを起動し、DrawModifierNode を実装してコンテンツの上にエフェクトを描画します。
private class NeonNode( private val shape: Shape, private val borderWidth: Dp, private val interactionSource: InteractionSource ) : Modifier.Node(), DrawModifierNode { var currentPressPosition: Offset = Offset.Zero val animatedProgress = Animatable(0f) val animatedPressAlpha = Animatable(1f) var pressedAnimation: Job? = null var restingAnimation: Job? = null private suspend fun animateToPressed(pressPosition: Offset) { // Finish any existing animations, in case of a new press while we are still showing // an animation for a previous one restingAnimation?.cancel() pressedAnimation?.cancel() pressedAnimation = coroutineScope.launch { currentPressPosition = pressPosition animatedPressAlpha.snapTo(1f) animatedProgress.snapTo(0f) animatedProgress.animateTo(1f, tween(450)) } } private fun animateToResting() { restingAnimation = coroutineScope.launch { // Wait for the existing press animation to finish if it is still ongoing pressedAnimation?.join() animatedPressAlpha.animateTo(0f, tween(250)) animatedProgress.snapTo(0f) } } override fun onAttach() { coroutineScope.launch { interactionSource.interactions.collect { interaction -> when (interaction) { is PressInteraction.Press -> animateToPressed(interaction.pressPosition) is PressInteraction.Release -> animateToResting() is PressInteraction.Cancel -> animateToResting() } } } } override fun ContentDrawScope.draw() { val (startPosition, endPosition) = calculateGradientStartAndEndFromPressPosition( currentPressPosition, size ) val brush = animateBrush( startPosition = startPosition, endPosition = endPosition, progress = animatedProgress.value ) val alpha = animatedPressAlpha.value drawContent() val outline = shape.createOutline(size, layoutDirection, this) // Draw overlay on top of content drawOutline( outline = outline, brush = brush, alpha = alpha * 0.1f ) // Draw border on top of overlay drawOutline( outline = outline, brush = brush, alpha = alpha, style = Stroke(width = borderWidth.toPx()) ) } /** * Calculates a gradient start / end where start is the point on the bounding rectangle of * size [size] that intercepts with the line drawn from the center to [pressPosition], * and end is the intercept on the opposite end of that line. */ private fun calculateGradientStartAndEndFromPressPosition( pressPosition: Offset, size: Size ): Pair<Offset, Offset> { // Convert to offset from the center val offset = pressPosition - size.center // y = mx + c, c is 0, so just test for x and y to see where the intercept is val gradient = offset.y / offset.x // We are starting from the center, so halve the width and height - convert the sign // to match the offset val width = (size.width / 2f) * sign(offset.x) val height = (size.height / 2f) * sign(offset.y) val x = height / gradient val y = gradient * width // Figure out which intercept lies within bounds val intercept = if (abs(y) <= abs(height)) { Offset(width, y) } else { Offset(x, height) } // Convert back to offsets from 0,0 val start = intercept + size.center val end = Offset(size.width - start.x, size.height - start.y) return start to end } private fun animateBrush( startPosition: Offset, endPosition: Offset, progress: Float ): Brush { if (progress == 0f) return TransparentBrush // This is *expensive* - we are doing a lot of allocations on each animation frame. To // recreate a similar effect in a performant way, it would be better to create one large // gradient and translate it on each frame, instead of creating a whole new gradient // and shader. The current approach will be janky! val colorStops = buildList { when { progress < 1 / 6f -> { val adjustedProgress = progress * 6f add(0f to Blue) add(adjustedProgress to Color.Transparent) } progress < 2 / 6f -> { val adjustedProgress = (progress - 1 / 6f) * 6f add(0f to Purple) add(adjustedProgress * MaxBlueStop to Blue) add(adjustedProgress to Blue) add(1f to Color.Transparent) } progress < 3 / 6f -> { val adjustedProgress = (progress - 2 / 6f) * 6f add(0f to Pink) add(adjustedProgress * MaxPurpleStop to Purple) add(MaxBlueStop to Blue) add(1f to Blue) } progress < 4 / 6f -> { val adjustedProgress = (progress - 3 / 6f) * 6f add(0f to Orange) add(adjustedProgress * MaxPinkStop to Pink) add(MaxPurpleStop to Purple) add(MaxBlueStop to Blue) add(1f to Blue) } progress < 5 / 6f -> { val adjustedProgress = (progress - 4 / 6f) * 6f add(0f to Yellow) add(adjustedProgress * MaxOrangeStop to Orange) add(MaxPinkStop to Pink) add(MaxPurpleStop to Purple) add(MaxBlueStop to Blue) add(1f to Blue) } else -> { val adjustedProgress = (progress - 5 / 6f) * 6f add(0f to Yellow) add(adjustedProgress * MaxYellowStop to Yellow) add(MaxOrangeStop to Orange) add(MaxPinkStop to Pink) add(MaxPurpleStop to Purple) add(MaxBlueStop to Blue) add(1f to Blue) } } } return linearGradient( colorStops = colorStops.toTypedArray(), start = startPosition, end = endPosition ) } companion object { val TransparentBrush = SolidColor(Color.Transparent) val Blue = Color(0xFF30C0D8) val Purple = Color(0xFF7848A8) val Pink = Color(0xFFF03078) val Orange = Color(0xFFF07800) val Yellow = Color(0xFFF0D800) const val MaxYellowStop = 0.16f const val MaxOrangeStop = 0.33f const val MaxPinkStop = 0.5f const val MaxPurpleStop = 0.67f const val MaxBlueStop = 0.83f } }
ここでの主な違いは、animateToResting() 関数を使用したアニメーションの最小時間が設定されたことです。そのため、すぐにリリースしても、プレス アニメーションは継続されます。animateToPressed の開始時に複数回押された場合の処理もあります。既存の押下アニメーションまたは停止アニメーション中に押下が発生した場合、以前のアニメーションはキャンセルされ、押下アニメーションが最初から開始されます。複数の同時効果(リップルなど。新しいリップル アニメーションが他のリップルの上に描画される)をサポートするには、既存のアニメーションをキャンセルして新しいアニメーションを開始するのではなく、リストでアニメーションをトラッキングします。
あなたへのおすすめ
- 注: JavaScript がオフになっている場合はリンクテキストが表示されます
- ジェスチャーについて
- Jetpack Compose で Kotlin を使用する
- マテリアル コンポーネントとレイアウト
