
To make your notifications look their best across different versions of Android, use the standard notification template to build your notifications. If you want to provide more content in your notification, consider using one of the expandable notification templates.
However, if the system templates don't meet your needs, you can use your own layout for the notification.
Create custom layout for the content area
If you need a custom layout, you can apply
NotificationCompat.DecoratedCustomViewStyle
to your notification. This API lets you provide a custom layout for the content
area normally occupied by the title and text content, while still using system
decorations for the notification icon, timestamp, sub-text, and action buttons.
This API works similarly to the expandable notification templates by building on the basic notification layout as follows:
- Build a basic notification
with
NotificationCompat.Builder. - Call
setStyle(), passing it an instance ofNotificationCompat.DecoratedCustomViewStyle. - Inflate your custom layout as an instance of
RemoteViews. - Call
setCustomContentView()to set the layout for the collapsed notification. - Optionally, also call
setCustomBigContentView()to set a different layout for the expanded notification.
Prepare the layouts
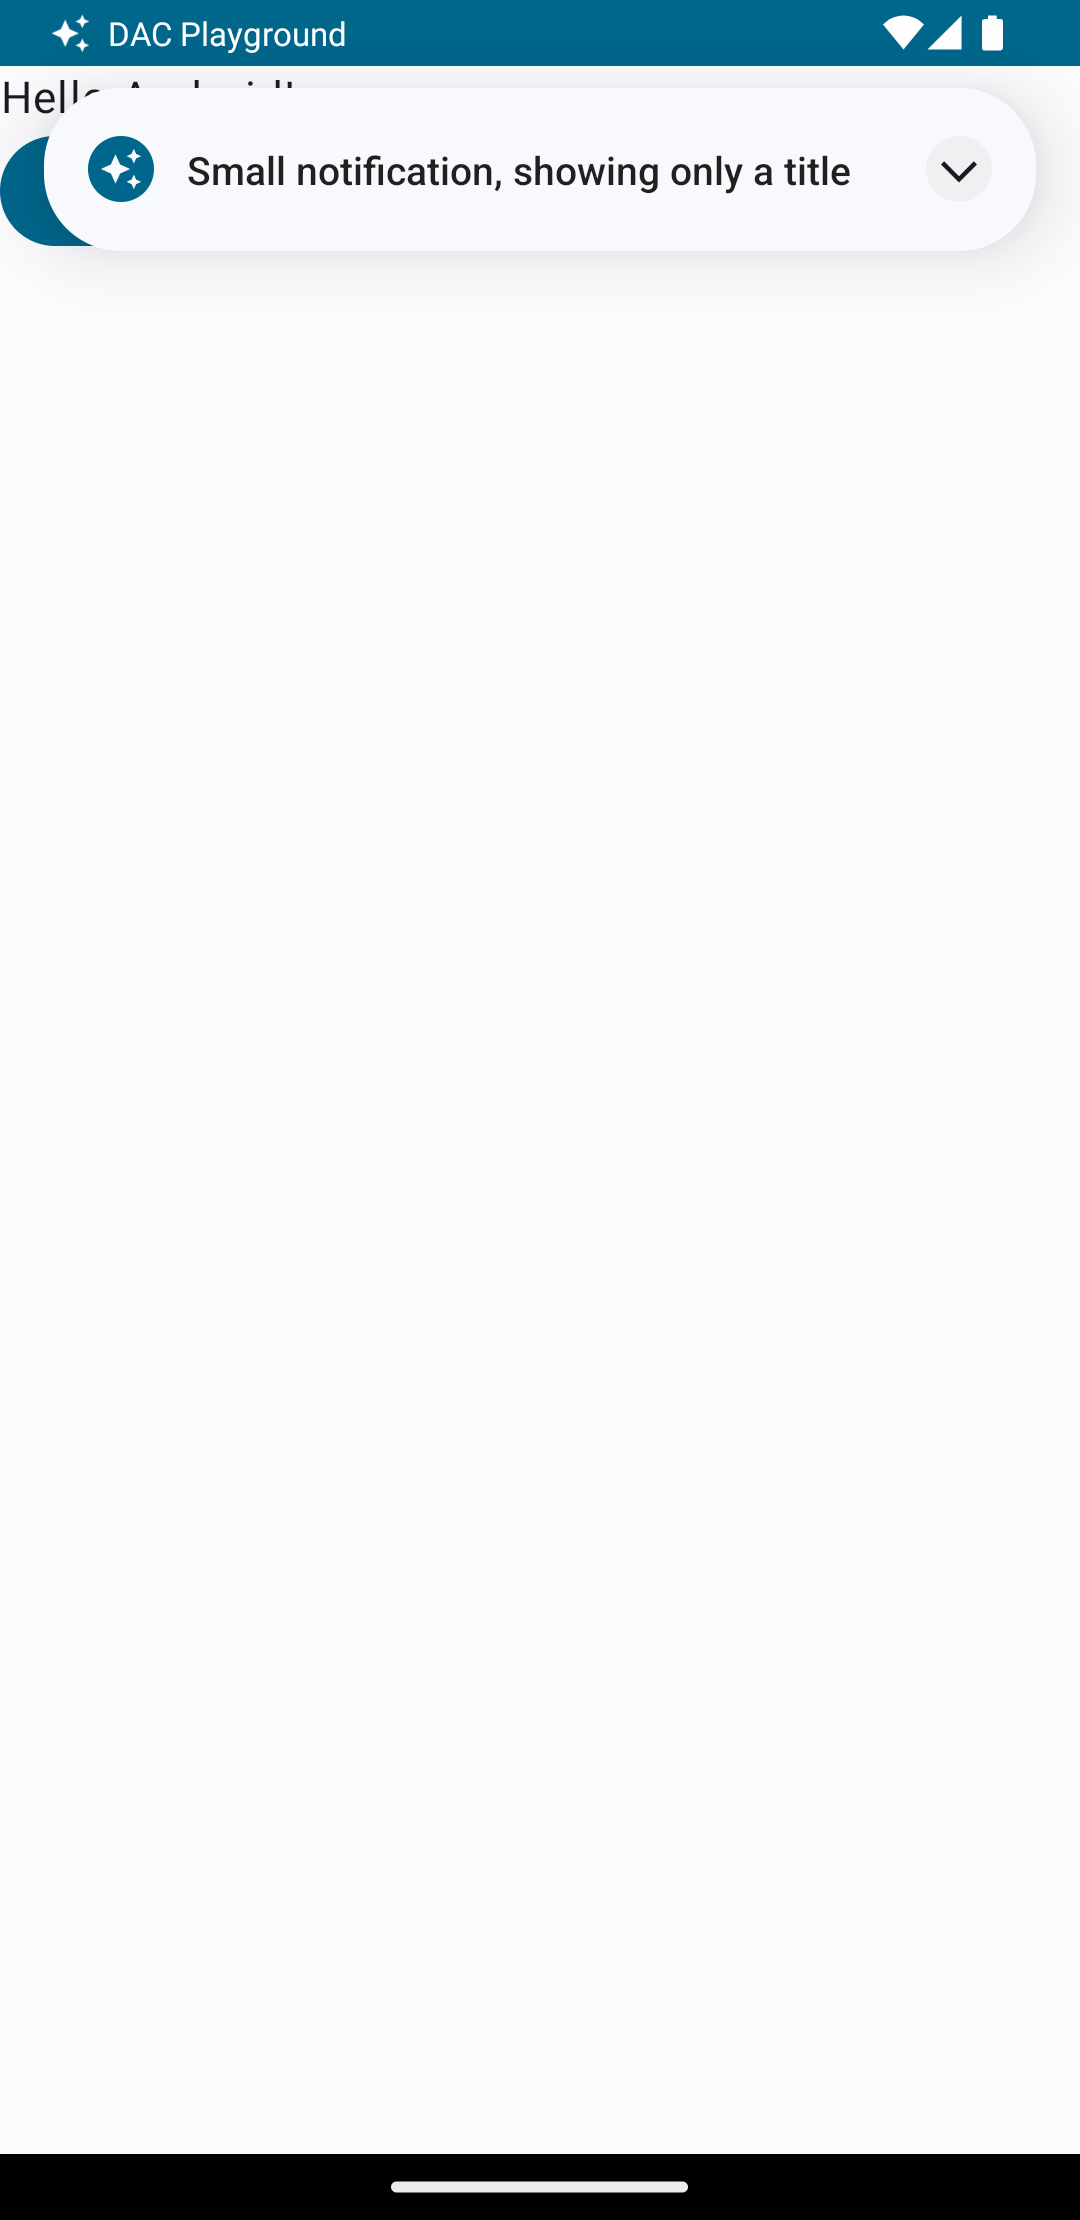
You need a small and large layout. For this example, the small layout
might look like this:
<?xml version="1.0" encoding="utf-8"?>
<LinearLayout xmlns:android="http://schemas.android.com/apk/res/android"
    android:layout_width="match_parent"
    android:layout_height="wrap_content"
    android:orientation="vertical">

    <TextView
        android:id="@+id/notification_title"
        style="@style/TextAppearance.Compat.Notification.Title"
        android:layout_width="wrap_content"
        android:layout_height="0dp"
        android:layout_weight="1"
        android:text="Small notification, showing only a title" />
</LinearLayout>
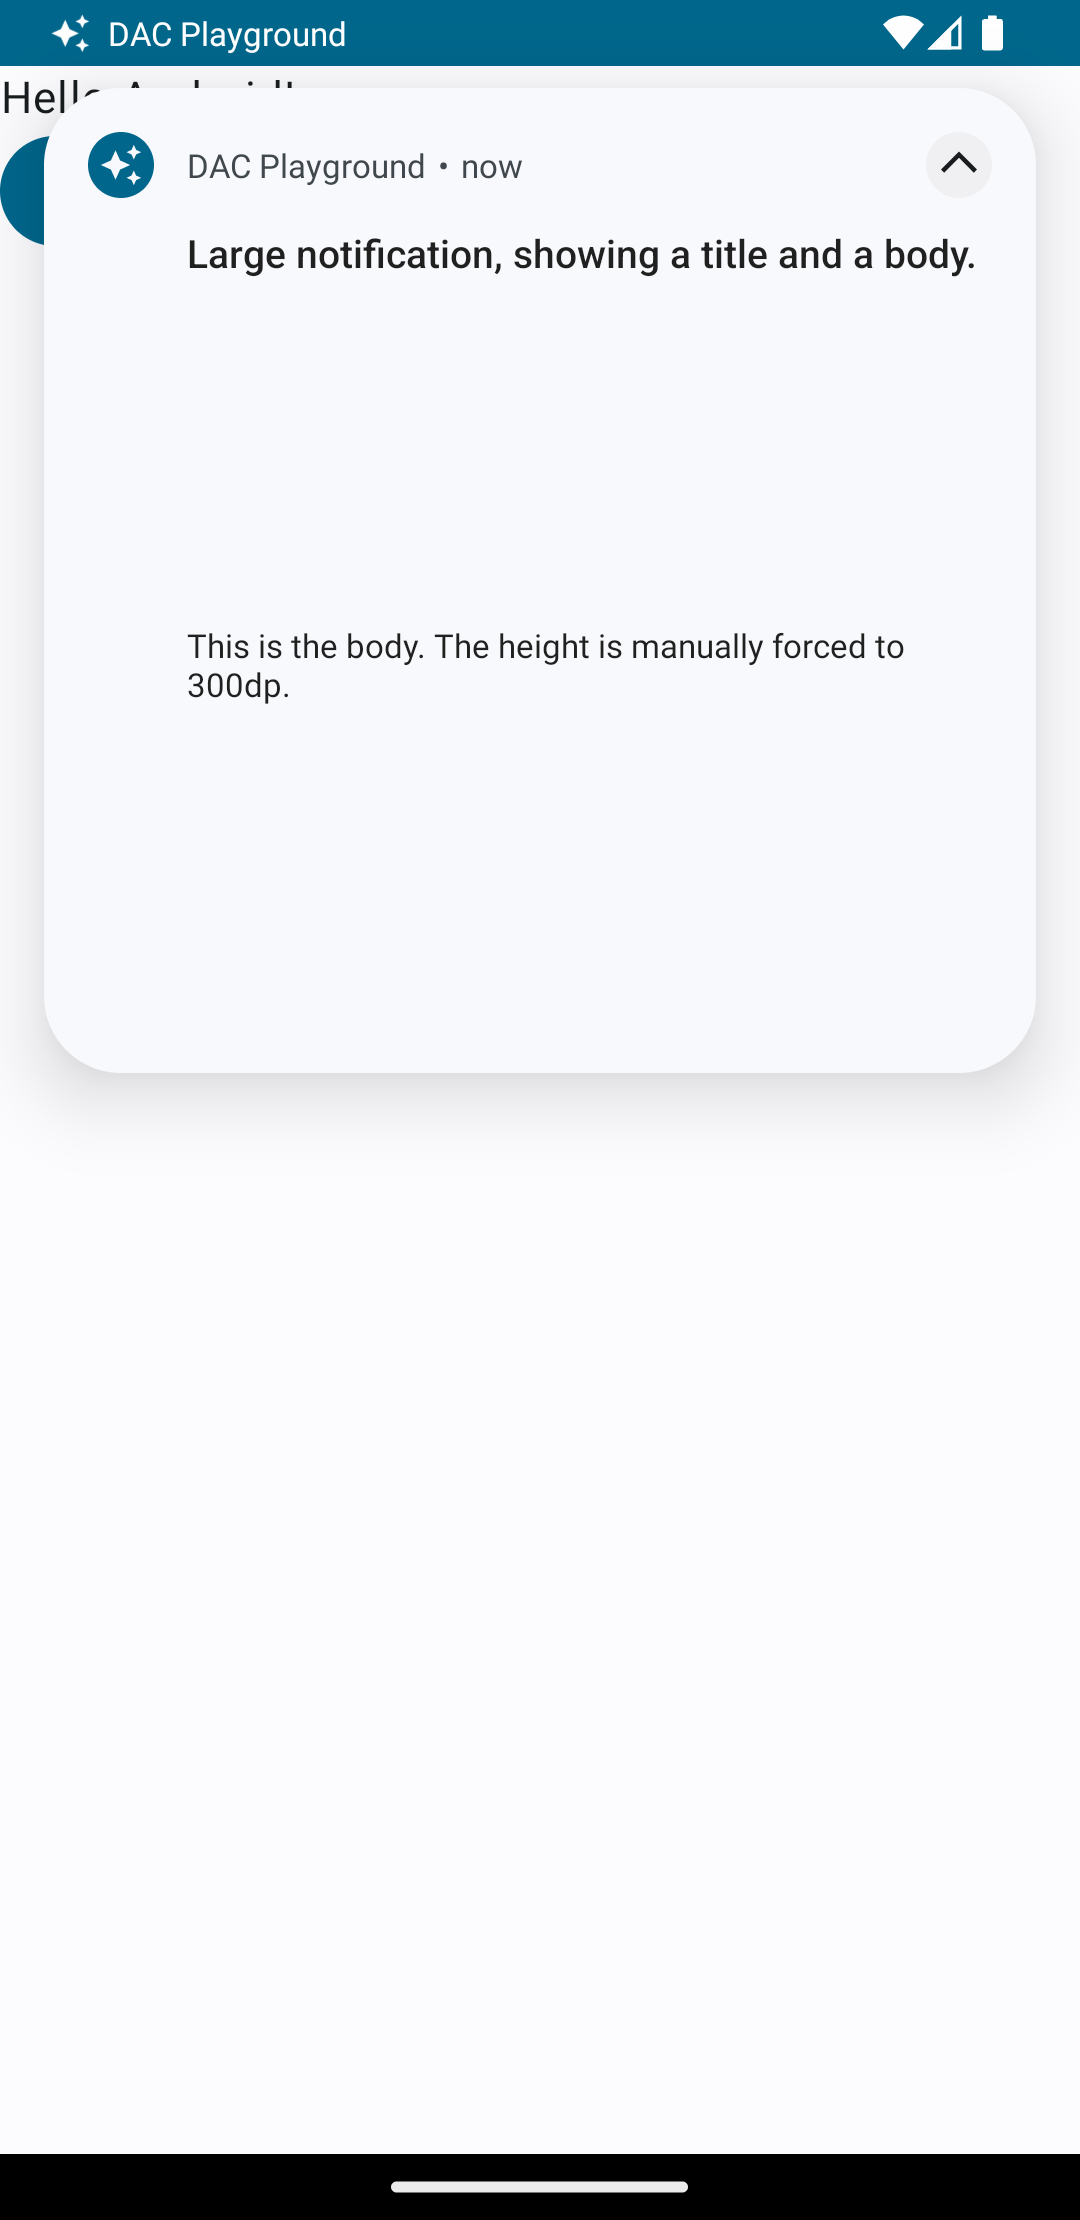
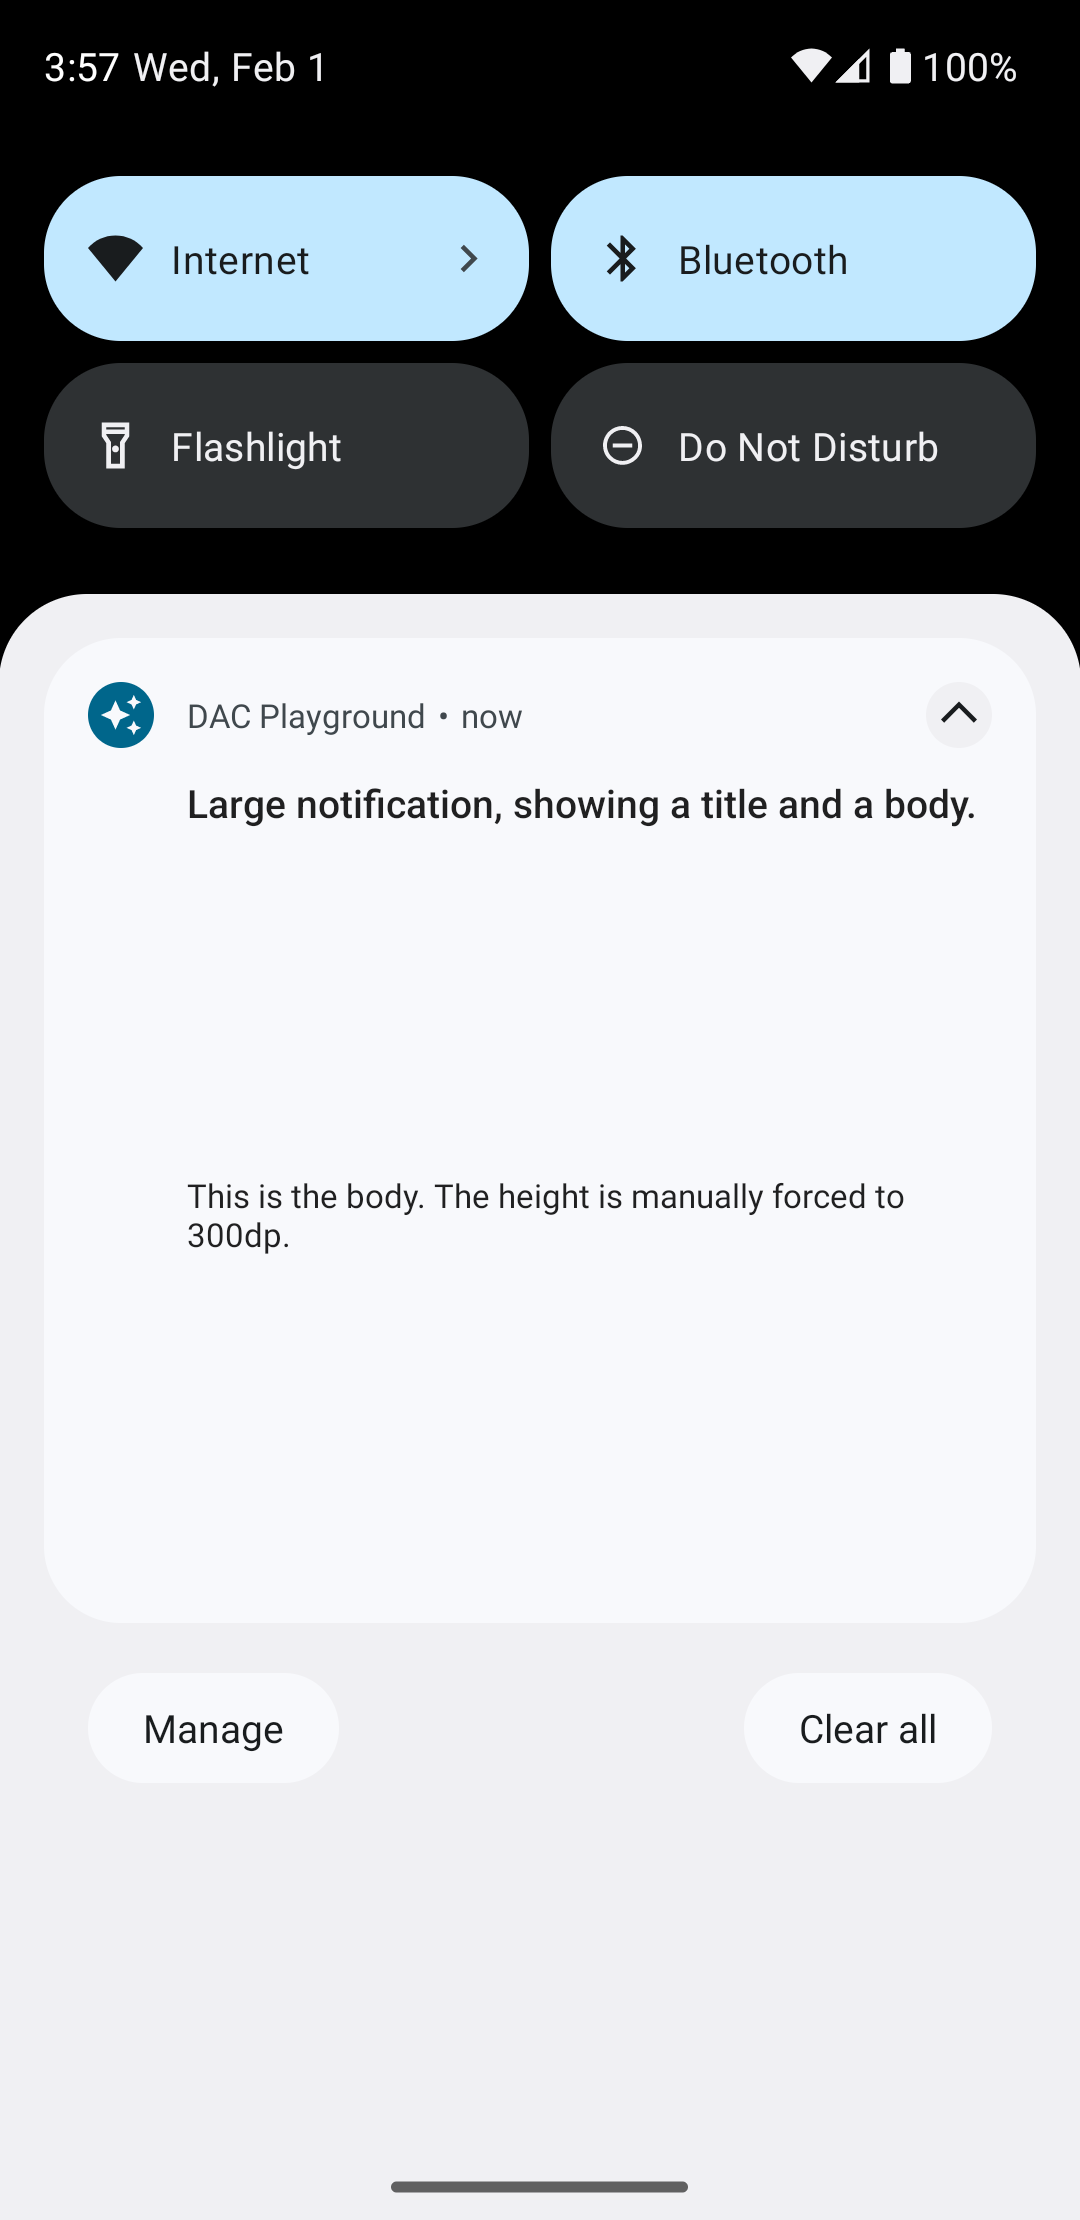
And the large layout might look like this:
<?xml version="1.0" encoding="utf-8"?>
<LinearLayout xmlns:android="http://schemas.android.com/apk/res/android"
    android:layout_width="match_parent"
    android:layout_height="300dp"
    android:orientation="vertical">

    <TextView
        android:id="@+id/notification_title"
        style="@style/TextAppearance.Compat.Notification.Title"
        android:layout_width="wrap_content"
        android:layout_height="wrap_content"
        android:layout_weight="1"
        android:text="Large notification, showing a title and a body." />

    <TextView
        android:id="@+id/notification_body"
        style="@style/TextAppearance.Compat.Notification.Line2"
        android:layout_width="wrap_content"
        android:layout_height="wrap_content"
        android:layout_weight="1"
        android:text="This is the body. The height is manually forced to 300dp." />
</LinearLayout>
Build and show the notification
After the layouts are ready, you can use them as shown in the following example:
Kotlin
val notificationManager = getSystemService(Context.NOTIFICATION_SERVICE) as NotificationManager

// Get the layouts to use in the custom notification.
val notificationLayout = RemoteViews(packageName, R.layout.notification_small)
val notificationLayoutExpanded = RemoteViews(packageName, R.layout.notification_large)

// Apply the layouts to the notification.
val customNotification = NotificationCompat.Builder(context, CHANNEL_ID)
        .setSmallIcon(R.drawable.notification_icon)
        .setStyle(NotificationCompat.DecoratedCustomViewStyle())
        .setCustomContentView(notificationLayout)
        .setCustomBigContentView(notificationLayoutExpanded)
        .build()

notificationManager.notify(666, customNotification)
Java
NotificationManager notificationManager = (NotificationManager) getSystemService(Context.NOTIFICATION_SERVICE);

// Get the layouts to use in the custom notification
RemoteViews notificationLayout = new RemoteViews(getPackageName(), R.layout.notification_small);
RemoteViews notificationLayoutExpanded = new RemoteViews(getPackageName(), R.layout.notification_large);

// Apply the layouts to the notification.
Notification customNotification = new NotificationCompat.Builder(context, CHANNEL_ID)
        .setSmallIcon(R.drawable.notification_icon)
        .setStyle(new NotificationCompat.DecoratedCustomViewStyle())
        .setCustomContentView(notificationLayout)
        .setCustomBigContentView(notificationLayoutExpanded)
        .build();

notificationManager.notify(666, customNotification);
Be aware that the background color for the notification can vary across devices
and versions. Apply Support Library styles such as
TextAppearance_Compat_Notification for the text and
TextAppearance_Compat_Notification_Title for the title in your custom layout,
as shown in the following example. These styles adapt to the color variations so
you don't end up with black-on-black or white-on-white text.
<TextView
    android:layout_width="wrap_content"
    android:layout_height="match_parent"
    android:layout_weight="1"
    android:text="@string/notification_title"
    android:id="@+id/notification_title"
    style="@style/TextAppearance.Compat.Notification.Title" />
Avoid setting a background image on your RemoteViews object, because your text
might become unreadable.
When you trigger a notification while the user is using an app, the result is similar to figure 1:
Tapping the expander arrow expands the notification, as shown in figure 2:
After the notification timeout runs out, the notification is visible only in the system bar, which looks like figure 3:

Tapping the expander arrow expands the notification, as shown in figure 4:
Create a fully custom notification layout
If you don't want your notification decorated with the standard notification
icon and header, follow the preceding steps but don't call setStyle().