
หน้านี้จะกล่าวถึงข้อมูลเบื้องต้นเกี่ยวกับ AGSL และวิธีอื่นๆ ในการใช้ AGSL บน Android แอป
เครื่องมือเฉดสี AGSL อย่างง่าย
จะมีการเรียกโค้ดตัวปรับแสงเงาสำหรับพิกเซลที่วาดแต่ละพิกเซล และจะแสดงสีที่พิกเซลนั้น
ที่ควรใช้ เครื่องมือเฉดสีที่เรียบง่ายที่สุดจะให้ผลลัพธ์
สีเดียว ตัวอย่างนี้ใช้สีแดง กำหนดเฉดสีภายใน String
Kotlin
private const val COLOR_SHADER_SRC =
   """half4 main(float2 fragCoord) {
      return half4(1,0,0,1);
   }"""
Java
private static final String COLOR_SHADER_SRC =
   "half4 main(float2 fragCoord) {\n" +
      "return half4(1,0,0,1);\n" +
   "}";
ขั้นตอนถัดไปคือการสร้างRuntimeShader
เริ่มต้นด้วยสตริงตัวปรับแสงเงาของคุณ ซึ่งจะรวมตัวปรับแสงเงาด้วย
Kotlin
val fixedColorShader = RuntimeShader(COLOR_SHADER_SRC)
Java
RuntimeShader fixedColorShader = new RuntimeShader(COLOR_SHADER_SRC);
RuntimeShader ของคุณสามารถใช้ได้ทุกที่ที่เครื่องมือเฉดสีของ Android มาตรฐานสามารถทำได้ ในฐานะ
ตัวอย่างเช่น คุณสามารถใช้แท็กนี้เพื่อวาดลงใน View ที่กำหนดเองโดยใช้
Canvas
Kotlin
val paint = Paint()
paint.shader = fixedColorShader
override fun onDrawForeground(canvas: Canvas?) {
   canvas?.let {
      canvas.drawPaint(paint) // fill the Canvas with the shader
   }
}
Java
Paint paint = new Paint();
paint.setShader(fixedColorShader);
public void onDrawForeground(@Nullable Canvas canvas) {
   if (canvas != null) {
      canvas.drawPaint(paint); // fill the Canvas with the shader
   }
}
การดำเนินการนี้จะวาด View สีแดง คุณสามารถใช้ uniform เพื่อส่งผ่านพารามิเตอร์สีไปยัง
ตัวปรับแสงเงาที่จะวาด ก่อนอื่น ให้เพิ่มสี uniform ลงในเฉดสี ดังนี้
Kotlin
private const val COLOR_SHADER_SRC =
"""layout(color) uniform half4 iColor;
   half4 main(float2 fragCoord) {
      return iColor;
   }"""
Java
private static final String COLOR_SHADER_SRC =
   "layout(color) uniform half4 iColor;\n"+
      "half4 main(float2 fragCoord) {\n" +
      "return iColor;\n" +
   "}";
จากนั้น เรียก setColorUniform จาก View ที่คุณกำหนดเองเพื่อส่งสีที่ต้องการ
ลงในตัวปรับแสงเงา AGSL
Kotlin
fixedColorShader.setColorUniform("iColor", Color.GREEN )
Java
fixedColorShader.setColorUniform("iColor", Color.GREEN );
ตอนนี้คุณจะได้รับ View สีเขียว สีของ View ถูกควบคุมโดยใช้
จากโค้ดใน View ที่กำหนดเองแทนที่จะฝังลงใน
ตัวปรับแสงเงา
สร้างเอฟเฟกต์การไล่ระดับสีแทนได้ ก่อนอื่นคุณจะต้องเปลี่ยน
ตัวปรับแสงเงาเพื่อยอมรับความละเอียด View เป็นอินพุต
Kotlin
private const val COLOR_SHADER_SRC =
"""uniform float2 iResolution;
   half4 main(float2 fragCoord) {
      float2 scaled = fragCoord/iResolution.xy;
      return half4(scaled, 0, 1);
   }"""
Java
private static final String COLOR_SHADER_SRC =
   "uniform float2 iResolution;\n" +
      "half4 main(float2 fragCoord) {\n" +
      "float2 scaled = fragCoord/iResolution.xy;\n" +
      "return half4(scaled, 0, 1);\n" +
   "}";
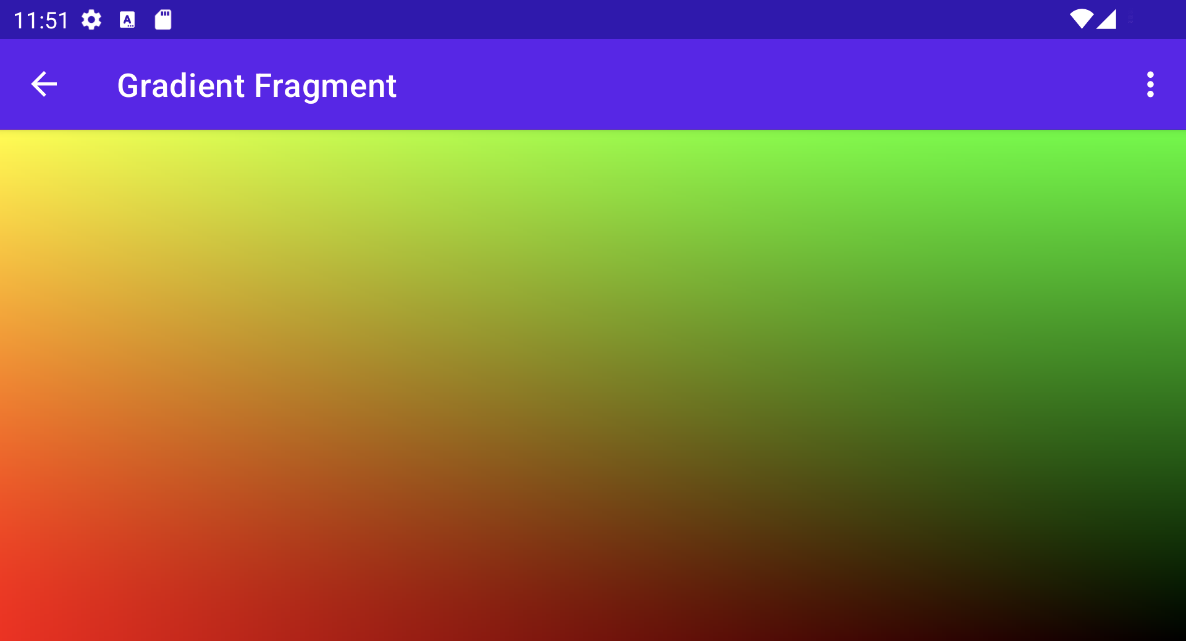
การวาดการไล่ระดับสี
เฉดสีนี้ทำอะไรที่หรูหราเล็กน้อย สำหรับแต่ละพิกเซล ระบบจะสร้างfloat2
เวกเตอร์ที่มีพิกัด x และ y หารด้วยความละเอียด ซึ่ง
จะสร้างค่าระหว่าง 0 ถึง 1 จากนั้นจะใช้เวกเตอร์ที่ปรับขนาดเพื่อ
สร้างส่วนประกอบสีแดงและเขียวของสีแสดงผล
คุณได้ส่งความละเอียดของ View ไปยังเครื่องมือให้เฉดสี AGSL uniform โดยการเรียกใช้
setFloatUniform
Kotlin
val paint = Paint()
paint.shader = fixedColorShader
override fun onDrawForeground(canvas: Canvas?) {
   canvas?.let {
      fixedColorShader.setFloatUniform("iResolution", width.toFloat(), height.toFloat())
      canvas.drawPaint(paint)
   }
}
Java
Paint paint = new Paint();
paint.setShader(fixedColorShader);
public void onDrawForeground(@Nullable Canvas canvas) {
   if (canvas != null) {
      fixedColorShader.setFloatUniform("iResolution", (float)getWidth(), (float()getHeight()));
      canvas.drawPaint(paint);
   }
}
การสร้างภาพเคลื่อนไหวของตัวปรับแสงเงา
คุณสามารถใช้เทคนิคที่คล้ายกันเพื่อสร้างภาพเคลื่อนไหวของตัวให้เฉดสีได้โดยแก้ไขให้รับเครื่องแบบ iTime และ iDuration ตัวปรับแสงเงาจะใช้ค่าเหล่านี้เพื่อสร้าง
คลื่นสามเหลี่ยมสำหรับสี ทำให้สีวนกลับไปกลับมาตามค่าการไล่ระดับสี
Kotlin
private const val DURATION = 4000f
private const val COLOR_SHADER_SRC = """
   uniform float2 iResolution;
   uniform float iTime;
   uniform float iDuration;
   half4 main(in float2 fragCoord) {
      float2 scaled = abs(1.0-mod(fragCoord/iResolution.xy+iTime/(iDuration/2.0),2.0));
      return half4(scaled, 0, 1.0);
   }
"""
Java
private static final float DURATION = 4000f;
private static final String COLOR_SHADER_SRC =
   "uniform float2 iResolution;\n"+
   "uniform float iTime;\n"+
   "uniform float iDuration;\n"+
   "half4 main(in float2 fragCoord) {\n"+
      "float2 scaled = abs(1.0-mod(fragCoord/iResolution.xy+iTime/(iDuration/2.0),2.0));\n"+
      "return half4(scaled, 0, 1.0);\n"+
   "}";
จากซอร์สโค้ดของมุมมองที่กำหนดเอง
ValueAnimator อัปเดต
เครื่องแบบ iTime
Kotlin
// declare the ValueAnimator
private val shaderAnimator = ValueAnimator.ofFloat(0f, DURATION)

// use it to animate the time uniform
shaderAnimator.duration = DURATION.toLong()
shaderAnimator.repeatCount = ValueAnimator.INFINITE
shaderAnimator.repeatMode = ValueAnimator.RESTART
shaderAnimator.interpolator = LinearInterpolator()

animatedShader.setFloatUniform("iDuration", DURATION )
shaderAnimator.addUpdateListener { animation ->
    animatedShader.setFloatUniform("iTime", animation.animatedValue as Float )
}
shaderAnimator.start()
Java
// declare the ValueAnimator
private final ValueAnimator shaderAnimator = ValueAnimator.ofFloat(0f, DURATION);

// use it to animate the time uniform
shaderAnimator.setDuration((long)DURATION);
shaderAnimator.setRepeatCount(ValueAnimator.INFINITE);
shaderAnimator.setRepeatMode(ValueAnimator.RESTART);
shaderAnimator.setInterpolator(new LinearInterpolator());

animatedShader.setFloatUniform("iDuration", DURATION );
shaderAnimator.addUpdateListener(new ValueAnimator.AnimatorUpdateListener() {
   public final void onAnimationUpdate(ValueAnimator animation) {
      animatedShader.setFloatUniform("iTime", (float)animation.getAnimatedValue());
   }
});
การวาดภาพวัตถุที่ซับซ้อน
คุณไม่ต้องวาดแถบเฉดสีเพื่อเติมพื้นหลัง อาจเป็นไปได้
ใช้ในที่ใดก็ตามที่ยอมรับ
Paint ของออบเจ็กต์ เช่น
drawText
Kotlin
canvas.drawText(ANIMATED_TEXT, TEXT_MARGIN_DP, TEXT_MARGIN_DP + bounds.height(),
   paint)
Java
canvas.drawText(ANIMATED_TEXT, TEXT_MARGIN_DP, TEXT_MARGIN_DP + bounds.height(),
   paint);
การลงเฉดสีและการเปลี่ยนรูปแบบ Canvas
คุณสามารถใช้การเปลี่ยนรูปแบบเพิ่มเติม Canvas รายการในข้อความที่แรเงาได้ เช่น
การหมุน ใน ValueAnimator คุณสามารถอัปเดตเมทริกซ์สำหรับการหมุน 3 มิติ
โดยใช้
android.graphics.Camera ชั้นเรียน
Kotlin
// in the ValueAnimator
camera.rotate(0.0f, animation.animatedValue as Float / DURATION * 360f, 0.0f)
Java
// in the ValueAnimator
camera.rotate(0.0f, (Float)animation.getAnimatedValue() / DURATION * 360f, 0.0f);
เนื่องจากคุณต้องการหมุนข้อความจากแกนกึ่งกลางแทนที่จะหมุนจากมุม
รับขอบเขตของข้อความ แล้วใช้ preTranslate และ postTranslate เพื่อปรับเปลี่ยน
เมทริกซ์เพื่อแปลข้อความเพื่อให้ 0,0 เป็นศูนย์กลางของการหมุนโดยไม่มี
เปลี่ยนตำแหน่งที่จะวาดข้อความบนหน้าจอ
Kotlin
linearColorPaint.getTextBounds(ANIMATED_TEXT, 0, ANIMATED_TEXT.length, bounds)
camera.getMatrix(rotationMatrix)
val centerX = (bounds.width().toFloat())/2
val centerY = (bounds.height().toFloat())/2
rotationMatrix.preTranslate(-centerX, -centerY)
rotationMatrix.postTranslate(centerX, centerY)
canvas.save()
canvas.concat(rotationMatrix)
canvas.drawText(ANIMATED_TEXT, 0f, 0f + bounds.height(), paint)
canvas.restore()
Java
linearColorPaint.getTextBounds(ANIMATED_TEXT, 0, ANIMATED_TEXT.length(), bounds);
camera.getMatrix(rotationMatrix);
float centerX = (float)bounds.width()/2.0f;
float centerY = (float)bounds.height()/2.0f;
rotationMatrix.preTranslate(-centerX, -centerY);
rotationMatrix.postTranslate(centerX, centerY);
canvas.save();
canvas.concat(rotationMatrix);
canvas.drawText(ANIMATED_TEXT, 0f, 0f + bounds.height(), paint);
canvas.restore();
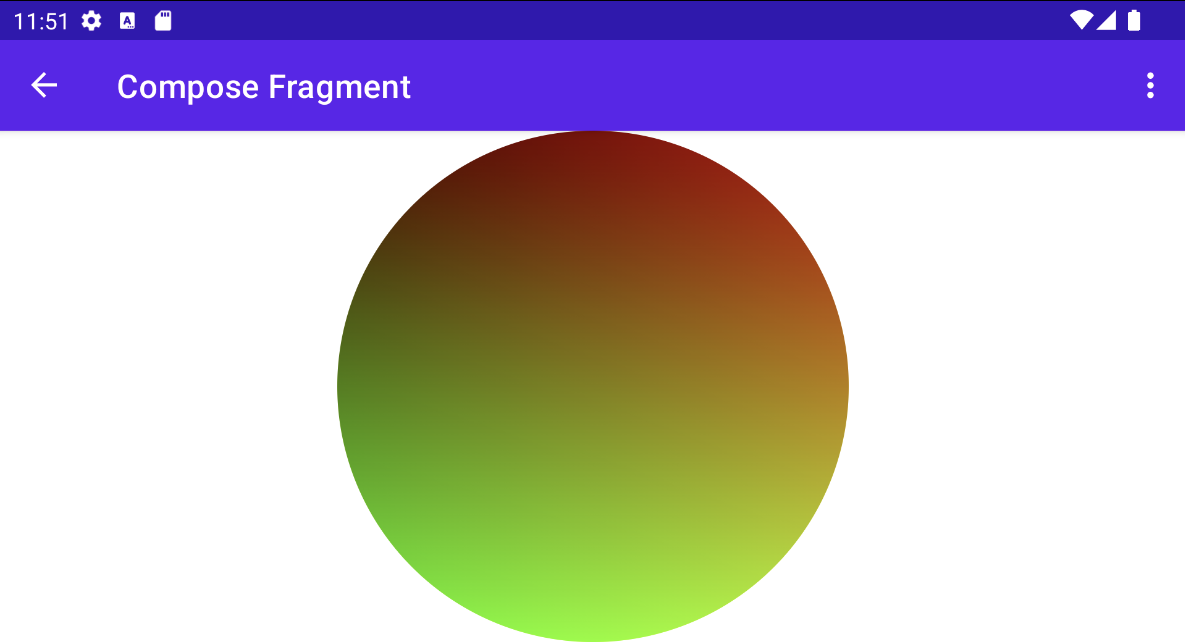
การใช้ RuntimeShader กับ Jetpack Compose
การใช้ RuntimeShader จะง่ายขึ้นไปอีกหากคุณแสดงผล UI โดยใช้
Jetpack Compose เริ่มต้นด้วยตัวไล่ระดับสีเดียวกันจาก
ก่อน:
private const val COLOR_SHADER_SRC =
    """uniform float2 iResolution;
   half4 main(float2 fragCoord) {
   float2 scaled = fragCoord/iResolution.xy;
   return half4(scaled, 0, 1);
}"""
คุณสามารถใช้ตัวปรับแสงเงานั้นกับ
ShaderBrush คุณ
แล้วใช้ ShaderBrush เป็นพารามิเตอร์กับคำสั่งวาดภายใน
ขอบเขตการวาดของ Canvas
// created as top level constants
val colorShader = RuntimeShader(COLOR_SHADER_SRC)
val shaderBrush = ShaderBrush(colorShader)

Canvas(
   modifier = Modifier.fillMaxSize()
) {
   colorShader.setFloatUniform("iResolution",
   size.width, size.height)
   drawCircle(brush = shaderBrush)
}
การใช้ RuntimeShader กับ RenderEffect
คุณสามารถใช้
RenderEffect เพื่อใช้
RuntimeShader ไปยัง View ระดับบน
และการดูของเด็กทั้งหมด ราคานี้แพงกว่าการวาด View แบบกำหนดเอง แต่
ทำให้คุณสามารถสร้างผลลัพธ์
ที่รวมสิ่งที่ต้องมี
เดิมวาดโดยใช้
createRuntimeShaderEffect
Kotlin
view.setRenderEffect(RenderEffect.createRuntimeShaderEffect(myShader, "background"))
Java
view.setRenderEffect(RenderEffect.createRuntimeShaderEffect(myShader, "background"));
พารามิเตอร์ที่ 2 คือชื่อของชุดเครื่องมือให้เฉดสีที่คุณสามารถevalโดยใช้
พารามิเตอร์พิกัด (เช่น ค่าที่ส่งใน fragCoord) เพื่อให้ได้สีเดิม
ของ
RenderNode (ข้อมูลพร็อพเพอร์ตี้และองค์ประกอบย่อย
) ซึ่งทำให้คุณสร้างเอฟเฟกต์ได้ทุกประเภท
uniform shader background;       // Root node of View tree to be altered
return mix(returnColor, background.eval(fragCoord), 0.5);
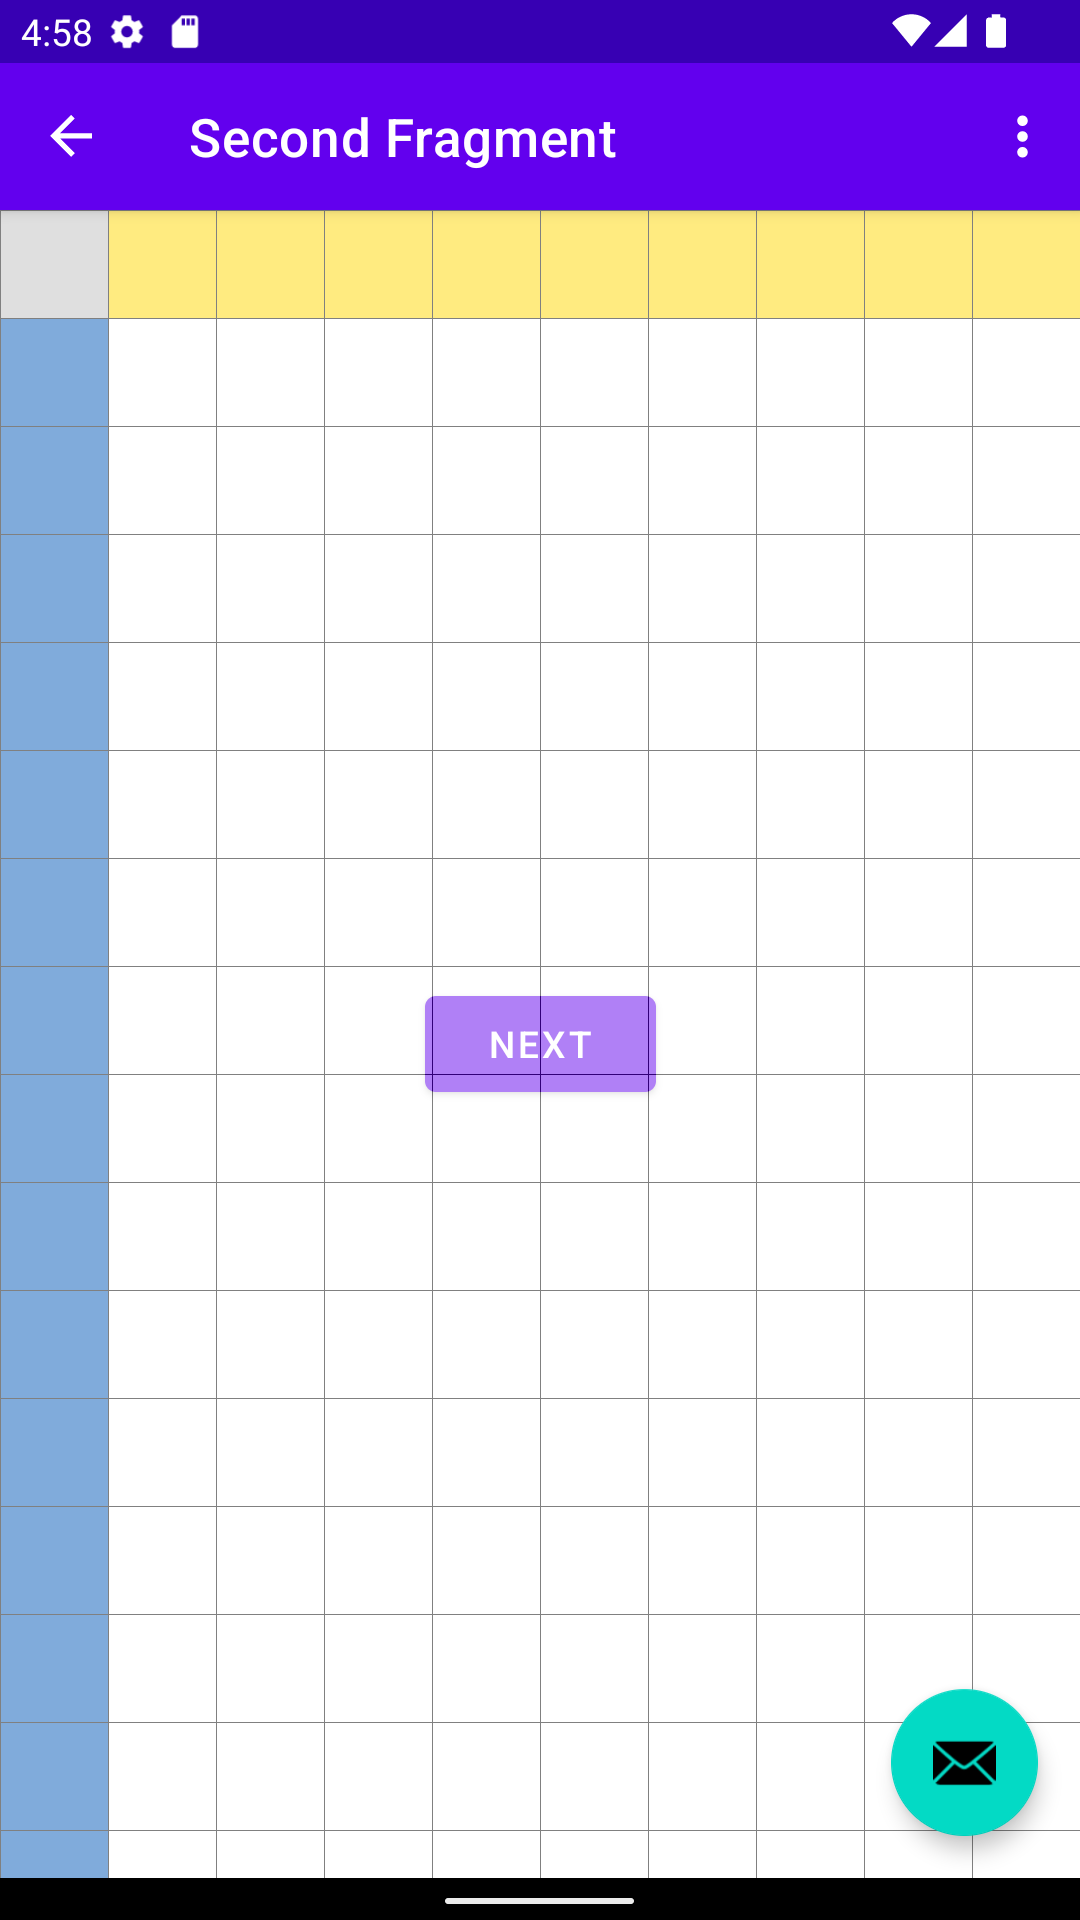
เอฟเฟกต์ตารางกริดผสมปนกับปุ่ม แต่อยู่ใต้ปุ่มการทำงานแบบลอย
(เนื่องจากอยู่ในลำดับชั้น View ที่ต่างกัน)