
אפשר להתאים אישית תמונות באמצעות מאפיינים ב-Image composable
(contentScale, colorFilter). אפשר גם להחיל modifiers קיימים כדי להחיל אפקטים שונים על Image. אפשר להשתמש במאפייני שינוי בכל קומפוזבל, ולא רק בקומפוזבל Image, בעוד ש-contentScale ו-colorFilter הם פרמטרים מפורשים בקומפוזבל Image.
היקף התוכן
מציינים אפשרות contentScale לחיתוך או לשינוי של קנה המידה של התמונה בתוך הגבולות שלה. כברירת מחדל, אם לא מציינים contentScale אפשרות, נעשה שימוש ב-ContentScale.Fit.
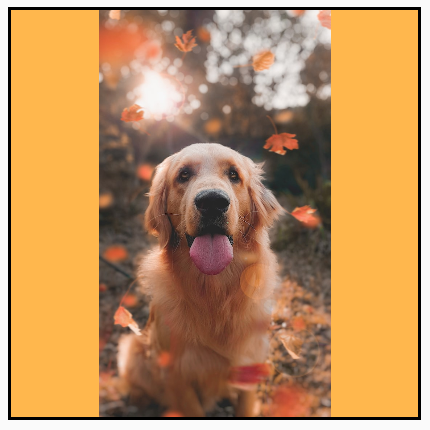
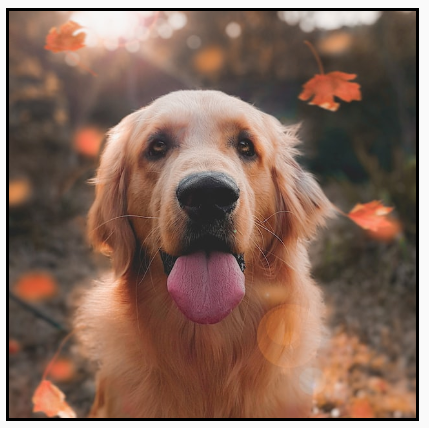
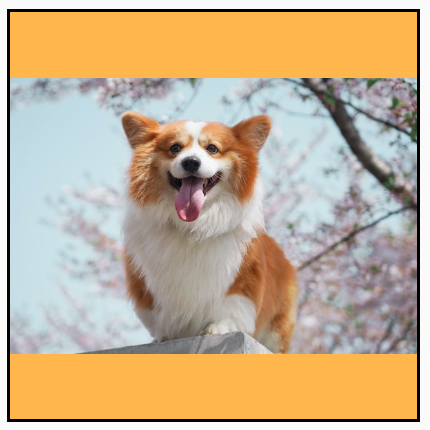
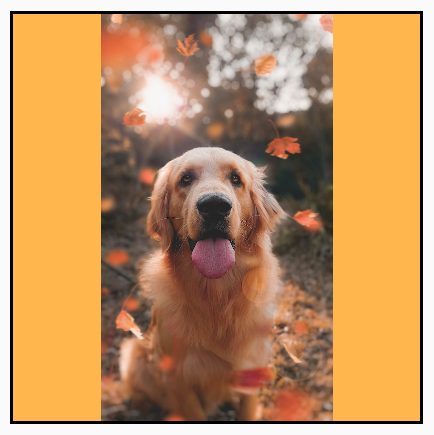
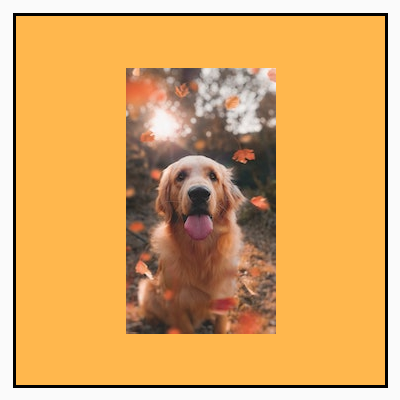
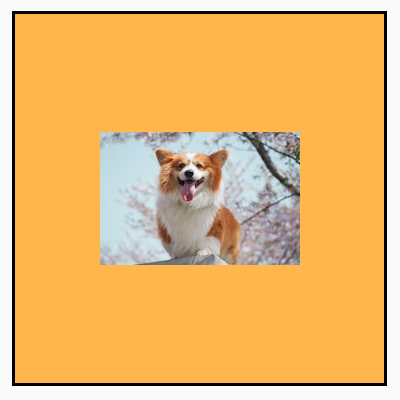
בדוגמה הבאה, גודל הרכיב Image מוגבל ל-150dp עם גבול, והרקע מוגדר לצהוב ברכיב Image כדי להציג את האפשרויות השונות של ContentScale בטבלה הבאה.
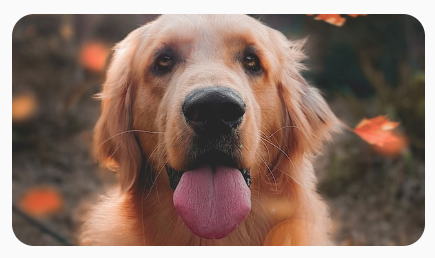
val imageModifier = Modifier .size(150.dp) .border(BorderStroke(1.dp, Color.Black)) .background(Color.Yellow) Image( painter = painterResource(id = R.drawable.dog), contentDescription = stringResource(id = R.string.dog_content_description), contentScale = ContentScale.Fit, modifier = imageModifier )
הגדרת אפשרויות שונות של ContentScale מובילה לפלטים שונים. הטבלה הבאה עוזרת לכם לבחור את המצב הנכון של ContentScale:
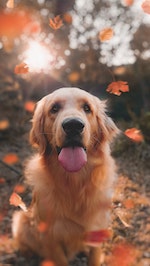
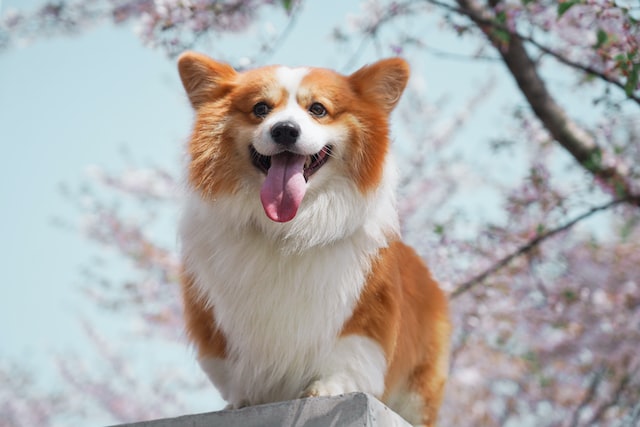
| תמונת מקור |
|
|
ContentScale |
תוצאה – תמונה לאורך: | תוצאה – תמונה לרוחב: |
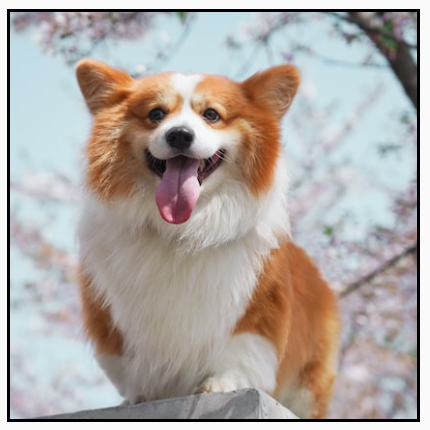
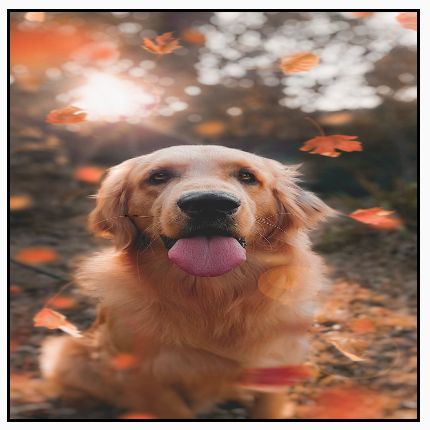
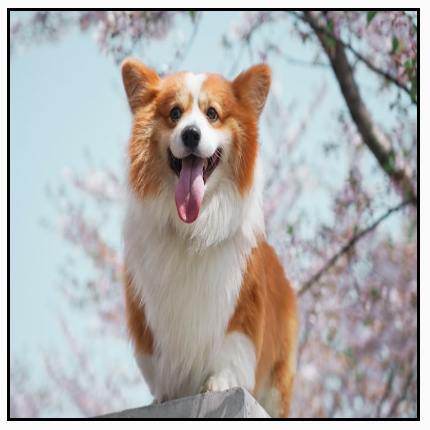
ContentScale.Fit: שינוי גודל התמונה באופן אחיד, תוך שמירה על יחס הגובה-רוחב (ברירת מחדל). אם התוכן קטן מהגודל, התמונה מוגדלת כדי להתאים לגבולות. |

|

|
ContentScale.Crop: חיתוך התמונה למרכז כדי שתתאים לשטח הזמין. |

|
|
ContentScale.FillHeight: שינוי קנה המידה של המקור תוך שמירה על יחס הגובה-רוחב, כך שהגבולות יתאימו לגובה היעד. |
|

|
ContentScale.FillWidth: שינוי קנה המידה של המקור תוך שמירה על יחס הגובה-רוחב, כך שהגבולות יתאימו לרוחב היעד. |
|
|
ContentScale.FillBounds: שינוי קנה המידה של התוכן באופן אנכי ואופקי לא אחיד כדי למלא את גבולות היעד. (הערה: אם מציבים תמונות במאגרי תמונות שלא תואמים ליחס המדויק של התמונה, התמונות יעוותו). |
|
|
ContentScale.Inside: שינוי קנה המידה של המקור כדי לשמור על יחס הגובה-רוחב בתוך גבולות היעד. אם המקור קטן מהיעד או שווה לו בשני הממדים, הפעולה דומה לזו של None. התוכן תמיד יהיה בתוך הגבולות. אם התוכן קטן מהגבולות, לא יחול שינוי גודל. |
תמונת המקור גדולה יותר מהגבולות:
 תמונת המקור קטנה יותר מהגבולות:
|
תמונת המקור גדולה יותר מהגבולות:
 תמונת המקור קטנה יותר מהגבולות:
|
ContentScale.None: לא מתבצעת התאמה של המקור. אם התוכן קטן יותר מגבולות היעד, הוא לא יוגדל כדי להתאים לאזור. |
תמונת המקור גדולה יותר מהגבולות:
 תמונת המקור קטנה יותר מהגבולות:
|
תמונת המקור גדולה יותר מהגבולות:
 תמונת המקור קטנה יותר מהגבולות:
|
חיתוך של רכיב Image שניתן להרכבה לצורה
כדי להתאים תמונה לצורה, משתמשים בclipהגדרת השינוי המובנית.
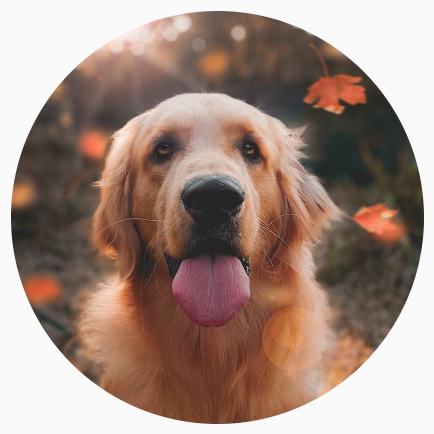
כדי לחתוך תמונה לצורה של עיגול, משתמשים בModifier.clip(CircleShape):
Image( painter = painterResource(id = R.drawable.dog), contentDescription = stringResource(id = R.string.dog_content_description), contentScale = ContentScale.Crop, modifier = Modifier .size(200.dp) .clip(CircleShape) )
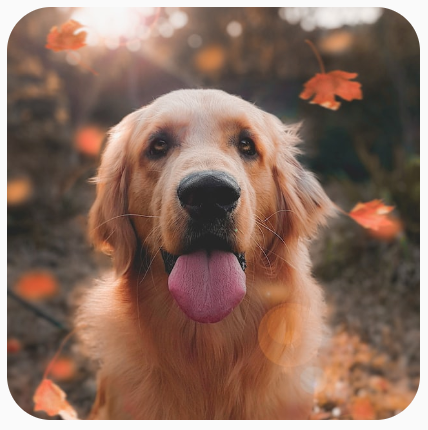
CircleShape.כדי ליצור צורה עם פינות מעוגלות, משתמשים ב-Modifier.clip(RoundedCornerShape(16.dp)), עם גודל הפינות שרוצים לעגל:
Image( painter = painterResource(id = R.drawable.dog), contentDescription = stringResource(id = R.string.dog_content_description), contentScale = ContentScale.Crop, modifier = Modifier .size(200.dp) .clip(RoundedCornerShape(16.dp)) )
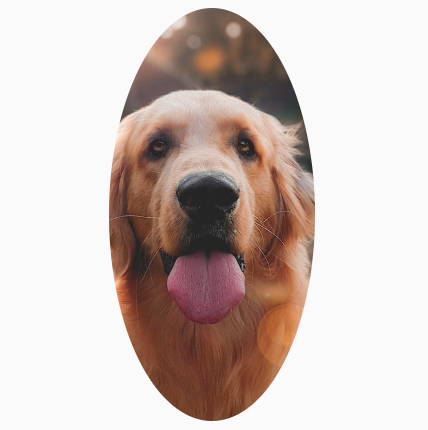
RoundedCornerShape.אפשר גם ליצור צורת חיתוך משלכם על ידי הרחבת Shape וציון Path לצורה לחיתוך:
class SquashedOval : Shape { override fun createOutline( size: Size, layoutDirection: LayoutDirection, density: Density ): Outline { val path = Path().apply { // We create an Oval that starts at ¼ of the width, and ends at ¾ of the width of the container. addOval( Rect( left = size.width / 4f, top = 0f, right = size.width * 3 / 4f, bottom = size.height ) ) } return Outline.Generic(path = path) } } Image( painter = painterResource(id = R.drawable.dog), contentDescription = stringResource(id = R.string.dog_content_description), contentScale = ContentScale.Crop, modifier = Modifier .size(200.dp) .clip(SquashedOval()) )
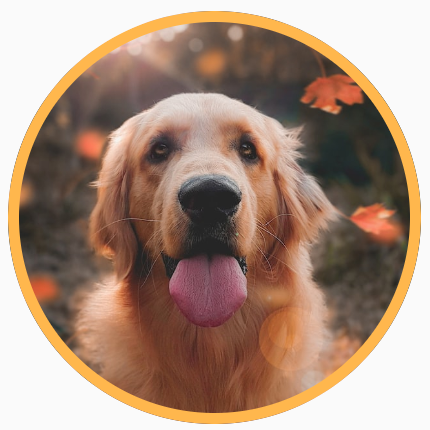
הוספת גבול לרכיב קומפוזבילי Image
פעולה נפוצה היא לשלב את Modifier.border() עם Modifier.clip()
כדי ליצור מסגרת סביב תמונה:
val borderWidth = 4.dp Image( painter = painterResource(id = R.drawable.dog), contentDescription = stringResource(id = R.string.dog_content_description), contentScale = ContentScale.Crop, modifier = Modifier .size(150.dp) .border( BorderStroke(borderWidth, Color.Yellow), CircleShape ) .padding(borderWidth) .clip(CircleShape) )
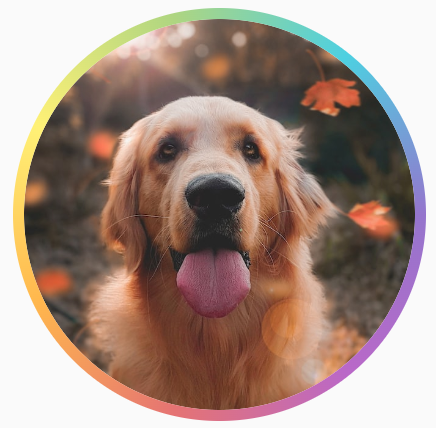
כדי ליצור גבול עם מעבר צבעים, אפשר להשתמש ב-API Brush כדי לצייר גבול עם מעבר צבעים בצבעי הקשת מסביב לתמונה:
val rainbowColorsBrush = remember { Brush.sweepGradient( listOf( Color(0xFF9575CD), Color(0xFFBA68C8), Color(0xFFE57373), Color(0xFFFFB74D), Color(0xFFFFF176), Color(0xFFAED581), Color(0xFF4DD0E1), Color(0xFF9575CD) ) ) } val borderWidth = 4.dp Image( painter = painterResource(id = R.drawable.dog), contentDescription = stringResource(id = R.string.dog_content_description), contentScale = ContentScale.Crop, modifier = Modifier .size(150.dp) .border( BorderStroke(borderWidth, rainbowColorsBrush), CircleShape ) .padding(borderWidth) .clip(CircleShape) )
הגדרת יחס גובה-רוחב מותאם אישית
כדי לשנות את יחס הגובה-רוחב של תמונה, משתמשים ב-Modifier.aspectRatio(16f/9f) כדי לספק יחס גובה-רוחב מותאם אישית לתמונה (או לכל רכיב שאפשר להוסיף).
Image( painter = painterResource(id = R.drawable.dog), contentDescription = stringResource(id = R.string.dog_content_description), modifier = Modifier.aspectRatio(16f / 9f) )
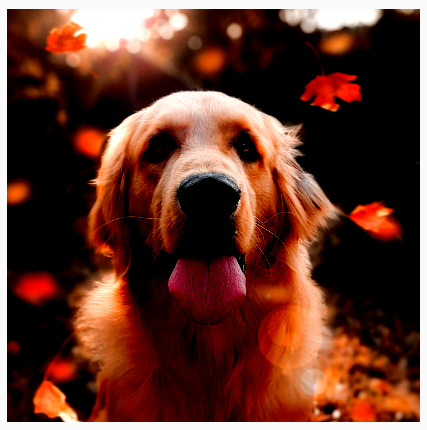
Modifier.aspectRatio(16f/9f) ב-Image.פילטר צבע: שינוי צבעי הפיקסלים של התמונה
ל-Image composable יש פרמטר colorFilter שיכול לשנות את הפלט של פיקסלים בודדים בתמונה.
שינוי גוון של תמונות
השימוש ב-ColorFilter.tint(color, blendMode) מחיל מצב מיזוג עם הצבע שצוין על רכיב ה-Image. ColorFilter.tint(color, blendMode)
משתמש ב-BlendMode.SrcIn כדי לצבוע את התוכן, כלומר הצבע שסופק מוצג במקום שבו התמונה מוצגת במסך. זה שימושי לסמלים ולווקטורים שצריך לעצב בצורה שונה.
Image( painter = painterResource(id = R.drawable.baseline_directions_bus_24), contentDescription = stringResource(id = R.string.bus_content_description), colorFilter = ColorFilter.tint(Color.Yellow) )

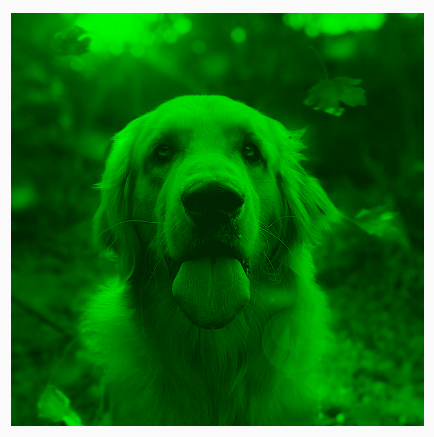
ColorFilter.tint הוחל באמצעות BlendMode.SrcIn.ערכים אחרים של BlendMode יוצרים אפקטים שונים. לדוגמה, הגדרת BlendMode.Darken עם Color.Green בתמונה יוצרת את התוצאה הבאה:
Image( painter = painterResource(id = R.drawable.dog), contentDescription = stringResource(id = R.string.dog_content_description), colorFilter = ColorFilter.tint(Color.Green, blendMode = BlendMode.Darken) )
Color.Green tint עם BlendMode.Darken.מידע נוסף על מצבי השילוב השונים זמין בBlendModeמאמרי העזרה.
החלת מסנן Image עם מטריצת צבע
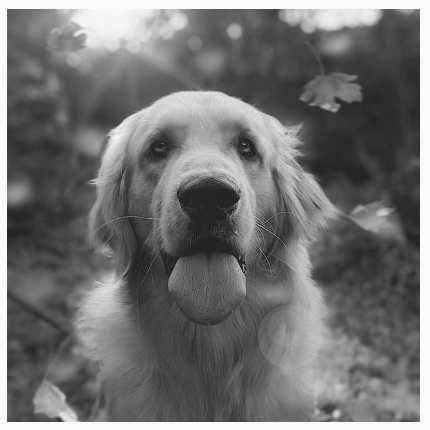
משנים את התמונה באמצעות האפשרות ColorFilterמטריצת צבעים. לדוגמה, כדי להחיל פילטר שחור-לבן על התמונות, אפשר להשתמש ב-ColorMatrix ולהגדיר את הרוויה ל-0f.
Image( painter = painterResource(id = R.drawable.dog), contentDescription = stringResource(id = R.string.dog_content_description), colorFilter = ColorFilter.colorMatrix(ColorMatrix().apply { setToSaturation(0f) }) )
התאמת הניגודיות או הבהירות של Image רכיב שאפשר להרכיב
כדי לשנות את הניגודיות והבהירות של תמונה, אפשר להשתמש בColorMatrix כדי לשנות את הערכים:
val contrast = 2f // 0f..10f (1 should be default) val brightness = -180f // -255f..255f (0 should be default) val colorMatrix = floatArrayOf( contrast, 0f, 0f, 0f, brightness, 0f, contrast, 0f, 0f, brightness, 0f, 0f, contrast, 0f, brightness, 0f, 0f, 0f, 1f, 0f ) Image( painter = painterResource(id = R.drawable.dog), contentDescription = stringResource(id = R.string.dog_content_description), colorFilter = ColorFilter.colorMatrix(ColorMatrix(colorMatrix)) )
ColorMatrix.היפוך צבעים של רכיב קומפוזבילי Image
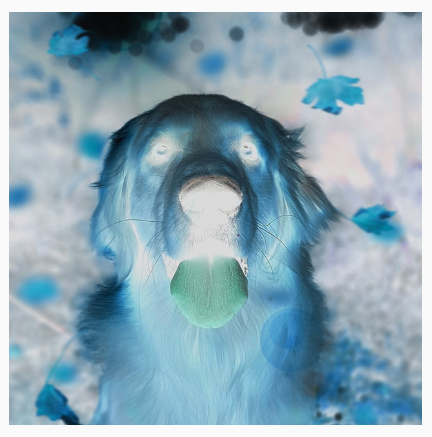
כדי להפוך את הצבעים של תמונה, מגדירים את ColorMatrix להפוך את הצבעים:
val colorMatrix = floatArrayOf( -1f, 0f, 0f, 0f, 255f, 0f, -1f, 0f, 0f, 255f, 0f, 0f, -1f, 0f, 255f, 0f, 0f, 0f, 1f, 0f ) Image( painter = painterResource(id = R.drawable.dog), contentDescription = stringResource(id = R.string.dog_content_description), colorFilter = ColorFilter.colorMatrix(ColorMatrix(colorMatrix)) )
טשטוש של רכיב קומפוזבילי Image
כדי לטשטש תמונה, משתמשים ב-Modifier.blur() ומציינים את radiusX ואת radiusY, שקובעים את רדיוס הטשטוש בכיוון האופקי והאנכי בהתאמה.
Image( painter = painterResource(id = R.drawable.dog), contentDescription = stringResource(id = R.string.dog_content_description), contentScale = ContentScale.Crop, modifier = Modifier .size(150.dp) .blur( radiusX = 10.dp, radiusY = 10.dp, edgeTreatment = BlurredEdgeTreatment(RoundedCornerShape(8.dp)) ) )
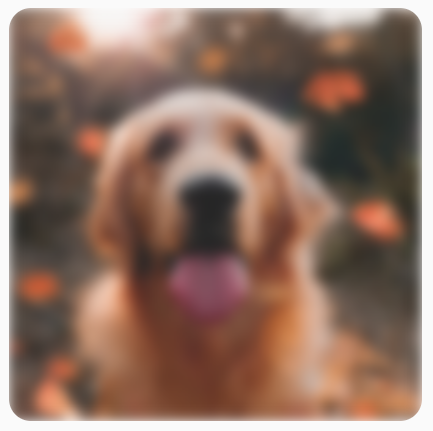
BlurEffect חל על תמונה.כשמטשטשים Images, מומלץ להשתמש ב-BlurredEdgeTreatment(Shape),
במקום ב-BlurredEdgeTreatment.Unbounded, כי האחרון משמש לטשטוש
של עיבודים שרירותיים שאמורים לעבור עיבוד מחוץ לגבולות של
התוכן המקורי. כשמדובר בתמונות, סביר להניח שהן לא יעברו עיבוד מחוץ לגבולות של התוכן, אבל כשמטשטשים מלבן מעוגל יכול להיות שיהיה צורך בהבחנה הזו.
לדוגמה, אם מגדירים את הערך BlurredEdgeTreatment ל-Unbounded בתמונה הקודמת, הקצוות של התמונה מופיעים מטושטשים במקום חדים:
Image( painter = painterResource(id = R.drawable.dog), contentDescription = stringResource(id = R.string.dog_content_description), contentScale = ContentScale.Crop, modifier = Modifier .size(150.dp) .blur( radiusX = 10.dp, radiusY = 10.dp, edgeTreatment = BlurredEdgeTreatment.Unbounded ) .clip(RoundedCornerShape(8.dp)) )
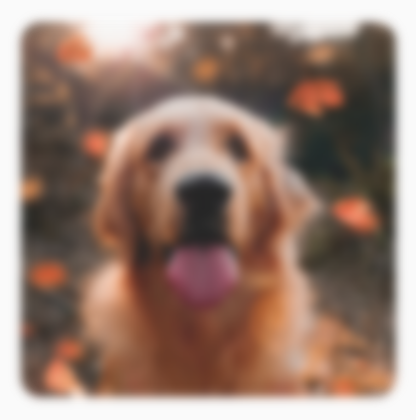
BlurEdgeTreatment.Unbounded.מומלץ בשבילך
- הערה: טקסט הקישור מוצג כש-JavaScript מושבת
- משני גרפיקה
- טעינת תמונות
- סמלי Material