
Compose には多くの組み込みアニメーション メカニズムがあり、どれを選択すべきか迷うことがあります。一般的なアニメーションのユースケースを以下に示します。利用可能なさまざまな API オプションの詳細については、Compose アニメーションのドキュメントをご覧ください。
一般的なコンポーザブル プロパティをアニメーション化する
Compose には、一般的なアニメーションのユースケースの多くを解決できる便利な API が用意されています。このセクションでは、コンポーザブルの一般的なプロパティをアニメーション化する方法について説明します。
表示 / 非表示をアニメーション化する
AnimatedVisibility を使用して、コンポーザブルを非表示または表示します。AnimatedVisibility 内の子は、独自の開始または終了トランジションに Modifier.animateEnterExit() を使用できます。
var visible by remember { mutableStateOf(true) } // Animated visibility will eventually remove the item from the composition once the animation has finished. AnimatedVisibility(visible) { // your composable here // ... }
AnimatedVisibility の enter パラメータと exit パラメータを使用すると、コンポーザブルが表示または非表示になったときの動作を構成できます。詳細については、完全なドキュメントをご覧ください。
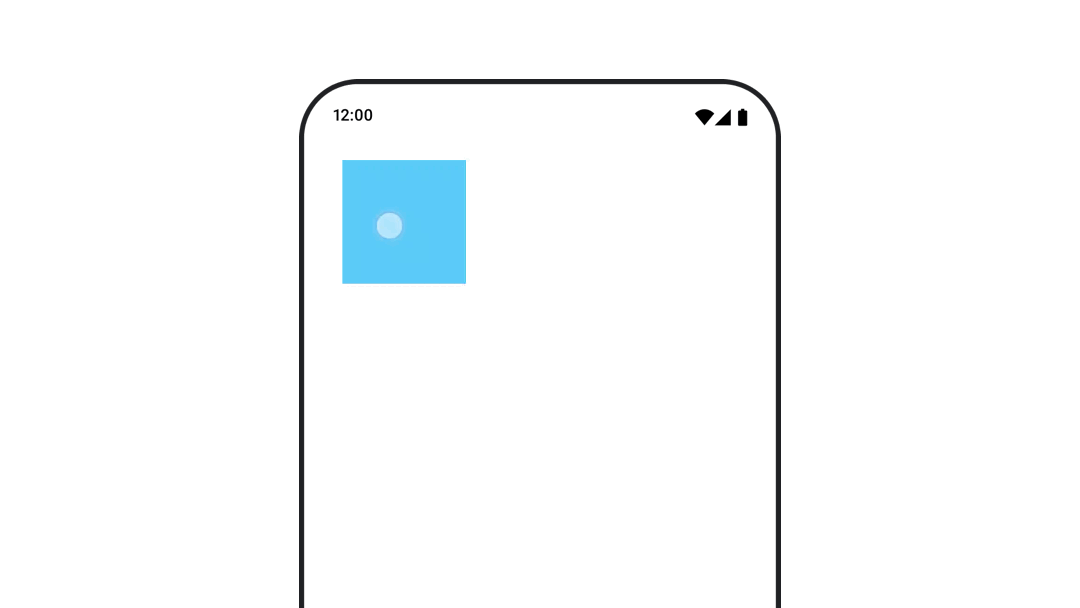
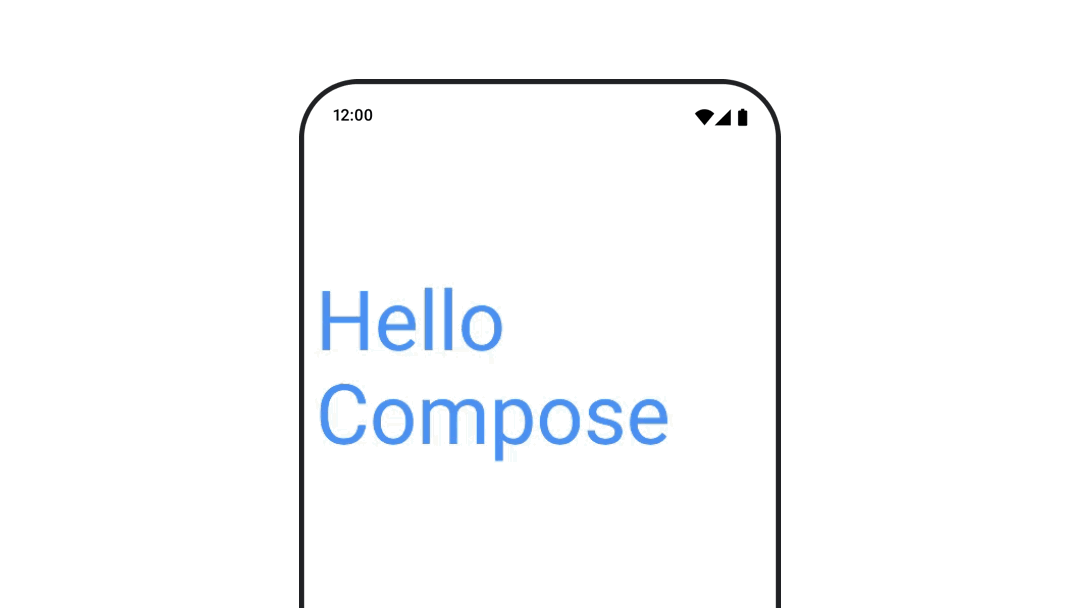
コンポーザブルの表示をアニメーション化するもう 1 つの方法は、animateFloatAsState を使用してアルファを時間経過とともにアニメーション化することです。
var visible by remember { mutableStateOf(true) } val animatedAlpha by animateFloatAsState( targetValue = if (visible) 1.0f else 0f, label = "alpha" ) Box( modifier = Modifier .size(200.dp) .graphicsLayer { alpha = animatedAlpha } .clip(RoundedCornerShape(8.dp)) .background(colorGreen) .align(Alignment.TopCenter) ) { }
ただし、アルファを変更すると、コンポーザブルがコンポジションに残ったままになり、レイアウトされたスペースを占有し続けるという注意点があります。これにより、スクリーン リーダーなどのユーザー補助メカニズムが、画面上のアイテムをまだ考慮する可能性があります。一方、AnimatedVisibility は最終的にコンポジションからアイテムを削除します。
背景色をアニメーション表示する
val animatedColor by animateColorAsState( if (animateBackgroundColor) colorGreen else colorBlue, label = "color" ) Column( modifier = Modifier.drawBehind { drawRect(animatedColor) } ) { // your composable here }
このオプションは、Modifier.background() を使用するよりもパフォーマンスが優れています。Modifier.background() は 1 回限りの色の設定には適していますが、色を時間経過でアニメーション化する場合は、必要以上に再コンポーズが発生する可能性があります。
背景色を無限にアニメーション化する方法については、アニメーションのセクションを繰り返すをご覧ください。
コンポーザブルのサイズをアニメーション化する
Compose では、いくつかの方法でコンポーザブルのサイズをアニメーション化できます。コンポーザブルのサイズ変更間のアニメーションには、animateContentSize() を使用します。
たとえば、1 行から複数行に展開できるテキストを含むボックスがある場合は、Modifier.animateContentSize() を使用してスムーズなトランジションを実現できます。
var expanded by remember { mutableStateOf(false) } Box( modifier = Modifier .background(colorBlue) .animateContentSize() .height(if (expanded) 400.dp else 200.dp) .fillMaxWidth() .clickable( interactionSource = remember { MutableInteractionSource() }, indication = null ) { expanded = !expanded } ) { }
AnimatedContent と SizeTransform を使用して、サイズ変更の動作を記述することもできます。
コンポーザブルの位置をアニメーション化する
コンポーザブルの位置をアニメーション化するには、animateIntOffsetAsState() と組み合わせて Modifier.offset{ } を使用します。
var moved by remember { mutableStateOf(false) } val pxToMove = with(LocalDensity.current) { 100.dp.toPx().roundToInt() } val offset by animateIntOffsetAsState( targetValue = if (moved) { IntOffset(pxToMove, pxToMove) } else { IntOffset.Zero }, label = "offset" ) Box( modifier = Modifier .offset { offset } .background(colorBlue) .size(100.dp) .clickable( interactionSource = remember { MutableInteractionSource() }, indication = null ) { moved = !moved } )
位置やサイズをアニメーション化するときに、コンポーザブルが他のコンポーザブルの上または下に描画されないようにするには、Modifier.layout{ } を使用します。この修飾子は、サイズと位置の変更を親に伝播させ、親が他の子に影響を与えます。
たとえば、Column 内で Box を移動し、Box の移動時に他の子も移動する必要がある場合は、次のように Modifier.layout{ } でオフセット情報を含めます。
var toggled by remember { mutableStateOf(false) } val interactionSource = remember { MutableInteractionSource() } Column( modifier = Modifier .padding(16.dp) .fillMaxSize() .clickable(indication = null, interactionSource = interactionSource) { toggled = !toggled } ) { val offsetTarget = if (toggled) { IntOffset(150, 150) } else { IntOffset.Zero } val offset = animateIntOffsetAsState( targetValue = offsetTarget, label = "offset" ) Box( modifier = Modifier .size(100.dp) .background(colorBlue) ) Box( modifier = Modifier .layout { measurable, constraints -> val offsetValue = if (isLookingAhead) offsetTarget else offset.value val placeable = measurable.measure(constraints) layout(placeable.width + offsetValue.x, placeable.height + offsetValue.y) { placeable.placeRelative(offsetValue) } } .size(100.dp) .background(colorGreen) ) Box( modifier = Modifier .size(100.dp) .background(colorBlue) ) }
Modifier.layout{ }コンポーザブルのパディングをアニメーション化する
コンポーザブルのパディングをアニメーション化するには、animateDpAsState と Modifier.padding() を組み合わせて使用します。
var toggled by remember { mutableStateOf(false) } val animatedPadding by animateDpAsState( if (toggled) { 0.dp } else { 20.dp }, label = "padding" ) Box( modifier = Modifier .aspectRatio(1f) .fillMaxSize() .padding(animatedPadding) .background(Color(0xff53D9A1)) .clickable( interactionSource = remember { MutableInteractionSource() }, indication = null ) { toggled = !toggled } )
コンポーザブルの高度をアニメーション化する
コンポーザブルの高度をアニメーション化するには、animateDpAsState を Modifier.graphicsLayer{ } と組み合わせて使用します。1 回限りの標高の変化には Modifier.shadow() を使用します。シャドウをアニメーション化する場合は、Modifier.graphicsLayer{ } 修飾子を使用する方がパフォーマンスに優れています。
val mutableInteractionSource = remember { MutableInteractionSource() } val pressed = mutableInteractionSource.collectIsPressedAsState() val elevation = animateDpAsState( targetValue = if (pressed.value) { 32.dp } else { 8.dp }, label = "elevation" ) Box( modifier = Modifier .size(100.dp) .align(Alignment.Center) .graphicsLayer { this.shadowElevation = elevation.value.toPx() } .clickable(interactionSource = mutableInteractionSource, indication = null) { } .background(colorGreen) ) { }
または、Card コンポーザブルを使用して、状態ごとに異なる値に elevation プロパティを設定します。
テキストのスケール、変換、回転をアニメーション化する
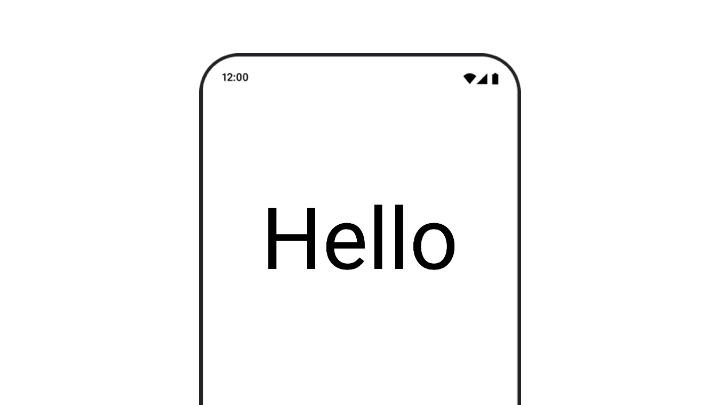
テキストのスケール、変換、回転をアニメーション化する場合は、TextStyle の textMotion パラメータを TextMotion.Animated に設定します。これにより、テキスト アニメーション間の移行がスムーズになります。Modifier.graphicsLayer{ } を使用して、テキストを変換、回転、拡大縮小します。
val infiniteTransition = rememberInfiniteTransition(label = "infinite transition") val scale by infiniteTransition.animateFloat( initialValue = 1f, targetValue = 8f, animationSpec = infiniteRepeatable(tween(1000), RepeatMode.Reverse), label = "scale" ) Box(modifier = Modifier.fillMaxSize()) { Text( text = "Hello", modifier = Modifier .graphicsLayer { scaleX = scale scaleY = scale transformOrigin = TransformOrigin.Center } .align(Alignment.Center), // Text composable does not take TextMotion as a parameter. // Provide it via style argument but make sure that we are copying from current theme style = LocalTextStyle.current.copy(textMotion = TextMotion.Animated) ) }
テキストの色をアニメーション化する
テキストの色をアニメーション化するには、BasicText コンポーザブルで color ラムダを使用します。
val infiniteTransition = rememberInfiniteTransition(label = "infinite transition") val animatedColor by infiniteTransition.animateColor( initialValue = Color(0xFF60DDAD), targetValue = Color(0xFF4285F4), animationSpec = infiniteRepeatable(tween(1000), RepeatMode.Reverse), label = "color" ) BasicText( text = "Hello Compose", color = { animatedColor }, // ... )
さまざまな種類のコンテンツを切り替える
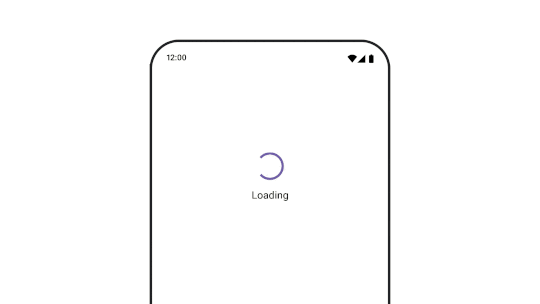
異なるコンポーザブル間でアニメーションを行うには AnimatedContent を使用します。コンポーザブル間の標準的なフェードのみが必要な場合は、Crossfade を使用します。
var state by remember { mutableStateOf(UiState.Loading) } AnimatedContent( state, transitionSpec = { fadeIn( animationSpec = tween(3000) ) togetherWith fadeOut(animationSpec = tween(3000)) }, modifier = Modifier.clickable( interactionSource = remember { MutableInteractionSource() }, indication = null ) { state = when (state) { UiState.Loading -> UiState.Loaded UiState.Loaded -> UiState.Error UiState.Error -> UiState.Loading } }, label = "Animated Content" ) { targetState -> when (targetState) { UiState.Loading -> { LoadingScreen() } UiState.Loaded -> { LoadedScreen() } UiState.Error -> { ErrorScreen() } } }
AnimatedContent は、さまざまな種類の開始遷移と終了遷移を表示するようにカスタマイズできます。詳細については、AnimatedContent のドキュメントまたは AnimatedContent に関するこちらのブログ投稿をご覧ください。
さまざまな目的地に移動する際にアニメーションを表示する
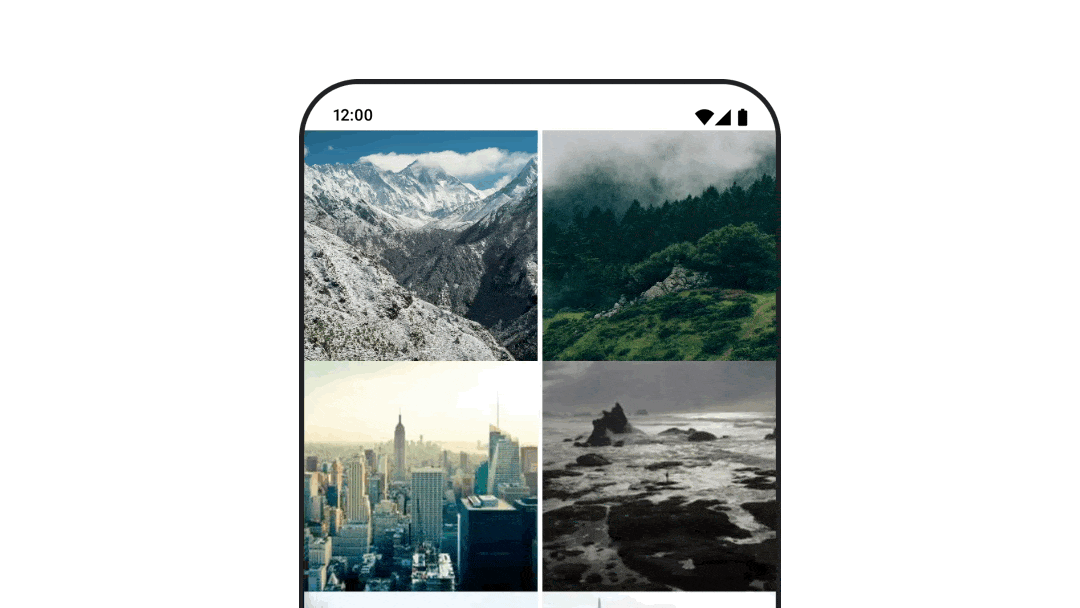
navigation-compose アーティファクトを使用しているときにコンポーザブル間の遷移をアニメーション化するには、コンポーザブルで enterTransition と exitTransition を指定します。最上位の NavHost で、すべてのデスティネーションで使用するデフォルトのアニメーションを設定することもできます。
val navController = rememberNavController() NavHost( navController = navController, startDestination = "landing", enterTransition = { EnterTransition.None }, exitTransition = { ExitTransition.None } ) { composable("landing") { ScreenLanding( // ... ) } composable( "detail/{photoUrl}", arguments = listOf(navArgument("photoUrl") { type = NavType.StringType }), enterTransition = { fadeIn( animationSpec = tween( 300, easing = LinearEasing ) ) + slideIntoContainer( animationSpec = tween(300, easing = EaseIn), towards = AnimatedContentTransitionScope.SlideDirection.Start ) }, exitTransition = { fadeOut( animationSpec = tween( 300, easing = LinearEasing ) ) + slideOutOfContainer( animationSpec = tween(300, easing = EaseOut), towards = AnimatedContentTransitionScope.SlideDirection.End ) } ) { backStackEntry -> ScreenDetails( // ... ) } }
さまざまな種類の入退場トランジションがあり、入ってくるコンテンツと出ていくコンテンツに異なる効果が適用されます。詳しくは、ドキュメントをご覧ください。
アニメーションを繰り返す
rememberInfiniteTransition と infiniteRepeatable
animationSpec を使用して、アニメーションを連続で繰り返します。RepeatModes を変更して、往復の動作を指定します。
repeatable を使用して、指定した回数だけ繰り返します。
val infiniteTransition = rememberInfiniteTransition(label = "infinite") val color by infiniteTransition.animateColor( initialValue = Color.Green, targetValue = Color.Blue, animationSpec = infiniteRepeatable( animation = tween(1000, easing = LinearEasing), repeatMode = RepeatMode.Reverse ), label = "color" ) Column( modifier = Modifier.drawBehind { drawRect(color) } ) { // your composable here }
コンポーザブルの起動時にアニメーションを開始する
LaunchedEffect は、コンポーザブルがコンポジションに入ったときに実行されます。コンポーザブルの起動時にアニメーションを開始します。これを使用してアニメーションの状態変化を制御できます。animateTo メソッドで Animatable を使用して、起動時にアニメーションを開始します。
val alphaAnimation = remember { Animatable(0f) } LaunchedEffect(Unit) { alphaAnimation.animateTo(1f) } Box( modifier = Modifier.graphicsLayer { alpha = alphaAnimation.value } )
連続アニメーションを作成する
Animatable コルーチン API を使用して、順次アニメーションまたは同時実行アニメーションを実行します。Animatable で animateTo を次々に呼び出すと、各アニメーションは前のアニメーションが終了するまで待機してから続行します。これは、suspend 関数であるためです。
val alphaAnimation = remember { Animatable(0f) } val yAnimation = remember { Animatable(0f) } LaunchedEffect("animationKey") { alphaAnimation.animateTo(1f) yAnimation.animateTo(100f) yAnimation.animateTo(500f, animationSpec = tween(100)) }
同時アニメーションを作成する
コルーチン API(Animatable#animateTo() または animate)または Transition API を使用して、同時アニメーションを実現します。コルーチン コンテキストで複数の起動関数を使用すると、アニメーションが同時に起動します。
val alphaAnimation = remember { Animatable(0f) } val yAnimation = remember { Animatable(0f) } LaunchedEffect("animationKey") { launch { alphaAnimation.animateTo(1f) } launch { yAnimation.animateTo(100f) } }
updateTransition API を使用すると、同じ状態を使用して、同時にさまざまなプロパティ アニメーションを駆動できます。次の例では、状態の変化によって制御される 2 つのプロパティ(rect と borderWidth)をアニメーション化しています。
var currentState by remember { mutableStateOf(BoxState.Collapsed) } val transition = updateTransition(currentState, label = "transition") val rect by transition.animateRect(label = "rect") { state -> when (state) { BoxState.Collapsed -> Rect(0f, 0f, 100f, 100f) BoxState.Expanded -> Rect(100f, 100f, 300f, 300f) } } val borderWidth by transition.animateDp(label = "borderWidth") { state -> when (state) { BoxState.Collapsed -> 1.dp BoxState.Expanded -> 0.dp } }
アニメーションのパフォーマンスを最適化する
Compose のアニメーションはパフォーマンスの問題を引き起こす可能性があります。これは、アニメーションの性質によるものです。アニメーションとは、画面上のピクセルをフレームごとにすばやく移動または変更して、動きの錯覚を生み出すものです。
Compose のさまざまなフェーズ(コンポジション、レイアウト、描画)を考慮します。アニメーションでレイアウト フェーズが変更される場合は、影響を受けるすべてのコンポーザブルを再レイアウトして再描画する必要があります。アニメーションが描画フェーズで発生する場合、レイアウト フェーズでアニメーションを実行する場合よりも、全体的に処理が少なくなるため、デフォルトでパフォーマンスが向上します。
アニメーション中にアプリの処理をできるだけ少なくするには、可能な限り Modifier のラムダ バージョンを選択します。これにより、再コンポーズがスキップされ、コンポーズ フェーズ外でアニメーションが実行されます。それ以外の場合は、Modifier.graphicsLayer{ } を使用します。この修飾子は常に描画フェーズで実行されるためです。詳細については、パフォーマンスに関するドキュメントの読み取りの遅延セクションをご覧ください。
アニメーションのタイミングを変更する
Compose では、ほとんどのアニメーションにデフォルトでスプリング アニメーションが使用されます。バネ、つまり物理学ベースのアニメーションは、より自然に感じられます。また、固定時間ではなくオブジェクトの現在の速度を考慮するため、中断可能です。デフォルトをオーバーライドする場合は、上記のすべてのアニメーション API で animationSpec を設定して、アニメーションの実行方法(特定の期間に実行するか、より弾むようにするかなど)をカスタマイズできます。
さまざまな animationSpec オプションの概要は次のとおりです。
spring: 物理ベースのアニメーション。すべてのアニメーションのデフォルトです。stiffness または dampingRatio を変更して、アニメーションのルック アンド フィールを変更できます。tween(between の略): 期間ベースのアニメーション。Easing関数を使用して 2 つの値の間をアニメーション化します。keyframes: アニメーションの特定のキーポイントで値を指定するための仕様。repeatable:RepeatModeで指定された回数だけ実行される期間ベースの仕様。infiniteRepeatable: 永久に実行される期間ベースの仕様。snap: アニメーションなしで終了値に瞬時にスナップします。
animationSpecs の詳細については、完全なドキュメントをご覧ください。
参考情報
Compose の楽しいアニメーションのその他の例については、以下をご覧ください。
- Compose での 5 つの簡単なアニメーション
- Compose で Jellyfish を動かす
- Compose での
AnimatedContentのカスタマイズ - Compose でのイージング関数のイージング