برای اینکه اعلانهایتان در نسخههای مختلف اندروید به بهترین شکل ظاهر شوند، از الگوی استاندارد اعلانها برای ساخت اعلانهای خود استفاده کنید. اگر میخواهید محتوای بیشتری در اعلان خود ارائه دهید، از یکی از الگوهای اعلان قابل ارتقا استفاده کنید.
با این حال، اگر الگوهای سیستم نیازهای شما را برآورده نمی کند، می توانید از طرح بندی خود برای اعلان استفاده کنید.
طرح بندی سفارشی برای منطقه محتوا ایجاد کنید
اگر به یک طرح بندی سفارشی نیاز دارید، می توانید NotificationCompat.DecoratedCustomViewStyle را در اعلان خود اعمال کنید. این API به شما امکان میدهد یک طرحبندی سفارشی برای ناحیه محتوایی که معمولاً توسط محتوای عنوان و متن اشغال میشود، ارائه دهید، در حالی که همچنان از تزئینات سیستم برای نماد اعلان، مهر زمانی، متن فرعی و دکمههای عمل استفاده میکنید.
این API به طور مشابه با الگوهای اعلان قابل ارتقا با ایجاد طرح اولیه اعلان به شرح زیر عمل می کند:
- با
NotificationCompat.Builderیک اعلان اولیه بسازید. -
setStyle()را فراخوانی کنید و آن را به عنوان نمونه ای ازNotificationCompat.DecoratedCustomViewStyleارسال کنید. - طرح بندی سفارشی خود را به عنوان نمونه ای از
RemoteViewsافزایش دهید. - برای تنظیم طرحبندی اعلان جمعشده
setCustomContentView()فراخوانی کنید. - در صورت تمایل،
setCustomBigContentView()نیز فراخوانی کنید تا یک طرح بندی متفاوت برای اعلان توسعه یافته تنظیم کنید.
چیدمان ها را آماده کنید
شما نیاز به یک چیدمان small و large دارید. برای این مثال، طرح بندی small ممکن است به شکل زیر باشد:
<?xml version="1.0" encoding="utf-8"?>
<LinearLayout xmlns:android="http://schemas.android.com/apk/res/android"
    android:layout_width="match_parent"
    android:layout_height="wrap_content"
    android:orientation="vertical">

    <TextView
        android:id="@+id/notification_title"
        style="@style/TextAppearance.Compat.Notification.Title"
        android:layout_width="wrap_content"
        android:layout_height="0dp"
        android:layout_weight="1"
        android:text="Small notification, showing only a title" />
</LinearLayout>
و طرح large ممکن است به شکل زیر باشد:
<?xml version="1.0" encoding="utf-8"?>
<LinearLayout xmlns:android="http://schemas.android.com/apk/res/android"
    android:layout_width="match_parent"
    android:layout_height="300dp"
    android:orientation="vertical">

    <TextView
        android:id="@+id/notification_title"
        style="@style/TextAppearance.Compat.Notification.Title"
        android:layout_width="wrap_content"
        android:layout_height="wrap_content"
        android:layout_weight="1"
        android:text="Large notification, showing a title and a body." />

    <TextView
        android:id="@+id/notification_body"
        style="@style/TextAppearance.Compat.Notification.Line2"
        android:layout_width="wrap_content"
        android:layout_height="wrap_content"
        android:layout_weight="1"
        android:text="This is the body. The height is manually forced to 300dp." />
</LinearLayout>
اعلان را بسازید و نشان دهید
پس از آماده شدن طرحبندیها، میتوانید مانند مثال زیر از آنها استفاده کنید:
کاتلین
val notificationManager = getSystemService(Context.NOTIFICATION_SERVICE) as NotificationManager

// Get the layouts to use in the custom notification.
val notificationLayout = RemoteViews(packageName, R.layout.notification_small)
val notificationLayoutExpanded = RemoteViews(packageName, R.layout.notification_large)

// Apply the layouts to the notification.
val customNotification = NotificationCompat.Builder(context, CHANNEL_ID)
        .setSmallIcon(R.drawable.notification_icon)
        .setStyle(NotificationCompat.DecoratedCustomViewStyle())
        .setCustomContentView(notificationLayout)
        .setCustomBigContentView(notificationLayoutExpanded)
        .build()

notificationManager.notify(666, customNotification)
جاوا
NotificationManager notificationManager = (NotificationManager) getSystemService(Context.NOTIFICATION_SERVICE);

// Get the layouts to use in the custom notification
RemoteViews notificationLayout = new RemoteViews(getPackageName(), R.layout.notification_small);
RemoteViews notificationLayoutExpanded = new RemoteViews(getPackageName(), R.layout.notification_large);

// Apply the layouts to the notification.
Notification customNotification = new NotificationCompat.Builder(context, CHANNEL_ID)
        .setSmallIcon(R.drawable.notification_icon)
        .setStyle(new NotificationCompat.DecoratedCustomViewStyle())
        .setCustomContentView(notificationLayout)
        .setCustomBigContentView(notificationLayoutExpanded)
        .build();

notificationManager.notify(666, customNotification);
توجه داشته باشید که رنگ پسزمینه اعلان میتواند در دستگاهها و نسخههای مختلف متفاوت باشد. همانطور که در مثال زیر نشان داده شده است، سبک های کتابخانه پشتیبانی مانند TextAppearance_Compat_Notification را برای متن و TextAppearance_Compat_Notification_Title برای عنوان در طرح بندی سفارشی خود اعمال کنید. این سبکها با تغییرات رنگی سازگار میشوند تا در نهایت متن سیاه روی سیاه یا سفید روی سفید را نداشته باشید.
<TextView
    android:layout_width="wrap_content"
    android:layout_height="match_parent"
    android:layout_weight="1"
    android:text="@string/notification_title"
    android:id="@+id/notification_title"
    style="@style/TextAppearance.Compat.Notification.Title" />
از تنظیم تصویر پسزمینه روی شی RemoteViews خودداری کنید، زیرا ممکن است متن شما ناخوانا شود.
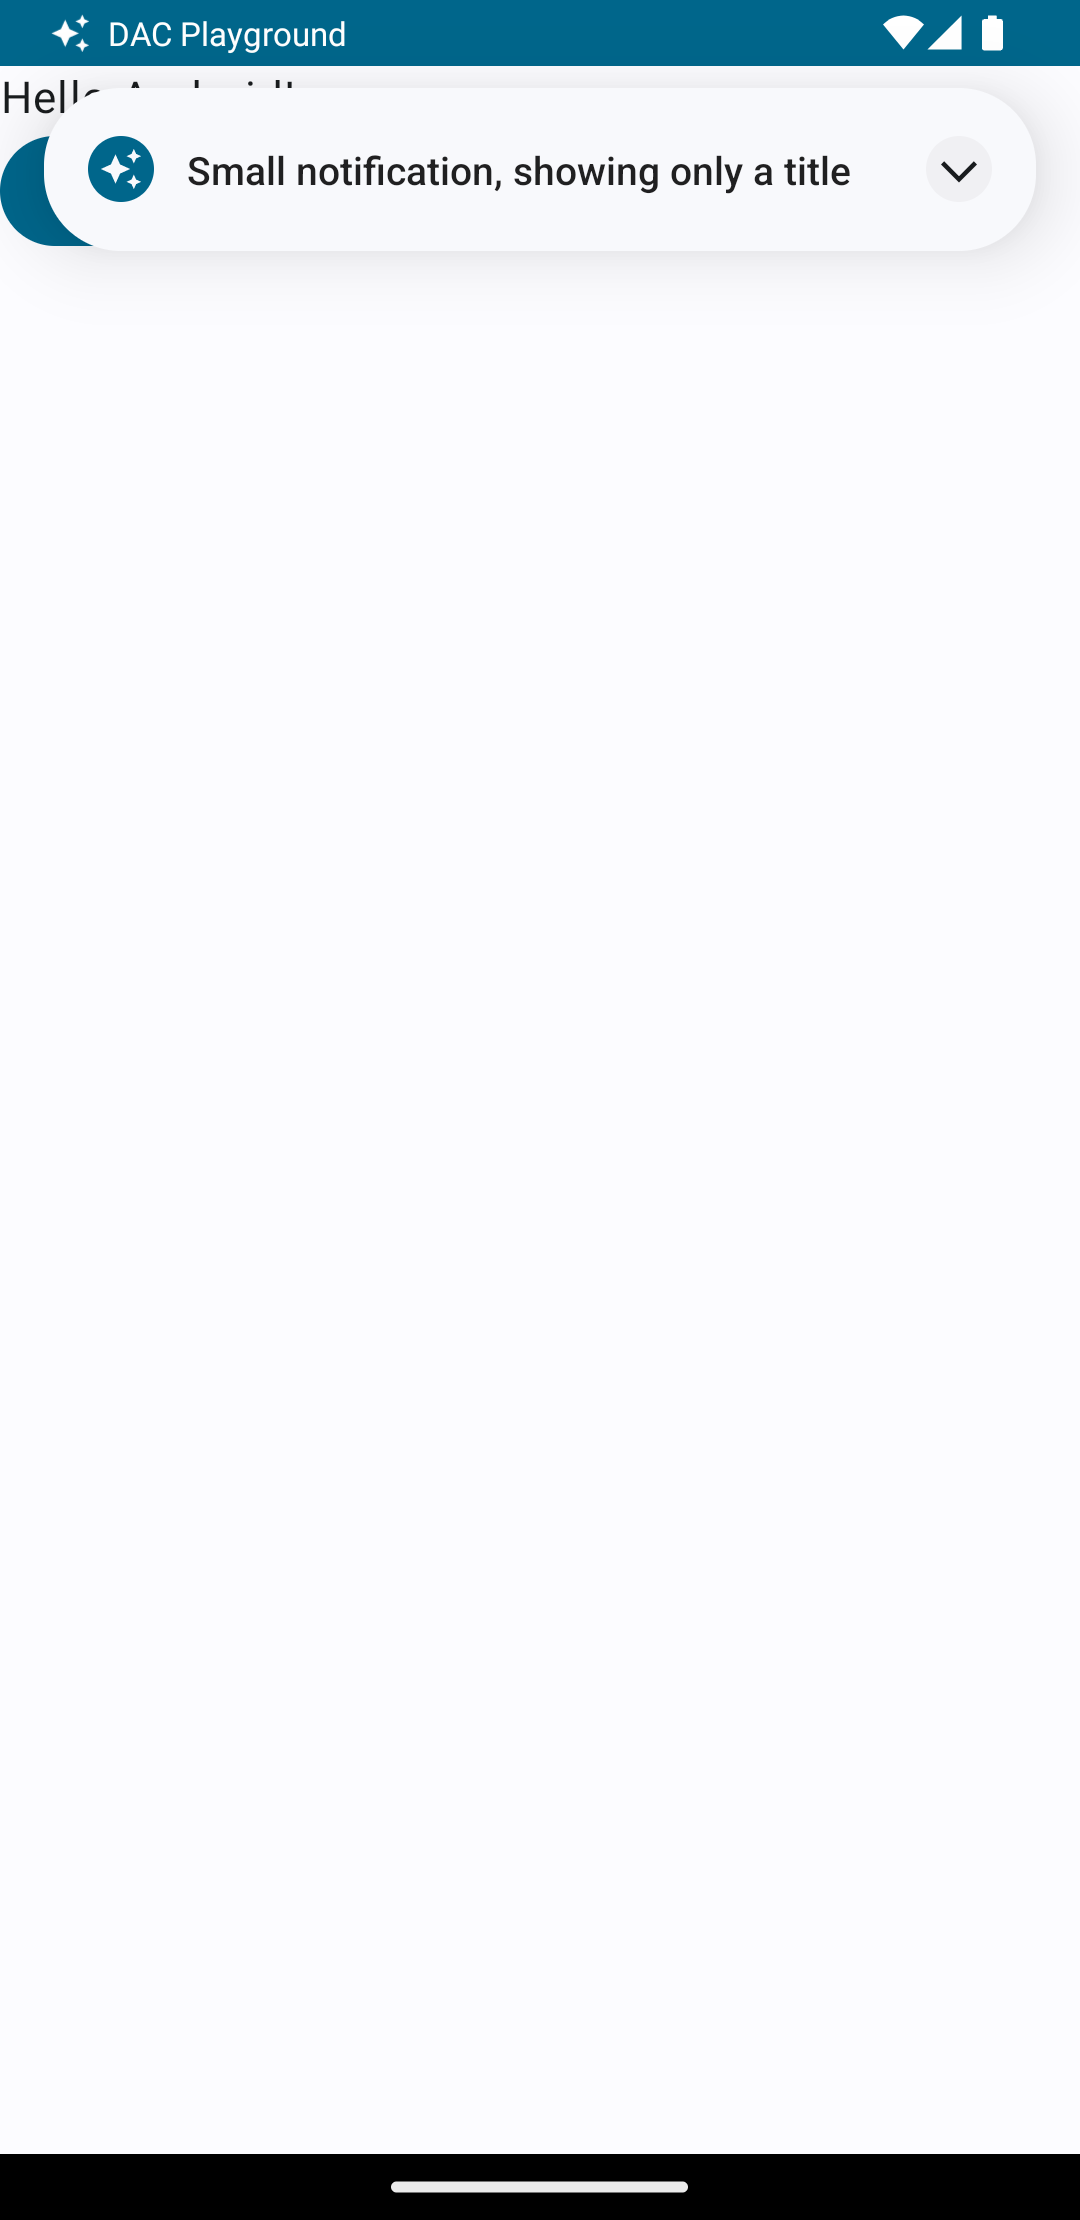
هنگامی که هنگام استفاده کاربر از یک برنامه، اعلان را راه اندازی می کنید، نتیجه مشابه شکل 1 است:

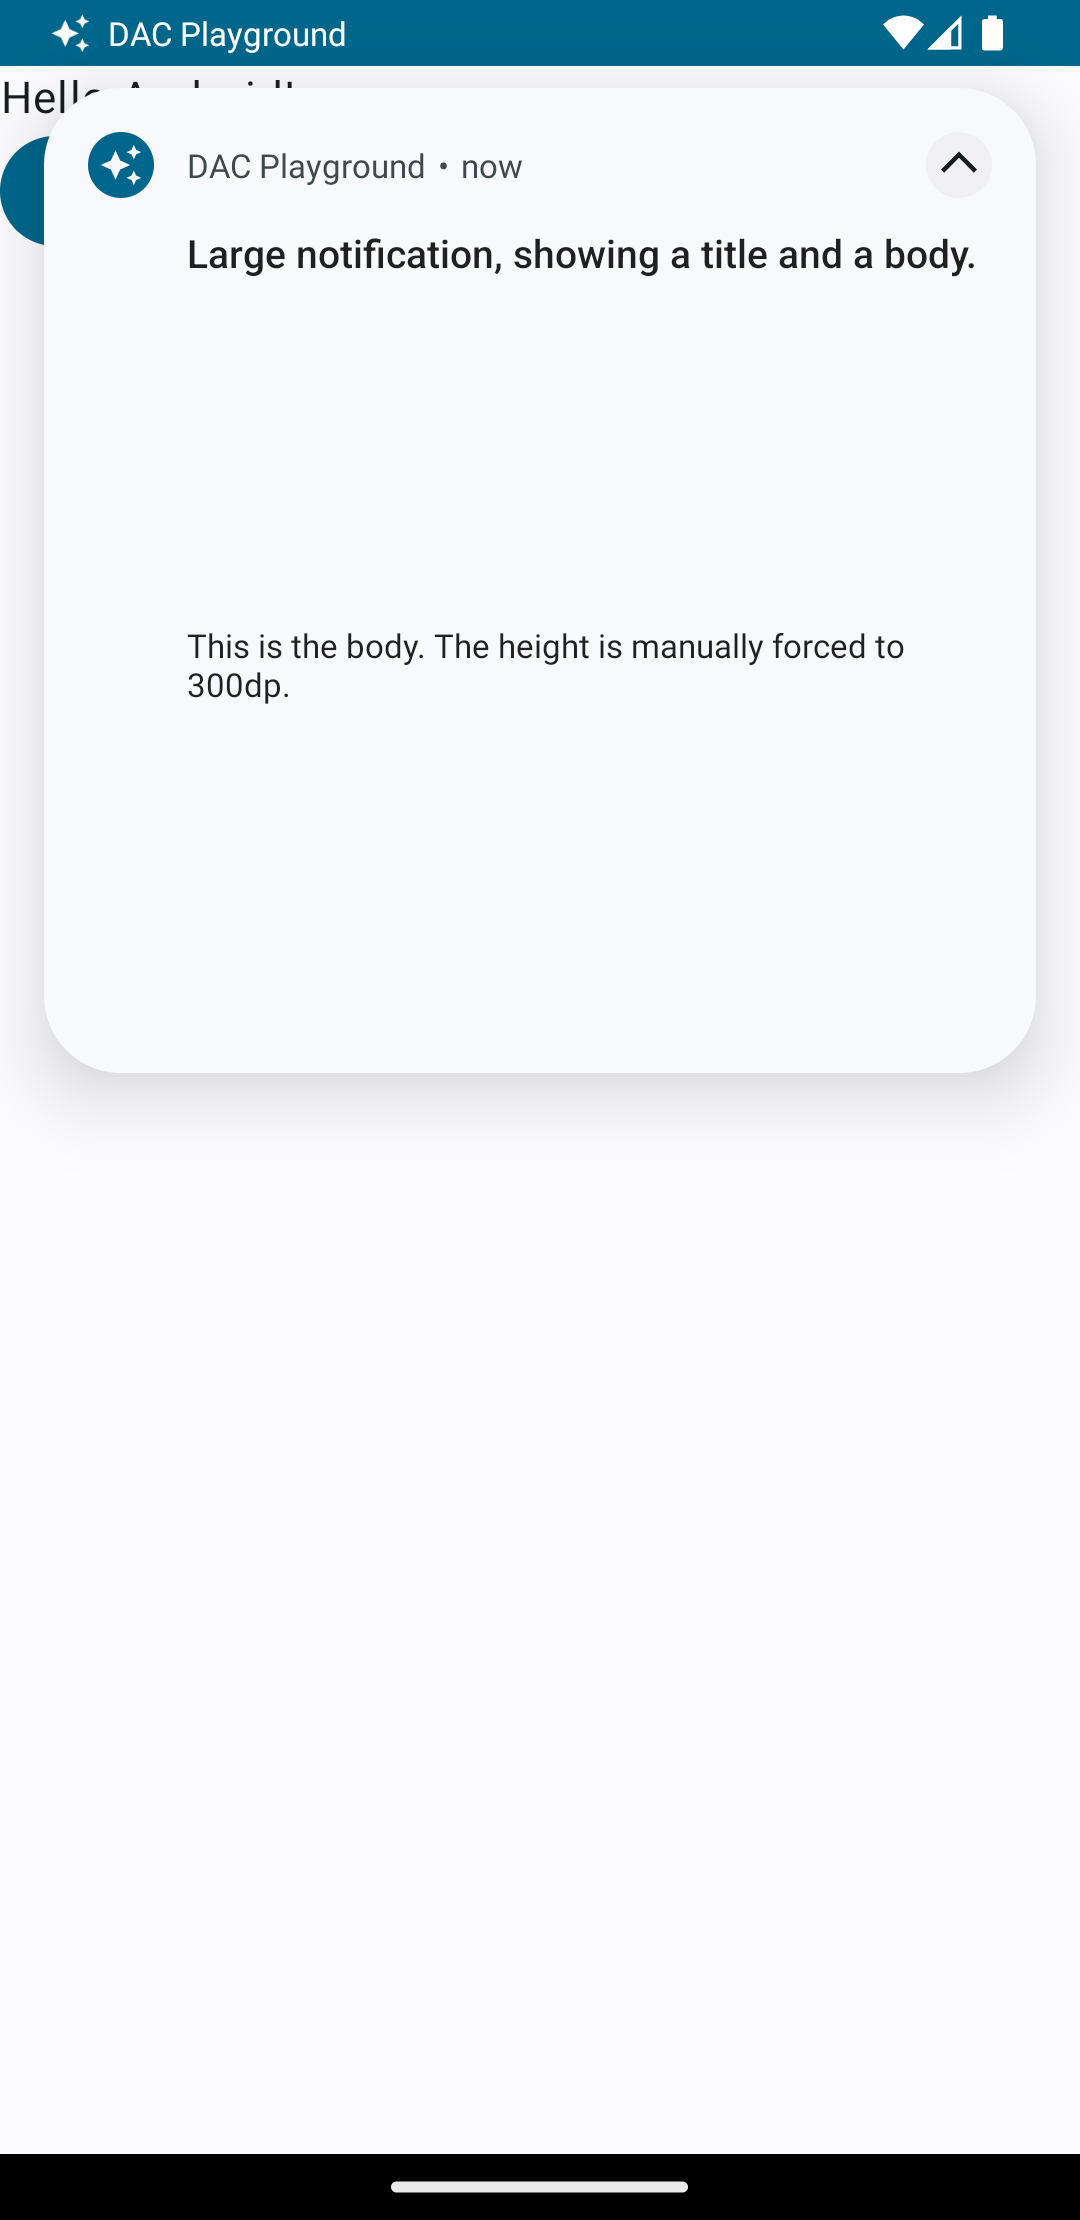
همانطور که در شکل 2 نشان داده شده است، با ضربه زدن روی فلش توسعه دهنده، اعلان گسترش می یابد:

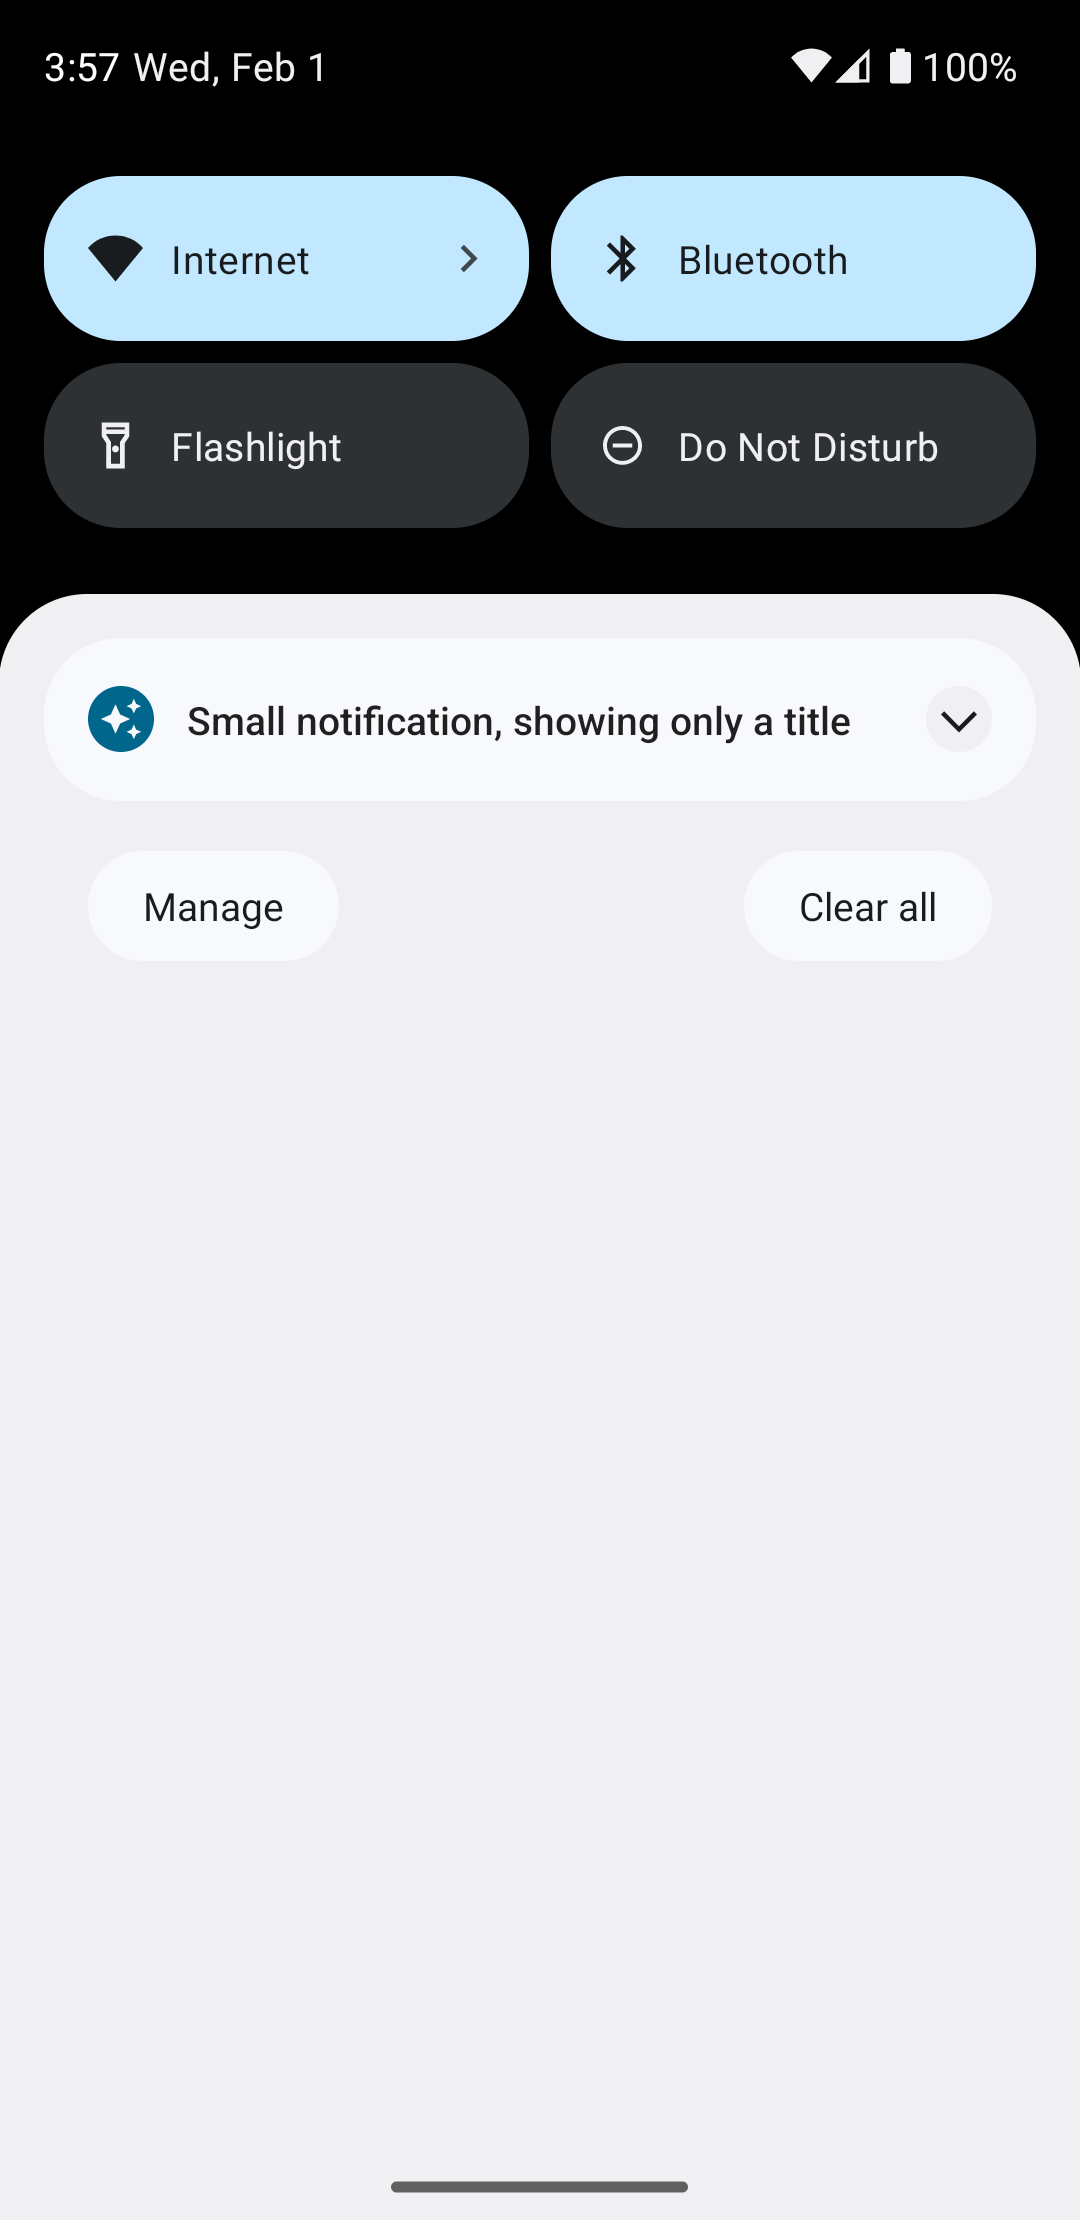
پس از اتمام زمان اعلان، اعلان فقط در نوار سیستم قابل مشاهده است که شبیه شکل 3 است:

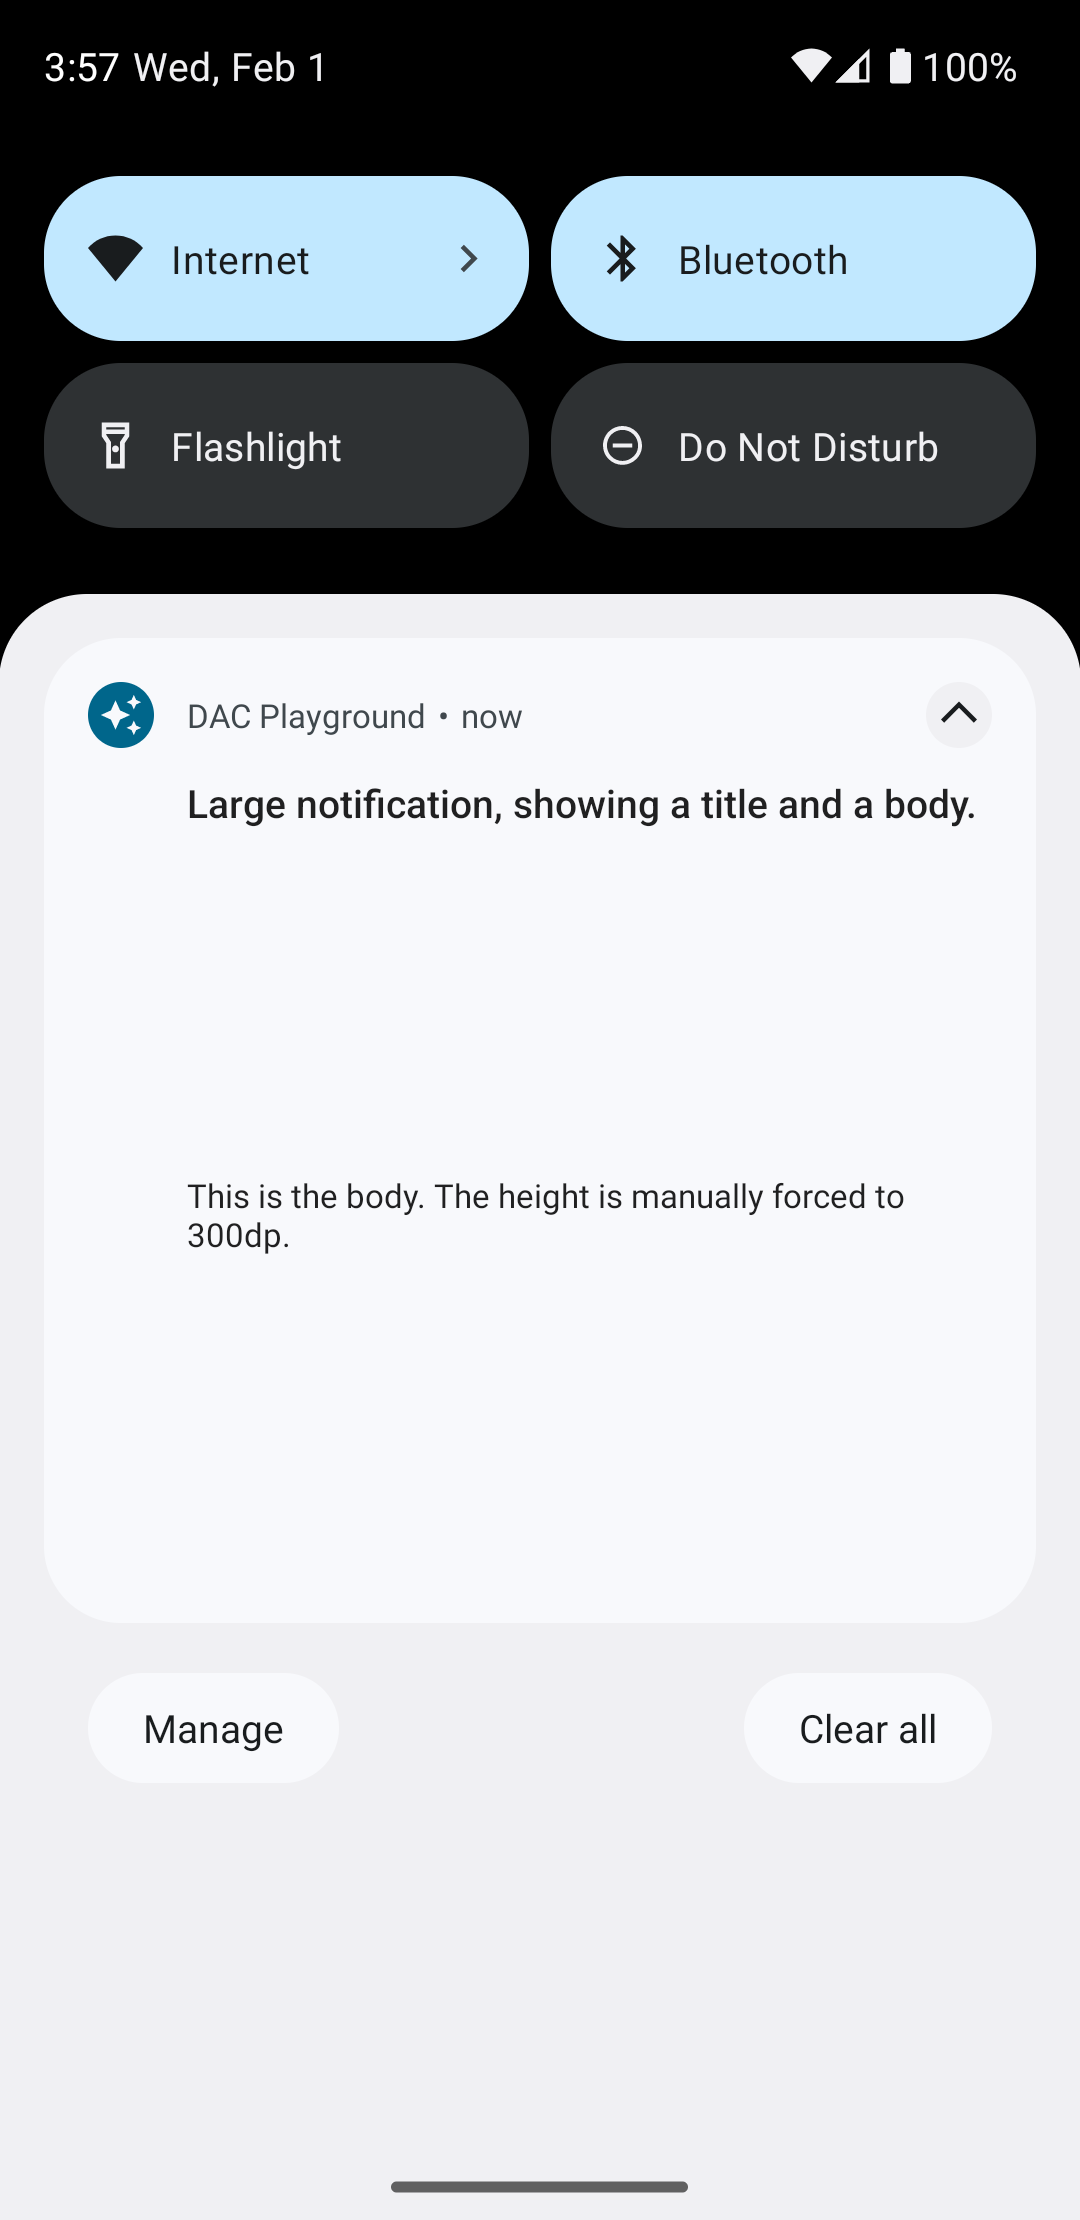
همانطور که در شکل 4 نشان داده شده است، با ضربه زدن روی فلش توسعه دهنده، اعلان گسترش می یابد:

یک طرح اعلان کاملاً سفارشی ایجاد کنید
اگر نمیخواهید اعلان شما با نماد اعلان استاندارد و هدر تزئین شود، مراحل قبل را دنبال کنید اما setStyle() را صدا نکنید .

