به رویدادهای لمسی پاسخ دهید
با مجموعهها، منظم بمانید
ذخیره و طبقهبندی محتوا براساس اولویتهای شما.
حرکت دادن اجسام بر اساس یک برنامه از پیش تعیین شده مانند مثلث چرخان برای جلب توجه مفید است، اما اگر بخواهید کاربران با گرافیک OpenGL ES شما تعامل داشته باشند، چه؟ کلید تعاملی کردن لمسی برنامه OpenGL ES شما این است که پیاده سازی GLSurfaceView
را گسترش دهید تا onTouchEvent()
را برای گوش دادن به رویدادهای لمسی لغو کنید.
این درس به شما نشان میدهد که چگونه به رویدادهای لمسی گوش دهید تا به کاربران اجازه دهید یک شی OpenGL ES را بچرخانند.
یک شنونده لمسی راه اندازی کنید
برای اینکه برنامه OpenGL ES شما به رویدادهای لمسی پاسخ دهد، باید متد onTouchEvent()
در کلاس GLSurfaceView
خود پیاده سازی کنید. اجرای مثال زیر نحوه گوش دادن به رویدادهای MotionEvent.ACTION_MOVE
و ترجمه آنها را به زاویه چرخش برای یک شکل نشان می دهد.
کاتلین
private const val TOUCH_SCALE_FACTOR: Float = 180.0f / 320f
...
private var previousX: Float = 0f
private var previousY: Float = 0f
override fun onTouchEvent(e: MotionEvent): Boolean {
// MotionEvent reports input details from the touch screen
// and other input controls. In this case, you are only
// interested in events where the touch position changed.
val x: Float = e.x
val y: Float = e.y
when (e.action) {
MotionEvent.ACTION_MOVE -> {
var dx: Float = x - previousX
var dy: Float = y - previousY
// reverse direction of rotation above the mid-line
if (y > height / 2) {
dx *= -1
}
// reverse direction of rotation to left of the mid-line
if (x < width / 2) {
dy *= -1
}
renderer.angle += (dx + dy) * TOUCH_SCALE_FACTOR
requestRender()
}
}
previousX = x
previousY = y
return true
}
جاوا
private final float TOUCH_SCALE_FACTOR = 180.0f / 320;
private float previousX;
private float previousY;
@Override
public boolean onTouchEvent(MotionEvent e) {
// MotionEvent reports input details from the touch screen
// and other input controls. In this case, you are only
// interested in events where the touch position changed.
float x = e.getX();
float y = e.getY();
switch (e.getAction()) {
case MotionEvent.ACTION_MOVE:
float dx = x - previousX;
float dy = y - previousY;
// reverse direction of rotation above the mid-line
if (y > getHeight() / 2) {
dx = dx * -1 ;
}
// reverse direction of rotation to left of the mid-line
if (x < getWidth() / 2) {
dy = dy * -1 ;
}
renderer.setAngle(
renderer.getAngle() +
((dx + dy) * TOUCH_SCALE_FACTOR));
requestRender();
}
previousX = x;
previousY = y;
return true;
}
توجه داشته باشید که پس از محاسبه زاویه چرخش، این متد requestRender()
را فراخوانی می کند تا به رندر کننده بگوید که زمان رندر کردن فریم است. این روش در این مثال کارآمدترین است زیرا فریم نیازی به ترسیم مجدد ندارد مگر اینکه تغییری در چرخش ایجاد شود. با این حال، هیچ تاثیری بر کارایی ندارد، مگر اینکه شما همچنین درخواست کنید که رندر تنها زمانی که داده ها با استفاده از متد setRenderMode()
تغییر می کند، دوباره ترسیم کند، بنابراین مطمئن شوید که این خط در رندر بدون توضیح است:
کاتلین
class MyGlSurfaceView(context: Context) : GLSurfaceView(context) {
init {
// Render the view only when there is a change in the drawing data
renderMode = GLSurfaceView.RENDERMODE_WHEN_DIRTY
}
}
جاوا
public MyGLSurfaceView(Context context) {
...
// Render the view only when there is a change in the drawing data
setRenderMode(GLSurfaceView.RENDERMODE_WHEN_DIRTY);
}
زاویه چرخش را در معرض دید قرار دهید
کد مثال بالا مستلزم آن است که زاویه چرخش را از طریق رندر خود با افزودن یک عضو عمومی در معرض دید قرار دهید. از آنجایی که کد رندر در یک رشته مجزا از رشته رابط کاربری اصلی برنامه شما اجرا می شود، باید این متغیر عمومی را به عنوان volatile
اعلام کنید. در اینجا کدی برای اعلام متغیر و نمایش جفت گیرنده و تنظیم کننده وجود دارد:
کاتلین
class MyGLRenderer4 : GLSurfaceView.Renderer {
@Volatile
var angle: Float = 0f
}
جاوا
public class MyGLRenderer implements GLSurfaceView.Renderer {
...
public volatile float mAngle;
public float getAngle() {
return mAngle;
}
public void setAngle(float angle) {
mAngle = angle;
}
}
چرخش را اعمال کنید
برای اعمال چرخش ایجاد شده توسط ورودی لمسی، کدی که یک زاویه ایجاد می کند را نظر دهید و متغیری را اضافه کنید که حاوی زاویه ایجاد شده ورودی لمسی است:
کاتلین
override fun onDrawFrame(gl: GL10) {
...
val scratch = FloatArray(16)
// Create a rotation for the triangle
// long time = SystemClock.uptimeMillis() % 4000L;
// float angle = 0.090f * ((int) time);
Matrix.setRotateM(rotationMatrix, 0, angle, 0f, 0f, -1.0f)
// Combine the rotation matrix with the projection and camera view
// Note that the mvpMatrix factor *must be first* in order
// for the matrix multiplication product to be correct.
Matrix.multiplyMM(scratch, 0, mvpMatrix, 0, rotationMatrix, 0)
// Draw triangle
triangle.draw(scratch)
}
جاوا
public void onDrawFrame(GL10 gl) {
...
float[] scratch = new float[16];
// Create a rotation for the triangle
// long time = SystemClock.uptimeMillis() % 4000L;
// float angle = 0.090f * ((int) time);
Matrix.setRotateM(rotationMatrix, 0, mAngle, 0, 0, -1.0f);
// Combine the rotation matrix with the projection and camera view
// Note that the vPMatrix factor *must be first* in order
// for the matrix multiplication product to be correct.
Matrix.multiplyMM(scratch, 0, vPMatrix, 0, rotationMatrix, 0);
// Draw triangle
mTriangle.draw(scratch);
}
پس از انجام مراحل توضیح داده شده در بالا، برنامه را اجرا کنید و انگشت خود را روی صفحه بکشید تا مثلث بچرخد:

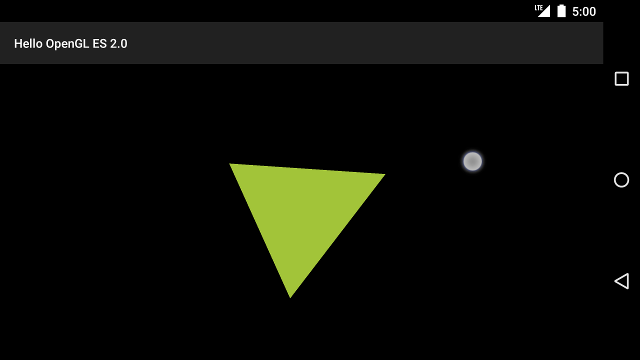
شکل 1. مثلثی که با ورودی لمسی می چرخد (دایره مکان لمس را نشان می دهد).
محتوا و نمونه کدها در این صفحه مشمول پروانههای توصیفشده در پروانه محتوا هستند. جاوا و OpenJDK علامتهای تجاری یا علامتهای تجاری ثبتشده Oracle و/یا وابستههای آن هستند.
تاریخ آخرین بهروزرسانی 2025-07-29 بهوقت ساعت هماهنگ جهانی.
[[["درک آسان","easyToUnderstand","thumb-up"],["مشکلم را برطرف کرد","solvedMyProblem","thumb-up"],["غیره","otherUp","thumb-up"]],[["اطلاعاتی که نیاز دارم وجود ندارد","missingTheInformationINeed","thumb-down"],["بیشازحد پیچیده/ مراحل بسیار زیاد","tooComplicatedTooManySteps","thumb-down"],["قدیمی","outOfDate","thumb-down"],["مشکل ترجمه","translationIssue","thumb-down"],["مشکل کد / نمونهها","samplesCodeIssue","thumb-down"],["غیره","otherDown","thumb-down"]],["تاریخ آخرین بهروزرسانی 2025-07-29 بهوقت ساعت هماهنگ جهانی."],[],[],null,["# Respond to touch events\n\nMaking objects move according to a preset program like the rotating triangle is useful for\ngetting some attention, but what if you want to have users interact with your OpenGL ES graphics?\nThe key to making your OpenGL ES application touch interactive is expanding your implementation of\n[GLSurfaceView](/reference/android/opengl/GLSurfaceView) to override the\n[onTouchEvent()](/reference/android/view/View#onTouchEvent(android.view.MotionEvent)) to listen for touch events.\n\nThis lesson shows you how to listen for touch events to let users rotate an OpenGL ES object.\n\nSetup a touch listener\n----------------------\n\nIn order to make your OpenGL ES application respond to touch events, you must implement the\n[onTouchEvent()](/reference/android/view/View#onTouchEvent(android.view.MotionEvent)) method in your\n[GLSurfaceView](/reference/android/opengl/GLSurfaceView) class. The example implementation below shows how to listen for\n[MotionEvent.ACTION_MOVE](/reference/android/view/MotionEvent#ACTION_MOVE) events and translate them to\nan angle of rotation for a shape. \n\n### Kotlin\n\n```kotlin\nprivate const val TOUCH_SCALE_FACTOR: Float = 180.0f / 320f\n...\nprivate var previousX: Float = 0f\nprivate var previousY: Float = 0f\n\noverride fun onTouchEvent(e: MotionEvent): Boolean {\n // MotionEvent reports input details from the touch screen\n // and other input controls. In this case, you are only\n // interested in events where the touch position changed.\n\n val x: Float = e.x\n val y: Float = e.y\n\n when (e.action) {\n MotionEvent.ACTION_MOVE -\u003e {\n\n var dx: Float = x - previousX\n var dy: Float = y - previousY\n\n // reverse direction of rotation above the mid-line\n if (y \u003e height / 2) {\n dx *= -1\n }\n\n // reverse direction of rotation to left of the mid-line\n if (x \u003c width / 2) {\n dy *= -1\n }\n\n renderer.angle += (dx + dy) * TOUCH_SCALE_FACTOR\n requestRender()\n }\n }\n\n previousX = x\n previousY = y\n return true\n}\n```\n\n### Java\n\n```java\nprivate final float TOUCH_SCALE_FACTOR = 180.0f / 320;\nprivate float previousX;\nprivate float previousY;\n\n@Override\npublic boolean onTouchEvent(MotionEvent e) {\n // MotionEvent reports input details from the touch screen\n // and other input controls. In this case, you are only\n // interested in events where the touch position changed.\n\n float x = e.getX();\n float y = e.getY();\n\n switch (e.getAction()) {\n case MotionEvent.ACTION_MOVE:\n\n float dx = x - previousX;\n float dy = y - previousY;\n\n // reverse direction of rotation above the mid-line\n if (y \u003e getHeight() / 2) {\n dx = dx * -1 ;\n }\n\n // reverse direction of rotation to left of the mid-line\n if (x \u003c getWidth() / 2) {\n dy = dy * -1 ;\n }\n\n renderer.setAngle(\n renderer.getAngle() +\n ((dx + dy) * TOUCH_SCALE_FACTOR));\n requestRender();\n }\n\n previousX = x;\n previousY = y;\n return true;\n}\n```\n\nNotice that after calculating the rotation angle, this method calls\n[requestRender()](/reference/android/opengl/GLSurfaceView#requestRender()) to tell the\nrenderer that it is time to render the frame. This approach is the most efficient in this example\nbecause the frame does not need to be redrawn unless there is a change in the rotation. However, it\ndoes not have any impact on efficiency unless you also request that the renderer only redraw when\nthe data changes using the [setRenderMode()](/reference/android/opengl/GLSurfaceView#setRenderMode(int))\nmethod, so make sure this line is uncommented in the renderer: \n\n### Kotlin\n\n```kotlin\nclass MyGlSurfaceView(context: Context) : GLSurfaceView(context) {\n\n init {\n // Render the view only when there is a change in the drawing data\n renderMode = GLSurfaceView.RENDERMODE_WHEN_DIRTY\n }\n}\n```\n\n### Java\n\n```java\npublic MyGLSurfaceView(Context context) {\n ...\n // Render the view only when there is a change in the drawing data\n setRenderMode(GLSurfaceView.RENDERMODE_WHEN_DIRTY);\n}\n```\n\nExpose the rotation angle\n-------------------------\n\nThe example code above requires that you expose the rotation angle through your renderer by\nadding a public member. Since the renderer code is running on a separate thread from the main user\ninterface thread of your application, you must declare this public variable as `volatile`.\nHere is the code to declare the variable and expose the getter and setter pair: \n\n### Kotlin\n\n```kotlin\nclass MyGLRenderer4 : GLSurfaceView.Renderer {\n\n @Volatile\n var angle: Float = 0f\n}\n```\n\n### Java\n\n```java\npublic class MyGLRenderer implements GLSurfaceView.Renderer {\n ...\n\n public volatile float mAngle;\n\n public float getAngle() {\n return mAngle;\n }\n\n public void setAngle(float angle) {\n mAngle = angle;\n }\n}\n```\n\nApply rotation\n--------------\n\nTo apply the rotation generated by touch input, comment out the code that generates an angle and\nadd a variable that contains the touch input generated angle: \n\n### Kotlin\n\n```kotlin\noverride fun onDrawFrame(gl: GL10) {\n ...\n val scratch = FloatArray(16)\n\n // Create a rotation for the triangle\n // long time = SystemClock.uptimeMillis() % 4000L;\n // float angle = 0.090f * ((int) time);\n Matrix.setRotateM(rotationMatrix, 0, angle, 0f, 0f, -1.0f)\n\n // Combine the rotation matrix with the projection and camera view\n // Note that the mvpMatrix factor *must be first* in order\n // for the matrix multiplication product to be correct.\n Matrix.multiplyMM(scratch, 0, mvpMatrix, 0, rotationMatrix, 0)\n\n // Draw triangle\n triangle.draw(scratch)\n}\n```\n\n### Java\n\n```java\npublic void onDrawFrame(GL10 gl) {\n ...\n float[] scratch = new float[16];\n\n // Create a rotation for the triangle\n // long time = SystemClock.uptimeMillis() % 4000L;\n // float angle = 0.090f * ((int) time);\n Matrix.setRotateM(rotationMatrix, 0, mAngle, 0, 0, -1.0f);\n\n // Combine the rotation matrix with the projection and camera view\n // Note that the vPMatrix factor *must be first* in order\n // for the matrix multiplication product to be correct.\n Matrix.multiplyMM(scratch, 0, vPMatrix, 0, rotationMatrix, 0);\n\n // Draw triangle\n mTriangle.draw(scratch);\n}\n```\n\nWhen you have completed the steps described above, run the program and drag your finger over the\nscreen to rotate the triangle:\n\n\n**Figure 1.** Triangle being rotated with touch input (circle shows touch\nlocation)."]]