
Membuat objek bergerak sesuai dengan program {i>preset<i} seperti segitiga berputar berguna untuk
mendapatkan perhatian, tetapi bagaimana jika Anda ingin pengguna berinteraksi dengan grafis OpenGL ES?
Kunci untuk membuat aplikasi OpenGL ES interaktif sentuh adalah memperluas implementasi
GLSurfaceView untuk mengganti
onTouchEvent() untuk memproses peristiwa sentuh.
Tutorial ini menunjukkan cara memproses peristiwa sentuh agar memungkinkan pengguna memutar objek OpenGL ES.
Menyiapkan pemroses sentuhan
Agar aplikasi OpenGL ES merespons peristiwa sentuh, Anda harus mengimplementasikan antarmuka
Metode onTouchEvent() di
Class GLSurfaceView. Contoh implementasi di bawah ini
menunjukkan cara memproses
MotionEvent.ACTION_MOVE peristiwa dan menerjemahkannya ke
sudut rotasi untuk sebuah bentuk.
Kotlin
private const val TOUCH_SCALE_FACTOR: Float = 180.0f / 320f
...
private var previousX: Float = 0f
private var previousY: Float = 0f

override fun onTouchEvent(e: MotionEvent): Boolean {
    // MotionEvent reports input details from the touch screen
    // and other input controls. In this case, you are only
    // interested in events where the touch position changed.

    val x: Float = e.x
    val y: Float = e.y

    when (e.action) {
        MotionEvent.ACTION_MOVE -> {

            var dx: Float = x - previousX
            var dy: Float = y - previousY

            // reverse direction of rotation above the mid-line
            if (y > height / 2) {
                dx *= -1
            }

            // reverse direction of rotation to left of the mid-line
            if (x < width / 2) {
                dy *= -1
            }

            renderer.angle += (dx + dy) * TOUCH_SCALE_FACTOR
            requestRender()
        }
    }

    previousX = x
    previousY = y
    return true
}
Java
private final float TOUCH_SCALE_FACTOR = 180.0f / 320;
private float previousX;
private float previousY;

@Override
public boolean onTouchEvent(MotionEvent e) {
    // MotionEvent reports input details from the touch screen
    // and other input controls. In this case, you are only
    // interested in events where the touch position changed.

    float x = e.getX();
    float y = e.getY();

    switch (e.getAction()) {
        case MotionEvent.ACTION_MOVE:

            float dx = x - previousX;
            float dy = y - previousY;

            // reverse direction of rotation above the mid-line
            if (y > getHeight() / 2) {
              dx = dx * -1 ;
            }

            // reverse direction of rotation to left of the mid-line
            if (x < getWidth() / 2) {
              dy = dy * -1 ;
            }

            renderer.setAngle(
                    renderer.getAngle() +
                    ((dx + dy) * TOUCH_SCALE_FACTOR));
            requestRender();
    }

    previousX = x;
    previousY = y;
    return true;
}
Perhatikan bahwa setelah menghitung sudut rotasi, metode ini akan memanggil
requestRender() untuk memberi tahu
bahwa sudah waktunya untuk merender {i>frame<i}. Pendekatan ini adalah yang paling efisien dalam contoh ini
karena {i>frame<i} tidak perlu digambar ulang kecuali jika ada perubahan dalam rotasi. Namun,
tidak berdampak pada efisiensi, kecuali jika Anda juga meminta agar perender hanya menggambar ulang saat
data berubah menggunakan setRenderMode()
, jadi pastikan baris ini tidak dikomentari di perender:
Kotlin
class MyGlSurfaceView(context: Context) : GLSurfaceView(context) {

    init {
        // Render the view only when there is a change in the drawing data
        renderMode = GLSurfaceView.RENDERMODE_WHEN_DIRTY
    }
}
Java
public MyGLSurfaceView(Context context) {
    ...
    // Render the view only when there is a change in the drawing data
    setRenderMode(GLSurfaceView.RENDERMODE_WHEN_DIRTY);
}
Menampilkan sudut rotasi
Kode contoh di atas mengharuskan Anda mengekspos sudut rotasi melalui perender dengan
menambahkan anggota publik. Karena kode perender berjalan pada thread terpisah dari pengguna utama
thread antarmuka aplikasi, Anda harus mendeklarasikan variabel publik ini sebagai volatile.
Berikut adalah kode untuk mendeklarasikan variabel serta menampilkan pasangan getter dan setter:
Kotlin
class MyGLRenderer4 : GLSurfaceView.Renderer {

    @Volatile
    var angle: Float = 0f
}
Java
public class MyGLRenderer implements GLSurfaceView.Renderer {
    ...

    public volatile float mAngle;

    public float getAngle() {
        return mAngle;
    }

    public void setAngle(float angle) {
        mAngle = angle;
    }
}
Menerapkan rotasi
Untuk menerapkan rotasi yang dihasilkan oleh input sentuh, komentari kode yang menghasilkan sudut dan tambahkan variabel yang berisi sudut yang dihasilkan input sentuh:
Kotlin
override fun onDrawFrame(gl: GL10) {
    ...
    val scratch = FloatArray(16)

    // Create a rotation for the triangle
    // long time = SystemClock.uptimeMillis() % 4000L;
    // float angle = 0.090f * ((int) time);
    Matrix.setRotateM(rotationMatrix, 0, angle, 0f, 0f, -1.0f)

    // Combine the rotation matrix with the projection and camera view
    // Note that the mvpMatrix factor *must be first* in order
    // for the matrix multiplication product to be correct.
    Matrix.multiplyMM(scratch, 0, mvpMatrix, 0, rotationMatrix, 0)

    // Draw triangle
    triangle.draw(scratch)
}
Java
public void onDrawFrame(GL10 gl) {
    ...
    float[] scratch = new float[16];

    // Create a rotation for the triangle
    // long time = SystemClock.uptimeMillis() % 4000L;
    // float angle = 0.090f * ((int) time);
    Matrix.setRotateM(rotationMatrix, 0, mAngle, 0, 0, -1.0f);

    // Combine the rotation matrix with the projection and camera view
    // Note that the vPMatrix factor *must be first* in order
    // for the matrix multiplication product to be correct.
    Matrix.multiplyMM(scratch, 0, vPMatrix, 0, rotationMatrix, 0);

    // Draw triangle
    mTriangle.draw(scratch);
}
Setelah Anda menyelesaikan langkah-langkah yang dijelaskan di atas, jalankan program dan seret jari Anda ke atas untuk memutar segitiga:
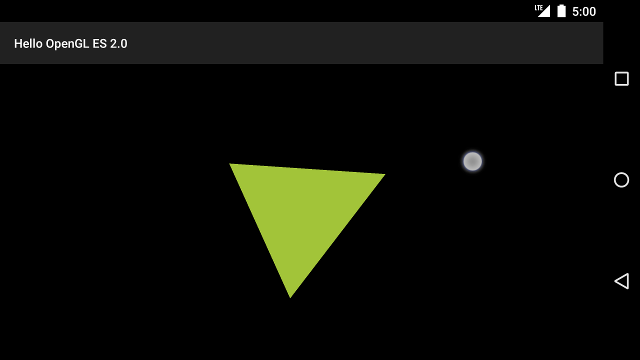
Gambar 1. Segitiga diputar dengan input sentuh (lingkaran menampilkan sentuhan lokasi).