
As visualizações deslizáveis permitem que você navegue entre telas irmãs, como guias, com um gesto horizontal com o dedo ou deslizando. Esse padrão de navegação também é conhecido como paginação horizontal. Este tópico ensina como criar um layout com visualizações deslizáveis para alternar entre guias, além de mostrar uma faixa de título em vez de guias.
Implementar visualizações deslizáveis
É possível criar visualizações deslizáveis usando o widget ViewPager2
do AndroidX.
Para usar o ViewPager2 e guias, você precisa adicionar uma dependência no
ViewPager2 e nos
Componentes do Material
do projeto.
Para configurar o layout com ViewPager2, adicione o <ViewPager2> ao layout XML. Por exemplo, se cada página na visualização deslizável consumir
todo o layout, ele ficará assim:
<androidx.viewpager2.widget.ViewPager2
    xmlns:android="http://schemas.android.com/apk/res/android"
    android:id="@+id/pager"
    android:layout_width="match_parent"
    android:layout_height="match_parent" />
Para inserir visualizações secundárias que representem cada página, é preciso vincular esse layout a
um FragmentStateAdapter.
Veja como você pode usá-lo para deslizar por uma coleção de objetos Fragment:
Kotlin
class CollectionDemoFragment : Fragment() {
    // When requested, this adapter returns a DemoObjectFragment,
    // representing an object in the collection.
    private lateinit var demoCollectionAdapter: DemoCollectionAdapter
    private lateinit var viewPager: ViewPager2

    override fun onCreateView(
        inflater: LayoutInflater,
        container: ViewGroup?,
        savedInstanceState: Bundle?
    ): View? {
        return inflater.inflate(R.layout.collection_demo, container, false)
    }

    override fun onViewCreated(view: View, savedInstanceState: Bundle?) {
        demoCollectionAdapter = DemoCollectionAdapter(this)
        viewPager = view.findViewById(R.id.pager)
        viewPager.adapter = demoCollectionAdapter
    }
}

class DemoCollectionAdapter(fragment: Fragment) : FragmentStateAdapter(fragment) {

    override fun getItemCount(): Int = 100

    override fun createFragment(position: Int): Fragment {
        // Return a NEW fragment instance in createFragment(int)
        val fragment = DemoObjectFragment()
        fragment.arguments = Bundle().apply {
            // Our object is just an integer :-P
            putInt(ARG_OBJECT, position + 1)
        }
        return fragment
    }
}

private const val ARG_OBJECT = "object"

// Instances of this class are fragments representing a single
// object in our collection.
class DemoObjectFragment : Fragment() {

    override fun onCreateView(
        inflater: LayoutInflater,
        container: ViewGroup?,
        savedInstanceState: Bundle?
    ): View {
        return inflater.inflate(R.layout.fragment_collection_object, container, false)
    }

    override fun onViewCreated(view: View, savedInstanceState: Bundle?) {
        arguments?.takeIf { it.containsKey(ARG_OBJECT) }?.apply {
            val textView: TextView = view.findViewById(android.R.id.text1)
            textView.text = getInt(ARG_OBJECT).toString()
        }
    }
}
Java
public class CollectionDemoFragment extends Fragment {
    // When requested, this adapter returns a DemoObjectFragment,
    // representing an object in the collection.
    DemoCollectionAdapter demoCollectionAdapter;
    ViewPager2 viewPager;

    @Nullable
    @Override
    public View onCreateView(@NonNull LayoutInflater inflater, @Nullable ViewGroup container,
            @Nullable Bundle savedInstanceState) {
        return inflater.inflate(R.layout.collection_demo, container, false);
    }

    @Override
    public void onViewCreated(@NonNull View view, @Nullable Bundle savedInstanceState) {
        demoCollectionAdapter = new DemoCollectionAdapter(this);
        viewPager = view.findViewById(R.id.pager);
        viewPager.setAdapter(demoCollectionAdapter);
    }
}

public class DemoCollectionAdapter extends FragmentStateAdapter {
    public DemoCollectionAdapter(Fragment fragment) {
        super(fragment);
    }

    @NonNull
    @Override
    public Fragment createFragment(int position) {
        // Return a NEW fragment instance in createFragment(int)
        Fragment fragment = new DemoObjectFragment();
        Bundle args = new Bundle();
        // Our object is just an integer :-P
        args.putInt(DemoObjectFragment.ARG_OBJECT, position + 1);
        fragment.setArguments(args);
        return fragment;
    }

    @Override
    public int getItemCount() {
        return 100;
    }
}

// Instances of this class are fragments representing a single
// object in our collection.
public class DemoObjectFragment extends Fragment {
    public static final String ARG_OBJECT = "object";

    @Nullable
    @Override
    public View onCreateView(@NonNull LayoutInflater inflater, @Nullable ViewGroup container,
            @Nullable Bundle savedInstanceState) {
        return inflater.inflate(R.layout.fragment_collection_object, container, false);
    }

    @Override
    public void onViewCreated(@NonNull View view, @Nullable Bundle savedInstanceState) {
        Bundle args = getArguments();
        ((TextView) view.findViewById(android.R.id.text1))
                .setText(Integer.toString(args.getInt(ARG_OBJECT)));
    }
}
As seções a seguir mostram como adicionar guias para facilitar a navegação entre páginas.
Adicionar guias usando um TabLayout
Um TabLayout oferece
uma maneira de mostrar guias horizontalmente. Quando usado junto com ViewPager2, um TabLayout pode fornecer uma interface familiar para navegar entre páginas em uma visualização deslizável.
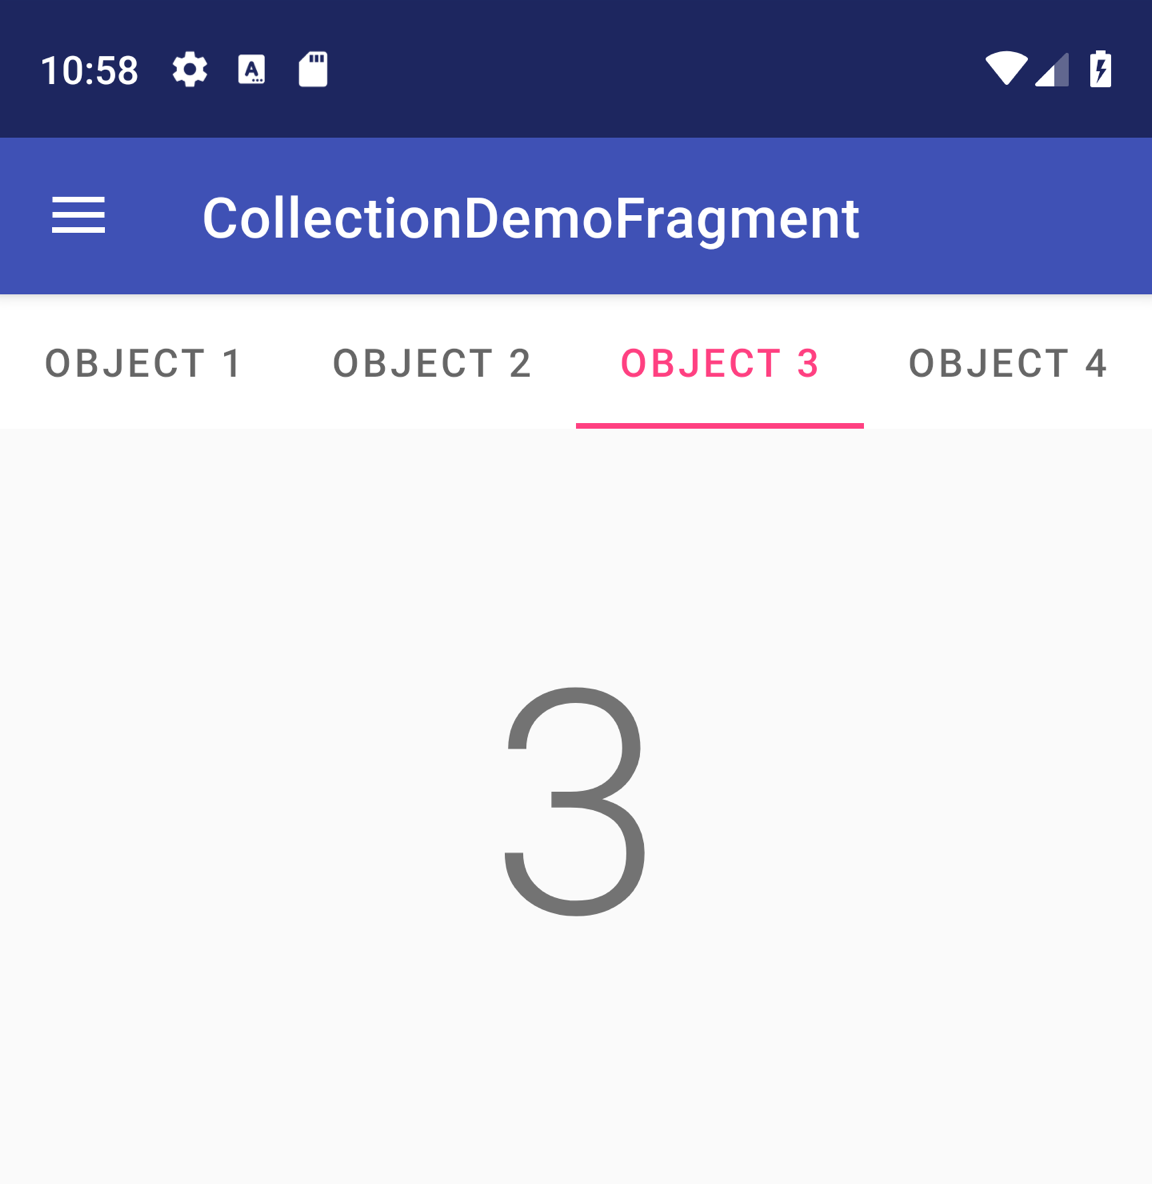
Figura 1: um TabLayout com quatro guias.
Para incluir um TabLayout em um ViewPager2, adicione um elemento <TabLayout> acima
do elemento <ViewPager2>, conforme mostrado abaixo:
<LinearLayout xmlns:android="http://schemas.android.com/apk/res/android"
    android:layout_width="match_parent"
    android:layout_height="match_parent"
    android:orientation="vertical">

    <com.google.android.material.tabs.TabLayout
        android:id="@+id/tab_layout"
        android:layout_width="match_parent"
        android:layout_height="wrap_content" />

    <androidx.viewpager2.widget.ViewPager2
        android:id="@+id/pager"
        android:layout_width="match_parent"
        android:layout_height="0dp"
        android:layout_weight="1" />

</LinearLayout>
Em seguida, crie um
TabLayoutMediator
para vincular o TabLayout ao ViewPager2 e anexe-o da seguinte maneira:
Kotlin
class CollectionDemoFragment : Fragment() {
    ...
    override fun onViewCreated(view: View, savedInstanceState: Bundle?) {
        val tabLayout = view.findViewById(R.id.tab_layout)
        TabLayoutMediator(tabLayout, viewPager) { tab, position ->
            tab.text = "OBJECT ${(position + 1)}"
        }.attach()
    }
    ...
}
Java
public class CollectionDemoFragment extends Fragment {
    ...
    @Override
    public void onViewCreated(@NonNull View view, @Nullable Bundle savedInstanceState) {
        TabLayout tabLayout = view.findViewById(R.id.tab_layout);
        new TabLayoutMediator(tabLayout, viewPager,
                (tab, position) -> tab.setText("OBJECT " + (position + 1))
        ).attach();
    }
    ...
}
Para outras orientações sobre o design de layouts de guias, consulte a documentação do Material Design para guias (link em inglês).
Outros recursos
Para saber mais sobre o ViewPager2, consulte os recursos adicionais a seguir.
Amostras
- Amostras do ViewPager2 no GitHub (em inglês)
Vídeos
- Virando a página: como migrar para o ViewPager2 (Conferência de Desenvolvedores Android '19)