
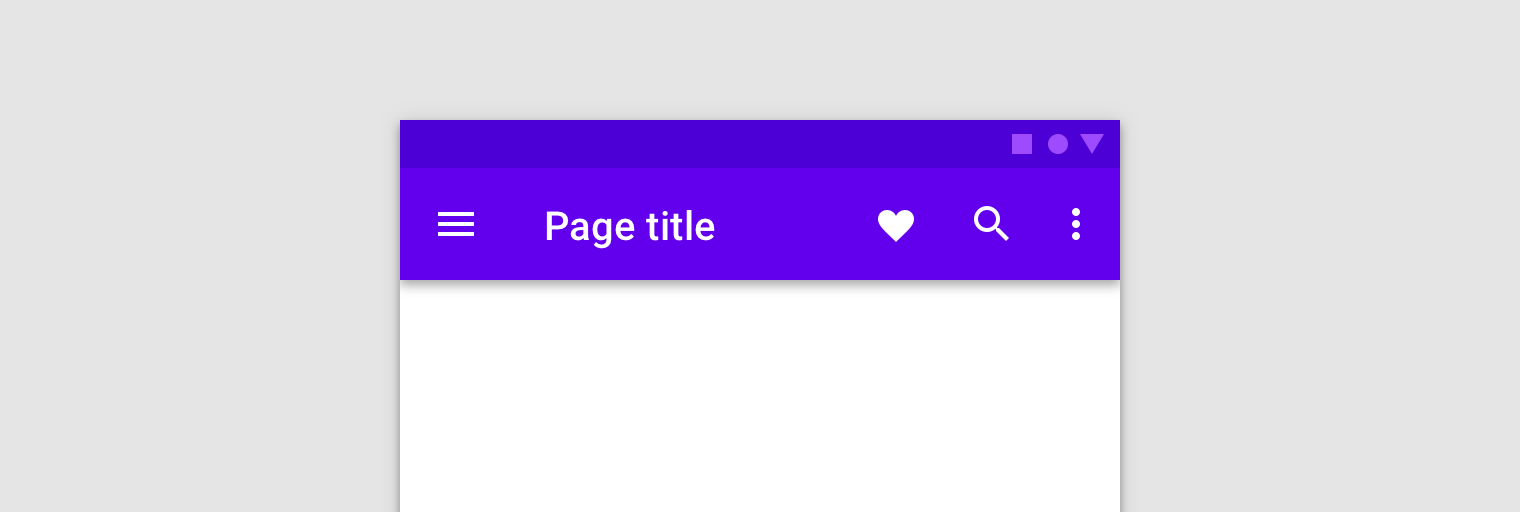
The top app bar provides a consistent place along the top of your app window for displaying information and actions from the current screen.
Ownership of the app bar varies depending on the needs of your app. When
using fragments, the app bar can be implemented as an
ActionBar that is owned
by the host activity or a toolbar within your fragment's layout.
If all your screens use the same app bar that's always at the top and spans the width of the screen, use a theme-provided action bar hosted by the activity. Using theme app bars helps to maintain a consistent look and provides a place to host option menus and an Up button.
Use a toolbar hosted by the fragment if you want more control over the size, placement, and animation of the app bar across multiple screens. For example, you might need a collapsing app bar or one that spans only half the width of the screen and is vertically centered.
Different situations require different approaches for things like inflating menus and responding to user interaction. Understanding the different approaches and employing the best one for your app saves you time and helps ensure that your app functions properly.
The examples in this topic reference an ExampleFragment that contains
an editable profile. The fragment inflates the following
XML-defined menu in its app bar:
<!-- sample_menu.xml -->
<menu
    xmlns:android="http://schemas.android.com/apk/res/android"
    xmlns:app="http://schemas.android.com/apk/res-auto">

    <item
        android:id="@+id/action_settings"
        android:icon="@drawable/ic_settings"
        android:title="@string/settings"
        app:showAsAction="ifRoom"/>
    <item
        android:id="@+id/action_done"
        android:icon="@drawable/ic_done"
        android:title="@string/done"
        app:showAsAction="ifRoom|withText"/>

</menu>
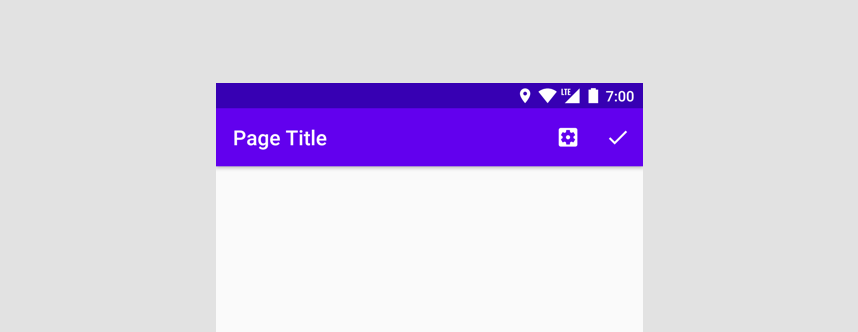
The menu contains two options: one for navigating to a profile screen and one to save any profile changes made.
Activity-owned app bar
The app bar is most commonly owned by the host activity. When the app bar is owned by an activity, fragments can interact with the app bar by overriding framework methods that are called during fragment creation.
Register with activity
You must inform the system that your app bar fragment is participating
in the population of the options menu. To do this, call
setHasOptionsMenu(true)
in your fragment's onCreate(Bundle) method, as shown in the following
example:
Kotlin
class ExampleFragment : Fragment() {
    override fun onCreate(savedInstanceState: Bundle?) {
        super.onCreate(savedInstanceState)
        setHasOptionsMenu(true)
    }
}
Java
public class ExampleFragment extends Fragment {
    @Override
    public void onCreate(Bundle savedInstanceState) {
        super.onCreate(savedInstanceState);
        setHasOptionsMenu(true);
    }
}
setHasOptionsMenu(true) tells the system that your fragment
wants to receive menu-related callbacks. When a menu-related
event occurs, like a click, the event-handling method is
first called on the activity before being called on the fragment.
However, don't rely on this order in your application logic. If the same activity hosts multiple fragments, each fragment can supply menu options, in which case the callback order depends on the order in which the fragments are added.
Inflate the menu
To merge your menu into the app bar's options menu, override
onCreateOptionsMenu()
in your fragment. This method receives the current app bar menu and a
MenuInflater as parameters. Use
the menu inflater to create an instance of your fragment's menu, and then
merge it into the current menu, as shown in the following example:
Kotlin
class ExampleFragment : Fragment() {
    ...
    override fun onCreateOptionsMenu(menu: Menu, inflater: MenuInflater) {
        inflater.inflate(R.menu.sample_menu, menu)
    }
}
Java
public class ExampleFragment extends Fragment {
    ...
    @Override
    public void onCreateOptionsMenu(@NonNull Menu menu, @NonNull MenuInflater inflater) {
       inflater.inflate(R.menu.sample_menu, menu);
    }
}
Figure 2 shows the updated menu.
Handle click events
Every activity and fragment that participates in the options menu can
respond to touches. The fragment's
onOptionsItemSelected()
receives the selected menu item as a parameter and returns a boolean
to indicate whether the touch is consumed. Once an
activity or fragment returns true from onOptionsItemSelected(), no
other participating fragments receive the callback.
In your implementation of onOptionsItemSelected(), use a switch
statement on the itemId of the menu item. If the selected item
is yours, handle the touch appropriately and return true to indicate
that the click event is handled. If the selected item isn't
yours, call the super implementation. By default, the super
implementation returns false to let menu processing continue.
Kotlin
class ExampleFragment : Fragment() {
    ...
    override fun onOptionsItemSelected(item: MenuItem): Boolean {
        return when (item.itemId) {
            R.id.action_settings -> {
                // Navigate to settings screen.
                true
            }
            R.id.action_done -> {
                // Save profile changes.
                true
            }
            else -> super.onOptionsItemSelected(item)
        }
    }
}
Java
public class ExampleFragment extends Fragment {
    ...
    @Override
    public boolean onOptionsItemSelected(@NonNull MenuItem item) {
        switch (item.getItemId()) {
            case R.id.action_settings:  {
                // Navigate to settings screen.
                return true;
            }
            case R.id.action_done: {
                // Save profile changes.
                return true;
            }
            default:
                return super.onOptionsItemSelected(item);
        }

    }

}
Dynamically modify the menu
Place the logic to hide or show a button or change the icon in
onPrepareOptionsMenu().
This method is called right before the menu is shown.
Continuing with the previous example, the Save button should be
invisible until the user begins editing, and it should disappear after
the user saves. Adding this logic to onPrepareOptionsMenu() makes
the menu present correctly:
Kotlin
class ExampleFragment : Fragment() {
    ...
    override fun onPrepareOptionsMenu(menu: Menu){
        super.onPrepareOptionsMenu(menu)
        val item = menu.findItem(R.id.action_done)
        item.isVisible = isEditing
    }
}
Java
public class ExampleFragment extends Fragment {
    ...
    @Override
    public void onPrepareOptionsMenu(@NonNull Menu menu) {
        super.onPrepareOptionsMenu(menu);
        MenuItem item = menu.findItem(R.id.action_done);
        item.setVisible(isEditing);
    }
}
When you need to update the menu, such as when a user presses the
Edit button to edit the profile info, call
invalidateOptionsMenu()
on the host activity to request that the system call onCreateOptionsMenu().
After invalidation, you can make the updates in onCreateOptionsMenu(). Once
the menu inflates, the system calls onPrepareOptionsMenu() and updates
the menu to reflect the fragment's current state.
Kotlin
class ExampleFragment : Fragment() {
    ...
    fun updateOptionsMenu() {
        isEditing = !isEditing
        requireActivity().invalidateOptionsMenu()
    }
}
Java
public class ExampleFragment extends Fragment {
    ...
    public void updateOptionsMenu() {
        isEditing = !isEditing;
        requireActivity().invalidateOptionsMenu();
    }
}
Fragment-owned app bar
If most screens in your app don't need an app bar, or if one
screen needs a different app bar than the others, you can add a
Toolbar to your
fragment layout. Though you can add a Toolbar anywhere within your
fragment's view hierarchy, you generally keep it at the top of
the screen. To use the Toolbar in your fragment, provide an ID and
obtain a reference to it in your fragment, as with any other
view. You can also consider animating the toolbar using
CoordinatorLayout
behaviors.
<androidx.appcompat.widget.Toolbar
    android:id="@+id/myToolbar"
    ... />
When using a fragment-owned app bar, Google recommends using the
Toolbar APIs directly. Do not use
setSupportActionBar()
and the Fragment menu APIs, which are appropriate only for activity-owned app bars.
Inflate the menu
The Toolbar convenience method inflateMenu(int) takes the ID of a
menu resource as a parameter. To inflate an XML menu resource into
your toolbar, pass the resId to this method, as shown in the following
example:
Kotlin
class ExampleFragment : Fragment() {
    ...
    override fun onViewCreated(view: View, savedInstanceState: Bundle?) {
        ...
        viewBinding.myToolbar.inflateMenu(R.menu.sample_menu)
    }
}
Java
public class ExampleFragment extends Fragment {
    ...
    @Override
    public void onViewCreated(@NonNull View view, @Nullable Bundle savedInstanceState) {
        ...
        viewBinding.myToolbar.inflateMenu(R.menu.sample_menu);
    }

}
To inflate another XML menu resource, call the method again with the
resId of the new menu. The new menu items are added to the menu, and
the existing menu items are not modified or removed.
If you want to replace the existing menu set, clear the menu before
calling inflateMenu(int) with the new menu ID, as shown in the following
example:
Kotlin
class ExampleFragment : Fragment() {
    ...
    fun clearToolbarMenu() {
        viewBinding.myToolbar.menu.clear()
    }
}
Java
public class ExampleFragment extends Fragment {
    ...
    public void clearToolbarMenu() {

        viewBinding.myToolbar.getMenu().clear()

    }

}
Handle click events
You can pass an
OnMenuItemClickListener
directly to the toolbar using the
setOnMenuItemClickListener()
method. This listener is invoked when the user selects a menu item
from the action buttons presented at the end of the toolbar or the
associated overflow. The selected
MenuItem is passed to the listener's
onMenuItemClick()
method and can be used to consume the action, as shown in the following
example:
Kotlin
class ExampleFragment : Fragment() {
    ...
    override fun onViewCreated(view: View, savedInstanceState: Bundle?) {
        ...
        viewBinding.myToolbar.setOnMenuItemClickListener {
            when (it.itemId) {
                R.id.action_settings -> {
                    // Navigate to settings screen.
                    true
                }
                R.id.action_done -> {
                    // Save profile changes.
                    true
                }
                else -> false
            }
        }
    }
}
Java
public class ExampleFragment extends Fragment {
    ...
    @Override
    public void onViewCreated(@NonNull View view, @Nullable Bundle savedInstanceState) {
        ...
        viewBinding.myToolbar.setOnMenuItemClickListener(item -> {
            switch (item.getItemId()) {
                case R.id.action_settings:
                    // Navigate to settings screen.
                    return true;
                case R.id.action_done:
                    // Save profile changes.
                    return true;
                default:
                    return false;
            }
        });
    }
}
Dynamically modify the menu
When your fragment owns the app bar, you can modify the Toolbar at
runtime exactly like any other view.
Continuing with the previous example, the Save menu option should be invisible until the user begins editing, and it should disappear again when tapped:
Kotlin
class ExampleFragment : Fragment() {
    ...
    fun updateToolbar() {
        isEditing = !isEditing

        val saveItem = viewBinding.myToolbar.menu.findItem(R.id.action_done)
        saveItem.isVisible = isEditing

    }
}
Java
public class ExampleFragment extends Fragment {
    ...
    public void updateToolbar() {
        isEditing = !isEditing;

        MenuItem saveItem = viewBinding.myToolbar.getMenu().findItem(R.id.action_done);
        saveItem.setVisible(isEditing);
    }

}
Add a navigation icon
If present, the navigation button appears at the start of the toolbar.
Setting a navigation icon on the toolbar makes it visible. You can also
set a navigation-specific onClickListener() that is called whenever
the user clicks on the navigation button, as shown in the following
example:
Kotlin
class ExampleFragment : Fragment() {
    ...
    override fun onViewCreated(view: View, savedInstanceState: Bundle?) {
        ...
        myToolbar.setNavigationIcon(R.drawable.ic_back)

        myToolbar.setNavigationOnClickListener { view ->
            // Navigate somewhere.
        }
    }
}
Java
public class ExampleFragment extends Fragment {
    ...
    @Override
    public void onViewCreated(@NonNull View view, @Nullable Bundle savedInstanceState) {
        ...
        viewBinding.myToolbar.setNavigationIcon(R.drawable.ic_back);
        viewBinding.myToolbar.setNavigationOnClickListener(new View.OnClickListener() {
            @Override
            public void onClick(View view) {
                // Navigate somewhere.
            }
        });
    }
}