
通知功能可在應用程式處於閒置狀態時,為使用者提供簡短且即時的應用程式事件資訊。本文將說明如何建立具有各種功能的通知。如要瞭解 Android 上的通知顯示方式,請參閱「通知總覽」。如需使用通知的程式碼範例,請參閱 GitHub 上的 SociaLite 範例。
本頁中的程式碼使用 AndroidX 程式庫的 NotificationCompat API。這些 API 可讓您新增僅適用於較新 Android 版本的相關功能,同時仍提供 Android 9 (API 級別 28) 的回溯相容性。不過,部分功能 (例如內嵌回覆動作) 在舊版中會導致無作業。
建立基本通知
最基本且精簡的通知形式 (又稱「摺疊形式」) 會顯示圖示、標題和少量文字內容。本節說明如何建立通知,讓使用者輕觸通知即可啟動應用程式中的活動。
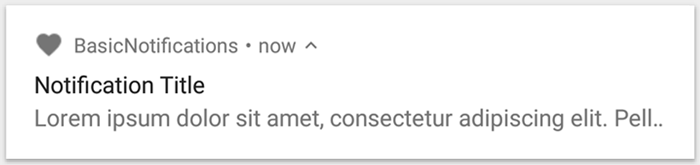
圖 1. 含有圖示、標題和部分文字的通知。
如要進一步瞭解通知的各個部分,請參閱通知結構。
宣告執行階段權限
Android 13 (API 級別 33) 以上版本支援執行階段權限,以便從應用程式發布非豁免 (包括前景服務 (FGS)) 通知。
以下程式碼片段顯示您必須在應用程式資訊清單檔案中宣告的權限:
<manifest ...>
    <uses-permission android:name="android.permission.POST_NOTIFICATIONS"/>
    <application ...>
        ...
    </application>
</manifest>
如要進一步瞭解執行階段權限,請參閱「通知執行階段權限」。
設定通知內容
如要開始使用,請使用 NotificationCompat.Builder 物件設定通知內容和管道。以下範例說明如何建立通知,並包含下列項目:
小型圖示,由
setSmallIcon()設定。這是唯一必須向使用者顯示的內容。由
setContentTitle()設定的標題。由
setContentText()設定的內文。setPriority()設定的通知優先順序。在 Android 7.1 和更早版本中,優先順序會決定通知的干擾程度。如果是 Android 8.0 以上版本,請改為設定管道重要性,如下一節所示。
val textTitle = "Title" val textContent = "Content" val builder = NotificationCompat.Builder(context, CHANNEL_ID) .setSmallIcon(R.drawable.ic_logo) .setContentTitle(textTitle) .setContentText(textContent) .setPriority(NotificationCompat.PRIORITY_DEFAULT)
NotificationCompat.Builder 建構函式需要您提供頻道 ID。這是為了與 Android 8.0 (API 級別 26) 以上版本相容,但較舊版本會忽略這項設定。
根據預設,通知的文字內容會遭到截斷,以便在單行顯示所有內容。您可以建立可展開的通知,顯示額外資訊。
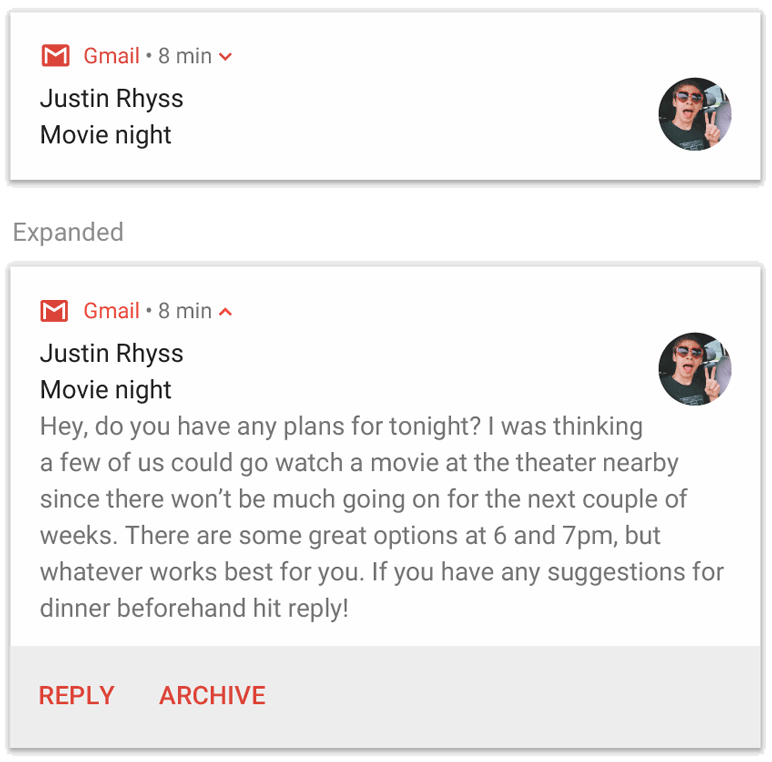
圖 2. 可展開的通知,包括收合和展開兩種形式。
如要增加通知的長度,可以新增含有 setStyle() 的樣式範本,啟用可展開的通知。舉例來說,下列程式碼會建立較大的文字區域:
val builder = NotificationCompat.Builder(context, CHANNEL_ID) .setSmallIcon(R.drawable.ic_logo) .setContentTitle("My notification") .setContentText("Much longer text that cannot fit one line...") .setStyle(NotificationCompat.BigTextStyle() .bigText("Much longer text that cannot fit one line...")) .setPriority(NotificationCompat.PRIORITY_DEFAULT)
如要進一步瞭解其他大型通知樣式,包括如何新增圖片和媒體播放控制項,請參閱「建立可展開的通知」。
建立管道並設定重要性
如要在 Android 8.0 以上版本中傳送通知,請將 NotificationChannel 的執行個體傳遞至 createNotificationChannel(),向系統註冊應用程式的通知管道。以下程式碼會遭到 SDK_INT 版本的條件封鎖:
fun createNotificationChannel(context: Context) { // Create the NotificationChannel, but only on API 26+ because // the NotificationChannel class is not in the Support Library. if (Build.VERSION.SDK_INT >= Build.VERSION_CODES.O) { val name = context.getString(R.string.channel_name) val descriptionText = context.getString(R.string.channel_description) val importance = NotificationManager.IMPORTANCE_DEFAULT val channel = NotificationChannel(CHANNEL_ID, name, importance).apply { description = descriptionText } // Register the channel with the system. val notificationManager: NotificationManager = context.getSystemService(NotificationManager::class.java) as NotificationManager notificationManager.createNotificationChannel(channel) } }
由於您必須先建立通知管道,才能在 Android 8.0 以上版本發布任何通知,因此請在應用程式啟動後立即執行這段程式碼。您可以放心重複呼叫此方法,因為建立現有的通知管道不會執行任何作業。
NotificationChannel 建構函式需要 importance,並使用 NotificationManager 類別中的其中一個常數。這個參數會決定如何中斷使用者操作,以顯示屬於這個管道的任何通知。使用 setPriority() 設定 priority,支援 Android 7.1 以下版本,如上例所示。
雖然您必須設定通知重要性或優先順序,如下列範例所示,但系統不保證您會收到警示。在某些情況下,系統可能會根據其他因素變更重要性等級,使用者隨時可以重新定義特定管道的重要性等級。
如要進一步瞭解不同等級的意義,請參閱「通知重要性等級」。
設定通知的輕觸動作
每則通知都必須回應輕觸動作,通常是開啟應用程式中與通知相應的活動。如要執行這項操作,請指定以 PendingIntent 物件定義的內容意圖,並將其傳遞至 setContentIntent()。
下列程式碼片段說明如何建立基本意圖,讓使用者輕觸通知時開啟活動:
// Create an explicit intent for an Activity in your app. val intent = Intent(context, AlertDetails::class.java).apply { flags = Intent.FLAG_ACTIVITY_NEW_TASK or Intent.FLAG_ACTIVITY_CLEAR_TASK } val pendingIntent: PendingIntent = PendingIntent.getActivity(context, 0, intent, PendingIntent.FLAG_IMMUTABLE) val builder = NotificationCompat.Builder(context, CHANNEL_ID) .setSmallIcon(R.drawable.ic_logo) .setContentTitle("My notification") .setContentText("Hello World!") .setPriority(NotificationCompat.PRIORITY_DEFAULT) // Set the intent that fires when the user taps the notification. .setContentIntent(pendingIntent) .setAutoCancel(true)
這段程式碼會呼叫 setAutoCancel(),在使用者輕觸通知時自動移除通知。
在上例中,意圖標記會保留使用者預期的導覽體驗,讓使用者透過通知開啟應用程式後,仍能享有相同體驗。視您要啟動的活動類型而定,您可能需要使用這項功能。活動類型可以是下列其中一種:
專門用於回覆通知的活動。使用者在正常使用應用程式時,沒有理由要瀏覽這項活動,因此這項活動會啟動新工作,而不是新增至應用程式現有的工作和返回堆疊。這是前一個範例中建立的意圖類型。
應用程式一般流程中的活動。在此情況下,啟動活動會建立返回堆疊,以保留使用者對返回和向上按鈕的預期行為。
顯示通知
如要顯示通知,請呼叫 NotificationManagerCompat.notify(),並傳遞通知的專屬 ID 和 NotificationCompat.Builder.build() 的結果。請參考以下範例:
with(NotificationManagerCompat.from(context)) { if (ActivityCompat.checkSelfPermission( context, Manifest.permission.POST_NOTIFICATIONS ) != PackageManager.PERMISSION_GRANTED ) { // TODO: Consider calling ActivityCompat#requestPermissions here // to request the missing permissions, and then overriding // public fun onRequestPermissionsResult(requestCode: Int, permissions: Array<out String>, // grantResults: IntArray) // to handle the case where the user grants the permission. See the documentation // for ActivityCompat#requestPermissions for more details. return@with } // notificationId is a unique int for each notification that you must define. notify(notificationId, builder.build())
請儲存傳遞至 NotificationManagerCompat.notify() 的通知 ID,因為您需要這個 ID 來更新或移除通知。
此外,如要在搭載 Android 13 以上版本的裝置上測試基本通知,請手動開啟通知,或建立對話方塊來要求通知。
新增動作按鈕
通知最多可提供三個動作按鈕,讓使用者快速回應,例如延後提醒或回覆簡訊。但這些動作按鈕不得重複使用者輕觸通知時執行的動作。
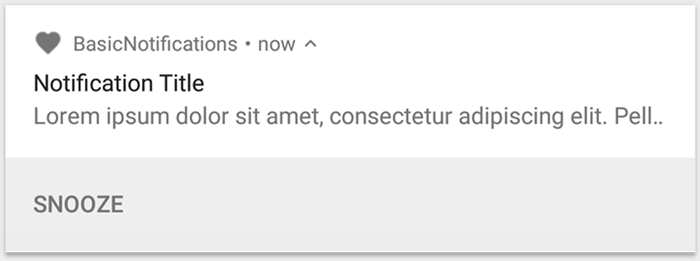
圖 3. 含有一個動作按鈕的通知。
如要新增動作按鈕,請將 PendingIntent 傳遞至 addAction() 方法。這與設定通知的預設輕觸動作類似,但您可以執行其他動作,例如啟動在背景執行工作的 BroadcastReceiver,這樣動作就不會中斷已開啟的應用程式,而不是啟動活動。
舉例來說,下列程式碼顯示如何將廣播傳送至特定接收器:
val ACTION_SNOOZE = "snooze" val snoozeIntent = Intent(context, MyBroadcastReceiver::class.java).apply { action = ACTION_SNOOZE putExtra(EXTRA_NOTIFICATION_ID, 0) } val snoozePendingIntent: PendingIntent = PendingIntent.getBroadcast(context, 0, snoozeIntent, PendingIntent.FLAG_IMMUTABLE) val builder = NotificationCompat.Builder(context, CHANNEL_ID) .setSmallIcon(R.drawable.ic_logo) .setContentTitle("My notification") .setContentText("Hello World!") .setPriority(NotificationCompat.PRIORITY_DEFAULT) .setContentIntent(pendingIntent) .addAction(R.drawable.snooze, context.getString(R.string.snooze), snoozePendingIntent)
如要進一步瞭解如何建構 BroadcastReceiver 來執行背景工作,請參閱「廣播總覽」。
如果您想改為建立含有媒體播放按鈕的通知 (例如暫停及跳過曲目),請參閱如何建立含有媒體控制項的通知。
新增直接回覆動作
Android 7.0 (API 級別 24) 推出的直接回覆動作,可讓使用者直接在通知中輸入文字。然後,系統會將文字傳送至您的應用程式,不必開啟活動。舉例來說,您可以透過直接回覆動作,讓使用者在通知中回覆簡訊或更新工作清單。

圖 4. 輕觸「回覆」按鈕即可開啟文字輸入畫面。
直接回覆動作會顯示為通知中的額外按鈕,開啟後即可輸入文字。使用者輸入完畢後,系統會將文字回覆附加至您為通知動作指定的意圖,並將意圖傳送至應用程式。
新增回覆按鈕
如要建立支援直接回覆的通知動作,請按照下列步驟操作:
建立 RemoteInput.Builder 執行個體, 可新增至通知動作。這個類別的建構函式會接受字串,系統會將該字串做為文字輸入的鍵。您的應用程式稍後會使用該鍵擷取輸入內容的文字。
// Key for the string that's delivered in the action's intent. val replyLabel: String = context.resources.getString(R.string.reply_label) val remoteInput: RemoteInput = RemoteInput.Builder(KEY_TEXT_REPLY).run { setLabel(replyLabel) build() }
為回覆動作建立 PendingIntent。
// Build a PendingIntent for the reply action to trigger. val replyPendingIntent: PendingIntent = PendingIntent.getBroadcast(context, conversationId, getMessageReplyIntent(conversationId), PendingIntent.FLAG_MUTABLE)
使用 addRemoteInput() 將 RemoteInput 物件附加至動作。
// Create the reply action and add the remote input. val action: NotificationCompat.Action = NotificationCompat.Action.Builder(R.drawable.reply, context.getString(R.string.reply_label), replyPendingIntent) .addRemoteInput(remoteInput) .build()
將動作套用至通知,然後發出通知。
// Build the notification and add the action.
val newMessageNotification = NotificationCompat.Builder(context, CHANNEL_ID)
    .setSmallIcon(R.drawable.ic_message)
    .setContentTitle(context.getString(R.string.title))
    .setContentText(context.getString(R.string.content))
    .addAction(action)
    .build()

// Issue the notification.
NotificationManagerCompat.from(context).notify(notificationId, newMessageNotification)
使用者觸發通知動作時,系統會提示使用者輸入回覆,如圖 4 所示。
從回覆中擷取使用者輸入內容
如要從通知的回覆 UI 接收使用者輸入內容,請呼叫 RemoteInput.getResultsFromIntent(),並將 BroadcastReceiver 收到的 Intent 傳遞給該函式:
private fun getMessageText(intent: Intent): CharSequence? { return RemoteInput.getResultsFromIntent(intent)?.getCharSequence(KEY_TEXT_REPLY) }
處理完文字後,請使用相同的 ID 和標記 (如有使用),呼叫 NotificationManagerCompat.notify() 更新通知。這項操作是必要的,因為必須隱藏直接回覆的 UI,並向使用者確認系統已收到回覆並正確處理。
// Build a new notification, which informs the user that the system // handled their interaction with the previous notification. val repliedNotification = NotificationCompat.Builder(context, CHANNEL_ID) .setSmallIcon(R.drawable.message) .setContentText(context.getString(R.string.replied)) .build() // Issue the new notification. NotificationManagerCompat.from(context).notify(notificationId, repliedNotification)
擷取其他資料
處理其他資料類型的方式與 RemoteInput 類似。以下範例使用圖片做為輸入內容。
val replyLabel: String = context.resources.getString(R.string.reply_label) val remoteInput: RemoteInput = RemoteInput.Builder(KEY_REPLY).run { setLabel(replyLabel) // Allow for image data types in the input. // This method can be used again to allow for other data types. setAllowDataType("image/*", true) build() }
呼叫 RemoteInput#getDataResultsFromIntent 並擷取對應資料。
class ReplyReceiver : BroadcastReceiver() { override fun onReceive(context: Context, intent: Intent) { val dataResults = RemoteInput.getDataResultsFromIntent(intent, KEY_REPLY) val imageUri: Uri? = dataResults?.get("image/*") as? Uri if (imageUri != null) { // Extract the image context.contentResolver.openInputStream(imageUri)?.use { inputStream -> val bitmap = BitmapFactory.decodeStream(inputStream) // Display the image // ... } } } companion object { const val KEY_REPLY = "key_reply" const val KEY_TEXT_REPLY = "key_text_reply" } }
處理這項新通知時,請使用傳遞至接收端 onReceive() 方法的內容。
呼叫 setRemoteInputHistory(),將回覆內容附加至通知底部。不過,如果您要建構訊息應用程式,請建立訊息樣式的通知,並將新訊息附加至對話。
如需有關訊息應用程式通知的更多建議,請參閱「訊息應用程式最佳做法」一節。
顯示緊急訊息
應用程式可能需要顯示緊急或時效性高的訊息,例如來電或鬧鐘響鈴。在這種情況下,您可以將全螢幕意圖與通知建立關聯。
通知觸發時,使用者會看到下列其中一種情況,視裝置的鎖定狀態而定:
- 如果使用者裝置已鎖定,系統會顯示全螢幕活動,覆蓋鎖定畫面。
- 如果使用者已解鎖裝置,通知會以展開形式顯示,並提供處理或關閉通知的選項。
下列程式碼片段說明如何將通知與全螢幕意圖建立關聯:
val fullScreenIntent = Intent(context, ImportantActivity::class.java) val fullScreenPendingIntent = PendingIntent.getActivity(context, 0, fullScreenIntent, PendingIntent.FLAG_IMMUTABLE) val builder = NotificationCompat.Builder(context, CHANNEL_ID) .setSmallIcon(R.drawable.ic_logo) .setContentTitle("My notification") .setContentText("Hello World!") .setPriority(NotificationCompat.PRIORITY_DEFAULT) .setFullScreenIntent(fullScreenPendingIntent, true)
設定鎖定螢幕顯示內容
如要控管螢幕鎖定畫面上顯示的通知詳細資料程度,請呼叫 setVisibility(),並指定下列其中一個值:
VISIBILITY_PUBLIC:通知完整內容會顯示在螢幕鎖定畫面上。VISIBILITY_SECRET:螢幕鎖定畫面不會顯示任何通知內容。VISIBILITY_PRIVATE:螢幕鎖定畫面只會顯示基本資訊,例如通知圖示和內容標題。通知不會顯示完整內容。
設定 VISIBILITY_PRIVATE 時,您也可以提供通知內容的替代版本,隱藏特定詳細資料。舉例來說,訊息應用程式可能會顯示「您有 3 則新簡訊」的通知,但隱藏訊息內容和傳送者。如要提供這項替代通知,請先照常使用 NotificationCompat.Builder 建立替代通知。然後使用 setPublicVersion() 將替代通知附加至一般通知。
請注意,使用者可以完全控管是否要在螢幕鎖定畫面上顯示通知,並根據應用程式的通知管道進行控管。
更新通知
如要在發出通知後更新通知,請再次呼叫 NotificationManagerCompat.notify(),並傳遞先前使用的相同 ID。如果先前的通知遭到關閉,系統會改為建立新通知。
您可以選擇呼叫 setOnlyAlertOnce(),讓通知在第一次顯示時中斷使用者操作,並發出音效、震動或視覺提示,但後續更新不會中斷。
移除通知
通知會持續顯示,直到發生下列任一情況為止:
- 使用者關閉通知。
- 使用者輕觸通知 (如果您在建立通知時呼叫
setAutoCancel())。 - 您會針對特定通知 ID 呼叫
cancel()。這個方法也會刪除進行中的通知。 - 您呼叫
cancelAll(),移除先前發出的所有通知。 - 如果您在建立通知時使用
setTimeoutAfter()設定逾時,系統會在指定時間到期後停止傳送通知。如有需要,您可以在指定逾時時間經過前取消通知。
訊息應用程式最佳做法
為訊息和即時通訊應用程式建立通知時,請參考下列最佳做法。
使用 MessagingStyle
從 Android 7.0 (API 級別 24) 開始,Android 提供專為訊息內容設計的通知樣式範本。您可以使用 NotificationCompat.MessagingStyle 類別變更通知中顯示的幾個標籤,包括對話標題、其他訊息和通知的內容檢視畫面。
下列程式碼片段說明如何使用 MessagingStyle 類別自訂通知樣式。
val message1 = NotificationCompat.MessagingStyle.Message( messages[0].text, messages[0].time, messages[0].sender ) val message2 = NotificationCompat.MessagingStyle.Message( messages[1].text, messages[1].time, messages[1].sender ) notification = NotificationCompat.Builder(context, CHANNEL_ID) .setSmallIcon(R.drawable.ic_logo) .setStyle( NotificationCompat.MessagingStyle(Person.Builder().setName("Me").build()) .addMessage(message1) .addMessage(message2) ) .build()
從 Android 9.0 (API 級別 28) 開始,您也必須使用 Person 類別,才能以最佳方式算繪通知和通知的化身。
使用 NotificationCompat.MessagingStyle 時,請執行下列操作:
- 撥打
MessagingStyle.setConversationTitle(),為超過兩人的群組對話設定標題。好的對話標題可能是群組通訊的名稱,如果沒有名稱,則可能是對話參與者的清單。如果沒有,系統可能會誤以為該訊息屬於與對話中最新訊息寄件者的私人對話。 - 使用
MessagingStyle.setData()方法加入圖片等媒體訊息。支援樣式圖片的 MIME 類型/*。
使用直接回覆功能
使用者可以透過「直接回覆」功能,在訊息內文中回覆。
- 使用者透過內嵌回覆動作回覆後,請使用
MessagingStyle.addMessage()更新MessagingStyle通知,且不要撤銷或取消通知。如果不取消通知,使用者就能透過通知傳送多則回覆。 - 如要讓內嵌回覆動作與 Wear OS 相容,請呼叫
Action.WearableExtender.setHintDisplayInlineAction(true)。 - 使用
addHistoricMessage()方法,將歷來訊息新增至通知,為直接回覆對話提供背景資訊。
啟用智慧回覆
- 如要啟用智慧回覆功能,請在回覆動作中呼叫
setAllowGeneratedResponses(true)。這樣一來,當通知橋接至 Wear OS 裝置時,使用者就能使用智慧回覆功能。智慧回覆功能會使用完全在手錶上執行的機器學習模型,根據NotificationCompat.MessagingStyle通知提供的內容生成回覆,且不會將任何資料上傳至網際網路。
新增通知中繼資料
- 指派通知中繼資料,讓系統瞭解裝置處於勿擾模式時,應如何處理應用程式通知。舉例來說,使用
addPerson()或setCategory(Notification.CATEGORY_MESSAGE)方法即可覆寫「零打擾」模式。